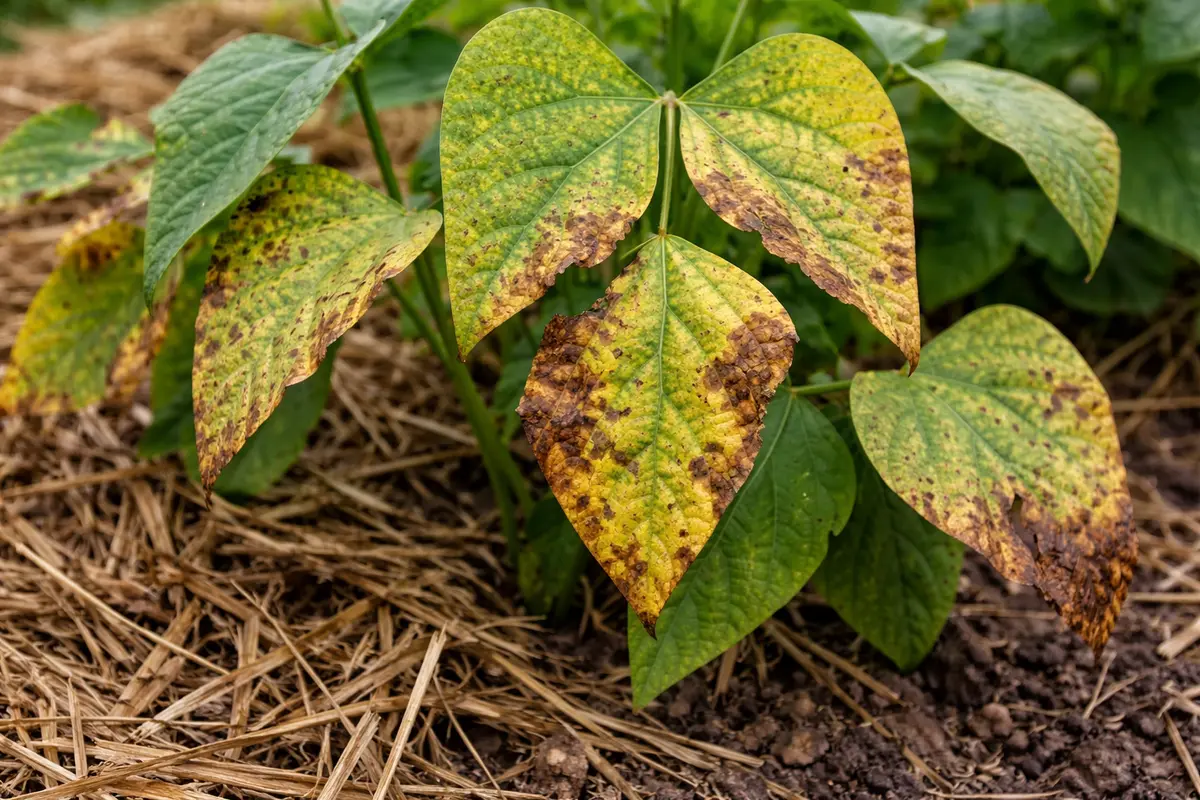
You may notice your bean plants turning a vibrant yellow after heavy mulch application, which is why you need to know why are my bean plants yellowing after heavy mulch application. This yellowing often signals that the plants are struggling due to a lack of adequate air circulation and potential moisture retention issues. If ignored, the problem can spread, weakening the plant and stalling growth, but fixing it is possible now; simply check your mulch depth and adjust accordingly to improve drainage and airflow.
Step 1 – Remove Excess Mulch from Bean Plants
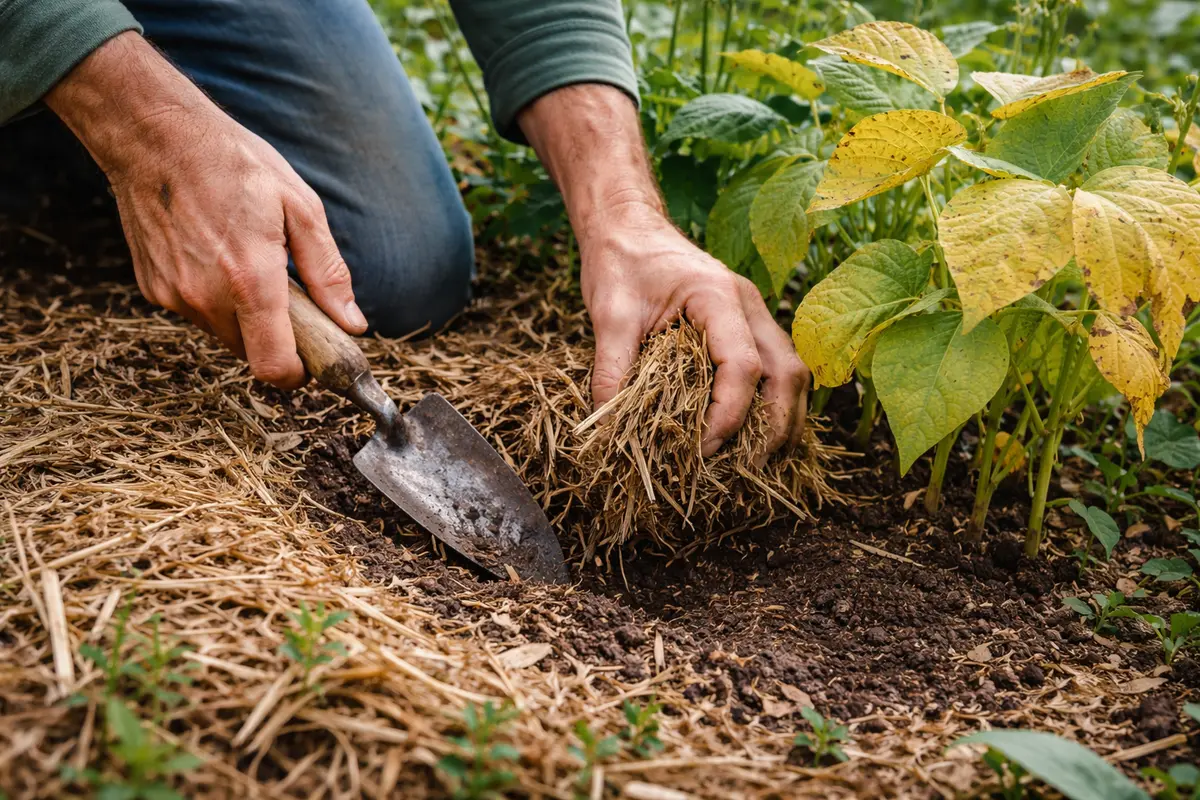
Start by carefully removing the excess mulch around your bean plants. You will see a reduction in moisture retention around the roots and possibly even observe the soil surface drying out within a day. The immediate goal is to remove enough mulch to create a barrier that still maintains some insulation but allows for essential airflow. Aim for a layer that is no thicker than 2–3 inches, as this limits condensation and prevents fungal growth.
Excessive mulch can suffocate bean plants, preventing proper moisture and airflow around their roots. When mulch is too thick, it holds moisture against the soil surface, which leads to root rot and nutrient deprivation. The soil should appear darker when healthy, indicating adequate moisture levels; however, overly wet soil often takes on a sour smell, indicating anaerobic conditions and potential root rot. Acting fast mitigates the risk of the plants suffering irreversible damage due to these anaerobic conditions, which are exacerbated by layers of moist mulch trapping heat and moisture around the base of the stems. If left unaddressed for too long, the roots may begin to rot, leading to a much more severe decline in plant health.
A common mistake at this stage is leaving mulch close to the stems, which can subsequently lead to collar rot. If you had mulch piled high due to recent heavy rainfall, it’s essential to improve air circulation around the stems immediately to stave off issues like fungal infections. Remember to space your mulch at least a few inches away from the plant’s stems, creating a protective barrier that promotes airflow and encourages healthy growth. If you notice white, fuzzy growth at the base of the plant, it may indicate mold from overly moist conditions, necessitating even greater caution moving forward.
Step 2 – Diagnose Nutrient Deficiency in Bean Plants
Inspect the soil and leaves for signs of nutrient deficiency, particularly nitrogen and potassium. You will notice improvements in leaf color within a week after identifying and correcting the imbalance. Soil tests often reveal key imbalances that may not be visually apparent, especially if the beans are sown in nutrient-poor soil or following mulch application that leached away essential elements. A good practice involves using a soil test kit to determine the specific nutrient levels; if nitrogen is low, consider nitrogen-rich amendments like blood meal or aged chicken manure to restore balance.
Yellowing indicates that the plant may struggle to uptake essential nutrients due to heavy reliance on mulch that may have leached nutrients away, especially if the mulch was derived from sources lacking in nitrogen or potassium. Nitrogen deficiency, especially, leads to pale leaves while potassium deficiency can cause leaf margin burn, characterized by dark curling at the edges. Noticing these signs early allows corrective measures to have maximum effect when the growth season is still active. After adjusting these nutrient levels, keep an eye on the plants to gauge the effects of your interventions, as a healthy comeback is often reflected in greener, more robust foliage.
If the soil feels overly compact or clay-like, amend it with compost or well-rotted manure to improve nutrient content and texture. Create a mixture of approximately one part compost to three parts existing soil to improve drainage while delivering critical nutrients. If the plants display leaf drop alongside yellowing, scale back on mulch addition and instead prioritize soil aeration to rectify a potential nutrient uptake problem, as tightly packed soil can prevent root expansion. Regularly check the soil texture as it should crumble easily in your hand; if it clumps, further intervention may be needed, such as adding perlite or sand to improve aeration.
Step 3 – Water Beans Deeply to Aid Recovery
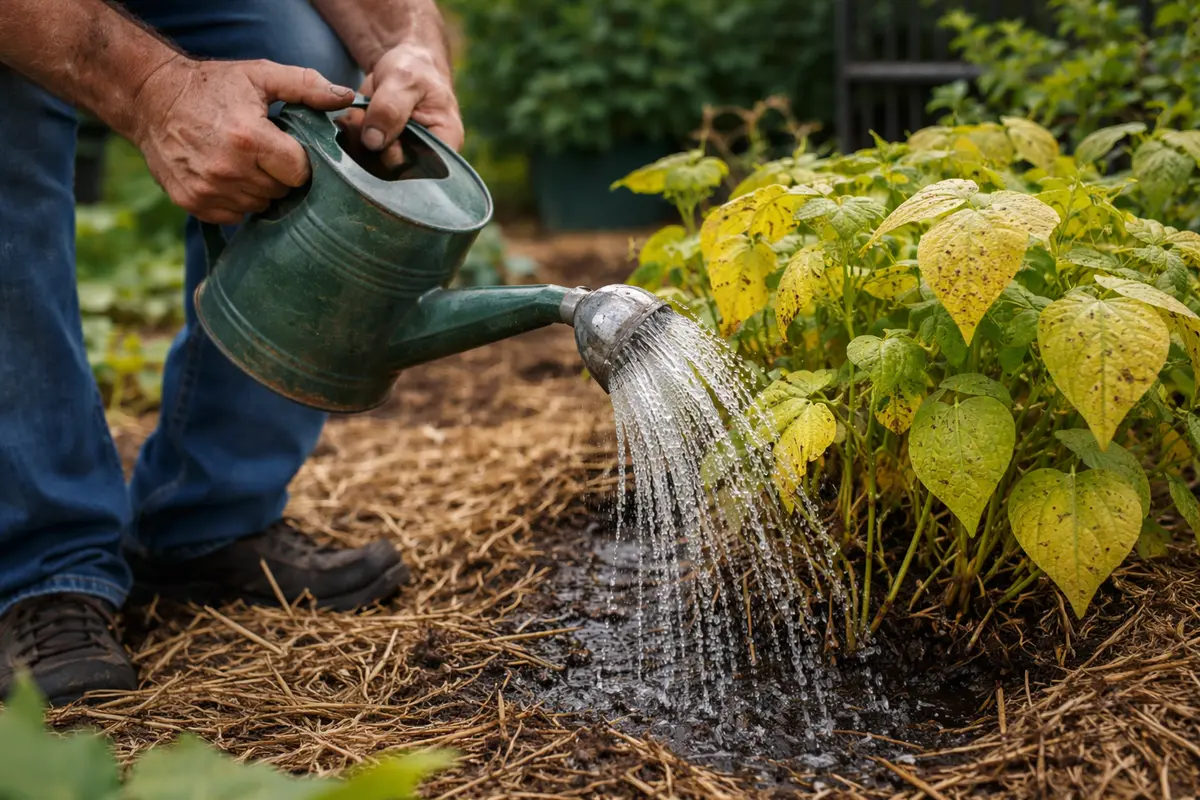
Water the bean plants thoroughly, ensuring water penetrates deep into the soil. Within a few hours, the leaves should become firmer and droop less as they absorb the much-needed hydration. This deep watering method counters any prior moisture deficits while ensuring that roots receive sufficient hydration to rekindle healthy growth. Use a soaker hose or a watering can with a narrow spout to direct water at the base of the plants to minimize splashback onto the leaves, which can cause further stress and potential fungal issues.
Deep watering encourages root growth by forcing roots to search downwards for moisture, fostering a more robust plant structure, and improving their drought tolerance. Healthy beans thrive with consistent moisture—neither too dry nor waterlogged. If your plants were showing yellowing due to dehydration, this action replenishes them effectively and improves their ability to uptake nutrients. Likewise, maintain this deep watering approach so that water penetrates at least 6-8 inches into the soil, ensuring that the root zone receives adequate moisture; if the water pools on the surface, it indicates you may need to adjust your watering technique or evaluate soil drainage.
A mistake to avoid during this recovery process is overcompensating with fertilizer or water. Excess nutrients can create further stress, leading to nutrient burn, where leaf tips turn brown and crispy, signaling that the plant is overwhelmed. Monitor the soil moisture regularly and only water when the top inch feels dry to the touch, focusing on encouraging gradual recovery rather than overwhelming the roots after a deficit. Consider using the finger method—insert your finger into the soil up to the first knuckle to gauge its moisture; if it feels dry at that depth, it’s time to water. Be cautious to account for weather factors; overly dry or windy days can also deplete soil moisture more rapidly than expected.
Step 4 – Use Organic Mulch Wisely to Avoid Yellowing
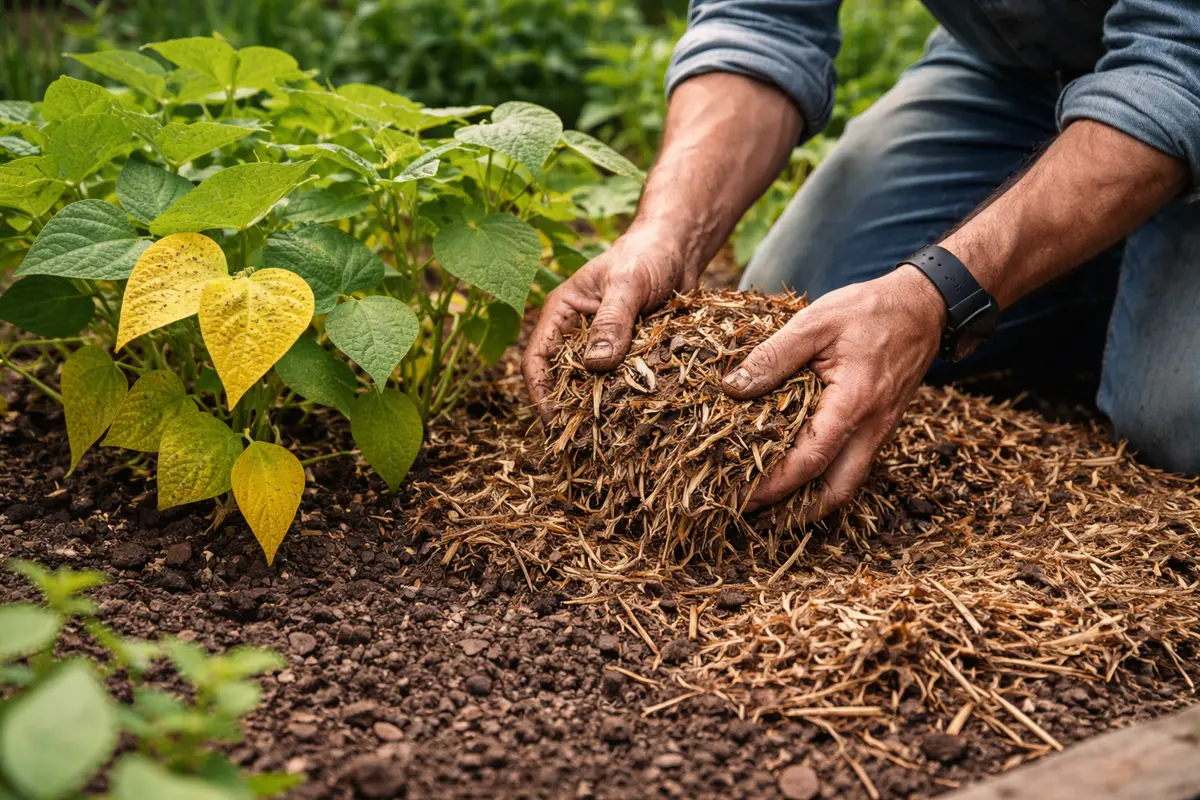
Apply a thinner layer of mulch, ensuring it is no more than 2 to 3 inches deep around your bean plants. This adjustment will allow air circulation and moisture retention, helping your plants regain healthier foliage. Reach for materials like straw or grass clippings, as they decompose and enrich the soil without excessively locking in moisture.
High mulch applications can create overly moist conditions, leading to root suffocation and nutrient deficiency, which manifest as yellowing leaves. Reducing mulch thickness promotes a balanced environment, enabling roots to access necessary oxygen and nutrients while avoiding excessive water retention that can drown them. Monitor the mulch depth regularly, especially after heavy rains—excessive moisture can lead to anaerobic conditions, promoting diseases.
During periods of heavy rainfall, reduce or temporarily remove mulch to prevent waterlogging. If the soil remains overly saturated even after rainfall, check for drainage issues to ensure that excess water can escape effectively. While mulching aids moisture retention during dry spells, it should not present further complications during wet weather conditions. For those who cultivate beans in their gardens, a careful balance between mulch thickness is paramount; if too thick, it can form a compact barrier against helpful rainwater reaching the soil. Adjust mulching practices based on seasonal demands and visualize how weather changes can impact soil conditions.
Using a thinner layer of mulch retains soil moisture without choking the roots and allows beneficial microbes to thrive, thereby enhancing soil fertility. Always monitor how much mulch is applied, as applying too thick a layer can prevent sunlight from reaching the lower leaves and foster unhealthy plant conditions that lead to yellowing. Seasonal flexibility is essential; for instance, using a thicker layer in early spring can help suppress weeds while providing insulation during cooler nights. In warmer months, you might want to reduce mulch thickness to promote heat dissipation and improve airflow while increasing it during colder months to provide insulation against frost damage. Observe how the mulch layer changes over time, and adjust accordingly to ensure optimal health.
Step 5 – Inspect Leaves for New Yellowing Signs Weekly
Start by checking the moisture level of the soil beneath the mulch. Use your finger or a soil moisture meter to determine if the soil is too wet or too dry. Observe the bean plants for any signs of wilting or further yellowing, and recheck the moisture levels every few days to ensure they stabilize and improve.
A fully recovered bean plant displays vibrant green leaves, firm stems, and robust growth, indicative of nutrient uptake and healthy photosynthesis. In contrast, if yellowing returns, you might notice leaves curling or developing brown edges, which signals stress. If you see new growth that feels spongy rather than firm, it suggests the problem persists.
If yellowing returns despite following initial steps, consider adjusting the mulch to promote better drainage and air circulation around the roots. If the plants continue to deteriorate, explore options for amending the soil with organic fertilizers or seek advice from a local gardening expert for more in-depth solutions.
After implementing corrective actions, seeing leaves perk up again signals that the plants are regaining strength; vibrant green foliage reflects successful intervention. While green leaves denote positive recovery, any return of yellowing may indicate that root issues persist, potentially leading to more serious problems. If new yellowing appears, make observations methodically regarding changes, including watering frequency, rainfall, and any additional treatments applied. Utilize a digital journal or an app to record your observations; this aids proactive management of plant health.
If yellowing returns despite corrective measures, inspect for signs of pests or diseases as additional causes of stress. Watch for typical pests such as aphids or spider mites, which may damage leaves and require immediate action—which could involve using an insecticidal soap or introducing beneficial insects to combat pests organically. Be prepared to adjust your approach if you notice fresh signs of distress; consider if soil moisture levels or nutrient content may require further adjustments. Additionally, a more extensive inspection may be warranted to identify underlying health issues such as fungal infections or root problems that could be compounding the yellowing symptoms, interfering with plant recovery.
FAQ
How long does it take for bean plants to recover after addressing yellowing?
Typically, you should see some noticeable improvement within 7 to 10 days after implementing corrective actions like proper watering and thinning mulch. During this time, keep monitoring the plants for any signs of yellowing recurring; rapid recovery often correlates with immediate responsiveness in your care methods.
Can yellowing spread to other plants in the garden?
Yes, yellowing can signal underlying issues like nutrient deficiencies or diseases that might spread. It’s essential to address the primary cause in your bean plants to prevent potential effects on nearby plants; consider isolating affected plants to prevent any transfer of pests or pathogens that might exacerbate the issues. Extra vigilance is also recommended for neighboring plants to prevent shock waves of infection or nutrient depletion.
Should I remove yellowing leaves immediately to help recovery?
Yes, you should prune away any severely yellowing leaves to redirect the plant’s energy toward healthy growth. However, remove them gradually; avoid stripping too many leaves at once, as the plant still needs some foliage for photosynthesis during recovery. Take care to use clean, sharp pruning shears to prevent damaging the plant further and to reduce the risk of pathogens entering the plant through fresh cuts.