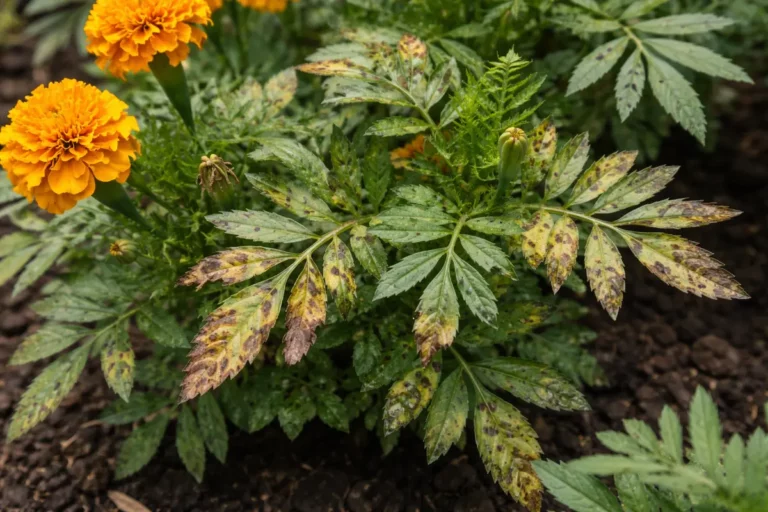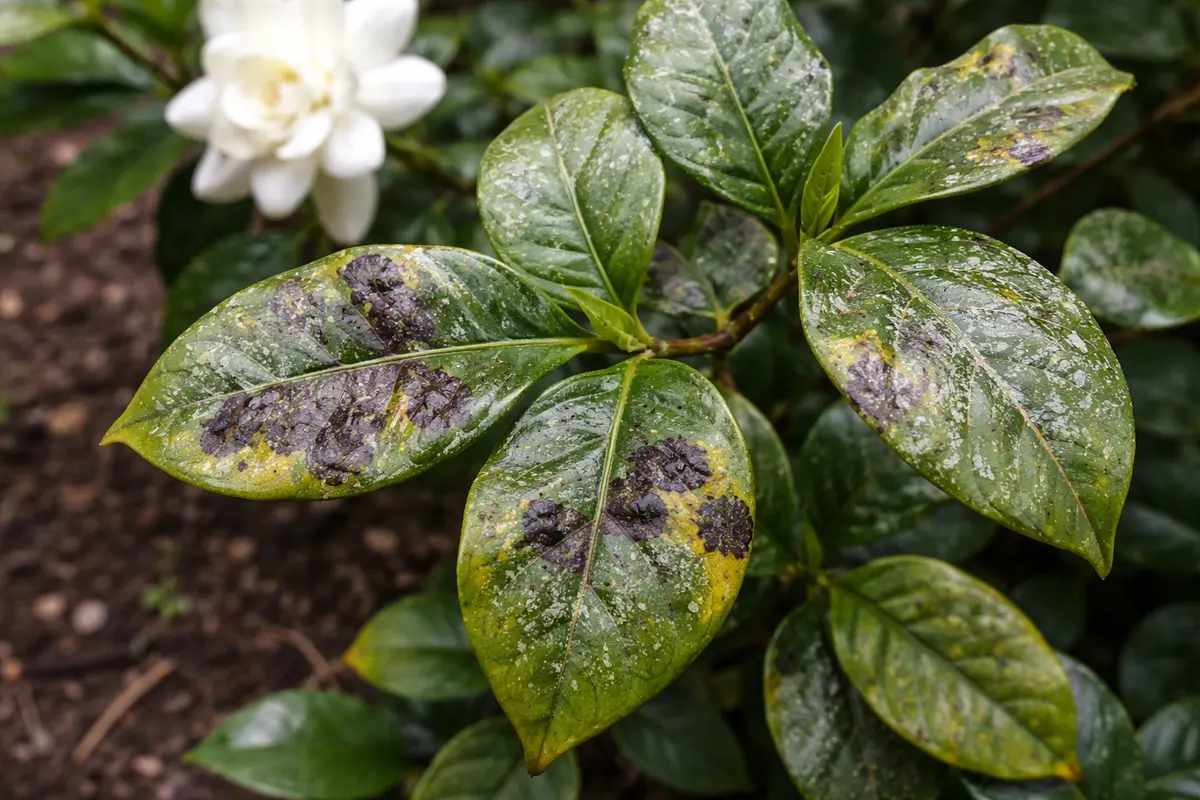
You may notice your gardenias looking unsightly with dark blemishes on their leaves, especially when humidity rises, which is why you need to know “Why are my gardenias developing black spots during humidity.” This alarming issue is often caused by fungal infections that lead to black spots, compromising the health and appearance of your plants. If left unchecked, the condition can spread and weaken the plant, leading to more damage over time, but fixing it is possible now if you inspect foliage closely and reduce humidity levels. Additionally, removing affected leaves and improving air circulation can greatly aid in reversing the problem.
Step 1 – Prune Gardenia Leaves with Black Spots
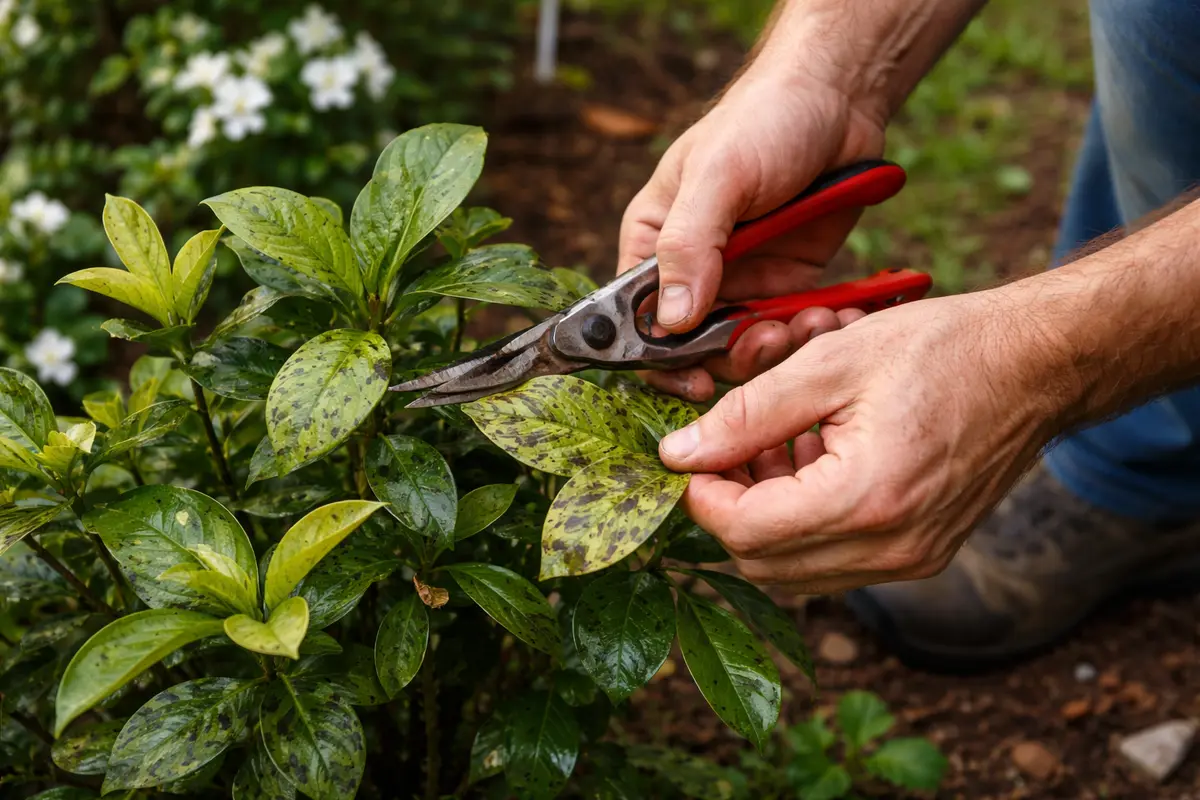
Start by promptly removing any affected leaves. This action will limit the spread of the black spot fungus while improving airflow around the remaining foliage, which should start to appear less droopy and more vibrant within a few days. When pruning, ensure you cut leaves at their base to prevent any fungal spores from lingering.
Checking for any additional signs of infection is essential after pruning. The presence of black spots indicates fungal pathogens thriving in humid conditions, which can multiply quickly if not addressed. If you let the problem persist, the plant’s ability to photosynthesize may diminish due to reduced leaf surface area, leading to increased stress levels. Also, new growth may be stunted without prompt intervention, making the plant more susceptible to further infections.
For instance, a gardener who delayed pruning until the spots spread extensively faced a complete collapse of the plant. In contrast, another gardener promptly removed infected leaves and applied a targeted fungicide, resulting in vibrant recovery. If new spots appear, check for moisture accumulation around the base of the plants, as excess moisture can exacerbate fungal issues. Always dispose of the pruned leaves away from your garden area to avoid reinfection.
Swift action helps to prevent further fungal infections, reducing leaf drop and improving blooming potential. If you delay treatment, the black spots could spread rapidly, inflicting irreversible damage and weakening the plant’s overall structure. If you observe wilting alongside the spots, check for root rot, as this can also contribute to the issue; wilting often indicates that the plant is unable to take up water effectively.
A common error occurs when gardeners put off addressing black spots, leading to extensive damage requiring complete removal of affected plants. Additionally, treating all areas without identifying the precise cause diminishes the effectiveness of targeted treatments. Pay attention to specific symptoms to tailor your response appropriately.
Removing infected leaves effectively prevents the black spot fungus from compromising healthy parts of the plant. If black spots persist despite pruning, it may signify that fungal spores have infiltrated deeper into the plant’s system. Ensure that pruning shears are disinfected before and after use to avoid cross-contamination between plants. This practice is crucial for gardenias, as they are susceptible to various fungal diseases, particularly in humid conditions. Ignoring infection signs can lead to severe plant decline or even necessitate removal.
A common mistake many gardeners make is delaying the removal of affected leaves, believing the issue will resolve itself or that pruning can wait. Sometimes, gardeners only trim the most visibly affected areas while leaving hidden leaves untouched, allowing fungi to thrive. If you see clusters of black spots at the base of the plant, those leaves may harbor spores ready to infect the rest. The longer spores remain, the more they spread. Promptly pruning all visibly affected leaves is vital to maintaining the plant’s overall health and preventing a more widespread outbreak.
Step 2 – Investigate Humidity Levels Causing Disease
Start by checking the humidity levels around your gardenias using a hygrometer. You will notice changes in air circulation within a few hours after adjustment, which can significantly reduce fungal activity. Ideal humidity levels for gardenias are between 40% and 60%; excessive humidity fosters rapid fungal growth that manifests as black spots on the leaves. If humidity levels exceed 60%, it’s recommended to take immediate action to alleviate excess moisture.
The cause is that too much moisture in the air creates a perfect breeding ground for fungal spores, leading to disease. If you observe a sticky residue on the leaves or water droplets forming, these are indications that humidity is too high and requires immediate action. Furthermore, if the leaf surface feels soft or slimy, this suggests a more advanced problem requiring urgent intervention.
To correct the humidity issue, consider relocating the plants or enhancing airflow to reduce moisture levels. If your gardenias are near water features, tightly packed planters, or other dense plantings, appointing fans to improve air circulation can be beneficial. Ensure plants are spaced at least two feet apart for optimal ventilation; if condensation forms on the leaves, such visual cues signal that humidity is too high, necessitating quick adjustments. If humidity issues persist, employing a dehumidifier in the growing area during peak seasons can effectively manage excess moisture and prevent fungal proliferation. A dehumidifier should be set to maintain these ideal humidity levels consistently.
Step 3 – Fertilize Gardenias for New Growth Recovery
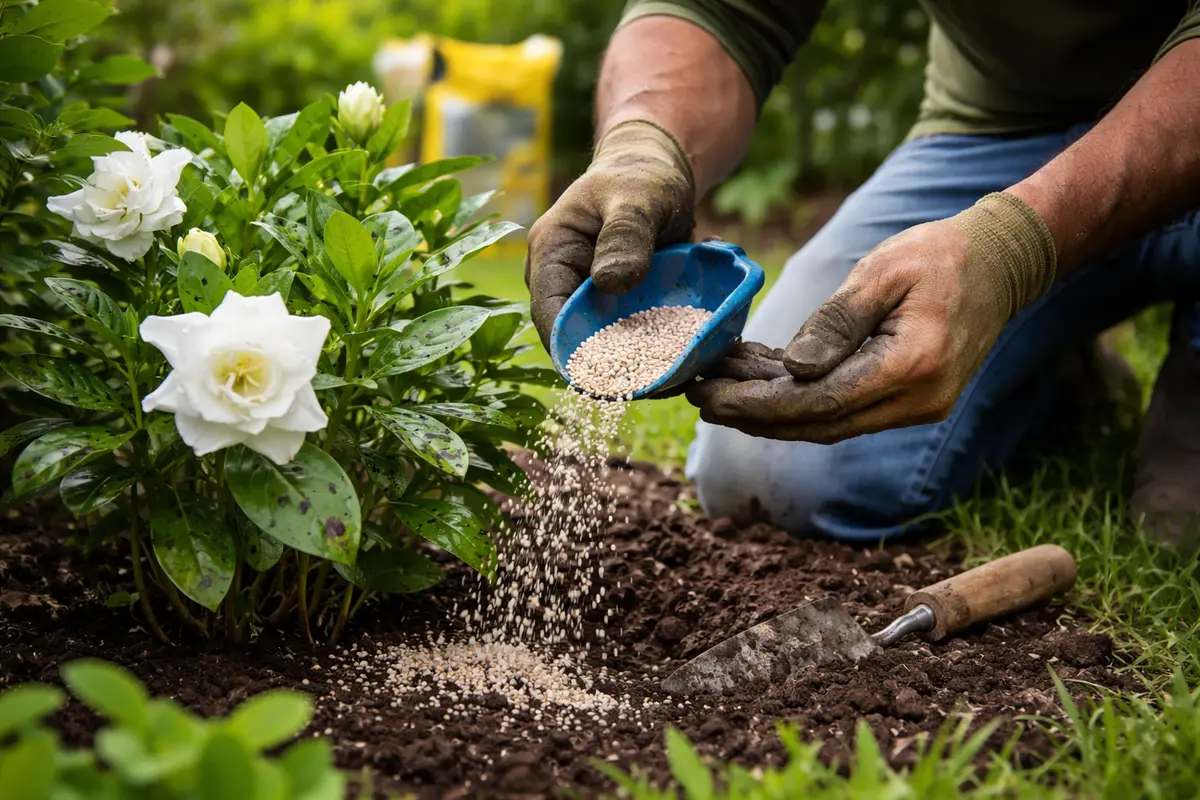
Start by applying a balanced fertilizer formulated for acid-loving plants at half strength. You should see new growth emerge with vibrant green leaves as the plant begins to recover from the black spot damage. Optimal timing for fertilization is early in the morning or late afternoon to reduce the risk of fertilizer burn.
Recovery begins when the new leaves start to appear, typically within a week after fertilization, and this process can unfold over the next two to four weeks. In optimum conditions—warm and dry—you’ll observe a faster improvement, while excessive humidity can still hinder growth, causing any new foliage to remain small and curled. If you’re noticing slow growth despite fertilizing, check the light levels; insufficient light can delay recovery, especially if the plants aren’t getting the minimum recommended six hours of sunlight daily.
Monitor your watering routine during recovery to prevent overwatering, which can increase the risk of root rot and aggravate spotting issues. If you see wilting instead of robust growth, inspect the roots for signs of decay before proceeding with further treatments. Maintain a consistent watering schedule, allowing the top inch of soil to dry out before returning to the next watering; you can use a soil moisture meter to help check the moisture levels accurately. Excess water in the potting medium can significantly delay recovery.
Visible signs of good recovery include taut, glossy leaves free of black spots, contrasted with slow recovery which may display a fair amount of yellowing or continued spotting. If, however, you spot mushy or discolored roots, reassess your watering habits; healthy roots should feel firm and have a white color. Adjust your care if necessary to support the recovery process effectively.
Strong fertilization during this stage is critical, since it replenishes nutrients depleted by the stress factors impacting gardenias. Nitrogen supports lush leaf development, while phosphorus boosts root vitality, both essential for regrowth. Use a balanced fertilizer with an N-P-K ratio of 5-5-5 or 10-10-10, applying it only once growth is apparent and at half strength to avoid stressing the plant. Watch closely for signs of over-fertilization—such as crusty soil and leaf tip burn, indicating nutrient excess—and be prepared to adjust your feeding routine accordingly.
Step 4 – Avoid Overwatering to Prevent Black Spots
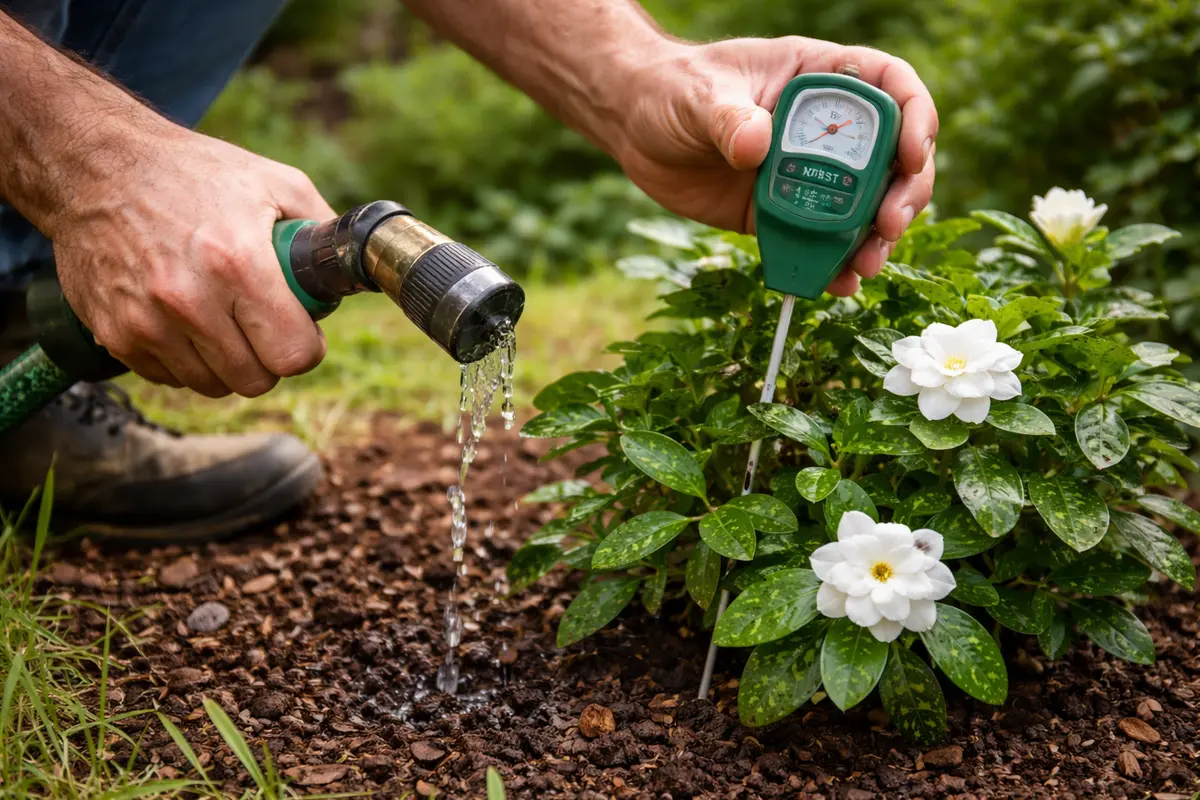
Start by reducing watering frequencies to allow the soil to dry out slightly between sessions. This results in firmer, healthier roots and a more vibrant plant appearance. Water only when the top inch of soil feels dry, typically about every 7 to 10 days, depending on humidity levels. In high humidity periods, wait longer before watering to prevent the soil from becoming too saturated; monitor the surrounding environment for humidity readings to inform your watering schedule.
Monitor your gardenias carefully: if you notice the leaves turning yellow or becoming soft, it may indicate overhydration. Conduct a soil moisture test before watering; insert your finger about an inch deep into the soil—if it feels wet, delay watering. Check the local forecast: if heavy rain is expected, postpone watering until the rain has passed to avoid worsening soil saturation. Regularly assess drainage systems around the plants; poor drainage can lead to root rot.
If the top inch of soil remains consistently wet, check your watering routine. Consider using a moisture meter to more accurately gauge soil moisture levels, especially during peak humidity. If roots are consistently exposed to excess moisture, they can develop issues such as rot. For the best balance, aim for soil that feels damp but not soggy, which is crucial for preventing fungal infections. Pulling up the plant gently for visual inspection can provide insight into the root system’s health. If symptoms remain, reevaluate your potting medium or ensure that the garden bed has adequate drainage; poorly draining soils pose a significant risk to plant health in the long run.
Step 5 – Recheck Leaves for New Black Spots Weekly
Start by inspecting your gardenias weekly for any resurgence of black spots on the leaves. Observe for new growth or signs of improvement; a weekly check can help you catch any problems early. Focus on a thorough examination of both the upper and lower sides of the leaves, as spores may hide on the reverse. If you notice new spots forming, re-evaluate your humidity control measures immediately.
For the next few weeks, watch the leaves for health indicators: a fully recovered plant will have vibrant, blemish-free leaves. If healthy young leaves are present alongside new black spots, this indicates a possible returning issue, often caused by recurring high humidity or insufficient air circulation. If it returns, reassess humidity levels and care regimens immediately, as quick identification and action can prevent widespread fungal problems.
After your check, if issues persist despite your adjustments, consider seeking guidance from a local gardening expert. They can diagnose soil health problems, pest issues, or extreme environmental conditions affecting your gardenias. Keeping detailed records of your observations will help to distinguish between normal seasonal changes and genuine distress, assisting in pinpointing what adjustments are necessary for the health of your plants.
FAQ
How long does it take for gardenias to recover from black spots?
Recovery can vary, but generally, if the black spots are treated promptly and effectively, you should start seeing signs of recovery within two to three weeks. New growth should begin to emerge within this timeframe. During this period, keep an eye on nutrient levels to support overall health, as lean soils may prolong recovery. Establishing a regular inspection schedule will help track the success of implementing recovery measures.
Can black spots spread to other plants nearby?
Yes, black spots can potentially spread to nearby plants, especially in humid conditions conducive to fungal growth. Maintaining proper spacing and airflow among plants can help mitigate this risk, along with regular inspections of surrounding plants. If you start to notice similar symptoms on other plants, take immediate action to assess and isolate affected specimens to prevent further contagion. Be vigilant, especially following heavy rains or periods of high humidity, as these can exacerbate the spread of fungal spores.
Should I remove the entire plant if it has black spots?
Removing the entire plant is typically unnecessary unless the infestation is severe and impacts the entire anatomy of the plant significantly, such as loss of multiple branches or extensive root rot. Pruning the affected areas and improving growing conditions often suffices to enable recovery. However, if root rot symptoms develop, consult gardening professionals for a more accurate diagnosis before making the decision to remove the plant completely. Keep in mind that gardenias are resilient, and many can bounce back with the right care when compromised by fungus.