You may notice your calla lilies developing yellowing leaves in clay soil during hot, dry spells, which is why you need to know how to treat yellowing leaves on calla lilies in clay soil. This yellowing often results from nutrient deficiencies or poor drainage, leading to wilting and damage. If left unaddressed, the problem gets worse and can spread, ultimately weakening the plant and stalling growth, but fixing it is possible now if you inspect and adjust your watering routine and soil conditions.
Step 1 – Inspect Calla Lilies for Nutrient Deficiencies
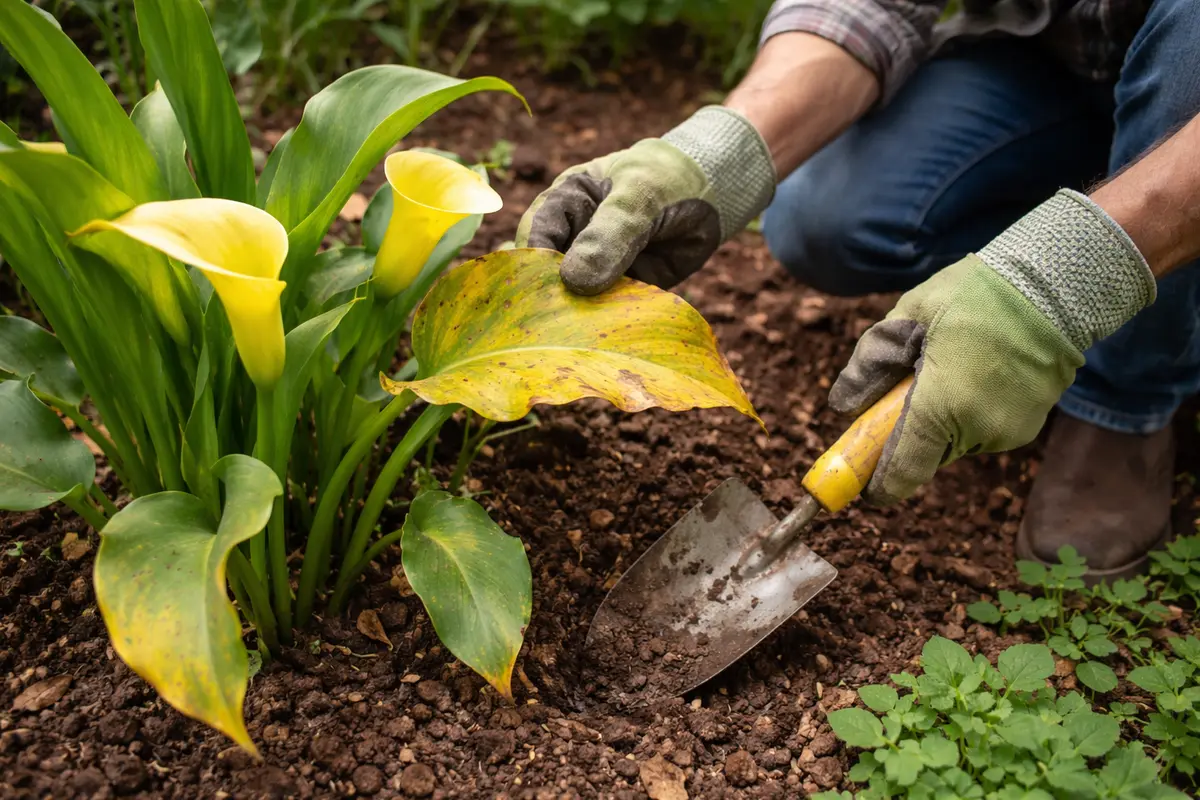
Start by thoroughly examining the foliage of your calla lilies for any signs of nutrient deficiencies. Look specifically for a color change from dark green to yellow, particularly in the lower leaves, which should visibly reduce within a few days as the inspection process unfolds. If you identify leaves that are extensively yellow, that’s a clear indicator of inadequate nutrients or waterlogged conditions resulting from clay soil. This initial assessment focuses on visible symptoms that will determine the next course of action. A closer inspection should include checking the chlorophyll levels in leaves, as pronounced yellowing often indicates nitrogen deficiency.
Identifying yellowing in plants primarily points toward nitrogen deficiency, especially in the basal leaves. This condition often arises in clay soils that are compacted, causing poor drainage that hampers nutrient absorption. Observing the plant’s condition quickly is crucial because if neglected, the yellowing can advance, leading to plant stress and stunted growth. If your plants show symptoms of both yellowing and wilting, this dual issue could signify both nutrient and water stress. This juxtaposition emphasizes the need for a prompt response; neglecting yellowing could shift to wilting and ultimately compromise plant integrity. Look for signs of new growth, as healthy plants will generally produce strong green stems and leaves.
Gardeners often forget the importance of nutrient checks after heavy rain and assume the plants are simply suffering from excess water. However, compacted soil can foster anaerobic bacteria, which further depletes vital nutrients. If you notice a mix of firm and limp leaves, it indicates different levels of health and must be addressed accordingly. If soil samples feel muddy and compacted when squeezed, it confirms moisture retention issues. Understanding the state of your soil provides actionable insight; if it’s too acidic, the yellowing may be exacerbated. A tangible first step is to adjust soil pH—if it’s overly acidic, applying lime can aid nutrient access for the roots. Ensure to monitor the effects of any amendment over a couple of growing seasons, documenting any changes in nutrient levels and plant vigor.
Step 2 – Analyze Drainage Issues in Clay Soil
Start by checking the drainage of your clay soil; if it retains too much water, amend it with organic matter like compost. You should see the yellowing of leaves begin to stabilize or even reverse in a few weeks as the waterlogged conditions improve. Observe for any signs of root rot, such as a mushy texture in roots when examined.
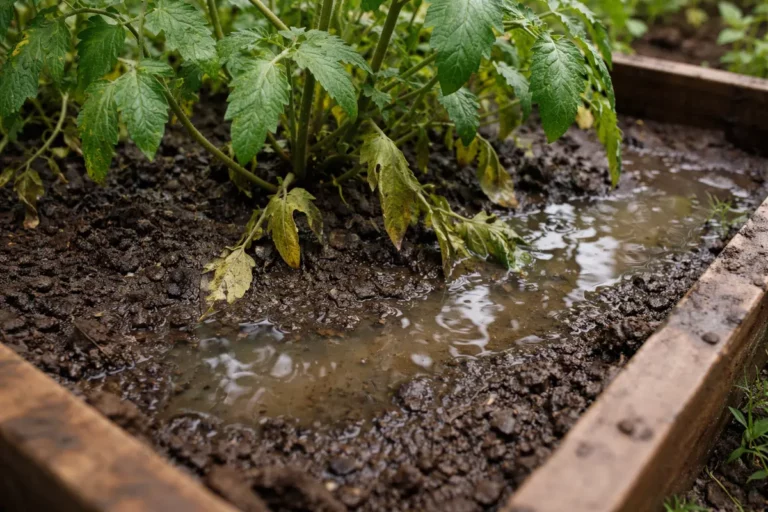
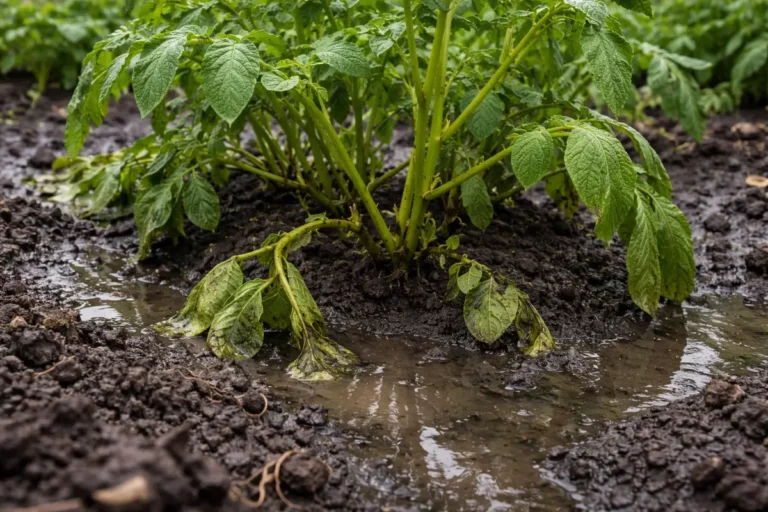
Clay soil often has poor drainage, leading to waterlogged roots that suffocate the plant and prevent nutrient uptake, causing the yellowing leaves. If the soil feels overly compact and heavy, this issue is accentuated, while well-drained soil allows proper air circulation and root health. If the problem persists even with improved drainage, check for signs of nutrient deficiencies such as dark green veins paired with yellowing leaves. If you notice any symptoms such as a foul smell from the soil, it’s a significant indicator of compromised root health.
If the soil smells sour or has a slimy texture, it likely indicates root rot. In this case, lift the plant immediately and trim away the affected roots before repotting it in fresh soil. Alternatively, if your calla lily is too dry instead of waterlogged, you may need to increase your watering frequency to prevent desiccation that can also lead to yellow leaves. Understanding the moisture needs during different seasons can greatly assist in preventing recurrence of this issue. Generally, clay soils retain moisture well during the rainy season, while summer months often require increased watering efforts.
The root cause for yellowing leaves could be excess moisture from clay soil, which restricts oxygen from reaching plant roots. Calla lilies prefer well-aerated soil; prolonged moisture can lead to root rot or nutrient lockout due to insufficient aeration. If you delay correcting drainage issues, yellowing will likely worsen, as roots struggle to uptake necessary elements during this stressed condition. Signs like stunted growth and the crisp texture of the leaves should alert you to the urgency of checking drainage. Using a soil moisture meter could provide concrete data on the moisture levels, allowing for timely adjustments that promote optimal health. If the soil tests consistently show high moisture levels and the plant continues to yellow, this could indicate that drainage solutions need to be escalated, like constructing raised beds to improve environment.
Step 3 – Fertilize Calla Lilies to Revive Yellowing Leaves
Start by flushing the clay soil around your calla lilies with water to remove excess salts and improve drainage. After treatment, watch for a transition in leaf color, shifting from yellow to a more vibrant green within 2-3 weeks. To prevent recurrence, establish a watering schedule that promotes consistent moisture without waterlogging, particularly during the growing season. Ideally, watering in the early morning allows for maximum evaporation and reduces chances for fungal infections.
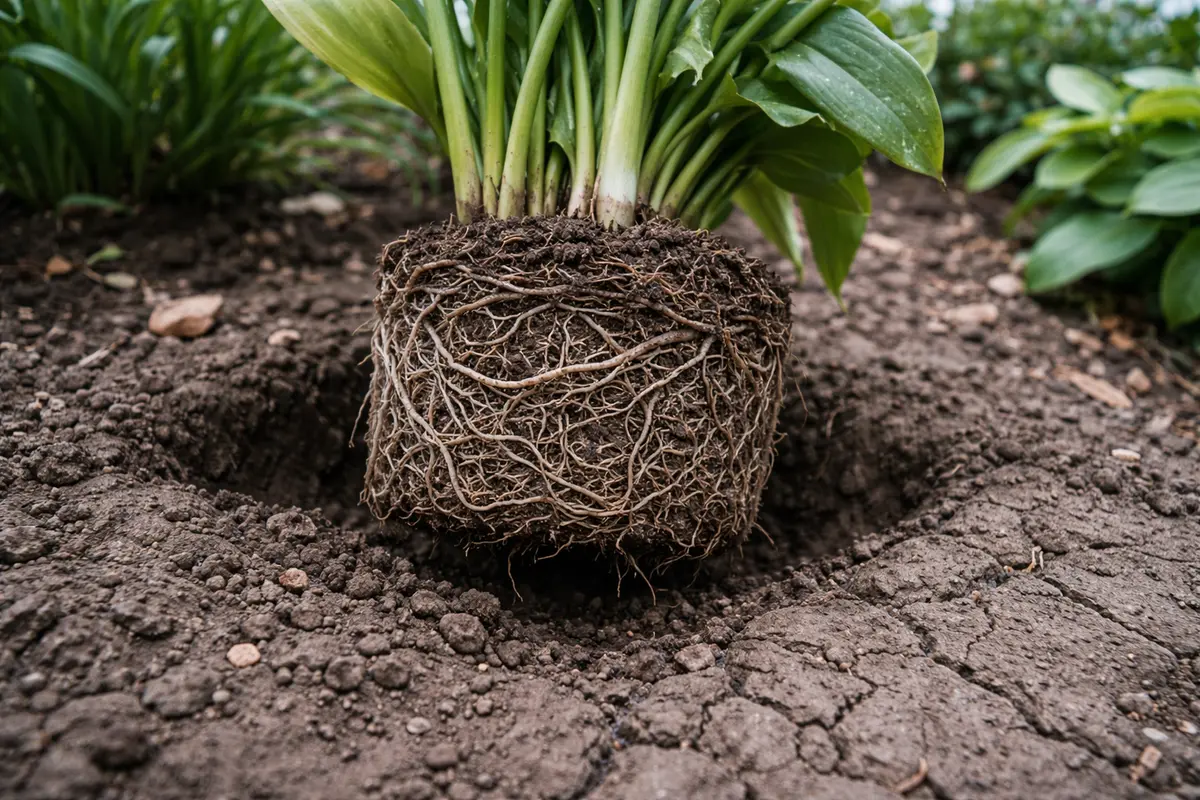
The recovery timeline for yellowing leaves can take several weeks, with signs of improvement appearing as the soil conditions stabilize and the roots recover. Warm, moist conditions can trigger recurrence if drainage issues persist, leading to root rot. If your calla lilies don’t show positive changes after a few weeks, check if the soil remains too dense and water retention is causing ongoing stress. This may involve testing the soil structure by squeezing a handful—well-aerated soil should crumble easily and not feel sticky.
A common mistake during the recovery and prevention transition is to fertilize too soon without addressing the drainage problem. If yellowing persists despite good drainage, adjusting your watering frequency based on weather conditions can be crucial. For severe cases, consider reducing watering until conditions improve as overwatering can exacerbate root stress. Wait at least two weeks after applying fertilizer to reassess the yellowing to ensure you provide adequate time for the roots to adapt.
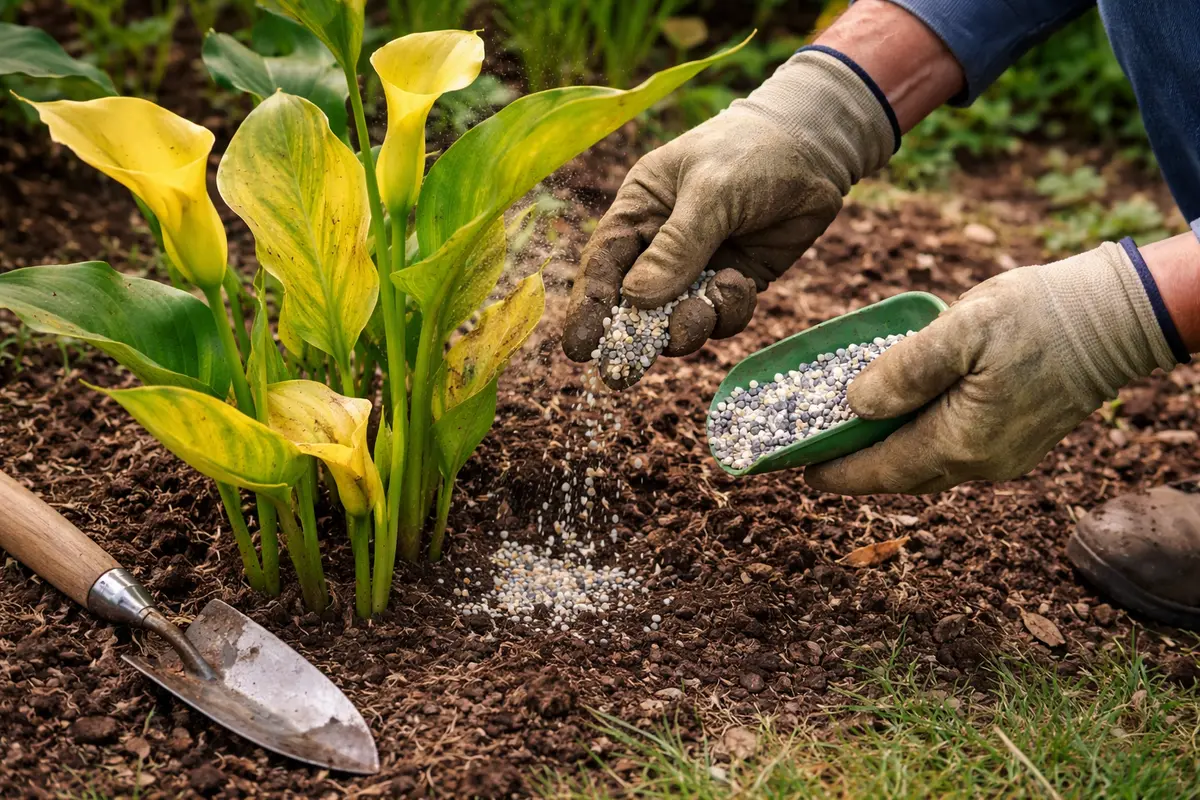
Using a well-balanced fertilizer provides essential nutrients that promote robust growth and vibrant color in the foliage. Calla lilies require consistent feeding during their growing season, especially in nutrient-poor clay soils that may have been depleted post-heavy rain. Regular fertilization every four to six weeks can help strengthen the plant against the detrimental effects of drought and over-saturation, ensuring it meets its nutritional requirements effectively. Observing the visual cues on your calla lilies, such as bright coloration or growth rate, can serve as a guide to the effectiveness of your fertilization strategy. Some fertilizers specifically formulated for calla lilies often contain micronutrients that may address specific deficiencies shorter in the growing season.
A common mistake gardeners make is under-fertilization or using the wrong type of fertilizer, which can further stress the plant. Always calibrate your fertilizer application based on the age and health of the plant; younger calla lilies may require less fertilizer than older ones. If you observe improvement but yellowing recurs mid-growing season, you may need to adjust your feeding schedule or consult a local agricultural extension office for tailored soil advice. Additionally, consider testing your soil’s nutrient levels every couple of years; imbalances can indicate specific deficiencies that require targeted integration. Remember, heavy clay soils can sometimes bind nutrients, so applying a slow-release organic fertilizer may help over time.
Step 4 – Check Leaves for New Yellowing After Treatment
Monitor your calla lilies closely, checking their leaves at least every couple of days for any new yellowing or distress. Observe how quickly new leaves start to grow in comparison to older ones that were previously affected. Ideally, look for a growth increment of at least one inch per week, indicating healthy plant behavior. Signs of recovery should include newly green leaves and overall firmness with a healthy sheen as indications of improved hydration and nutrient conditions. Continue this monitoring for an entire week to assess plant health accurately, as this critical period is when your interventions should start showing results. The prompt identification of problems allows you to make timely adjustments that facilitate recovery and may avert further escalation.
A healthy calla lily will exhibit bright green leaves and sturdy stems, while ongoing signs of distress may manifest as any new yellowing or loss of leaf integrity. Regular evaluations allow you to catch any emerging issues early and avoid long-term damage. If newly treated plants begin to show signs of yellowing again, it could indicate a need for further nutrient adjustments or that drainage issues persist. Speedy assessments are particularly helpful in areas with erratic weather patterns, where sudden temperature or moisture changes can shock the plants. Check the environmental aspects, including ensuring that the plants are in suitable light and not exposed to extremely high temperatures.
If despite all remedies, you observe no improvement or if yellowing gets worse, consider reviewing your environmental conditions, such as light and temperature. Soil pH levels might be off, adversely affecting nutrient uptake, or it could indicate a more severe underlying affliction requiring deeper investigation or consultation with a specialist in plant health. Regular checks post-treatment can help fend off any recurring issues; consider keeping a detailed log of changes over time to identify patterns that may inform your ongoing care strategies. If you see yellowing returning, evaluate the presence of pests or diseases that could further stress the plant’s health, calling for a preventive approach in managing these situations.
FAQ
How long will it take for my calla lilies to recover from yellowing leaves?
Recovery from yellowing leaves can take anywhere from one to two weeks after addressing the issue with proper fertilization and drainage adjustments. However, if the root cause persists, recovery might take longer or may not happen at all. Observing the leaf texture and color for improvements closely will allow you to effectively gauge your plant’s progress using visible signs of vitality such as new growth.
Can yellowing leaves spread to other plants?
If the yellowing is caused by a pathogen or pest, yes, yellowing leaves can indeed spread. However, nutrient deficiencies and environmental stresses typically do not transmit in this way, although they could compromise the health of nearby plants if shared conditions continue. Regular monitoring of all plants in the vicinity is advisable, especially under similar growth conditions or localized stresses that particular pest infestations may exacerbate.
Should I remove the yellow leaves immediately?
Removing significantly yellowing leaves can help the plant focus its energy on repairing and growing healthy foliage. Just ensure the yellowing is due to stress and not new growth; delaying removal until the cause stabilizes ensures you do not hasten the plant’s decline. Aim for the careful removal of severely damaged leaves to promote better air circulation and increased sunlight access for healthy leaves still in development, as this can significantly improve overall plant health.