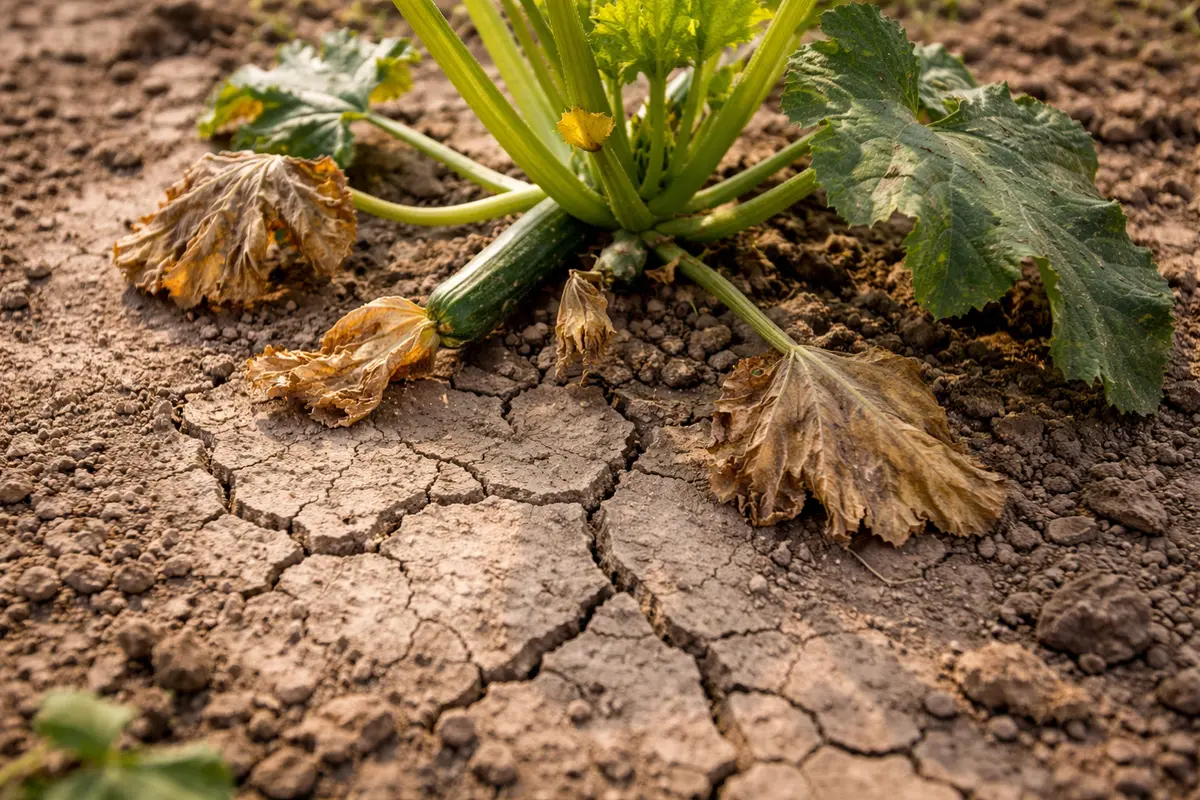
You may notice that your zucchini plants are developing a soft, mushy appearance at the base during hot weather, which is why you need to know why are my zucchini plants rotting at the base during hot weather. This condition often results from excessive moisture combined with high temperatures, leading to rotting and yellowing at the base of the stalks. If not addressed, the situation can worsen, weakening the plant and making it harder to fix, but you can improve this by inspecting your plants and adjusting their watering routine.
Step 1 – Inspect Zucchini for Softened Bases
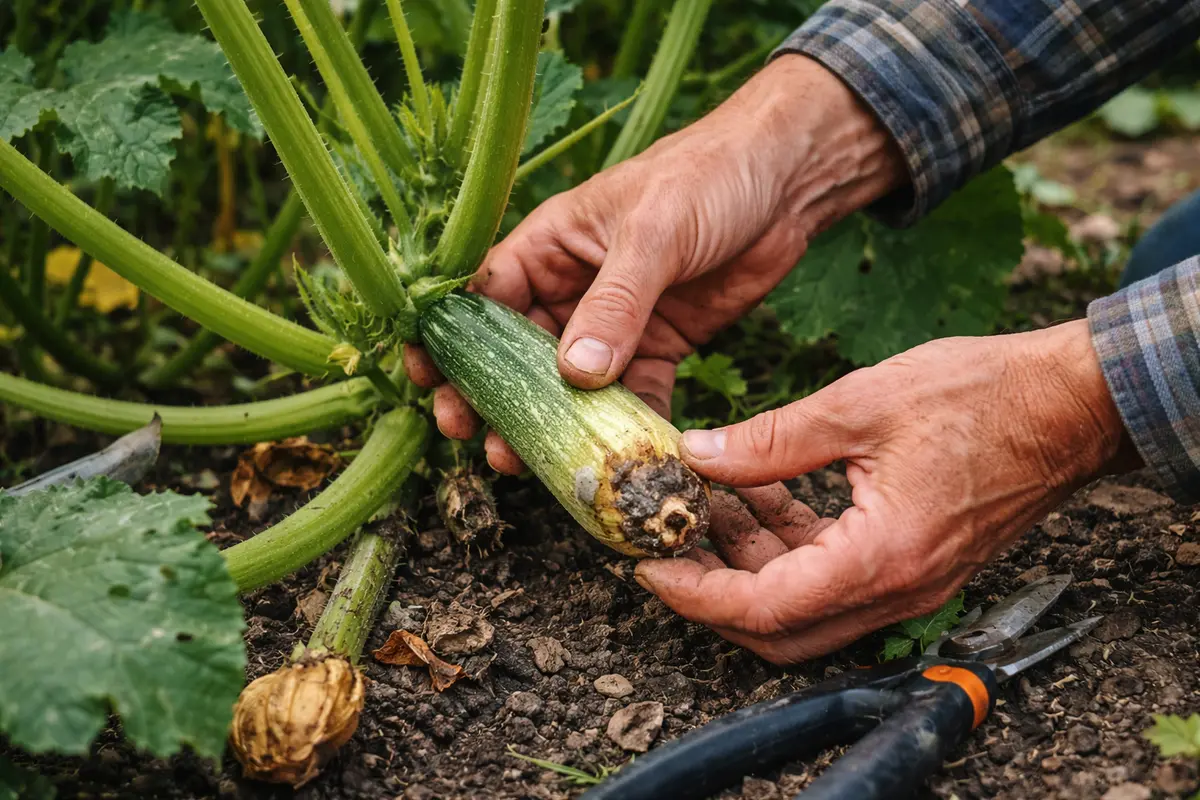
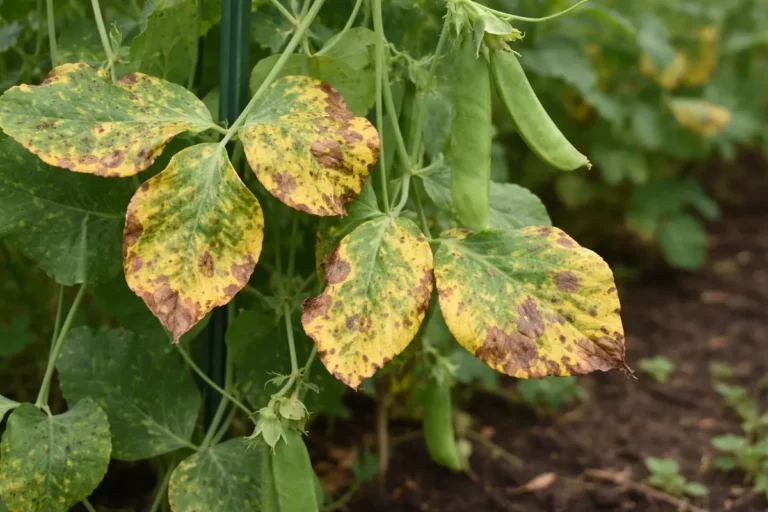
Begin by closely inspecting the base of the zucchini plants for any signs of softness or mushiness in the stems. You will immediately notice if any parts of the stem have become discolored or lost their firmness. Act very quickly; the sooner you identify damaged areas, the less likelihood there is of further spread. If you squeeze the stem and it yields easily, that’s a telltale sign that rot is present. Remember to check for discoloration, such as dark brown or black hues, which can underscore deeper structural issues related to moisture accumulation.
Identifying these symptoms quickly is crucial because soft spots often indicate the onset of rot, which can continue to degrade the plant’s health if not remedied. Zucchini plants can suffer greatly from excessive moisture trapped in the soil, particularly during heatwaves, leading to rapid decay under prolonged wet conditions. If you notice a soft stem, you can also check for a foul odor emanating from the base—a strong indicator that rot has set in. Healthy stems should remain firm and free of weak spots—a contrast you can use to identify when conditions worsen. If rot is allowed to progress, you may begin to see leaf curling as another secondary sign of distress.
A common mistake gardeners make at this stage is ignoring the signs or solely focusing on the foliage rather than inspecting the base. If multiple stems show signs of deterioration, the problem typically worsens under high humidity or temperatures, further quickening the issue’s advance. Taking immediate action means using a sharp knife to cut away diseased portions, aiming for healthy tissue whenever possible, and ensuring good airflow around the plant within the first few hours. Increasing air circulation is essential as it helps reduce moisture levels and can prevent further fungal growth. When implementing airflow strategies, consider spacing plants appropriately from each other. If plants are too close, airflow is restricted, leading to persistent moisture retention and higher rot risks.
Step 2 – Diagnose Root Rot Caused by Overwatering
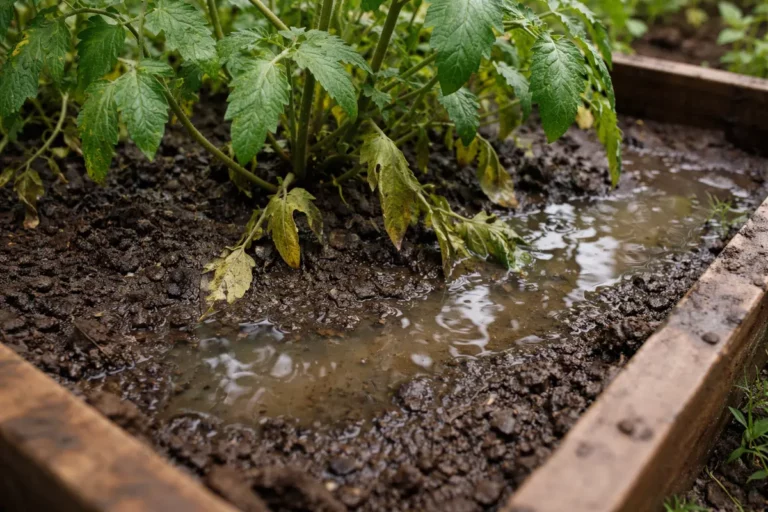
Next, check the soil moisture levels around the roots to diagnose if overwatering has caused root rot. If the soil feels excessively wet and heavy, you need to act quickly by reducing watering frequency. This will allow the soil to dry out, helping combat the conditions that promote further rot. Use a moisture meter if available; it provides an accurate assessment of the soil’s condition. Specifically, insert the moisture meter into the soil roughly 2 inches deep to get a precise read. A reading of 1 to 3 is typically indicative of over-saturation, prompting the need for immediate action.
Overwatering leads to root rot because it suffocates the roots, preventing oxygen absorption and creating a perfect environment for fungal growth. When the soil is saturated, roots begin to lose their structural integrity, visually indicated by spotting or blackened patches emerging on the stems. This imbalance weakens the plant, making it increasingly vulnerable to a slew of diseases, which exacerbates the effects during periods of high temperature and humidity. If the soil exudes an unpleasant smell or feels mushy to the touch, these are significant signs that immediate action is necessary. If there is no improvement in just a few days, your plants might benefit from a more extreme repositioning, like transferring them to drier earth altogether.
If the soil carries a foul odor or appears black and slimy, it’s a strong signal that you need to stop watering and consider repotting the zucchini in fresh, well-draining soil. This transition not only helps protect the remaining healthy roots but also enhances airflow, crucial for recovery. When managing young seedlings, it’s essential to recalculate the moisture settings versus mature plants, as their requirements differ significantly; seedlings require less moisture than older plants. If you notice roots protruding from drainage holes, it’s also a sign that they might be outgrowing their current container and need more space, sometimes indicating that swapping in a larger pot will enable healthier root expansion.
Step 3 – Water Zucchini Less to Aid Recovery
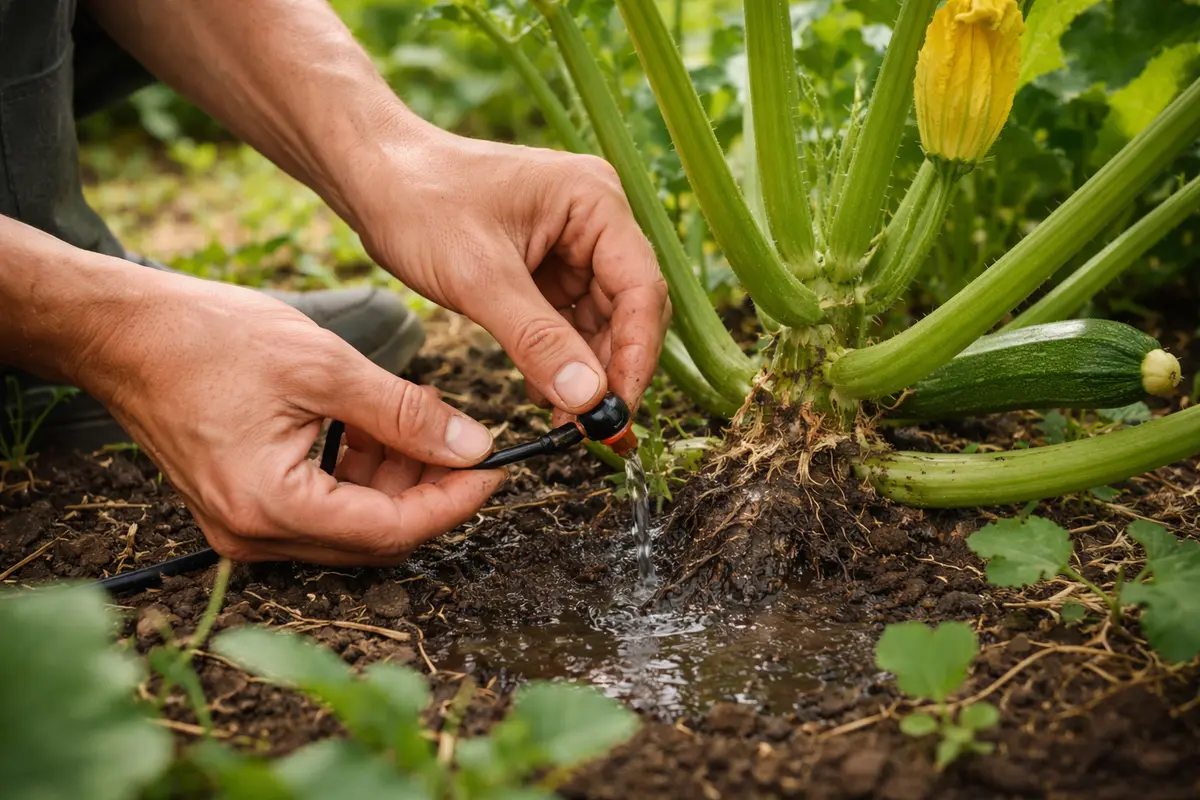
Reduce the watering schedule to only once every week until the soil feels semi-dry at least 2 inches deep. Monitor the soil closely; if it becomes too wet again before the week is over, further decrease the frequency of watering. After adjusting your watering habits, you should begin to see signs of recovery, such as the stems firming up and new leaf growth returning to a vibrant green color within a few days. This period can be crucial—monitor closely; if the soil still feels soggy after a week, consider increasing airflow around the base with additional mulching. If not addressed, failing to reduce watering could cause the rot to persist or even worsen.
Allowing your zucchini to establish a drying period is vital for recovery as it prevents the roots from sitting in damp conditions, which may encourage further rot to settle in. When adequate moisture levels are restored, the plant will revert to its natural growth response, supported by the reestablishment of nutrient uptake. Consequently, the visible buoyancy of the leaves signifies healthy resumption if the plant perks up after factoring in appropriate sunlight, typically 6 to 8 hours of direct sunlight per day. If you notice leaves that yellow despite proper watering, it may indicate another underlying issue, such as a nutrient deficiency, which may need addressing.
A common mistake during recovery is getting overly enthusiastic about water and fertilizer, believing the plants need immediate rectification. In reality, overcompensation can further stress the roots that are struggling against persistent dampness. It’s also essential to reflect on seasonal changes; particularly during hot weather, the soil dries out faster, which might require adjusting your watering schedule again or implementing mulch to help retain moisture effectively. If you’re using organic mulch, like wood chips, they’ll also help suppress weeds that could compete for nutrients. Remember that signs of chemical fertilizer burn, such as browning leaf tips, suggest that fertilization might need redirection, too.
Step 4 – Shade Zucchini During Extreme Heat Events
Start by ensuring that the base of your zucchini plants has good air circulation by spacing them appropriately and pruning any nearby foliage. As a result, you will see reduced moisture retention around the stem that prevents rotting, particularly during hot weather.
High humidity combined with poor air circulation creates a perfect environment for fungal diseases at the base of zucchini plants. When the soil is too wet and the plants are crowded, the risk of rotting increases significantly. This prevention routine interrupts fungal growth by promoting airflow and moisture evaporation, which helps keep the stems dry. If your plants are wilting despite dry conditions, check for excessive humidity under foliage.
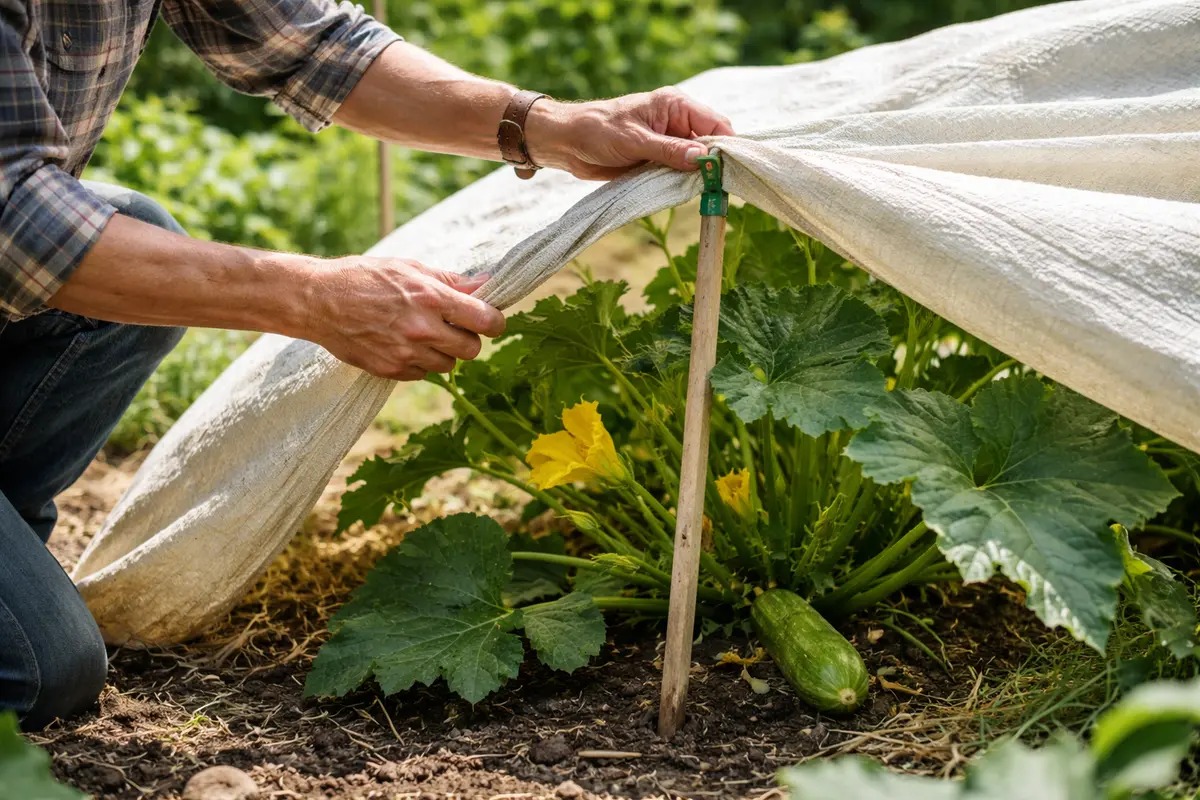
As the season progresses into peak summer heat, increase the frequency of mulch application around the base of your plants to further regulate soil moisture and suppress weeds. This additional layer helps combat heat stress and reduces the likelihood of rot. If temperatures are extreme, consider temporarily providing shade with row covers during the hottest part of the day to protect the plants.
Hot weather often leads to rapid evaporation of soil moisture, which can create a stress response in zucchini plants and increase susceptibility to root rot. By applying mulch, the soil stays cooler and retains moisture longer, addressing the root cause of overheating and dehydration. For example, if the ground is bare, zucchini may wilt under direct sun, while mulched plants thrive, showing vibrant leaves and sturdy stems. If not mulched, check for signs of wilting before the soil dries out completely, as this could indicate the plant has not maintained necessary hydration levels.
During particularly hot spells or drought conditions, increase the thickness of mulch around your zucchini plants to provide extra insulation against extreme temperatures. You might also consider using organic matter like straw or grass clippings, which not only insulate but also enrich the soil as they decompose. This extra layer can significantly lessen the stress during heat waves while helping you maintain a conducive growing environment. In extreme cases, shading may also benefit from adding portable shade panels to reduce sun exposure without obstructing airflow from natural breezes.
Extreme heat often exacerbates the risk of dehydration and fungal growth by stressing the plants, leading to severe consequences like wilting and potential death. Providing shade not only gives the leaves a respite but also ensures that moisture remains stable in the soil, countering the dry effects of high temperatures. Using lightweight materials, such as fabric, burlap, or even strategically placed shade cloth, can effectively diffuse sunlight while avoiding heavy coverage that may obstruct air circulation and water access. Change your approach depending on the day; light filtering can be adjusted to match the intensity of direct sunlight during peak hours.
Adjusting shade based on the midday sun and shifting seasons is essential for consistent protection; for instance, as it becomes cooler in fall, you may need to gradually reduce the shading to allow for maximum sun exposure to prepare for harvest. A secondary layer of prevention might include integrating mulch around the base of the plant, which aids in moisture retention while keeping soil temperatures cooler during harsh conditions. Be mindful of the type of mulch used; organic mulch breaks down and contributes nutrients over time, while inorganic options offer weight without the risk of decomposition.
Step 5 – Check for Wilting Leaves Mid-Week
Start by examining the base of your zucchini plants every few days during periods of extreme heat. Look for signs of discoloration, mushiness, or a foul odor, which indicate rotting. If you notice any of these symptoms, make sure to adjust your watering schedule and improve air circulation around the plants to facilitate drying out, and closely monitor them for any signs of recovery over the following week.
A fully recovered zucchini plant will exhibit firm and healthy stems at the base, displaying a rich green color and robust texture. In contrast, early signs of rot returning would present as a soft, discolored base accompanied by wilting leaves and an unpleasant smell. If you see the leaves drooping and a soft texture returning, this signals that the problem may be escalating.
If the rotting issue persists despite the adjustments, consider removing any affected parts of the plant to prevent spread. Additionally, applying a fungicide may be necessary if you cannot see improvement after a week. If the situation continues to worsen, escalate by consulting a local gardening expert for tailored advice on managing plant diseases and soil conditions.
By closely observing these characteristics, you can gauge the health of your zucchini after treatment; healthy leaves will look plump and vibrant, whereas wilted leaves and a new onset of soft spots indicate a likely return of the stress conditions. It’s critical to keep the environment stable; optimal plant care means addressing humidity, as well as heat, at different growth stages. Regularly assess the weather; high humidity could saturate the soil, while dry spells may demand more water. This is particularly critical if you notice soil conditions worsening in tandem with increased humidity levels; modify practices to balance those fluctuations immediately.
If conditions start reversing despite your care, it’s time to check the root system in detail; a thorough inspection may reveal the beginnings of further rot damage. An affected plant may need root pruning or repositioning in well-draining soil. Additionally, should wilting return even after implementing preventative shading, consider seeking professional advice if signs persist, as further root diseases could develop without thorough intervention. Documenting any environmental changes, such as substantial weather shifts, can also serve to inform your ongoing care strategy. Adopting a continuous observation strategy allows for proactive adjustments, ensuring plants remain resilient throughout varying conditions.
FAQ
How long does it take for zucchini plants to recover from rot?
Recovery from rot can often take anywhere from a few days to several weeks, depending on the extent of damage and how swiftly corrective actions are applied. Signs of revival, such as new leaf growth or firming up of stems, are primary indicators that recovery is underway. If leaves regain their vibrant green color and regain a stiff texture, then recovery is progressing well. Take care to avoid rushing the fertilizer application as recovery continues, as this process requires balancing the roots’ regrowth activity.
Can root rot spread to other plants nearby?
Yes, root rot can spread to nearby plants, especially if they share the same soil or moisture conditions. Diagnosing and treating affected plants as soon as possible is crucial to preventing the issue from affecting the entire garden. If you notice symptoms in one plant, closely inspect others in proximity for similar signs to contain potential spread. It’s prudent to implement a routine check of nearby plants whenever you identify issues; this can be part of an effective preventative strategy.
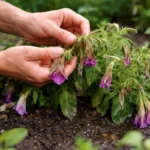
Should I remove affected leaves during recovery?
Yes, you should remove any visibly affected leaves to minimize stress on the plant and prevent the spread of rot. Ensure that only healthy foliage remains, which allows the plant to direct its energy toward recovery and regrowth. Performing this removal swiftly can also help you see improvements sooner, as unhealthy leaves can drain energy away from new growth efforts. More importantly, when removing leaves, sterilize your cutting tool afterward, as this will avoid cross-contamination with other plants, protecting the garden as a whole.