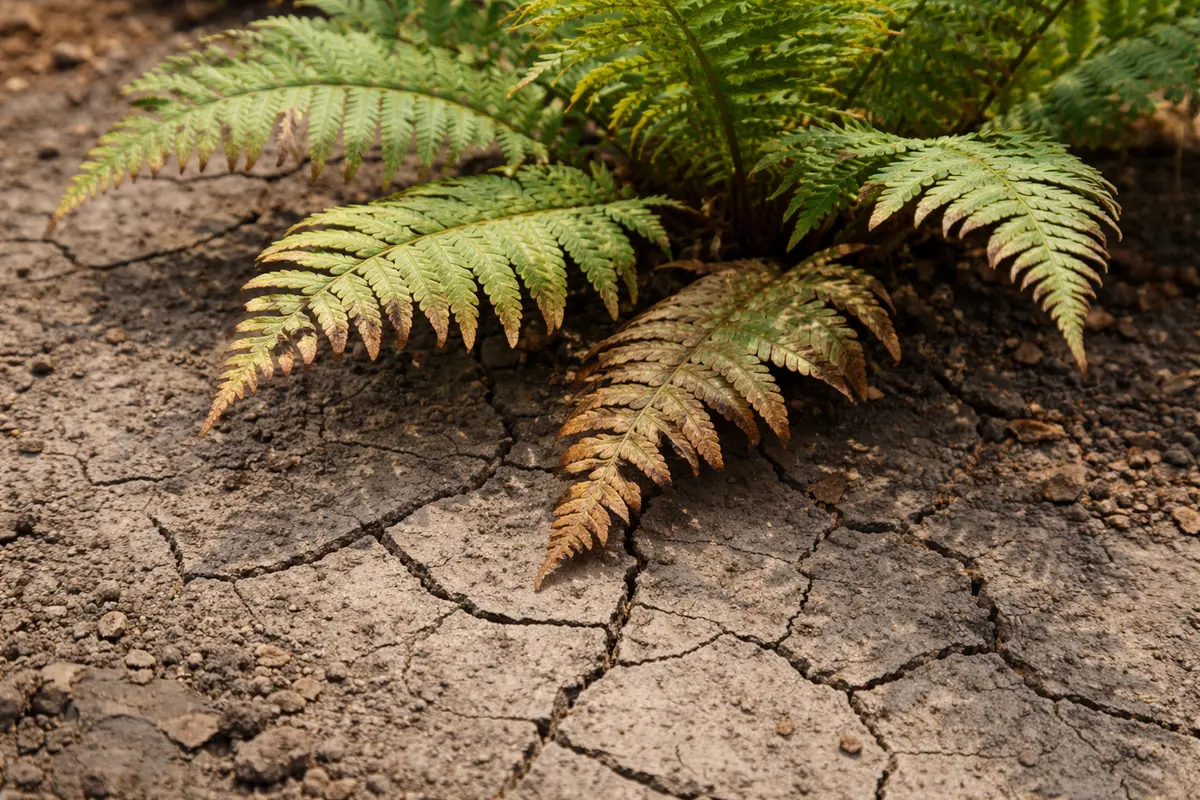
You may notice your outdoor ferns displaying unsightly brown leaf edges after a prolonged drought, which is why you need to know how to fix brown leaf edges on outdoor ferns after drought. This browning occurs as the plant struggles to maintain moisture, leading to damage that manifests as crisp, dry spots along the leaf margins. If left untreated, this condition can spread, weakening the plant and making recovery more challenging. However, addressing it now is entirely possible—simply water your ferns deeply and trim away the most affected fronds to help rejuvenate their health.
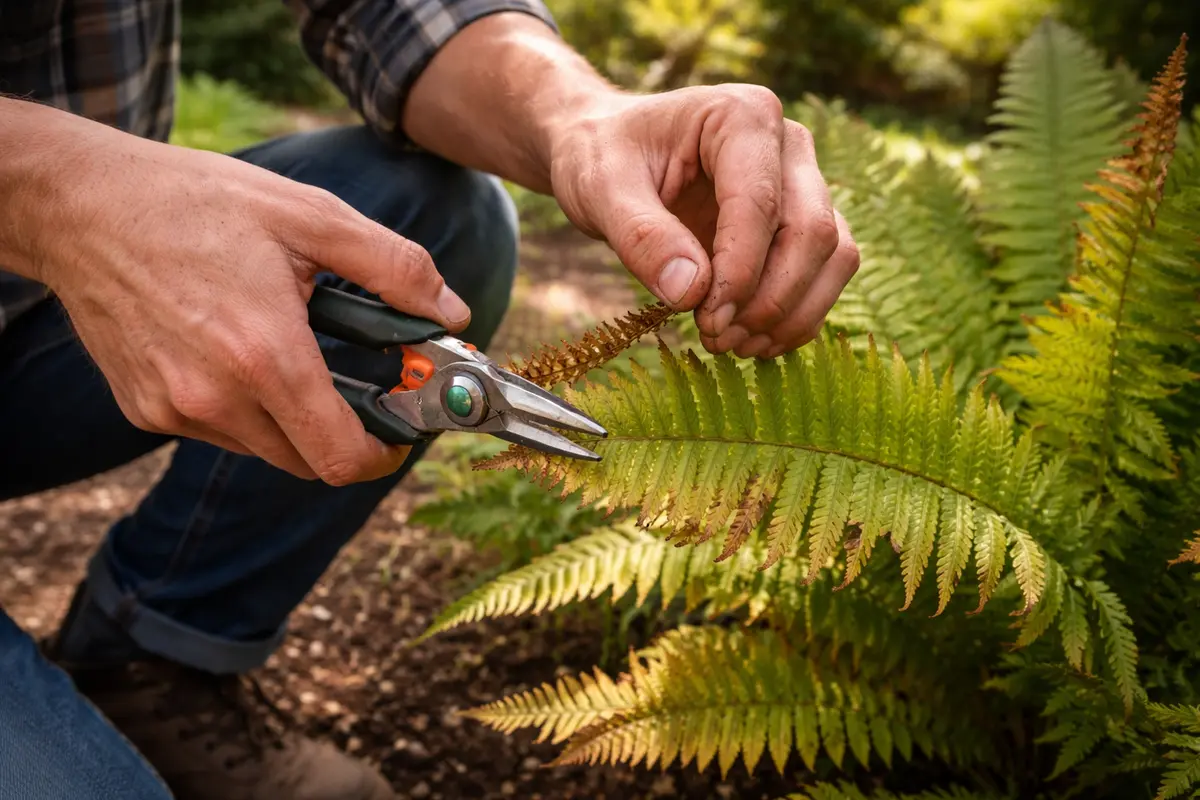
Step 1 – Trim Brown Edges on Fern Leaves
Start by gently misting the fronds of your outdoor ferns with water to immediately introduce moisture back into the leaves. You should notice the edges of the leaves begin to soften and the foliage regains some luster within a few hours, signaling the rehydration process has started. Look for gradual changes in leaf texture; healthy fronds will start to feel more pliable instead of dry and crisp.
Drought stress causes ferns to lose turgor pressure, leading to the browning of leaf edges as cells dry out and die. Acting fast helps prevent further dehydration and allows the plant to start repairing its damaged cells. Delaying this can result in irreversible damage, as the internal tissues may start breaking down after prolonged dryness. If the fronds remain shriveled after your initial misting, it could indicate that soil moisture is also critically low.
A gardener may recall a situation where they delayed watering ferns showing brown edges, only to find that the entire plant wilted beyond recovery in a matter of days. On the contrary, those who promptly misted their ferns usually saw significant improvement within 24 hours. If misting doesn’t change the leaf texture for the better, check the soil moisture—if it feels completely dry, deep watering is urgent. Regularly monitoring the soil moisture is essential; if it remains dry despite misting, the ferns may need immediate attention to address underlying root problems.
Trimming the damaged foliage is vital as it limits the potential for fungal infections to take hold in the dead tissue. Allowing the brown edges to remain can hinder the plant’s recovery by promoting rot, especially in humid conditions. If you notice the leaves develop a mushy texture after a few damp days, this often indicates the start of rot, necessitating swift upward pruning. In addition, by removing browning tips, you also improve air circulation within the fronds, essential for growth, particularly during warmer months when humidity levels can spike.
A common mistake gardeners make is waiting too long to trim damaged leaves. If you procrastinate, the brown edges may continue to worsen, leading to additional dieback. This becomes particularly pertinent when ferns are exposed to ongoing stressors like fluctuating temperatures or additional drought. If you wait until the fronds become completely dead, more energy is wasted on maintaining these parts rather than supporting healthier growth. Instead, check weekly to ensure that the foliage is being proactively managed.
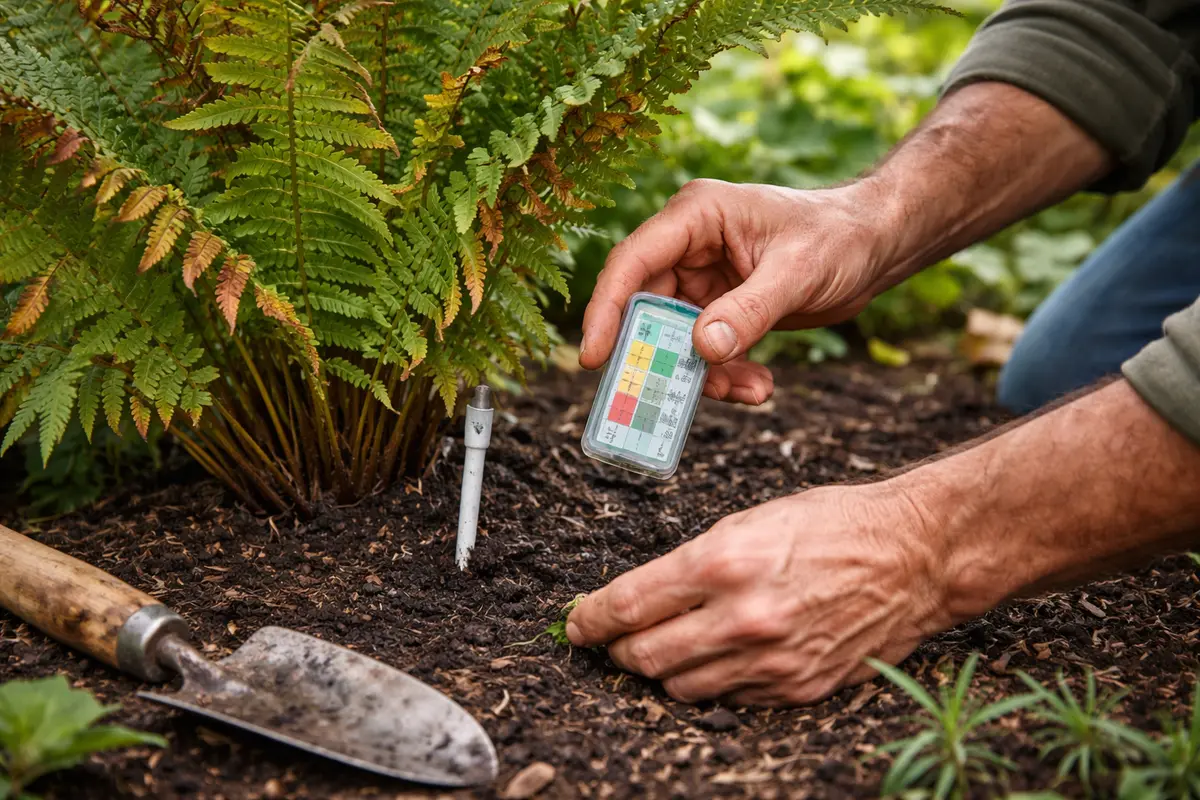
Step 2 – Assess Soil Moisture Levels
Check the soil moisture levels around your ferns by inserting your finger about two inches into the soil. If the soil feels dry or crumbly, it’s a clear sign that your ferns are not getting enough moisture. Hydration is crucial for healing, and knowing the soil condition helps inform you on how much to water going forward. If your finger feels wet but there’s still browning, deeper inspection is necessary because there might be other issues at play.
Ferns require consistently moist but not soggy soil to thrive, as they are sensitive to water stress and overwatering. Dry soil can lead to compromised root systems, making it difficult for the fern to absorb moisture and nutrients effectively. Feel for changes in the soil consistency, such as a hard crust on the surface. If your finger meets resistance when checking, it indicates that conditions are too dry, while excessively wet soil can signal root rot issues that complicate recovery.
Reflecting on discrepancies in soil consistency—like a hard crust on the surface or an unusual odor indicating decay—should prompt immediate action to adjust watering practices. If the soil appears wet but the leaves are still browning, the issue may not be moisture levels but rather a drainage complication or root rot. In such cases, removing the plant from its pot provides a clearer picture—inspect the roots for damage or rot, which is characterized by dark or mushy segments that may not support the plant effectively. Any rotten roots should be trimmed away before replanting in fresh soil to avoid re-infection.
Step 3 – Test for Nutrient Deficiency in Ferns
Inspect your ferns for signs of nutrient deficiency by looking closely at the leaf color and overall vigor. Yellowing fronds or stunted growth often indicate that the plant may lack essential nutrients, which can be rectified by supplementing with a balanced fertilizer specifically designed for ferns. Assure that any fertilizer used is appropriate for the exposure level your ferns have; too strong a mixture can lead to fertilizer burn, characterized by crisp, browning leaf tips. Even subtle yellowing along the edges can signal an underlying nutrient imbalance.
Visual symptoms of nutrient deficiencies can often resemble drought stress, which can confuse the gardener. For instance, leaf discoloration—like yellowing or browning—can suggest both nutrient issues and watering problems. Interpreting these symptoms accurately is crucial, especially if there’s a concurrent brown leaf edge issue. Regularly check new growth for signs of improvement post-fertilization; ideally, you should see positive changes within six to eight weeks after application. If nutrient uptake is a concern, adjusting your fertilization pattern can greatly assist recovery.
If you’re uncertain about the specific type of deficiency, conduct a soil test for pH and nutrient levels. This test can clarify what your soil may lack—such as nitrogen, phosphorus, or potassium. A balanced fertilizer generally addresses these shortfalls, but if the soil’s pH is significantly off, amendments to the soil’s chemistry could be necessary for successful nutrient uptake and long-term plant health. It’s crucial to observe how your ferns respond to adjustments; if yellowing persists post-fertilization, you may need further testing or different formulations tailored to your soil.
Step 4 – Provide Extra Hydration for Fern Recovery
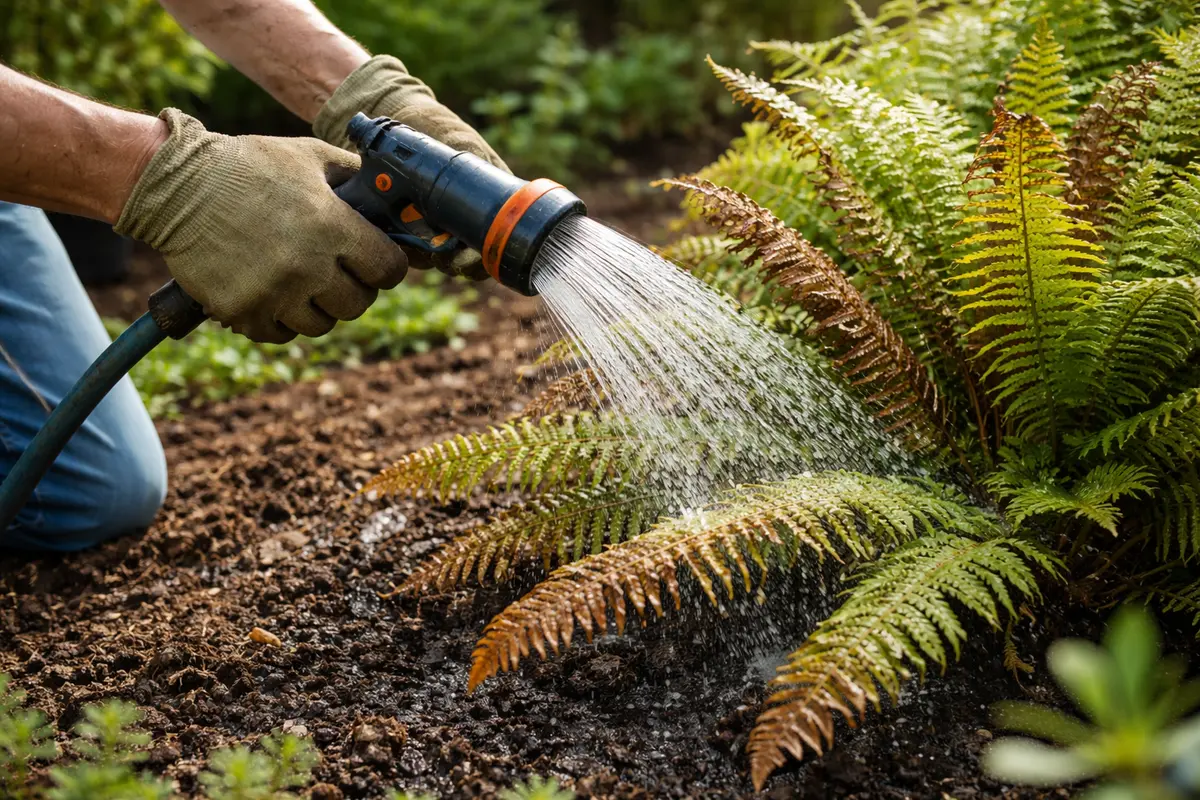
Water your ferns generously, ensuring that the soil is soaking wet but not overly saturated. You should observe the leaves starting to perk up within a few hours as they take in moisture and nutrients through their roots. Correct hydration is crucial for recovery after drought stress, making the fern more resistant to subsequent environmental stressors. Monitor how quickly the soil allows drainage—it should feel moist deeper down without becoming waterlogged.
Healthy hydration practices facilitate root health and support the recovery process by promoting new frond growth. When ferns receive adequate moisture, they can better absorb nutrients, contributing to stronger foliage. If the fronds fail to perk up after watering, it is essential to reevaluate both the watering technique and the soil’s drainage properties to ensure that root systems aren’t suffering from compaction or rot. Ideally, you should see noticeable improvement in leaf condition within a day or two of increased watering.
Many gardeners tend to overcompensate by watering too frequently or too heavily after drought, leading to potential root rot. Instead of daily deep waterings, monitoring the plant closely allows for the top inch of soil to dry out between watering sessions, which helps in establishing a healthy balance. When leaves start curling or appear droopy shortly after watering, it signals that adjustments are required. With careful attention to the watering schedule, you will witness your ferns gradually flourish, moving from limp to lively almost overnight.
Step 5 – Water Ferns Deeply During Drought
Start by regularly watering your outdoor ferns, ensuring the soil remains moist but not soggy. With consistent hydration, brown leaf edges will diminish, and you should witness new fronds emerging lush and green without further browning. The key is to establish a rhythm in your watering, ideally allowing the soil to absorb moisture deeply.
Drought conditions trigger dehydration in ferns, leading to brown edges that signal a lack of moisture. If the soil dries out completely, the plant’s leaves can suffer severe, irreversible damage. By maintaining a reliable watering schedule through seasons, you prevent the stress that leads to these symptoms, ultimately keeping your ferns thriving when temperatures rise. This also ensures that they have strong root systems capable of coping with environmental stress.
During the hottest months, increase the frequency of your watering routine, especially for ferns located in direct sunlight. The heat can exacerbate drying effects, drawing moisture from the soil faster. On hotter days, you might notice that the soil dries more quickly than usual, which makes consistent monitoring crucial. Alternatively, consider adding mulch around the base to conserve moisture and protect roots from extreme heat; a three-inch layer can be effective in maintaining soil temperature and moisture levels through dry spells.
During periods of drought, surface watering is insufficient as it only hydrates the upper soil layer, leaving the deeper roots dry. Therefore, employing a deep watering strategy allows for the facilitation of lower root growth, enabling your ferns to tap into deeper moisture sources that may be available. Keep an eye on soil moisture levels regularly, especially after hot spells; this proactive approach will help in preventing the stress buildup that leads to browning tips. If wilting occurs despite deep watering, revisit other aspects of care, such as nutrient supplementation.
Step 6 – Inspect Ferns for New Leaf Growth
Start by checking the soil moisture around your ferns at least once a week. Use your finger to feel the top 2-3 inches of soil—if it’s dry, your plants need watering. Observe the leaf edges closely for any changes; healthy new growth should appear soft and green, while browning indicates they still need care.
A fully recovered fern displays vibrant green fronds with no crispy edges, and the texture feels supple to the touch. In contrast, early signs of the problem returning may include yellowing near the tips, which feels dry and brittle. If you notice fronds drooping as well, this indicates a need for immediate attention.
If browning persists despite adequate watering and monitoring, consider applying a balanced liquid fertilizer to replenish nutrients. If this step does not yield improvement, escalate the issue by assessing drainage and root health, as these factors can also affect moisture retention and plant vitality.
A fully recovered fern displays lush, bright green fronds with smooth, unblemished edges, demonstrating resilience and renewed vitality. In contrast, early signs of the problem returning include the reappearance of brown-tipped edges or wilting leaves, indicating stress from insufficient moisture — in such cases, a renewed focus on watering may be necessary. If you notice the fronds starting to curl or feel dry despite proper watering techniques, immediate attention may be required to prevent further deterioration.
If the browning returns despite following recovery steps, it’s important to increase your watering frequency and possibly consider applying a balanced fertilizer to enhance nutrient uptake. If problems persist after these adjustments, escalate by consulting a local gardening expert or horticulturist for further diagnosis regarding soil composition or root health. Collaborating on potential solutions can lead to discovering issues that are less visible to the untrained eye or simply due to environmental stressors.
Initially, recovery may be slow post-drought, but any visible new growth signifies the plant regaining strength. Watch for texture changes — healthy leaves should feel supple and firm, whereas any sign of returning browning or wilting prompts immediate review of cultural conditions, as they may indicate a return of previous stress issues or nutrient deficiency. If your ferns show little to no progress within a couple of weeks, reevaluate the previous steps, such as fertilization and watering protocols.
FAQ
How long does it take for my ferns to recover from drought damage?
Recovery time for ferns can vary but often takes 2–4 weeks for new leaves to begin appearing once the right care is reinstated, including consistent hydration and nutrient support, which significantly speed up the regrowth.
Can brown edges on fern leaves spread to other plants?
Browning leaf edges primarily reflect stress conditions in the plant itself and are usually not contagious to other plants. However, if the underlying issue, such as pests or a disease, is present, they could potentially spread to nearby plants, warranting careful monitoring of all foliage within the vicinity to prevent further issues.
Should I remove all the affected leaves from my ferns?
Only remove severely affected leaves that are primarily brown or yellow. Leaving some healthy foliage facilitates ongoing photosynthesis, helping the plant retain energy for growth. It’s essential to ensure that remaining healthy leaves can sustain the fern’s energy needs until robust recovery is fully realized.