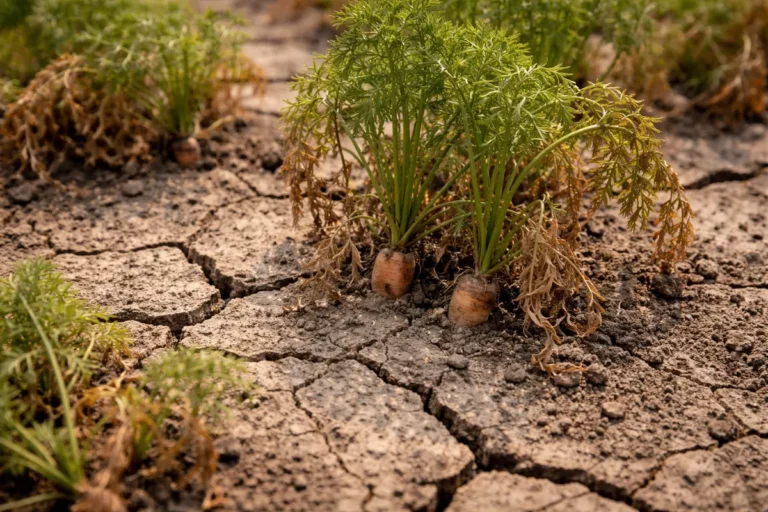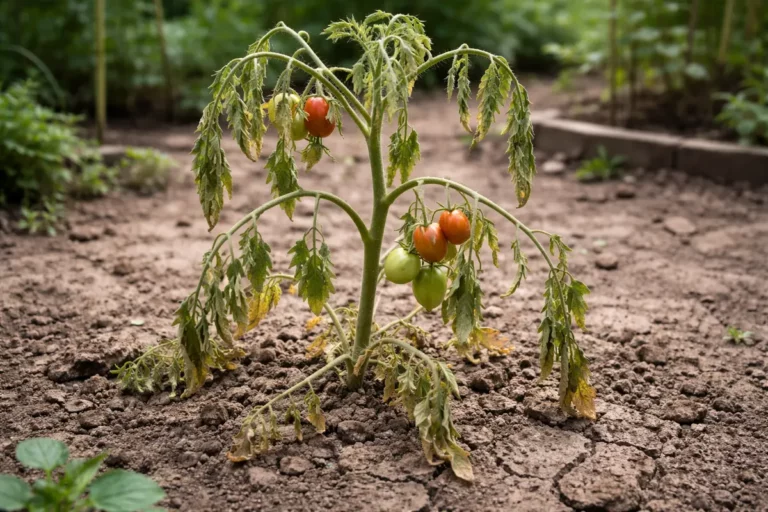
You may notice your tomato plants struggling under the intense sun of summer, which is why you need to know how to prevent blossom end rot in tomatoes during hot days. This problem often manifests as dark, sunken spots on the bottom of the fruit, caused by inconsistent watering and nutrient uptake. If left unaddressed, this condition worsens and weakens the plant, leading to more damage and stalling growth. Fortunately, you can improve the situation now by checking your watering schedule and adjusting soil nutrients accordingly.
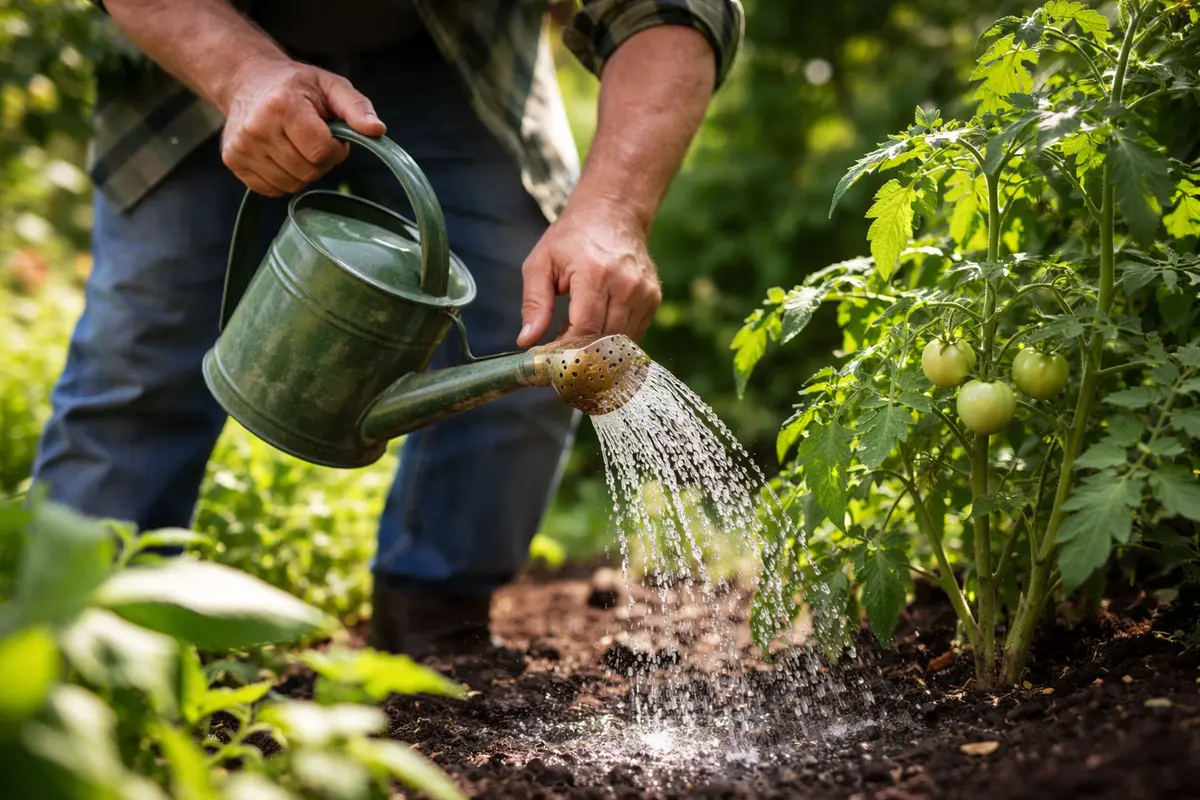
Step 1 – Water Tomato Plants Thoroughly Now
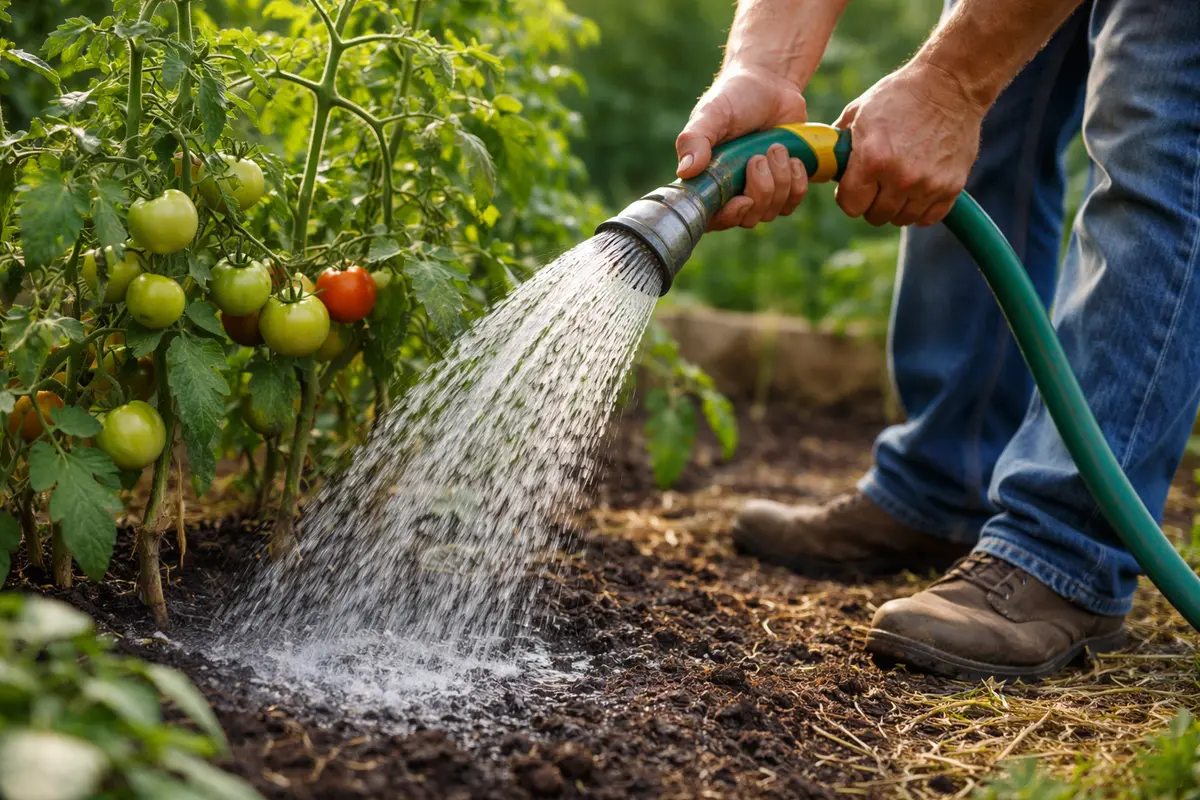
Water your tomato plants deeply, ensuring the soil is saturated at least six inches down. After thoroughly watering, you should observe the soil becoming noticeably moist and darker, creating a healthier base for your plants. This immediate action aids in reducing stress on the plants by restoring moisture levels crucial in hot climates. As you monitor the moisture levels, keep in mind that a deep soak will encourage roots to stretch downwards, fostering a robust root system.
Deep watering is essential because tomatoes require consistent moisture to absorb calcium effectively. When drought conditions occur, the plant’s roots may not take up this essential nutrient. If the moisture stays inconsistent, not only will you experience calcium deficiency, but you may also witness slower overall plant growth. During hot days, if you skip this step or delay it, the problem will worsen rapidly as the lack of water stresses the plant and reduces its nutrient uptake capabilities. Act swiftly to stabilize the soil moisture before the plants face irreversible damage.
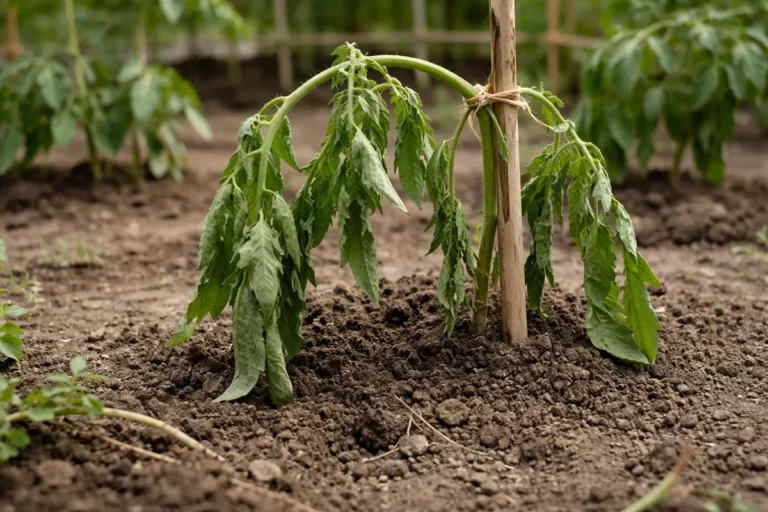
A common mistake at this stage is to water plants lightly or just at the surface level. This may give a temporary relief appearance but won’t reach the roots, likely leading to further calcium deficiencies and subsequent blossom end rot. If you do this, the plants may even show signs of wilting or stunted growth just a day after watering. Water in the early morning or late afternoon to prevent rapid evaporation, thus ensuring the plants have enough moisture during peak heat. If you notice the soil quickly drying out after watering, consider increasing the amount of water or reassessing your watering schedule to avoid further moisture loss, especially if you have sandy soil that drains quickly.
Step 2 – Check Soil Calcium Levels for Deficiency
Start by checking your soil moisture regularly to ensure it remains consistently damp but not waterlogged. Water your tomato plants deeply at the base to prevent rapid fluctuations in moisture, which can lead to blossom end rot. You should observe that as the soil moisture stabilizes, the likelihood of blossom end rot decreases, resulting in healthier tomatoes.
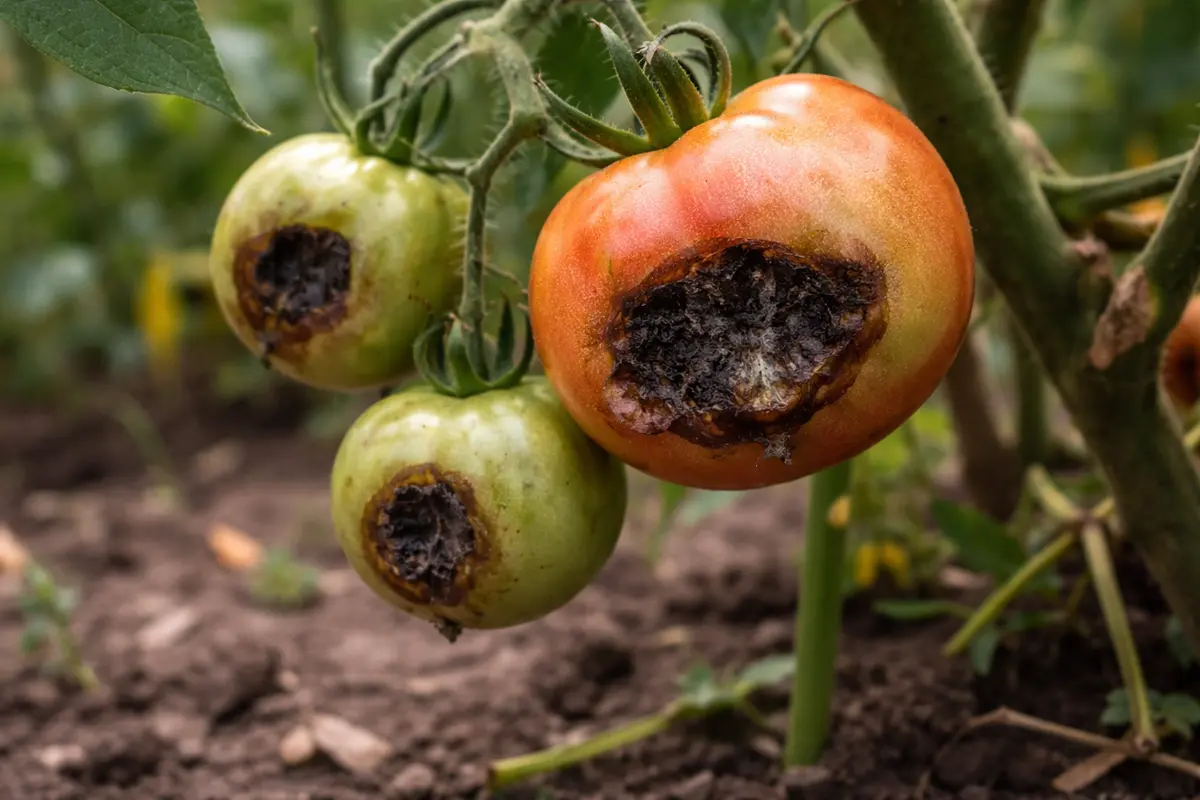
Blossom end rot occurs when plants experience calcium deficiency, often due to inconsistent watering that disrupts calcium uptake from the soil. When soil is either too dry or overly saturated, the roots can’t effectively absorb calcium, preventing it from reaching the developing fruits. As a result, you may see dark, sunken spots on the bottom of the tomatoes, contrasting with the vibrant green leaves above, indicating a nutrient imbalance.
If the soil feels dry despite recent watering, check for compacted soil that may hinder water absorption. Compacted soil can prevent roots from accessing necessary moisture and nutrients, worsening blossom end rot symptoms. On the other hand, if the soil is consistently soggy, you may need to adjust your drainage methods, such as adding organic matter to improve aeration.
Calcium is vital for cell wall structure in tomatoes; without it, the fruit cannot develop properly, leading to the characteristic dark spots on the blossom end. In hot conditions, if calcium levels are low, the plant might prioritize water uptake over nutrient absorption, which can cause a compounding effect of nutrient deficiencies, eventually leading to a downgrading of plant health. Checking early signs of this issue can prevent crop loss later on. Furthermore, doing a soil test before planting can save you the stress of diagnosing deficiencies mid-season.
If you find that the soil remains unbalanced or you also detect a sour smell during the test, this indicates broader soil issues, like compaction or poor drainage, which may require amendments such as lime or gypsum. Soil compaction can prevent roots from accessing nutrients and drying components, leading to further blossom end rot. If your test shows a pH below 6.0, consider adding lime to boost the pH and enhance calcium availability. If soil conditions are overly acidic and calcium is not available, your tomato plants will struggle despite other care efforts.
Step 3 – Apply Epsom Salt for Nutrient Boost
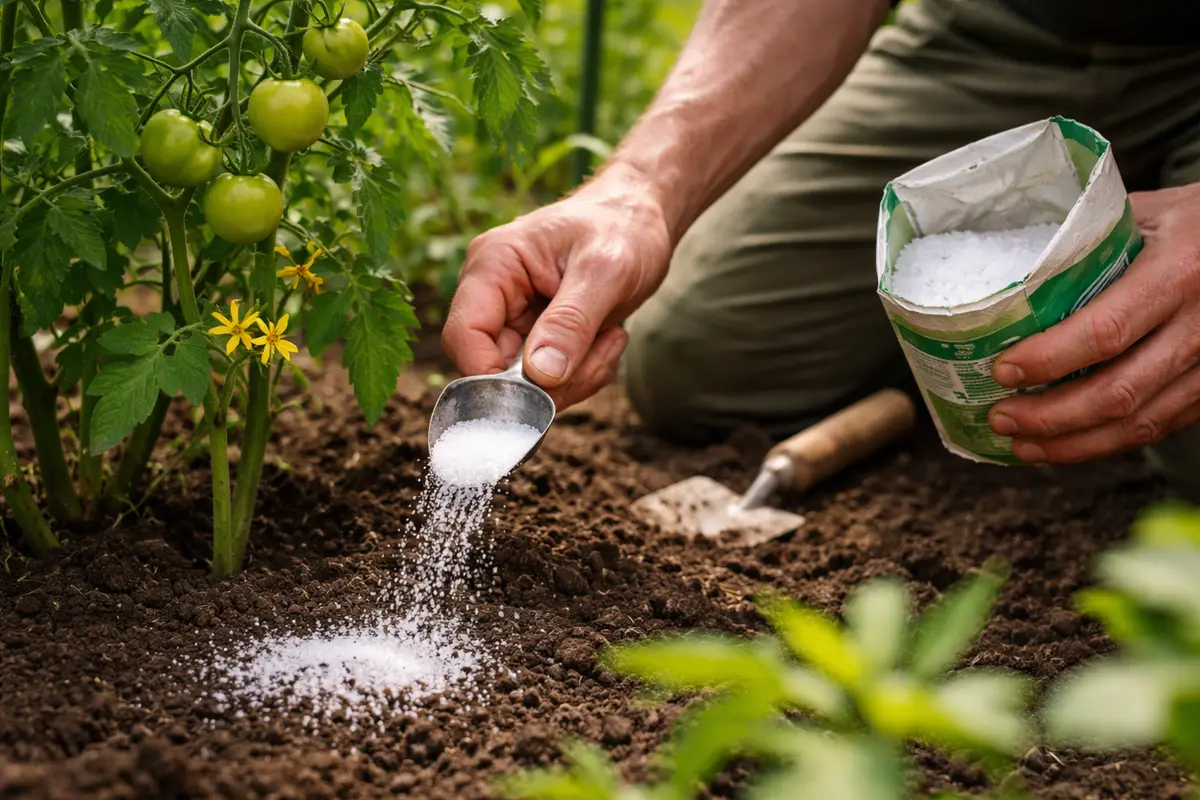
Apply Epsom salt around your tomato plants at a rate of one tablespoon per foot of plant height. Within a few days, you should observe the recovery of the fruit as the blossoms develop properly without signs of rot. Epsom salt provides magnesium, which aids in the better absorption of calcium and promotes overall health in fruit development. During this time, look for any changes in leaf color and growth vigor, as these can indicate how well the application is working.
This treatment works because magnesium plays a critical role in the photosynthesis process, enabling better growth under high-stress conditions like extreme heat. Healthy foliage supports the fruit, leading to a reduction in blossom end rot incidence. As the tomatoes begin to recover, you’ll see fewer dark patches and an increase in new fruit that develops normally. If you observe fruit developing without any signs of blossom end rot, it’s a good affirmation that you’re on the right track with your corrective measures.
However, be cautious of over-applying Epsom salt; too much can lead to nutrient imbalances, especially if the soil already contains adequate magnesium levels. An excess of magnesium can interfere with calcium absorption, potentially worsening your original issue. Track rain forecasts to assess whether the nutrients will be leached away, especially in hard rains, and consider alternating between Epsom salt and a balanced fertilizer if prolonged wet conditions are anticipated. If you’re noticing yellowing leaves alongside blossom end rot, it’s crucial to determine if the problem is solely magnesium deficiency or if other nutrient issues are at play. This can be achieved through further soil testing, ensuring a comprehensive nutrient evaluation.
Step 4 – Water Consistently to Prevent Blossom Rot
Water your tomato plants deeply and consistently, ensuring they receive at least 1-2 inches of moisture each week. By maintaining steady moisture levels, you will prevent blossom end rot and see healthier fruit develop without the characteristic blackened bottoms.
Blossom end rot is often triggered by inconsistent watering and drought stress, leading to calcium deficiencies in the developing fruit. When the soil dries out completely, it hampers nutrient uptake, specifically calcium, resulting in rotten fruit ends. By sticking to a regular watering schedule, you enhance soil moisture and calcium availability, addressing this root cause effectively.
During particularly hot spells, increase your watering frequency or use mulch to retain soil moisture. For instance, applying a thick layer of straw can help keep the ground cool and reduce evaporation. If you notice wilting leaves during heatwaves, adjust your watering routine accordingly for optimal plant health.
Consistent watering patterns help combat the pressures of drought during high temperatures, preventing both water stress and nutrient uptake issues. By observing your tomatoes, you’ll likely notice that established plants will produce healthy fruit with less likelihood of rot when temperatures soar. This action directly addresses the root cause of blossom end rot by ensuring calcium mobility to the fruit as it develops. If your plants are producing healthy fruit under optimal water conditions, it indicates you’re maintaining the necessary balance for nutrient delivery.
Consider adding mulch around the base of your plants for additional moisture retention; this also aids in regulating soil temperature, a crucial benefit during periods of extreme heat. If you’re in a particularly hot microclimate, planting your tomatoes in partial shade can help keep soil moisture levels consistent. When utilizing mulch, ensure it’s around two to four inches deep; too thin may not adequately retain moisture, while too thick can create a perfect environment for pests to thrive. If you notice a significant increase in insect activity with your mulch, it might be beneficial to reduce the thickness slightly to disturb pest habitats while still preserving moisture.
Step 5 – Inspect Fruit for Signs of Rot Weekly
Next, monitor your tomato plants every few days, focusing on soil moisture levels and leaf appearance. Check the bottom leaves for yellowing and inspect the developing fruits for dark spots at the blossom end. As the weather continues to fluctuate, recheck these factors weekly to ensure the problem does not resurface.
A fully recovered tomato plant will display deep green leaves, firm fruit with a healthy sheen, and no signs of bloom end rot. In contrast, early signs of the problem returning include a dull texture or water-soaked appearance on the blossom end of the tomatoes. If you notice new dark patches forming, investigate the soil conditions for moisture consistency.
If signs of blossom end rot return despite following these preventive steps, immediately adjust your watering regimen by providing consistent moisture and ensuring proper drainage. Additionally, consider applying a balanced fertilizer high in calcium, as this nutrient is crucial for preventing the condition. If problems persist after adjustment, seek advice from local gardening experts on further intervention strategies.
When a plant is fully recovered from past deficiencies, all fruits should appear firm, with vibrant green foliage free of irregularities like sunken spots or discoloration. Keep in mind that any re-emergence of dark areas can signify a return to previous watering or nutrient issues. Regular and careful observation at this stage can help manage these problems effectively. If you’re vigilant and notice new signs of blossom end rot, it may indicate underlying issues like fluctuating moisture or improper watering.
If, despite your consistent efforts, new signs of blossom end rot appear, consider adjusting your watering or rechecking soil pH levels. For instance, if you notice increasing rot despite adhering to your care routine, this could lean toward a pH issue rather than a moisture one; soil testing can clarify if this is truly the root cause. Engaging in more proactive weekly checks and understanding the nuances of temperature and water needs is essential. If problems persist, don’t hesitate to consult with a local extension service or agricultural expert for tailored advice suited to your specific conditions.
FAQ
How long does it take for tomatoes to recover from blossom end rot?
Tomatoes can begin to show signs of recovery within a week of correcting watering and nutrient issues. Over the next two to three weeks, you will want to monitor for new fruit growth and improvement in overall plant health; however, any fruit that has already developed rot will not heal. Therefore, it is crucial to focus on preventing further occurrences through regular monitoring and adherence to improved care practices for your tomatoes.
Can blossom end rot spread to other tomatoes on the plant?
Blossom end rot itself does not spread like a disease. However, the environmental conditions causing it—such as low calcium levels and inconsistent water supply—can lead to subsequent issues if they are not corrected. Maintaining uniform watering and nutrient levels is essential to prevent more fruit from developing rot. If you notice that older fruit is affected while new fruit appears without blemishes, maintaining your routine should help ensure overall health.
Should I remove tomatoes with blossom end rot?
Yes, remove any affected tomatoes immediately to prevent attracting pests or enabling disease spread. Healthy tomatoes can continue to thrive and produce if you ensure proper watering and nutrient levels going forward. After you’ve removed the affected fruit, consider adjusting your nutrient regimen to reinforce the remaining tomatoes and reduce the likelihood of future occurrences. This step will also help keep the plant focused on healthy growth instead of trying to heal damaged fruit.