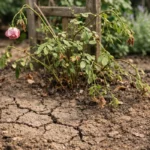
You may notice your daisies drooping and developing yellowing leaves when the soil stays soggy for too long, which is why you need to know why are my daisies wilting after being overwatered. This problem is caused by a lack of oxygen to the roots, leading to wilting and mushy stems. If ignored, this condition can worsen rapidly and weaken the plant, ultimately leading to its demise. Immediate action is required to improve the situation by reducing the watering frequency and inspecting the soil moisture levels carefully.
Step 1 – Remove Infected Daisies From Soil
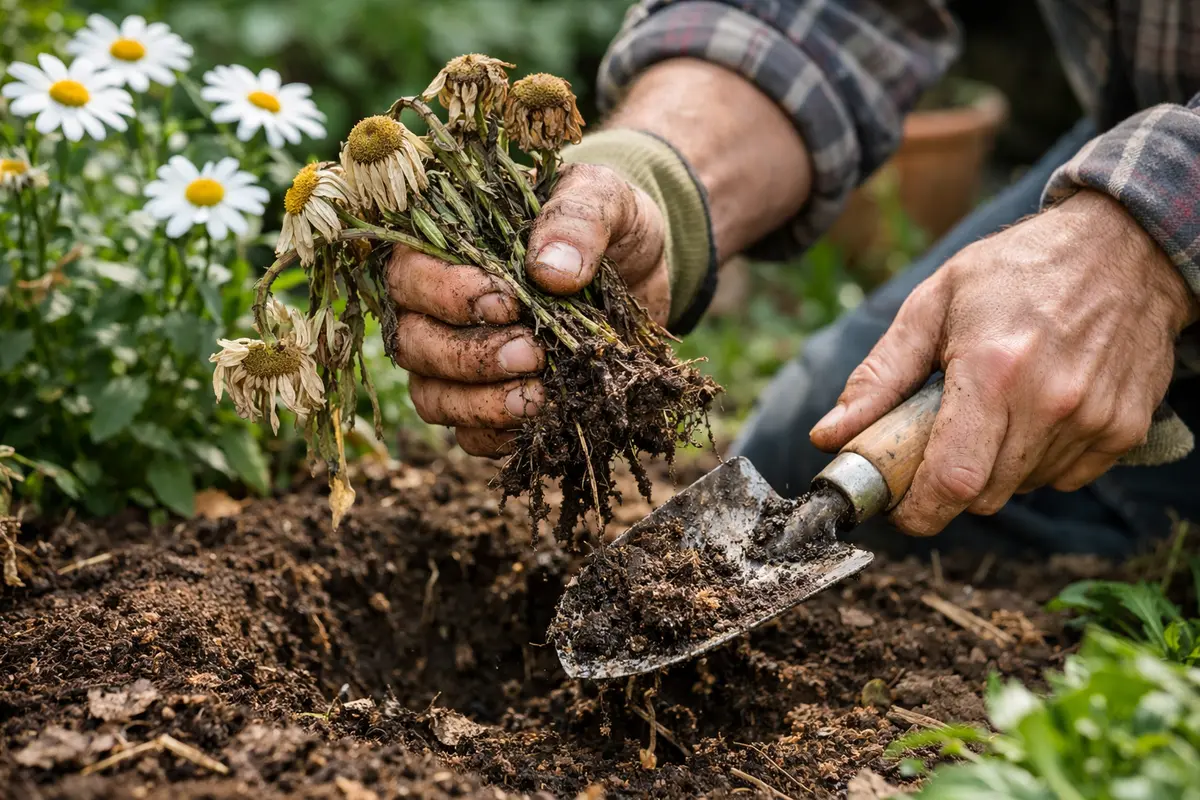
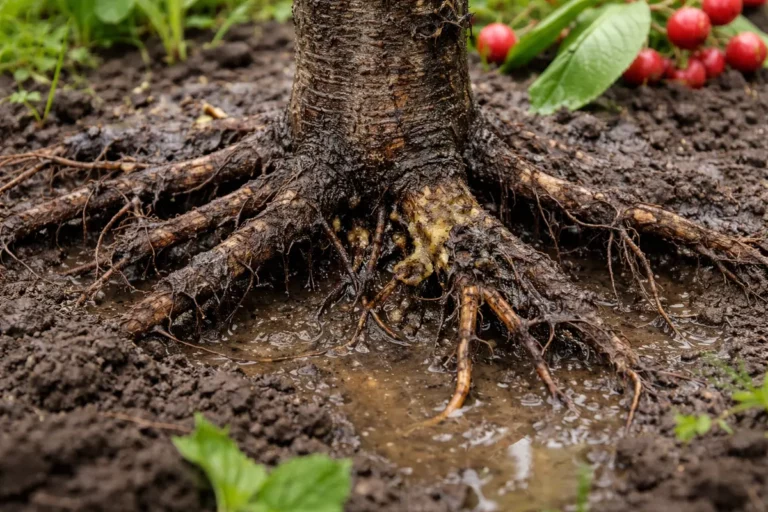
Remove any visibly infected daisies from the soil immediately. You should see healthier plants remaining in the soil as you pull out the wilting ones. Inspect each daisy closely; if the leaves are brown and mushy, this signals decay that requires rapid response. Look for any discolored, slimy roots, which indicate rot—this is a red flag signaling that action must be taken at once. Aim to take about 30 seconds per plant, ensuring you thoroughly evaluate the health of each root system as you proceed.
Taking prompt action is essential as it limits the spread of potential root rot, which causes wilting. Once roots rot, their ability to absorb nutrients and water diminishes significantly. When you remove the infected plants, you cut off the source of decay; this is crucial because diseases thrive in wet conditions. Allowing overwatered plants to remain in the soil can lead to rapid deterioration of neighboring healthy plants. It’s vital to handle the roots gently; any disturbance could stress the surrounding plants, worsening their condition. Aim to remove each plant by gently twisting and pulling at the base, avoiding any hard jerking motions that can damage the surrounding roots. This method not only prevents further damage but also allows you to gauge the soil’s condition as you extract each plant.
A common mistake during this phase is not inspecting the surrounding soil. If the environment remains overly moist, simply removing the wilting daisies may not be enough; pathogens can persist in the waterlogged earth. Before replacing any daisies, check the moisture levels nearby; if the soil feels soggy or has a sour smell, this indicates lingering rot that necessitates correcting. Push a finger into the soil to a depth of about two inches—if it feels damp, consider letting the soil dry out for several days before replanting. Moreover, applying a mild fungicide to the surrounding soil can mitigate any harmful pathogens left behind, especially if the wilting is consistent across multiple plants. If the wilting is localized to a few plants, observe neighboring daisies for any symptoms—if their condition declines, re-evaluate your approach. Tests done in this phase can reveal the extent of moisture retained in the soil, which can inform the next steps needed for recovery.
Step 2 – Assess Poor Drainage in Flower Bed
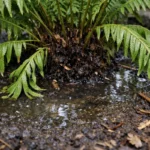
Inspect the drainage system of your flower bed for blockages. You should observe water draining more effectively, leaving behind moist but not soggy soil after heavy rainfall or watering. Watch for any signs of pooling water, which may indicate clogged drainage pathways. This could include checking gutters or downspouts that may be obstructing drainage from the flower bed. Occasionally, issues may stem from garden edges or landscaping features that restrict surface runoff, requiring adjustment as well. Using a trowel, dig shallow trenches around the flower bed to reveal compact areas that retain moisture, assisting you in diagnosing drainage problems.
Poor drainage is a primary culprit behind wilting daisies because it leads to waterlogged roots. When roots sit in water for extended periods, they struggle to absorb oxygen, resulting in wilting foliage. If you notice that water pools instead of draining away, then the soil’s drainage capability is compromised. Pay attention to how quickly the soil dries out after watering; it should not remain excessively wet for longer than one day. If it feels soggy for two or more consecutive days post-watering, immediate action is necessary to alter the drainage. Consider setting up a moisture gauge in the flower bed—it can help monitor the water levels accurately and notify you when the soil is too wet for healthy plant growth.
If you encounter clay-heavy soil that retains water excessively, you must amend it with organic materials such as compost or peat moss. Mixing about 25% organic matter into the existing soil enhances drainage and promotes aeration, which is essential for healthy root function. Spread this mixture across a minimum of the top six inches and water it lightly after amending to help settle the soil. As you monitor the drainage, observe how quickly the soil returns to a non-soggy state after watering. If the soil drains well yet the problem persists, explore potential root diseases that may require further attention. If roots remain infected despite good drainage conditions, consider incorporating drainage tiles to help remove excess water for both existing and new plantings. Ensuring paths for excess water to escape can improve not only the health of your daisies but also the overall health of the surrounding landscape.
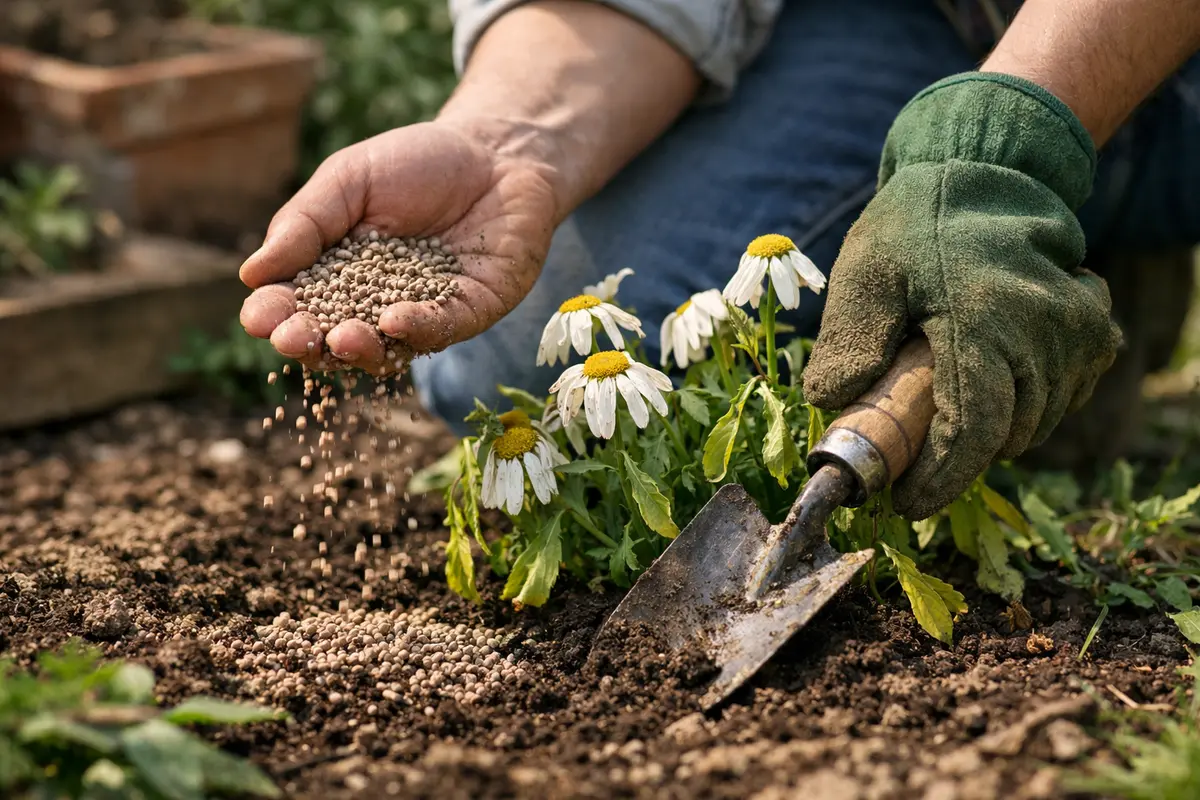
Step 3 – Apply Organic Fertilizer to Revive Daisies
Start by allowing the soil to drain properly; lift your daisies from the pot or garden bed to confirm adequate drainage. Once the excess water pools beneath is resolved, you’ll notice wilting signs begin to reverse within a few days as the soil moisture stabilizes. To prevent future overwatering, establish a regular watering schedule, only watering when the top inch of soil feels dry, and monitor rainfall to adjust your routine accordingly. Maintaining this measured approach will help your daisies adapt better to their environment, reducing stress on the plants.
Recovery from overwatering typically takes about one to two weeks, depending on soil type and environmental conditions. For instance, daisies in heavy clay soil may show slower recovery than those in lighter, well-draining soil, promoting a need for awareness of previous water saturation. If you notice yellowing leaves persisting beyond this timeframe, check the soil temperature—cool conditions can slow root recovery and exacerbate wilting symptoms. In addition, observe the plant’s overall vigor; if green shoots aren’t returning after two weeks, suspect issues like compacted roots or insufficient light. A handy practice during this phase is to check the surrounding conditions, including sunlight exposure and competing plants that may overshadow the daisies, as these factors can significantly affect recovery.
A common mistake during this transition is returning to a regular watering schedule too soon; this can lead to recurring wilting. If the soil still feels damp, adjust your watering frequency based on your observations; for severe cases, delaying watering for several additional days can be beneficial. Healthy nutrients are essential for reviving plants that are recovering from water stress. Fertilizers containing nitrogen, phosphorus, and potassium facilitate metabolic processes and assist roots and leaves in rejuvenating. Follow the manufacturer’s application recommendations closely; typically, about one tablespoon of fertilizer per foot of plant height should be mixed into the soil for deeper absorption. A thorough mix ensures that the nutrients are evenly distributed, minimizing areas of concentrated fertilizer that can harm the roots.
After application, water the area lightly to help the fertilizer penetrate the soil, allowing the nutrients to reach the roots efficiently. A common mistake during this recovery stage is applying too much fertilizer. Over-fertilizing can lead to additional stress—especially if the roots are still struggling to regain health, resulting in salt build-up. If the plants exhibit signs of burning—browning leaf edges or stunted growth—reduce application immediately. To avoid potential further issues, monitor soil salinity if you suspect an accumulation of salts, and routinely flush the soil with water to dilute these compounds. Always monitor the plants closely over the next few weeks; if new growth is seen but starts wilting again, re-evaluate your watering regimen or soil aeration practices, as keeping the soil moist but not saturated will be crucial during recovery. Ready yourself to experiment with different watering intervals, especially in response to changing environmental conditions. This flexibility can help tailor care more effectively to the daisies’ needs.
Step 4 – Inspect Leaves for New Wilting Signs Afterwards
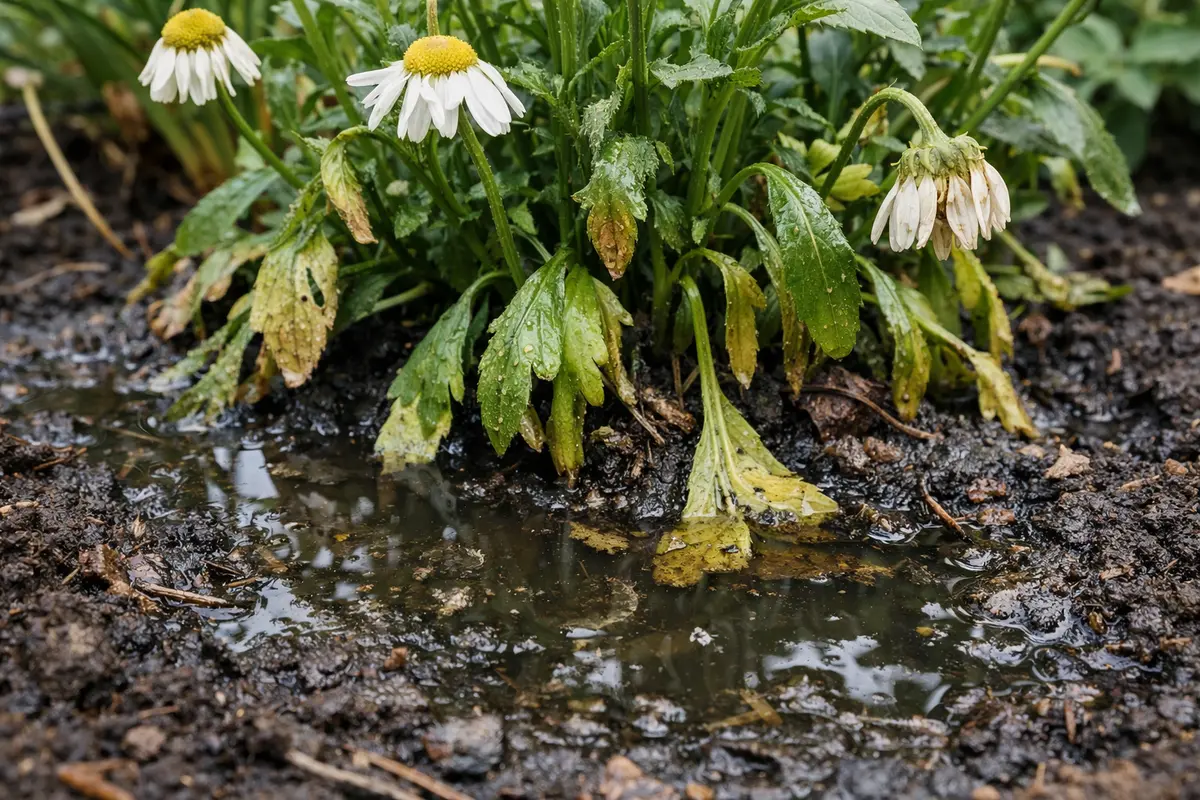
Inspect the remaining daisies every few days for new wilting signs. You should see a return to healthy green leaves instead of the earlier wilting after a week or so, indicating positive recovery. During your inspections, look for healthy leaf coloration and stiffness; wilting will often manifest as soft, drooping leaves that may be discolored. Pay particular attention to the lower leaves first, as they typically wilt before upper foliage, indicating nutrient or water deficits. Keeping a journal to track improvement over time can aid in understanding the specific conditions that lead to recovery or relapse. Documenting details such as the date, temperature, and water application can inform future care strategies.
Once the daisies have been treated, ongoing observation is key to ensuring they recover fully. Signs of vigorous growth, like firm stems and vibrant leaves, indicate recovery is taking place. This is where noting subtle changes becomes crucial; even a slight droop in previously healthy stems can signal a return of problems. If wilting returns after treatment, it may suggest underlying drainage issues or ongoing root damage that needs addressing immediately. Take notes on any patterns you observe, such as specific days when wilting occurs after watering; these observations will help you connect irrigation habits to plant behavior. Additionally, check the overall environment during your inspections for changes, like increased humidity or pest activity, that could impact the plant’s health. If you notice pests—like aphids or spider mites—they can stress the plants further, complicating recovery.
If you see symptoms returning despite following all the steps, it may be time to consult a professional. Persistent wilting could suggest a more severe root rot situation requiring specialized treatment to restore your daisies effectively. Waiting too long can prevent the plants from bouncing back, exacerbating the problem. Timing is crucial; if you notice a decline within a week of your assessments, seeking outside help sooner rather than later can save your plants. Should multiple plants begin showing signs of stress, consider comprehensive soil testing to diagnose further issues and adjust your fertilization or pH level strategies accordingly. The testing can reveal important underlying problems, such as excessive salts or nutrient imbalances, that may not be apparent but require immediate correction for healthy growth.
FAQ
How long does it take for daisies to recover from overwatering?
Recovery time can vary based on plant health and environmental conditions, but it often takes 1 to 3 weeks for newly treated daisies to return to their full vigor. Over this period, monitor signs of new growth regularly to ensure recovery; keeping a consistent light exposure and watering schedule can significantly improve outcomes. Newly sprouted leaves should ideally be more robust and vibrant than older leaves, indicating an increase in vitality and resilience.
Can overwatering spread disease to my other plants?
Yes, overwatering can lead to root rot, which may spread to other nearby plants if the waterlogged conditions persist. It’s essential to address drainage issues promptly to avoid this risk; consider using raised beds or adjusting the watering schedule across the entire garden to protect your plants from similar demise. Regular inspections of neighboring plants for similar symptoms will help catch any problems early and take action before infections can propagate.
Should I remove wilting leaves even after following the recovery steps?
Yes, removing wilting leaves can help redirect nutrients to healthier parts of the plant. However, ensure that the plant is improving before pruning further to avoid unnecessary stress; typically, wait until you see stable signs of recovery before doing extensive pruning. Trim leaves after they show a distinct change in color, especially if you see darkening or browning progressing. Focus on taking off only the most affected leaves first to ensure maximum revitalization while minimizing additional shock to the plant.