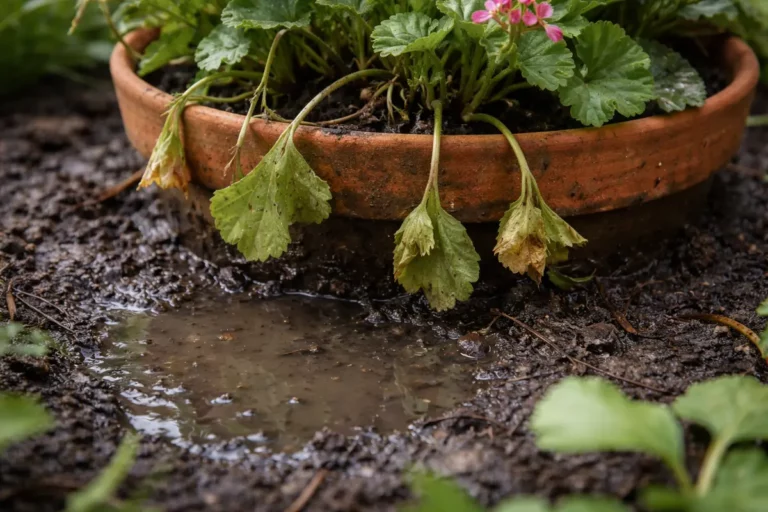
You may notice that your garlic plants are wilting and showing signs of yellowing, especially after heavy watering, which is why you need to know how to stop root rot in garlic after heavy watering. This condition occurs when excess moisture suffocates the roots, leading to mushy spots and overall damage. If left untreated, the problem can spread and weaken the plant, stalling growth. Prompt action can reduce damage significantly; begin by checking soil drainage and adjusting your watering schedule accordingly.
Step 1 – Inspect Garlic for Signs of Root Rot
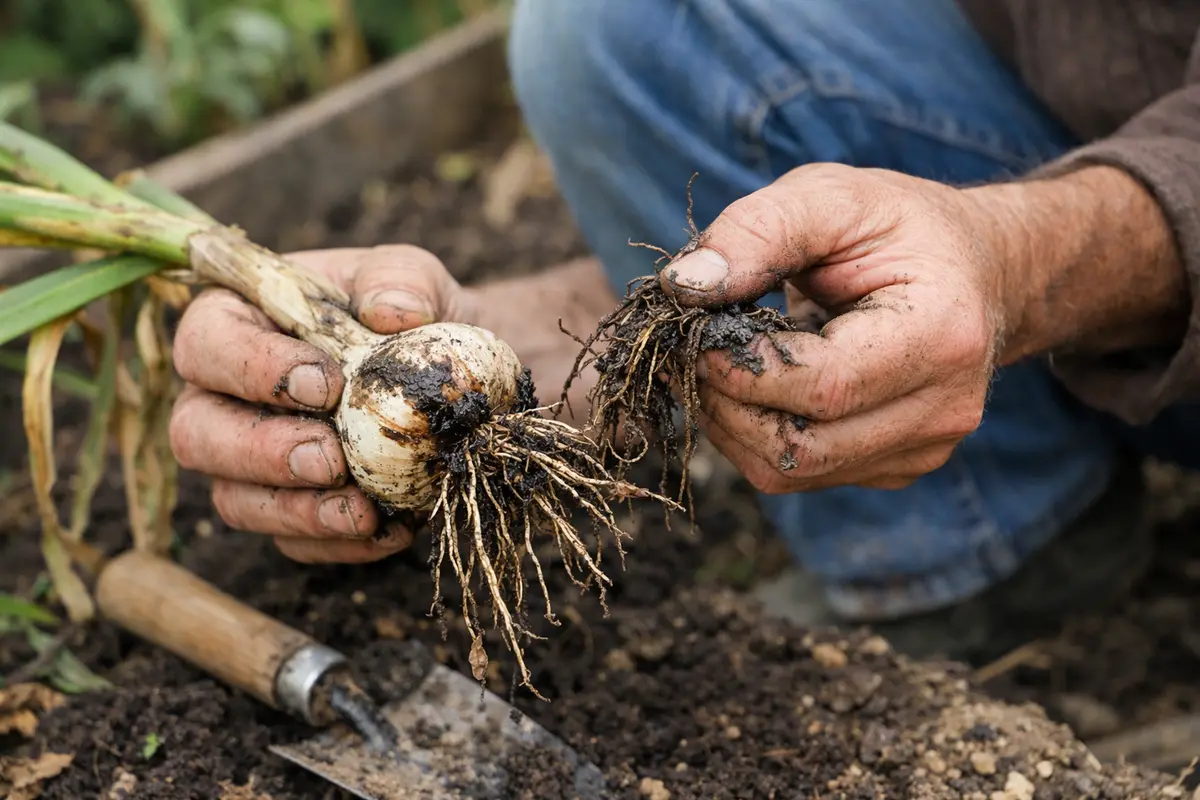
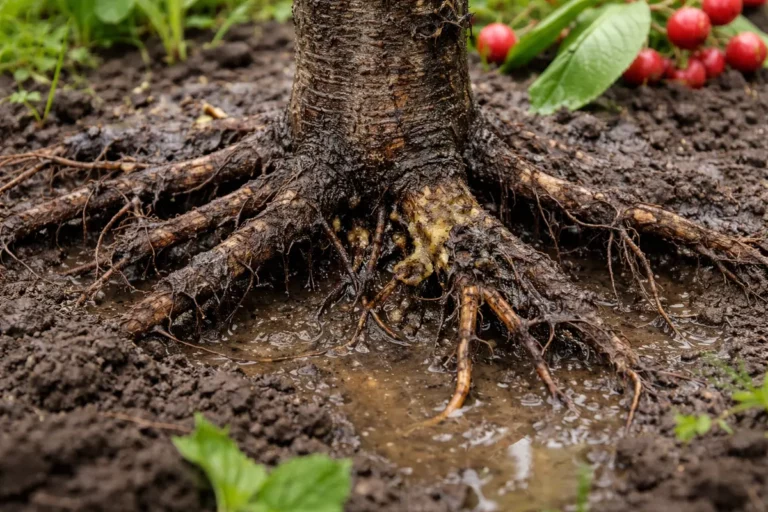
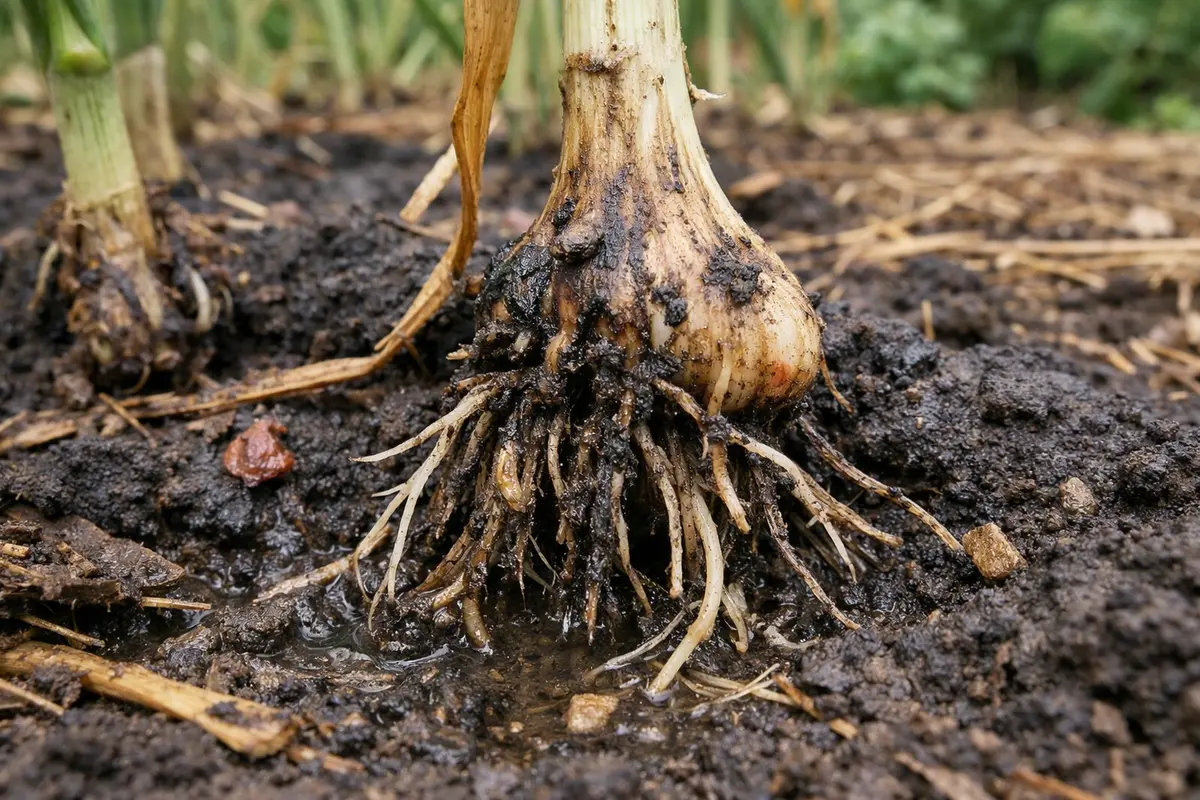
Begin by carefully removing the soil around the base of your garlic plants to look for signs of decay. As you dig, check the roots carefully; you should notice dark, mushy areas that indicate rot. Bright, healthy roots will appear white and firm, contrasting sharply with any blackened, soft, or mushy textures. If the garlic smells foul, this is an additional indicator of root rot. This initial inspection should be done within 24 hours of noticing symptoms to minimize damage, as root rot can spread rapidly in poorly drained soil. Keep in mind that garlic plants can show distinct signs based on the degree of rot; minor rot may only affect a portion of the root system, while advanced cases could severely compromise overall plant health.
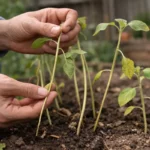
Acting quickly is crucial because root rot spreads rapidly in saturated environments, leading to further decline and eventually affecting the entire plant. If any roots exhibit rot characteristics, snip them away using clean, sharp scissors to minimize the risk of spreading pathogens. You should aim to remove rotten roots plus an additional half inch of healthy tissue to ensure no pathogens remain. This act not only helps stop the rot but also gives healthy roots room to recover and thrive. Pay special attention to the neck of the bulb, as it often shows signs of infection due to its proximity to the soil. If the neck feels soft to the touch or has darkened, this can indicate a significant infection requiring more urgent attention.
A common mistake many gardeners make at this stage is not checking the roots immediately after noticing symptoms. Waiting too long can lead to a broader spread of the rot throughout the plant, exacerbating the existing issue and making recovery more difficult. If you find that the condition has advanced significantly, consider taking more drastic measures, such as removing the entire plant. This approach minimizes the risk of future infection in the surrounding area and helps control the spread of fungus across your garden. Remember, removing a plant is not just about your current yield; it’s also about protecting healthier specimens nearby from potential cross-contamination.
Step 2 – Assess Soil Drainage Issues Under Garlic Plants
Next, inspect the garlic plants by utilizing a garden trowel to gently lift them from the ground. If the roots are indeed rotten, it’s crucial to remove the affected plants along with any decaying material from the surrounding area. This move will help stop the spread of pathogens, and you should notice improved drainage and enhanced health in any remaining plants over a couple of weeks. Ensure that the soil around the garlic bulbs is well-aerated; a well-draining mix can help prevent waterlogging. Look for soil texture: you seek crumbly, loose soil that allows for both water retention and air circulation; if the soil feels dense or sticks together, it’s likely too compacted, leading to drainage problems.
Root rot occurs when excess water saturates the soil, depriving roots of oxygen and creating an environment conducive to harmful pathogens. Understanding the condition of healthy roots is essential; they should appear firm and white, indicating a robust system capable of absorbing nutrients effectively. If this is not the case and you find mushy roots → check for soil compaction. Compacted soil can lead to symptoms similar to root rot, where roots become oxygen-deprived but may require slightly different remediation, focusing instead on aeration rather than fungicide treatment. Often overlooked, the soil around the garlic bulbs should be soft to the touch; any significant hardness indicates that oxygen isn’t reaching the roots effectively.
If the soil smells sour, there’s a significant risk of anaerobic decay, signaling that it’s crucial to replace the top layer of soil with fresh, well-draining material and adjust your watering schedule accordingly. In severe cases, you may need to completely remove and replace the soil around the garlic plants to ensure their root systems can thrive. Alternatively, if you observe yellowing leaves but roots appear healthy, consider that over-fertilization might be the real issue and necessitate a reduction in fertilizer use to restore balance. Addressing these different conditions promptly through individual assessment will help stabilize your garlic plants and prevent future outbreaks of root rot. This approach serves as a critical checkpoint in your prevention strategy—acknowledging variants in plant conditions leads to more effective treatment protocols.
Step 3 – Treat Garlic Roots with Fungicide Solution
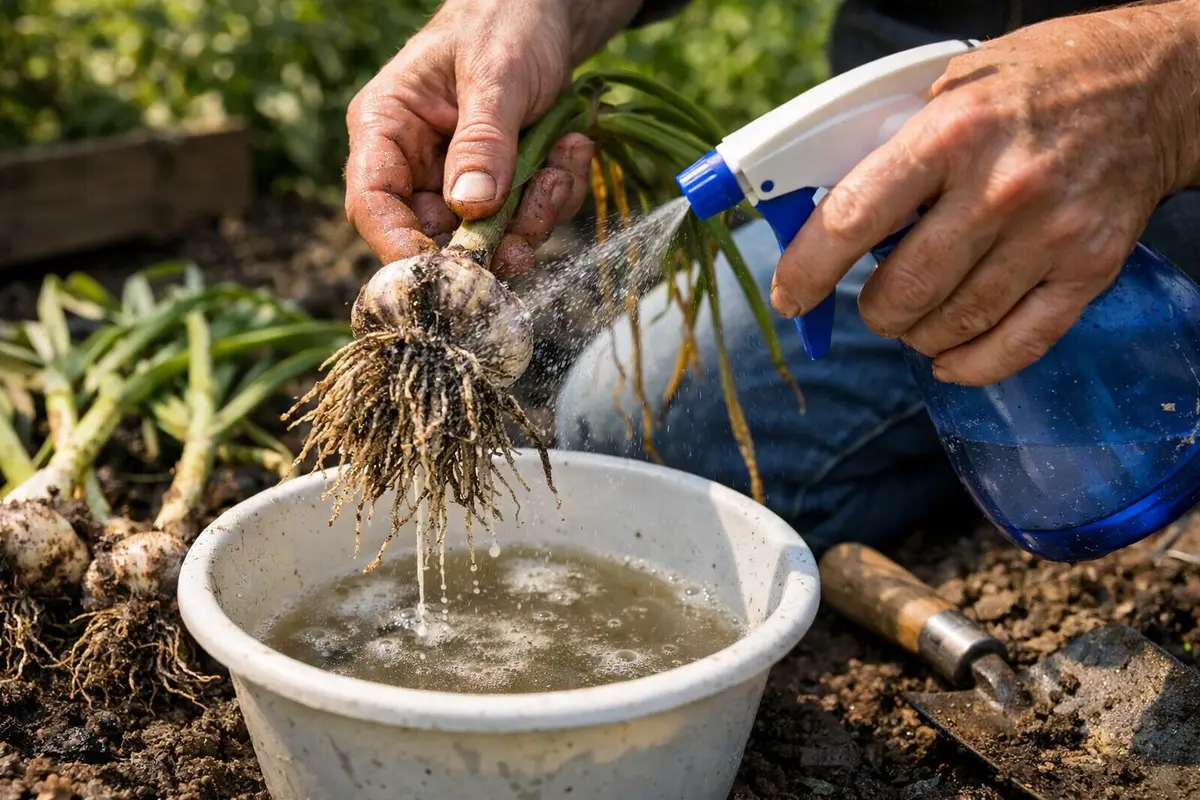
Start by removing any affected garlic bulbs from the soil to prevent the spread of root rot. Replace the soggy soil with fresh, well-draining potting mix and ensure the remaining roots are inspected for signs of rot, such as discoloration or mushiness. Within a week, you should notice the remaining plants perk up and show signs of new leaf growth.
The recovery timeline for garlic can range from one to three weeks, depending on conditions. Garlic that begins to produce new green shoots indicates that it is bouncing back, while yellowed foliage may suggest lingering issues. Warmth and sunlight can accelerate recovery, whereas continued dampness and cold can hinder it. If not thriving in the conditions you’ve provided, check for lingering moisture in the soil.
Avoid the mistake of overwatering during recovery; adding too much water can lead to further rot issues. Instead, water sparingly and focus on ensuring adequate drainage to support root respiration. Garlic prefers drier conditions during recovery, so observe the moisture level in the soil before watering again; if the top inch is still moist, do not water.
The application of fungicides helps restore a balanced microbial population in the soil, enabling healthy roots to resume normal function and recovery. While treating the plants, it’s vital to follow the application guidelines closely; overdosing can stress remaining healthy roots, potentially harming beneficial bacteria essential for maintaining soil health. Expect the healing process to take time; closely monitor the plants for signs of recovery, such as improved leaf color and upright posture. After a treatment application, keep the area well-ventilated and observe any lingering odors in the following days; these factors can indicate how well the treatment is taking hold.
A common pitfall after applying treatment is excessively watering the plants to “help” them recover. Instead, it’s advisable to reduce the watering schedule to allow the soil to dry slightly between watering sessions. Depending on the humidity and temperature in your area, a growing period of two to three weeks post-treatment is typically necessary before you can expect to see significant recovery signs. If you don’t notice any improvement after this timeframe, consider utilizing a different fungicide or consult with a gardening expert for further assistance. Keep an eye on any potential adverse reactions from the fungicide; in some cases, certain plants may react negatively, indicating the need for alternate approaches.
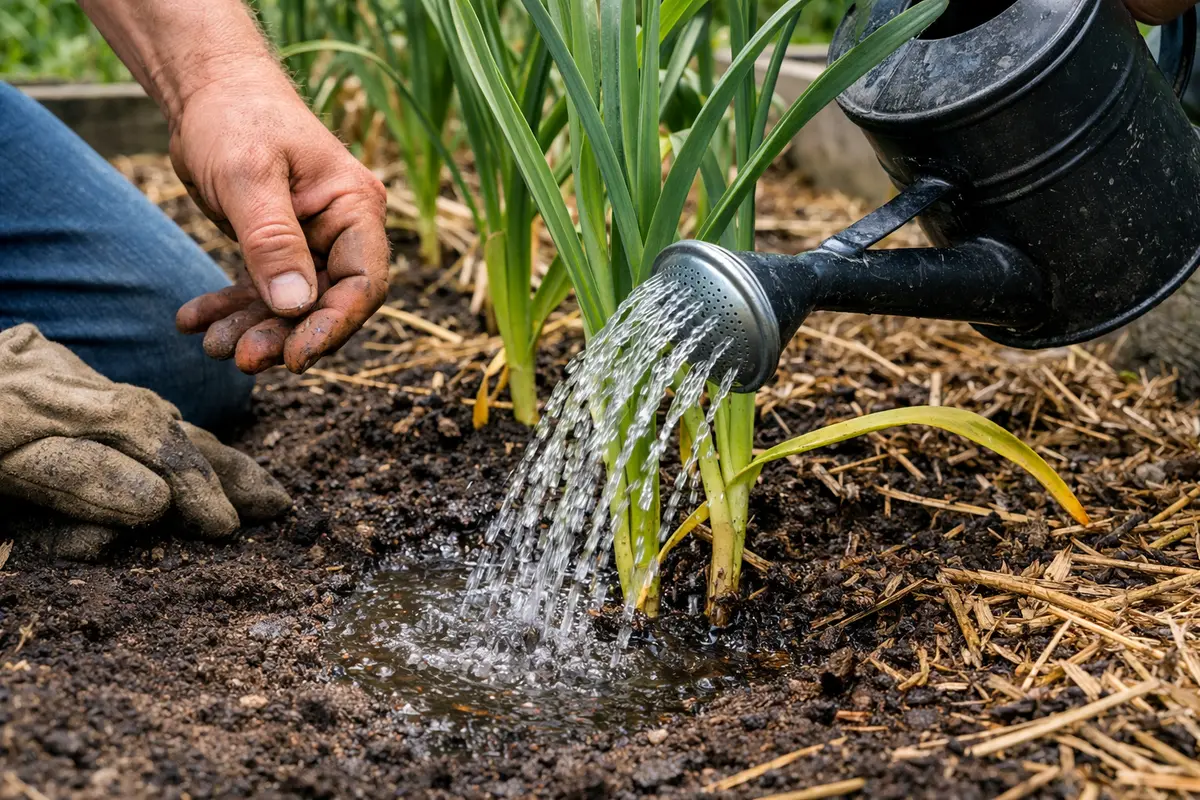
Step 4 – Water Garlic Only at Base to Prevent Rot
Start by ensuring your garlic beds are well-drained by adding organic matter such as compost or sand. This action not only improves soil structure but also prevents water from pooling, decreasing the likelihood of root rot and promoting healthier root systems.
Garlic thrives in loose, well-aerated soil, and heavy watering can lead to soggy conditions that contribute to root rot. In contrast, garlic planted in airy, well-drained soil shows strong, robust roots whereas garlic suffocated in wet soil develops mushy, blackened roots. If you notice poor drainage or persistent moisture, check for compacted soil or inadequate amendments to address the root cause effectively.
In addition to improving drainage, consider increasing the frequency of shallow watering during the dry summer months to foster deeper root development while avoiding over-saturation. Adjusting your watering schedule based on rainfall will help prevent sudden spikes in moisture, enabling plants to adapt to changing conditions.
This method ensures that the roots receive moisture directly without unnecessary exposure to wet foliage, which could lead to fungal proliferation. A consistent check of the moisture levels in the soil is necessary to prevent it from becoming too dry or oversaturated; aim to keep the soil consistently moist but not soggy. During peak summer months, garlic may need more frequent watering; however, focus solely on maintaining an adequate moisture level at the root zone. An actionable tip is to stick your finger into the soil about two inches deep; if it feels dry at this level, it’s time to water. This tactile check often reveals moisture discrepancies that might not be visible on the surface.
Be mindful of temperature changes and artificial humidity conditions; adjusting your watering habits accordingly can prevent potential rot issues. A common seasonal mistake involves persisting with the same watering frequency during cooler months, which can result in over-saturation and rot complications. Observing weather patterns closely will help you prevent unnecessary stress on your garlic due to excessive moisture, establishing a good routine for successful cultivation. In particularly rainy periods, consider erecting temporary barriers to redirect excess rainfall away from your garlic beds, ensuring that the plants aren’t subjected to prolonged saturation.
Step 5 – Check Garlic Leaves for Wilting After Treatment
Start by checking the soil moisture level every few days to prevent overwatering that leads to root rot. Observe the garlic plants for changes in leaf color, from yellowing to vibrant green, as a sign of recovery. If the foliage does not improve or shows signs of wilting again within a week, recheck the soil and adjust watering practices accordingly.
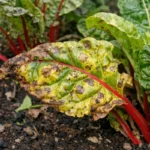
A fully recovered garlic plant boasts lush green leaves and firm, upright stalks, indicating that the roots have regained strength. In contrast, early signs of returning root rot may present as droopy leaves accompanied by a mushy base around the bulb. If you notice browning or a slimy texture on the roots, check for over-watering and signs of fungal activity in the soil.
If root rot symptoms return despite following these care steps, it’s crucial to remove the affected plants to prevent spreading the issue. Reassess your watering schedule, ensuring the soil drains properly and does not remain soggy. Additionally, consider applying a fungicide labeled for use with garlic if the problem persists.
A fully recovered garlic plant displays vibrant green leaves with a firm texture, showing no signs of drooping or discoloration. In contrast, if early signs of root rot are returning, you might notice darkened leaf tips or soft, mushy areas at the base of the leaves. If the leaves feel limp or fall over easily, reassess the watering and drainage conditions; if the roots are slimy, check for soil compaction or lack of aeration.
If the problem persists despite following the monitoring steps, consider removing the affected bulbs and replanting them in well-draining soil amended with compost. If the issue continues after replanting, escalate by applying a fungicide specifically labeled for root rot, following manufacturer instructions. This double-check ensures you tackle both the symptoms and possible ongoing issues effectively.
A well-recovered garlic plant will showcase sturdy green leaves that maintain their posture without sagging. If wilting reoccurs despite your adjustments, it may indicate an ongoing issue with root health or lingering moisture problems. Staying vigilant for any new signs of root rot or persistent dampness in the surrounding soil allows you to intervene swiftly and prevent any further damage from escalating. Implementing a routine of weekly inspections will increase your chances of catching these issues early, ensuring successful plant management.
If signs of renewed wilting persist despite following these care instructions, consider reassessing your drainage techniques and watering habits more critically. Compaction or deeply understated problems can exacerbate root issues, including poor soil amendments or imbalanced nutrient levels creating unhealthy conditions for root recovery. As a last resort, you might contemplate relocating the plants to a raised bed or a suitable container with optimally draining soil; this strategy ensures they have the drainage necessary for healthy growth while allowing you to correct nutrient imbalances in the original soil. Take this opportunity to enrich the new planting medium with compost or amendments that encourage drainage while maintaining vital nutrient content.
FAQ
How long does it take for garlic to recover from root rot?
Recovery from root rot typically spans one to three weeks, influenced by damage severity and the promptness of corrective actions. If conditions are favorable, you can expect signs of improvement in about two weeks, although monitoring care steps remains critical. However, should roots sustain severe damage, the plant may require a longer recovery period as it strives to regenerate new growth and functional roots; this scenario may necessitate modifications in care during the recovery window to support resilience.
Can root rot spread to other plants in the garden?
Yes, root rot can readily spread to surrounding plants, especially if they share the same soil environment. Fungal pathogens can propagate in moist conditions or through contaminated gardening tools, making it integral to isolate affected specimens and sterilize any tools used in their care. Observing for symptoms in nearby plants after treatment remains crucial to containing potential outbreaks and preserving the health of your broader garden ecosystem. When neighboring plants start showing similar signs, it often indicates that the pathogen has moved through the soil, warranting immediate action like soil amendment or fungicide treatment to protect healthy plants.
Should I remove the affected garlic bulbs completely?
If the garlic bulbs reveal extensive decay, complete removal may be necessary to prevent the proliferation of fungal pathogens in the soil. However, if only a portion of the roots shows signs of damage, strategically pruning the compromised areas while actively treating the surrounding soil can encourage recovery in the remaining healthier roots. Staying vigilant for signs of progress or decline will be essential to make informed decisions about your next steps in garlic cultivation. Noticing gradual deterioration in sound bulbs might suggest ongoing soil or moisture issues that need addressing before any replanting.