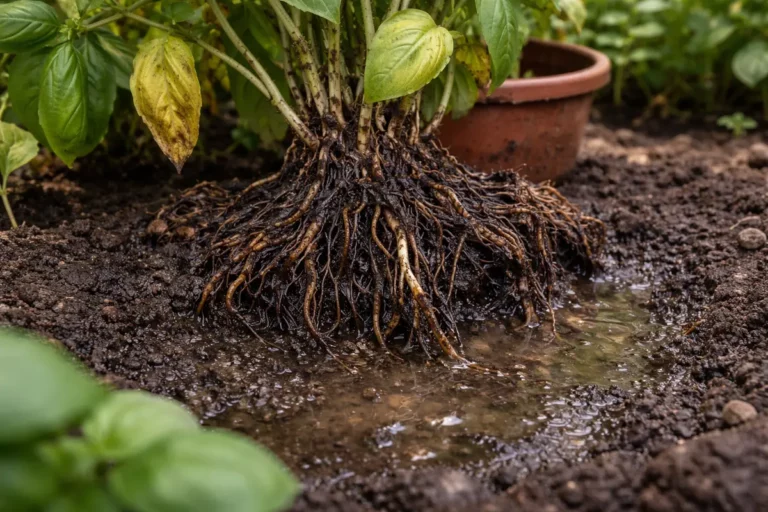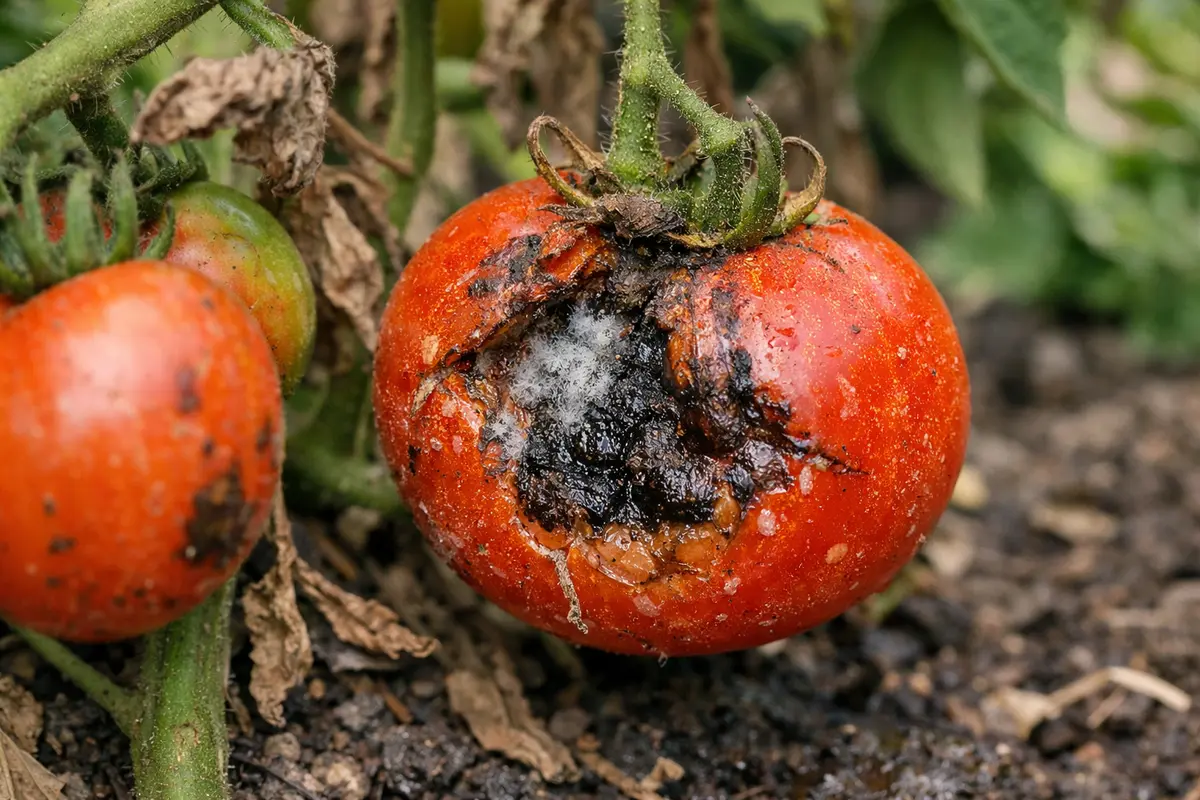
You may notice your chives developing mushy spots and a distinct decline in their health during periods of excessive moisture, which is why you need to know how to prevent fruit rot in chives after excessive moisture. This rotting can occur due to a build-up of water around the roots, leading to soft tissue damage and an unhealthy plant structure. If left unaddressed, this issue can spread rapidly, weakening the plant and setting back its growth, but you can fix it now by inspecting the soil condition and adjusting your watering habits accordingly.
Step 1 – Trim Off Rotted Chives Immediately
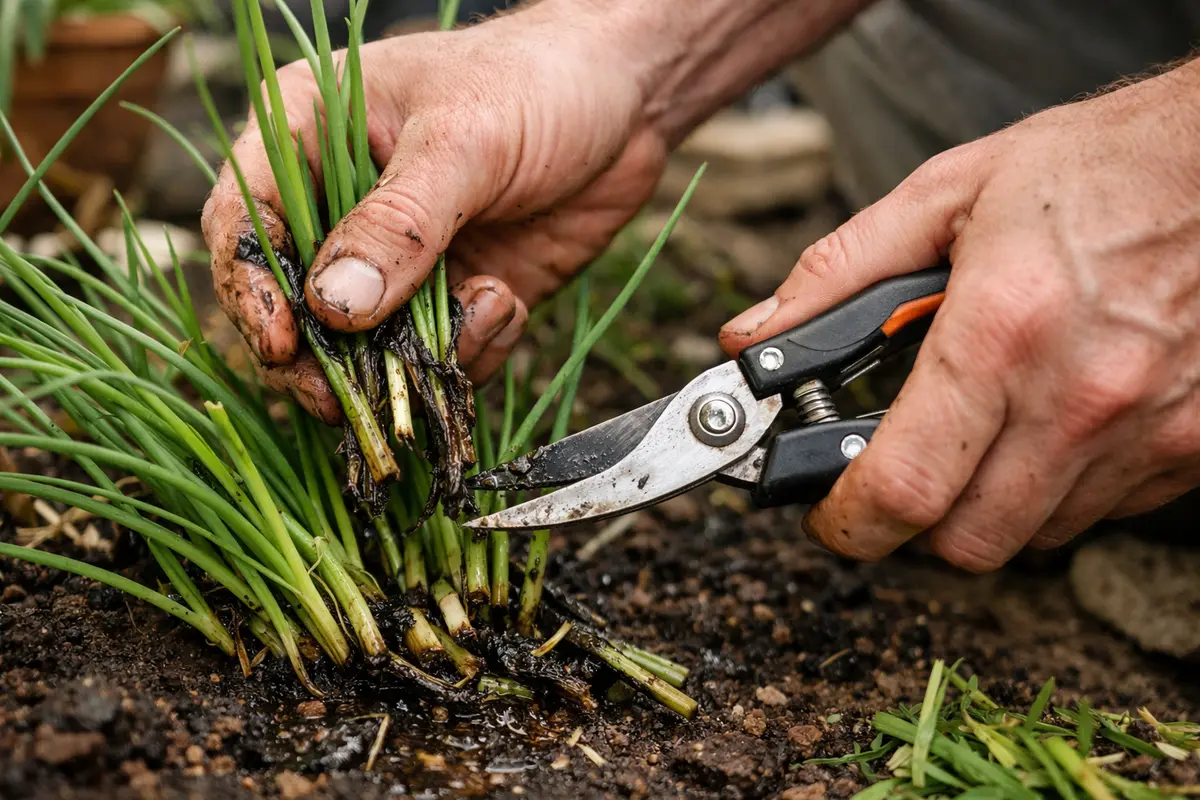
Start by pruning away any visibly rotted chives immediately. You should see the rotted sections being removed, which will help the plant focus its energy on healthy growth. Ensuring a clean cut at the base of the affected leaves will encourage the plant to send its energy into new, healthy growth instead of trying to repair damaged tissues. This step is crucial because any rot left unattended can quickly escalate, compromising the overall health of your chives.
Pruning off the rotted parts prevents fungal spores from spreading to healthy areas. By promptly addressing the issue, the remaining healthy foliage is protected, and airflow around the plant improves, reducing humidity levels that encourage further rot. Keeping the plant’s environment optimal is crucial for preventing recurring problems. For instance, if you notice brown, mushy patches on the leaves, this indicates that rot has advanced and requires immediate action. Regular checks can ensure you catch such issues sooner.
A common mistake is to avoid any pruning because of attachment to the plant’s appearance. However, delaying this action can worsen fruit rot, particularly after periods of heavy rainfall. If the rot is caught early, the remainder of the plant can bounce back more quickly. After trimming, you should see a clearer outline of the plant structure, allowing for better light penetration. Alternatively, ignoring the trimming can lead to additional rotting of the unaffected parts, compounding your problem. If multiple sections are affected, inspect the surrounding treatment practices to ensure you address any underlying moisture issues.
Step 2 – Diagnose Excess Moisture Risks for Chives
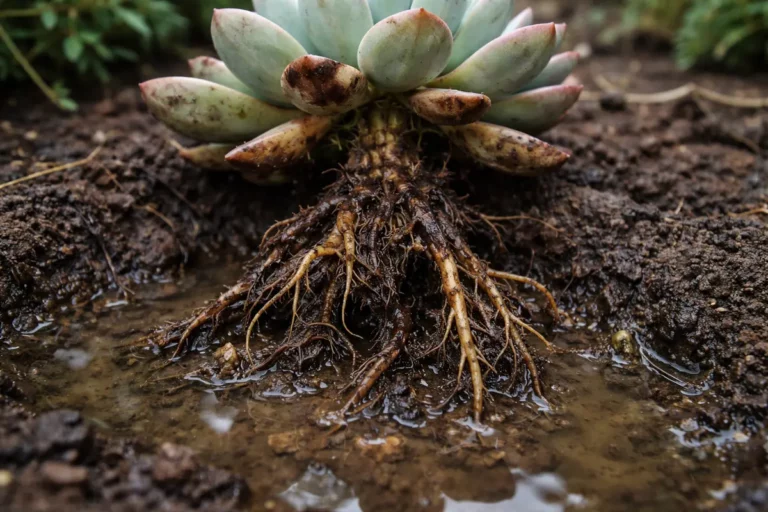
Inspect the surrounding soil conditions and drainage setup right away. You should check whether the soil remains consistently soggy or retains excess water surrounding the roots. If it feels like mud under your fingers or does not crumble, you likely have a moisture problem that needs addressing. Soil that remains excessively moist is a breeding ground for rot and can dramatically affect the health of your plants.
Excessive moisture often arises from poor drainage or overwatering practices. Waterlogged soil suffocates the roots and deprives them of oxygen, which can contribute to rot. The situation is exacerbated in clay-heavy soils where water does not drain well, increasing the risk of root rot and other diseases. If the roots are drowning, the plants are at risk, and poor oxygen levels can lead to a rapid decline in health. Conversely, if the soil is too dry, you risk stressing the plant, so it’s essential to find a balance.
If you find the soil smells sour or mushy, it indicates anaerobic conditions that require immediate action. A common response may include adjusting how often you water, but if the soil moisture seems stable yet rotting persists, investigate whether your plant is in a low-lying area where water pools after rain. Also, watch for signs such as wilting or yellowing leaves, which often suggest stress from either too much or too little water. Monitor conditions closely after heavy rains or watering sessions; if the soil remains soaked for more than 48 hours, consider exploring solutions like improving soil drainage or aeration methods to help mitigate this problem moving forward.
Step 3 – Revitalize Chives with Nutrient Boost
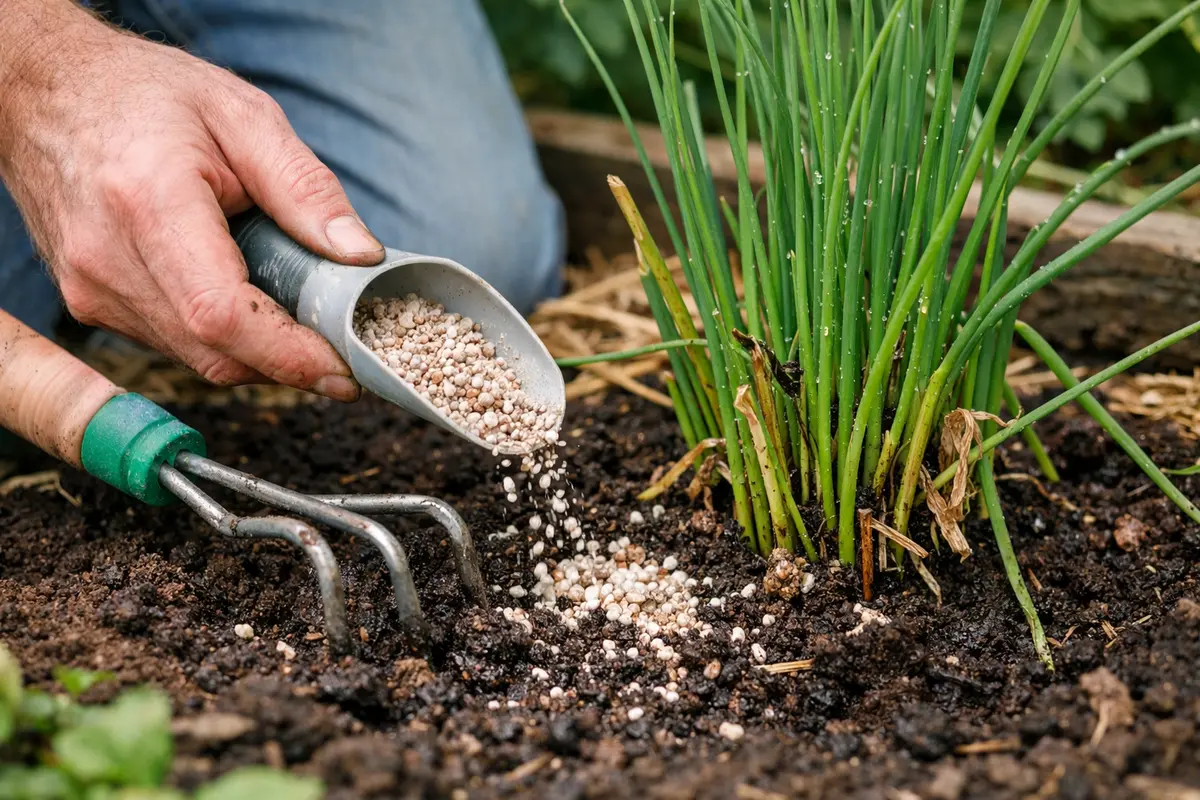
Apply a balanced fertilizer to enhance nutrient uptake in your chives. Fresh new growth should become noticeable within a week or so, indicating a positive recovery. After addressing moisture issues and trimming rotted areas, fertilization will help stimulate robust growth to recover from stress. The right nutrient support can be crucial after experiencing rot, as it can help the plant regain its former vigor.
Nourishing the soil with a balanced fertilizer can help your chives recover by providing essential nutrients required for new growth. Symptoms of nutrient deficiency or stress often include yellowing leaves and stunted development, which can be alleviated by feeding. Target fertilizers high in nitrogen and potassium, as they support leaf and root health. You could apply a slow-release granular fertilizer to minimize the frequency of applications and ensure a steady nutrient supply. If your chives are already in weak condition, a gentle application of fertilizer diluted to half strength might be best to ensure you don’t overwhelm the plant.
A mistake to avoid during this recovery phase is overcompensating with excessive fertilizer. Applying too much fertilizer can add further stress to your plant and lead to nutrient burn. To determine the right amount, start with a general recommendation such as applying one tablespoon per foot of plant height per month and adjusting based on the response. Paying close attention to the leaves and overall plant health is essential; if leaf tips begin browning or curling, your fertilizer application may need reevaluation. Consistent monitoring during this time allows you to adjust nutrient delivery and better promote recovery.
Step 4 – Water Chives Sparingly to Avoid Rot
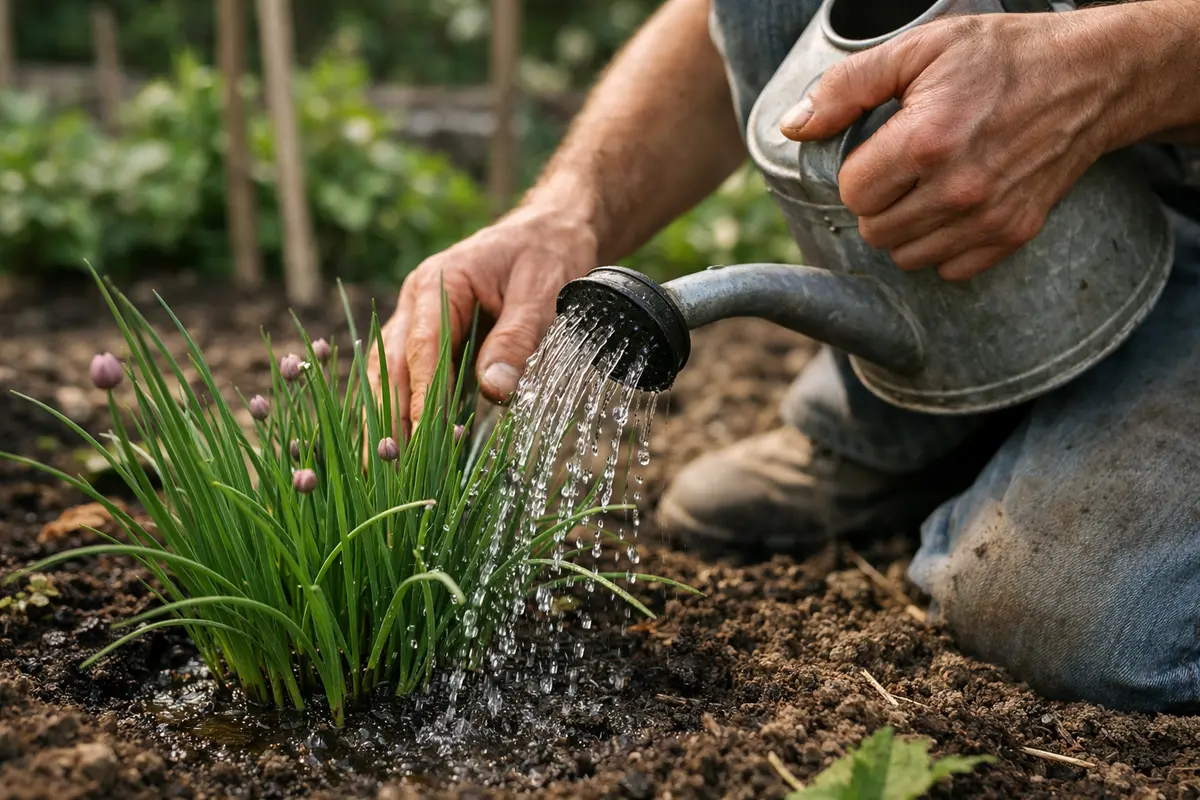
Reduce watering frequency to once a week, checking soil moisture before each session. Locking in this habit will help maintain proper moisture levels and prevent rot. Always remember to water deeply during these sessions, allowing water to reach the root zone effectively. Surface watering promotes shallow roots and does not adequately address the plant’s needs.
Establishing a routine that prioritizes thorough, less frequent watering helps promote deep root growth and allows the soil to breathe. Saturated soil often leads to detrimental conditions favorable for fungal growth, while too little water can stress the plant and hinder recovery after rot. Understanding the right balance is key to healthy chive plants. For instance, if you notice a significant drop in temperature or unexpected rain forecasted, you may need to skip watering completely until soil conditions dry out. Additionally, consider the plant’s developmental stage, as seedlings may have different acclimatization needs than mature chives.
In cooler, humid months, you want to be particularly vigilant with watering. Watch how nature impacts the ground—if rainfall has been abundant, err on the side of caution and reduce how often you water. Moisture stress can quickly escalate in these conditions—monitor the weather patterns closely, adjusting your routine to prevent water accumulation. If the weather has been rainy, adding measures like raised beds or creating drainage channels will ensure water runs off quickly instead of pooling. Remember that if the soil stays wet for more than a few days after rain, this is a prime cause for further rot issues.
Step 5 – Check Chives for Signs of Rot Progression
Start by monitoring your chives closely after heavy rainfall or excessive watering. Check the soil moisture daily, ensuring it is not overly soggy, and observe the leaves for any signs of browning or wilting. Recheck the moisture levels every few days to confirm that the soil is adequately draining and not retaining excessive water.
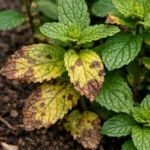
A fully recovered chive plant will exhibit vibrant green foliage that is firm to the touch, with no signs of rot at the base. In contrast, early signs of the problem returning include a slightly discolored, mushy texture on some leaves. If browning reappears, check the roots for signs of rot, which will feel spongy and emit a foul odor.
If the problem returns despite your efforts, prune any affected parts immediately to prevent further spread. Assess the drainage conditions in your garden; if they remain poor, consider relocating the chives to a better-draining area or elevate the soil to improve airflow around the roots.
Healthy plants should exhibit signs of firm, resilient leaves and growth that appears vibrant and strong. When inspecting, look for changes in color, texture, and overall structure. If you start noticing discoloration or any mushy texture returning, the problem could be resurfacing, signaling the need to retrace your steps. This monitoring phase is critical; for chives, taking notes during these inspection cycles can clarify whether environmental adjustments or treatment protocols are functioning as intended. If new growth appears stunted or deformed, it may suggest ongoing nutrient deficiencies or environmental stress rather than rot per se, requiring a reassessment.
If despite your efforts, there are no signs of recovery within a week, consider reviewing soil drainage and environmental exposure. An underlying issue may be persisting; in such cases, more drastic measures such as relocating the chives or allowing the soil to dry out more thoroughly may be necessary. Some people mistakenly believe they can simply fertilize and wait, but that approach can lead to unnaturally stressed plants. If rot has progressed severely, you may need to remove the entire clump and resow your seeds in fresh soil to ensure healthy growth. On the other hand, if you detect just minor rot returning, continue to adjust care and resume previous steps to rehabilitate them.
FAQ
How long does it take for chives to recover from fruit rot?
Chives can show signs of recovery within 1-2 weeks after proper management. Expect new leaves to emerge as you adhere to improved watering and nutrient schedules. If your environment remains stable and moisture levels are controlled, it’s likely that your chives can bounce back with healthy growth in this timeframe. Regular monitoring will help you notice any issues that may hinder growth during this recovery phase.
Will fruit rot spread to other plants in my garden?
Yes, if left unaddressed, fruit rot can spread to neighboring plants, especially in humid conditions that favor fungal growth. Isolating affected plants and maintaining proper spacing can help mitigate this risk. Also, knowing which plants may share susceptibility to rot can further aid you in preventing a crisis. Additionally, ensuring your gardening tools are clean and sterile when working around healthy plants helps prevent the accidental transfer of pathogens.
Should I remove affected parts of the chives immediately?
Yes, removing any affected parts is crucial for preventing the spread of rot to healthy sections. This immediate action helps ensure the plant’s energy is concentrated on regrowth rather than trying to repair damaged tissues. Act swiftly—allowing rot to linger only increases labor and effort needed to restore plant health later on. The sooner a diligent gardener acts, the better the odds for a full recovery of the plant.