You may notice that your potted orchids are showing signs of distress with drooping leaves and a soggy media after heavy rain, which is why you need to know how to treat root rot in potted orchids after heavy rain. This condition is often caused by excess moisture leading to soft, mushy roots that can eventually start rotting. If ignored, the problem can spread and weaken the plant, making recovery harder to achieve, but you can take action now by inspecting the roots and adjusting your watering routine to improve their health.
Step 1 – Prune Affected Orchid Roots Promptly
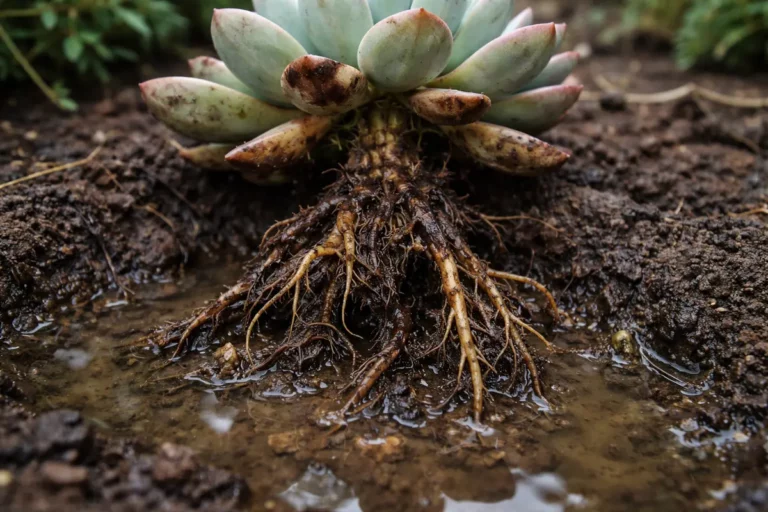
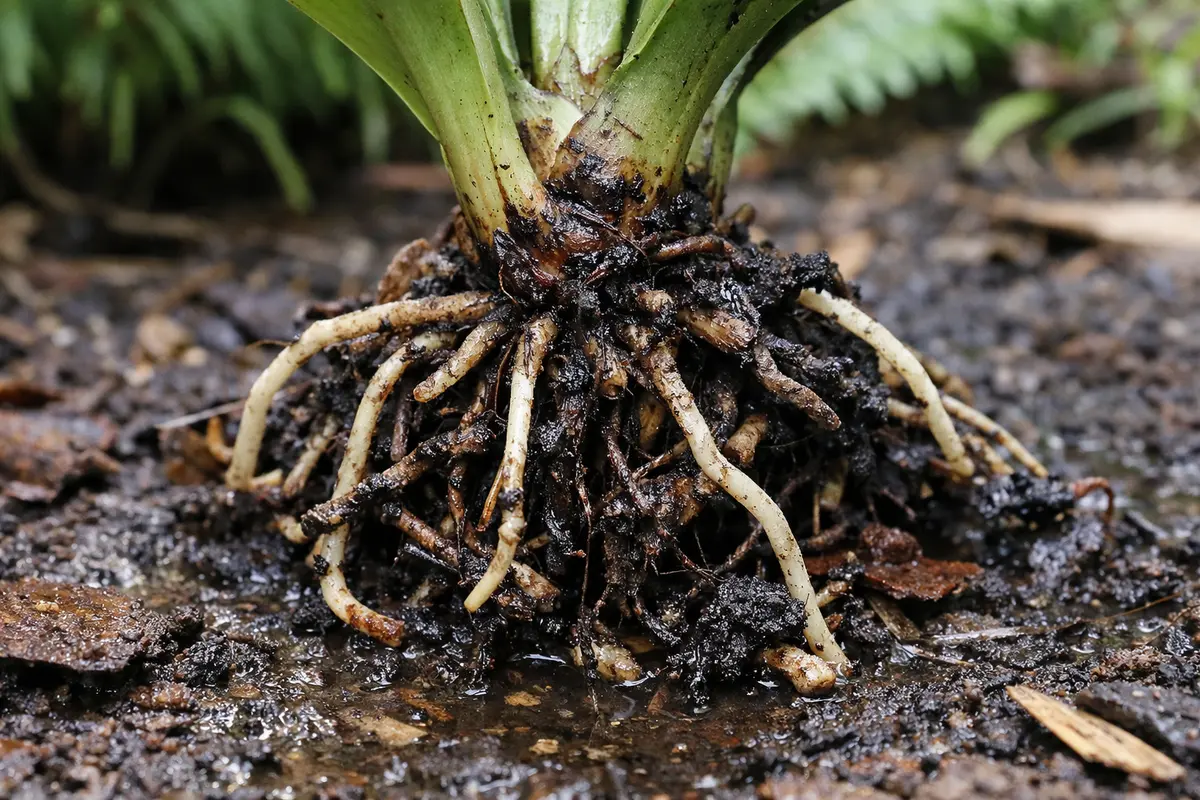
First, remove the orchid from its pot and gently shake off the excess damp potting medium. Inspect the roots closely; healthy roots should be firm and green, while rotten roots will appear brown and mushy. Trim away any damaged roots and repot the orchid in fresh, dry potting mix specifically designed for orchids; the plant should look more stable and sit upright in its new medium, indicating you’ve limited further damage.
Acting quickly is crucial for a potted orchid because prolonged exposure to excess moisture can lead to severe root decay, limiting its nutrient uptake. If you delay, rotten roots can lead to systemic issues where the entire plant loses its ability to photosynthesize effectively; healthy green foliage will start to yellow and wilt. If not exhibiting symptoms of rot, check for moisture levels in the potting medium as over-inundation can signal stress.
A gardener once noticed her potted orchids displaying early signs of rot but waited several days to repot; by the time she acted, almost half the root system had decayed, leading to a lengthy recovery process. In contrast, a neighbor who addressed the issue immediately saved her orchids from significant damage by swiftly replacing the potting medium. Understanding the urgency can prevent costly mistakes associated with delayed intervention.
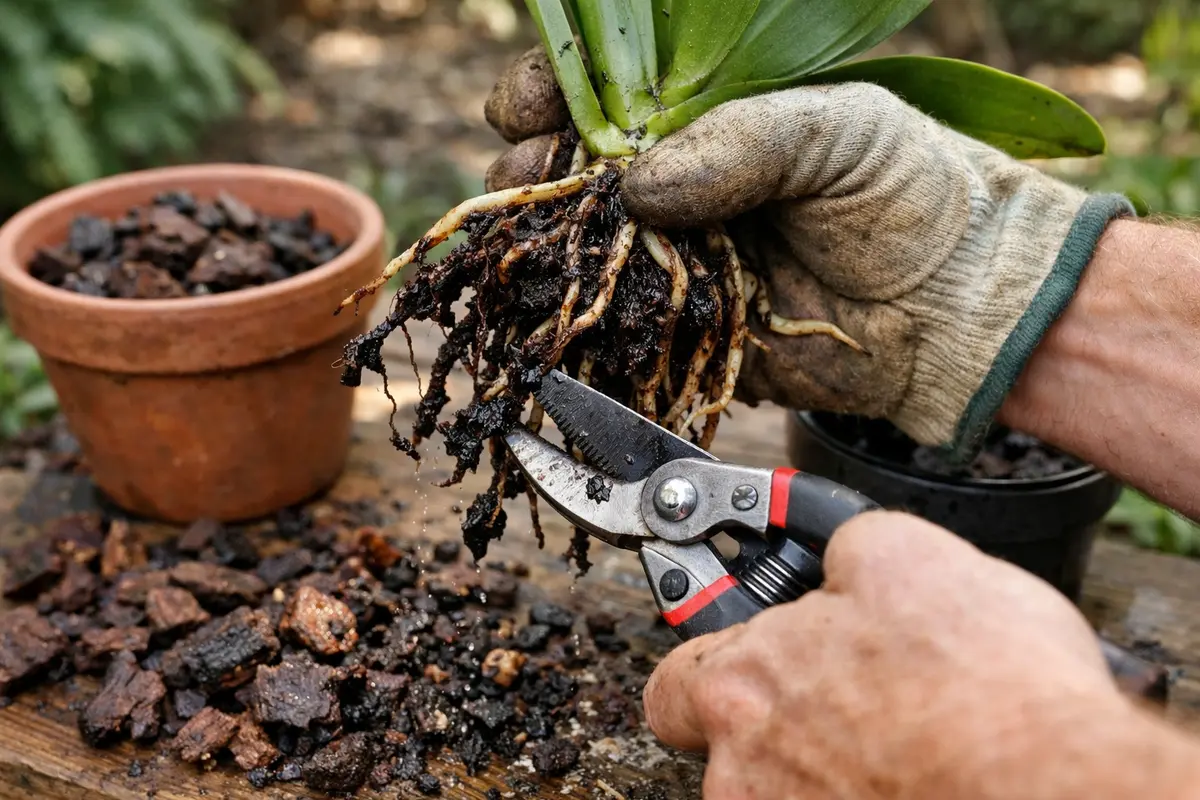
Pruning is crucial because it removes the infected portions, preventing the rot from further spreading to healthy roots. Healthy roots are firm and white, while the affected ones will feel mushy and may emit a foul odor as they decay. If you leave rotten roots in place, they can contaminate surrounding healthy roots, leading to a cascading effect that jeopardizes the entire plant. Acting quickly limits the damage and allows your orchid to recover faster by focusing energy on restoring healthy growth. Engaging in this practice not only fosters health in the remaining roots but also stimulates fresh growth since the plant’s energy can focus where it’s most needed.
Many gardeners mistakenly wait too long to prune, thinking that roots might recover on their own. However, delaying this step often leads to further root loss and can even affect the rest of the plant, including leaves and pseudobulbs. Always ensure to use sterilized scissors to avoid introducing more pathogens into the plant. A common mistake is using unclean tools, which can exacerbate the issue. Maintaining tool hygiene is essential: soak scissors in isopropyl alcohol or solution to ensure they are sterile. After pruning, keep an eye on the plant for signs of recovery, like new roots sprouting or improved leaf firmness. If these signs don’t manifest after pruning, it may indicate that further intervention is needed.
Step 2 – Assess Moisture Levels Causing Root Rot
Check the moisture levels of the potting mix by digging your fingers about two inches into the soil. If it feels consistently wet or sticky, this indicates over-saturation causing root rot. In some cases, the surface might seem dry; however, the inner soil could still be saturated. To get a true measure, consider using a moisture meter for more accurate readings, especially if the potting mix is dense. If the meter registers over 30% moisture levels, it’s time to reassess your watering habits.
Orchids thrive in well-draining environments, and excess moisture suffocates roots, hindering their ability to absorb water and nutrients. This situation often arises in poorly draining pots or during prolonged rain periods without sufficient drainage. If the soil retains too much water and begins to smell sour, consider replacing it with a fresh, well-aerated potting mix designed for orchids. Overwatering can be a consequence of inadequate drainage or inappropriate potting media, where organic materials decompose and retain moisture. Additionally, check if your orchid pot has been upgraded for larger roots as they grow—that can also contribute significantly to water retention problems. If your orchid pot doesn’t have enough drainage holes, this can exacerbate the problem, causing roots to rot as they become overwhelmed with water. Monitor regularly during rainy seasons to adjust your watering methods accordingly. If the inner soil still feels wet long after any watering has occurred, you’ll need to change the mix for optimum health.
If the moisture doesn’t seem to drain away even when you adjust the watering, you may need to reconsider your potting mix completely. Consider using one that has better air circulation properties. It’s easy for a potting mix heavy on peat to become compact and retain water, leading to rot. Switch to a mix rich in bark and perlite for better drainage. Always ensure that pots have sufficient drainage holes, ideally at least four, positioned spaced apart at the base. This setup maximizes water flow and reduces humidity build-up, essential in healthy orchid care.
Step 3 – Repot Orchids with Fresh Orchid Mix
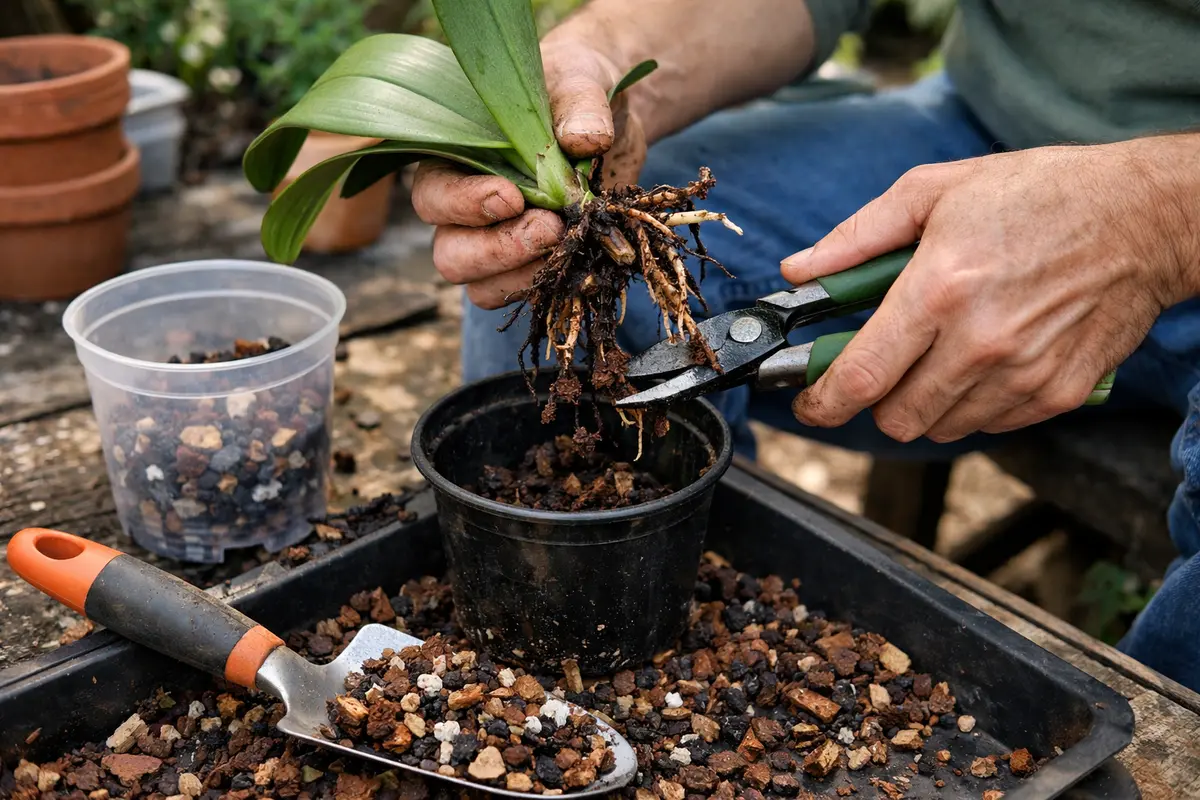
Begin the recovery process by removing the orchid from its pot to inspect the roots for rot. Trim away any blackened, mushy roots with sterilized scissors, leaving only healthy, firm roots. You should notice the remaining roots taking on a fresher appearance over the next few days as they dry out and begin to stabilize. Within a week, you should see new healthy root growth starting to form at the base, indicating the orchid is responding positively to the treatment.
Realistic recovery for potted orchids can take anywhere from several weeks to a few months, depending on the extent of root damage. Healthy regrowth looks like new root tips emerging, coupled with fresh leaf growth and vibrant coloration. Conditions such as adequate light, optimal humidity, and proper air circulation can accelerate recovery, while inadequate water management or poor lighting can stall it; if you see stunted growth with yellow leaves, check your light levels and humidity. If stunted growth persists, it may warrant adjusting the orchid’s exposure to its environment, ensuring it receives proper light without direct sun to avoid scorching.
A common mistake during recovery is overcompensating with water or fertilizer, thinking the plant needs extra support. Orchids requiring recovery prefer a conservative watering approach to avoid further stress. If you notice signs of additional rot or a decline in leaf turgidity, check the potting medium for its moisture content and adjust accordingly. Careful observation is crucial; if you’ve done all previous steps correctly, almost-certainly visible moisture is a sign something else may be amiss.
Healthy orchids should show signs of improved vitality, such as firm leaves and more vibrant coloration. The fresh mix allows for better drainage and airflow, which are essential to preventing further root rot. Well-draining orchid mix consists of bark, charcoal, and perlite that keep roots dry while providing necessary aeration. An ideal mix also includes an element providing some moisture retention without over-saturation. When choosing a mix, consider whether your orchid is epiphytic or terrestrial, as this can change the requirements of the mix. Depending on the species, epiphytic orchids, for example, might favor a coarser mix for better drainage.
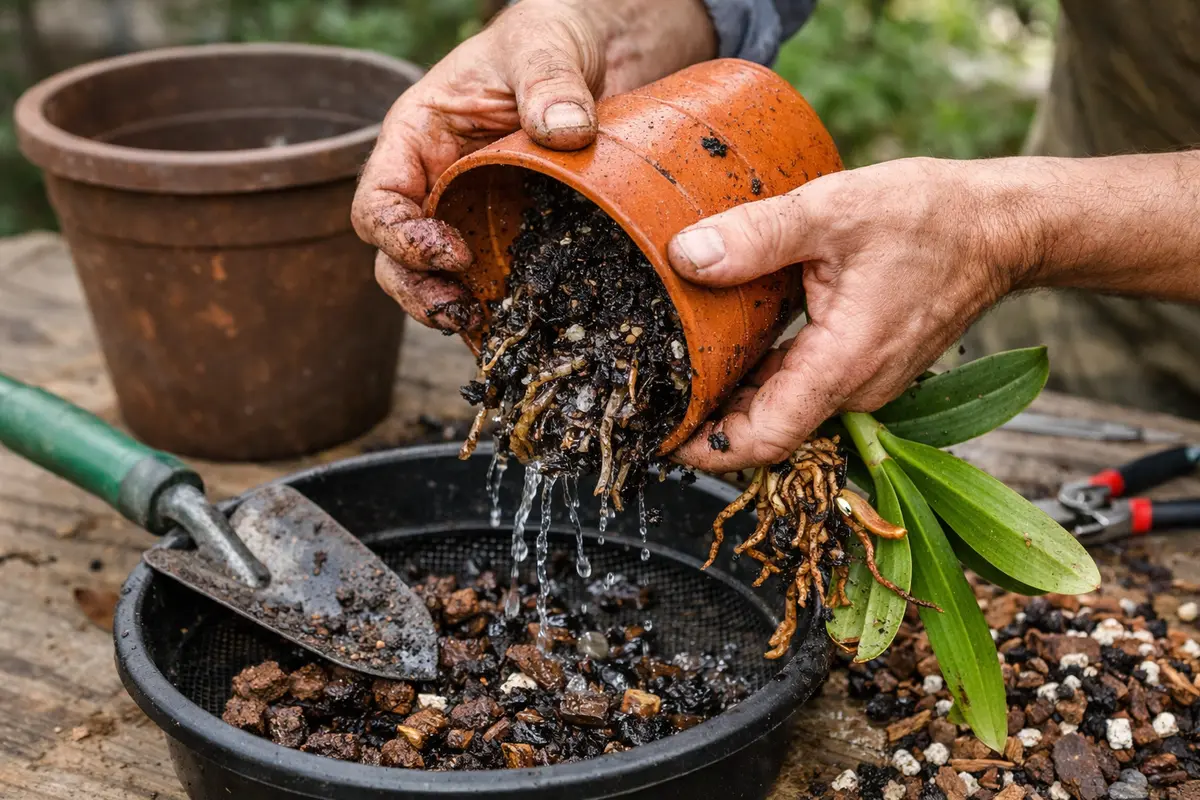
A common mistake during repotting is overwatering the plant immediately after. The fresh potting mix will hold moisture differently, so a light initial watering after repotting is enough. Be cautious not to flood the pot, which can wash away the newly positioned roots and cause further stress. Typically, waiting at least a week before resuming a regular watering schedule allows the roots to acclimate. Use the wriggle test by gently tugging on the plant; if you feel resistance, the roots are likely absorbing moisture effectively. This observation is crucial; resistance indicates favorable root establishment, while slackness or easy movement might hint at inadequate anchoring.
Step 4 – Ensure Proper Drainage for Future Watering
Start by ensuring your potted orchids are in well-draining pots filled with appropriate orchid mix to prevent future root rot. You will notice improved moisture management and healthier roots, as excess water will drain away more effectively. Reassess your orchid pot to ensure it is either ceramic or plastic pots designed specifically for orchids, that can drain water effectively.
Heavy rain often saturates the medium and creates a damp environment conducive to root rot, especially if your orchids are in plastic pots that retain moisture. By using well-draining materials like bark or sphagnum moss, you address the root cause of moisture retention, reducing the likelihood of rot reoccurring as it allows air circulation around the roots. In urban areas, such as when residing in apartments, consider that humidity levels often rise, causing unexpected moisture retention among potted plants. Keeping airflow unrestricted around the pots during rainy periods can mitigate humidity build-up.
In the spring, consider repotting your orchids into fresh, dry orchid mix after periods of heavy rain to rejuvenate the soil. If there’s a particularly rainy season, adding a layer of gravel at the bottom of the pot can further enhance drainage and prevent water from pooling. Observing the potting mix’s condition will inform your watering schedule. If you notice that the top inch of the mix dries out quickly, adjust your routine accordingly. Always ensure that any gravel or layering material you use is clean and dry to prevent adding the same moisture retention issues encountered previously.
A preventive measure during the rainy season is to reduce the frequency of watering and to check soil moisture often. If the weather is particularly wet, consider moving your orchids to a sheltered location where water exposure is minimized. An area with indirect light can be beneficial, ensuring that the orchids receive light without excessive moisture retention. Keep in mind that direct sunlight can become too intense after heavy rain, likely causing potting mix to inadequately dry out; evaluate light levels promptly.
Take into account that different orchid species have varying moisture requirements, so tailor your watering based on specific needs. If you’re caring for several types of orchids, it’s wise to research their individual care needs to avoid similar issues in the future. For example, certain species may thrive in slightly more moisture and while others would rather dry out quickly, ensuring a balanced watering schedule will significantly contribute to healthier orchids overall.
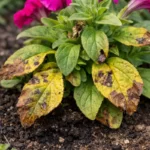
Step 5 – Check Orchid Leaves for Signs of Stress
Start by examining your orchid’s roots and the potting medium for signs of rot right after heavy rain. Look for roots that are dark brown or black and feel mushy, indicating decay. Check the potting mix for excessive moisture; if the medium remains soggy three days later, recheck the roots for continued signs of rot, as lingering moisture promotes fungal growth.
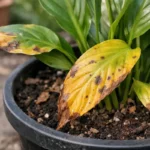
A fully recovered orchid will showcase firm, green roots that feel solid and snap if bent, indicating resilience. In contrast, if you observe new yellowing leaves or a resurgence of mushy, dark roots, the root rot might be returning. If the roots are dry and shriveled, indicating dehydration, check the soil moisture content; if the potting media is soggy, your orchid may be stressed again.
If root rot symptoms return despite following the initial treatment steps, consider repotting the orchid in fresh, well-draining medium to provide a safer environment. Additionally, inspect for any remaining rotted roots to remove them entirely and prevent further fungal risk. If the plant does not improve after repotting, it may be time to consult a horticultural professional for advanced treatment options.
FAQ
How long does it take for orchids to recover from root rot?
Recovery from root rot typically takes several weeks, depending on the extent of the damage. You should expect to see signs of new root growth within two to four weeks after repotting and correcting moisture issues. However, if you notice the same signs of rot after this period, it’s essential to reassess other influencing factors, which could include light exposure or ongoing moisture levels.
Can root rot spread to other plants?
Yes, root rot can spread, especially if you’re using contaminated soil or tools. Always ensure that tools are sterilized and avoid transferring moisture-laden soil between different plants to minimize the risk on other orchids. Additionally, if any plant in your collection shows similar symptoms, thoroughly inspect and isolate it to prevent cross-contamination. A simple isolation can stop the rotting matter from worsening and spreading among other plants.
Should I remove all affected roots immediately?
While it’s crucial to remove rotten roots, do not cut off everything until assessing the overall health of the orchid. Focus on the visibly mushy or dark roots first, as you can encourage recovery from any remaining healthy roots. It’s often wise to monitor the plant closely after the initial removal and continue to prune as needed—carefully noting how the remaining roots adjust moisture absorption in the coming weeks.