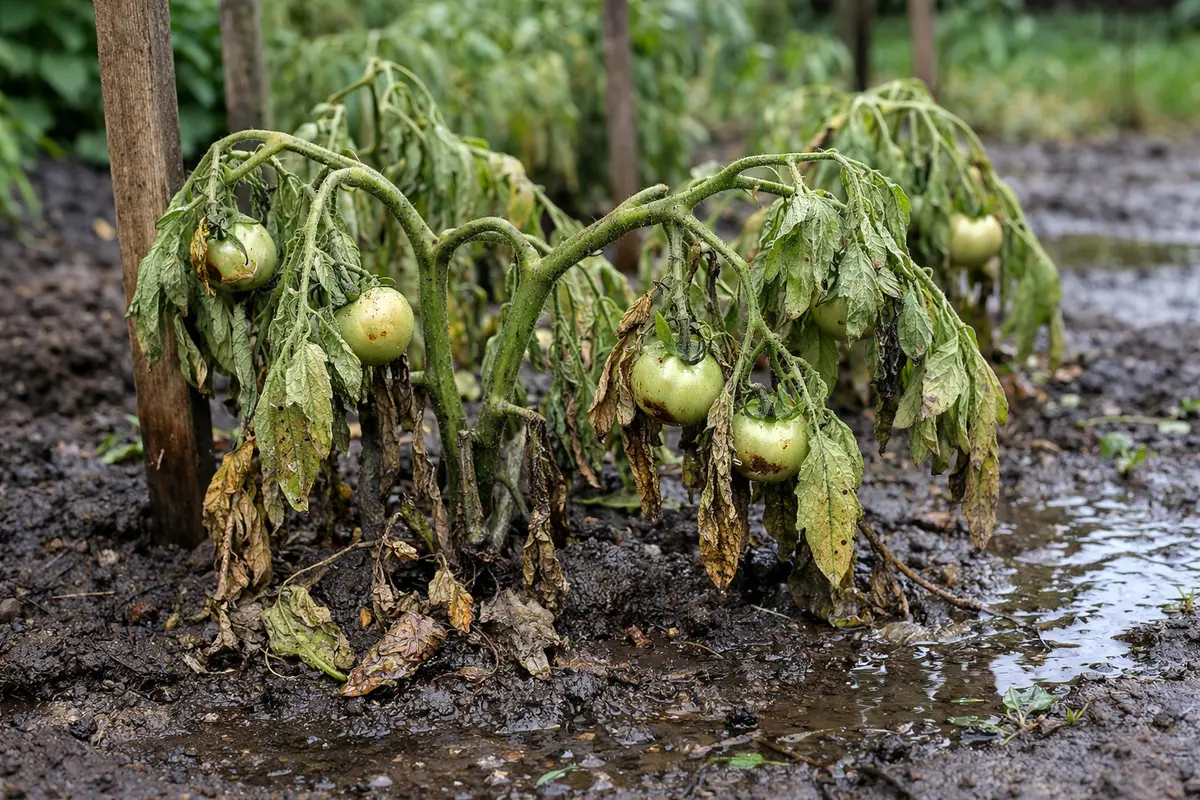
You may notice that your tomato plants appear droopy and lifeless after a heavy rainfall, which is why you need to know why are my tomato plants wilting after heavy rainfall. This wilting often occurs due to excess moisture in the soil, causing root rot or oxygen deprivation that results in mushy roots and overall decline. If left unchecked, this can weaken the plant significantly, making it harder to fix, but you can improve the situation now by inspecting the soil, adjusting watering practices, and removing any damaged foliage.
Step 1 – Assess Tomato Wilting Right After Rainfall

Inspect the base of your tomato plants immediately after noticing wilting. You should see if the soil feels overly saturated or if any standing water is present at the root zone. Kneeling down to check the moisture content of the soil is critical; take a handful and squeeze it. If water drips from it, you may have a serious overwatering issue. This step is essential; if you find that water does drip, it indicates deeper infiltration problems that can suffocate roots. Act within 24 hours of noticing wilting to prevent further stress and potential collapse. If you neglect this inspection, the oxygen levels in the soil may dwindle further, exacerbating the wilting symptoms.
Quickly evaluating soil saturation is crucial as excessive water can suffocate roots by depriving them of vital oxygen. Tomatoes require well-drained soil, and if the mix is too dense or holds too much moisture, it can lead to stress symptoms such as wilting. The longer this condition persists without intervention, the more severe the damage to the roots can become. Be especially wary if your tomatoes are in heavy clay or compacted soil, as these conditions exacerbate the problem. If you let conditions persist too long, you can expect the development of fungal issues, which would further weaken your plants’ ability to recover.
A common mistake gardeners make at this stage is to overlook actual soil conditions beneath the surface. You may find dry leaves and stems, but if the roots are sitting in waterlogged soil, you must act swiftly. If you discover excess water, consider gently pulling back any mulch or loosening the soil surface to promote drainage. Additionally, if you use containers, ensure that they have enough drainage holes; standing water in pots can culminate in rapid decline. Check the soil moisture depth by digging to about 3-4 inches, as moisture often varies with depth. If deeper layers remain saturated while upper layers appear dry, that discrepancy suggests a more serious drainage issue that needs correction. In this case, consider installing drainage tiles or using a soil moisture meter to guide future watering practices accurately.
Step 2 – Diagnose Soil Saturation Issues Affecting Tomatoes
First, inspect the soil around your tomato plants for excessive moisture. If the soil feels waterlogged or has standing water, it is crucial to improve drainage immediately. This action should lead to less wilting in the foliage over the next few days as oxygen levels in the root zone improve. Ensure that your plants are not also suffering from localized flooding during rain events by observing patterns in rainfall accumulation in your garden.
Heavy rainfall can create anaerobic conditions in the soil, suffocating the roots of your tomato plants. When soil remains saturated, beneficial microbes die off, leading to root rot and nutrient deficiencies. In contrast, if the soil is dry and the plants are wilting, they might be suffering from dehydration instead of drowning. This point of diagnosis is critical; hence, digging deeper than the top layer can reveal moisture imbalances that have gone unnoticed.
If you notice a sour smell when digging into the soil, this indicates potential root rot, and you should consider replanting your tomatoes in fresh, well-draining soil. An effective remediation method is to mix in organic compost or perlite, with a ratio of about 2:1, helping improve aeration and drainage. Alternatively, if wilting persists despite good drainage, check for pest infestations such as aphids or root nematodes that might also stress the plants. Inspect the foliage and root zone closely, as infestations often manifest in both the roots and on leaves.
Soil that retains too much moisture prevents adequate airflow to roots, significantly affecting nutrient uptake and root health. If you fail to address this situation quickly, over time, stagnant moisture can lead to root rot and other fungal diseases, manifesting as wilting and yellowing leaves. Compacted or waterlogged soil creates a hostile environment for tomato plants, which can lead to serious declines in their overall health. A quick test for aeration is to push a long, thin tool like a screwdriver into the soil; if it doesn’t go in easily, compaction is present and must be remedied.
If the soil smells sour during your inspection, consider mixing in organic matter such as compost to improve soil structure. An effective mix ratio might be 2:1, adding two parts compost to each part of existing soil to enhance drainage and aeration. If your soil feels too dry during inspection, leading to wilting symptoms as well, adjust your watering practices accordingly. For healthy tomatoes, watering should take place only when the top inch of soil has dried out, but following heavy rainfall, it’s best to avoid watering entirely until the soil has had a chance to drain properly.
Step 3 – Adjust Nutrients to Help Wilting Tomato Plants
Start by gently removing excess water from the base of your tomato plants using a spade or a shovel, allowing the soil to drain effectively. Look for signs of resilience, such as new green shoots or firm leaves within a few days after draining. To prevent future wilting, establish a routine of checking soil moisture before rainfall, and apply a layer of mulch to retain moisture evenly and protect roots from saturation.
Tomato plants can take several days to recover from wilting after heavy rain, especially if the roots were submerged for prolonged periods. If the leaves remain limp and yellow after a week, adjust the watering schedule during dry spells to ensure the soil isn’t overly dry, as this can trigger similar wilting symptoms in the future. Conversely, well-draining soil promotes faster recovery and minimizes the risk of recurrence.
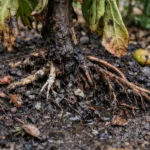
A common mistake during the recovery-prevention transition is overcompensating with fertilizers, which can exacerbate root stress. Instead, focus on soil quality by incorporating organic matter to improve drainage without adding nutrients excessively. If your plants are still wilting despite proper drainage, check for root rot by gently feeling the roots for mushy, discolored areas that indicate poor conditions.
Tomato plants often suffer from wilting after heavy rains due to root rot, which occurs when soil remains overly saturated for extended periods. Recovery can take a week to two weeks, depending on drainage conditions; for example, well-drained soil shows improvement quicker compared to compacted soils that retain moisture. If roots remain healthy despite initial wilting, and the soil starts to dry out, new growth indicates the plant’s gradual recovery. Conversely, if roots have succumbed to rot, the plant’s condition may deteriorate quickly.
A common error during recovery is over-fertilizing, which can stress the plants further, especially if rain has washed away nutrients. Adjust your nutrient application based on soil health; for instance, heavy rainfall may lead to significant nutrient leaching, potentially requiring a light feeding of balanced fertilizer. A granular fertilizer applied lightly around the base can help if soil tests indicate deficiency. If your plants start showing new wilting despite caution, re-examine drainage and consider improving soil structure to enhance aeration.
Heavy rain can wash away essential nutrients, leading to deficiencies that exacerbate wilting symptoms. Fertilizers rich in nitrogen will rejuvenate foliage while recovering from waterlogged conditions. However, excessive use can lead to imbalances or root burn, particularly if the soil has not sufficiently drained. An ideal approach is to apply fertilizer just after a light rain, allowing nature to assist in nutrient disbursement while reducing the risk of washing away your efforts. Monitor post-application closely; yellowing leaves may indicate further nutrient issues necessitating a follow-up treatment.
During this recovery phase, avoid over-fertilizing. Instead, monitor your plants’ growth progress regularly and adjust based on their visible recovery signs. If you notice green shoots begin to sprout, this indicates that your adjustments are effective, and stability in nutrient levels is returning. However, should your plants still display yellowing or wilting leaves after several days, consider reassessing your fertilizing practices and the soil’s moisture and drainage capacities. Additionally, it’s wise to test the pH levels of your soil every few seasons; if it fluctuates outside the optimal range for tomatoes (about 6.0-7.0), it can significantly hinder nutrient availability. Perform a soil test before applying fertilizers to better gauge which nutrients are necessary.
Step 4 – Inspect Tomato Leaves for Signs of Recovery
Start by checking the soil moisture around your tomato plants immediately after heavy rainfall. Look for signs of waterlogged soil, such as pools of water or compacted earth that doesn’t drain. Recheck the soil every few days to monitor changes; if it remains overly wet, consider adjusting your watering schedule and improving drainage to help your plants recover.
A fully recovered tomato plant will display vibrant green leaves and firm, healthy stems, while early signs of wilting might include droopy or yellowing leaves and soft, mushy stems. If you observe a plant that has returned to an upright position but shows darkening leaf edges, this indicates the potential for the wilting problem to return. If not vibrant green → check for drainage issues or pests affecting the roots.
If the wilting issue returns despite implementing the above steps, consider applying a fungicide formulated for root diseases, as excess moisture can lead to fungal problems. If symptoms persist, escalate by consulting a local agricultural extension office for specific advice tailored to your plant’s conditions and your local environment.
A fully recovered tomato plant will display upright leaves with a vibrant green color and firm stems. In contrast, if early signs of wilting return, expect to see leaves that remain limp or develop yellow-brown patches, indicating stress. If the leaves feel mushy or show a wrinkled texture, the problem is likely recurring.
If your plants show signs of trouble despite following the initial steps, consider adjusting your watering routine by allowing the soil to dry out more between waterings. Additionally, if you notice persistent yellowing or wilting, check for root rot by gently loosening the soil and inspecting the roots for a dark, mushy texture.
A fully recovered tomato plant will exhibit firm, vibrant green leaves and a sturdy stem, contrasting with early signs of trouble such as droopy, yellowing leaves that feel limp to the touch. Take care to observe not just one plant, but the condition of all your tomato plants, as widespread symptoms may suggest issues with watering practices or soil textures across multiple existing plants. If the plant starts developing darkened patches on the lower leaves, it signals a return of moisture stress, indicating that closer observation is needed on environmental conditions like soil saturation.
If wilting occurs again despite your efforts, enhance drainage by amending the soil with compost or peat moss to improve aeration. Additionally, consider relocating the plants to a raised bed to prevent future water accumulation around the roots. Raised beds are effective at minimizing waterlogging, particularly in heavy rain seasons. If problems persist after these adjustments, relocate the plants to a location less prone to flooding during intense rainfall events.
A fully recovered tomato plant will exhibit green, perky leaves and sturdy stems, contrasting sharply with earlier wilting symptoms. Regularly checking the moisture level in the soil after recovery ensures that these plants are neither overwatered nor left dry. If you notice signs of decline, such as recurring yellowing leaves, it indicates the need for additional adjustments or deeper analysis of external factors affecting health. Persistent yellowing despite interventions suggests the possibility of disease. Consider testing the remaining soil and nearby plants for diseases and pests, as both can spread in a garden environment, posing a risk to your crop.
If symptoms recur despite your interventions, consider repotting or amending the soil further if drainage remains an issue. If you consistently see indications of saturated soil, more drastic alterations to the planting environment—like implementing raised beds or layering materials to create soil mounds—may be necessary to enhance drainage. Additionally, applying organic mulch like straw or shredded leaves can help to absorb excess moisture while allowing beneficial water to seep into the root zone more effectively; ensure that mulch is not stacked against the stems to prevent rot. Layering can help to enhance not only drainage but also soil temperature stability, further supporting healthy growth.
FAQ
How long will it take for my wilting tomato plants to recover?
Recovery can take anywhere from a few days to a week, depending on the severity of the wilting and the promptness of your actions. Look for new growth and firmness in leaves as positive signs of improvement; these adjustments signify your interventions are taking effect. If your plants do not show any signs of improvement after a week, it may be time to delve deeper into soil health and drainage capabilities, ensuring that they are not suffocating in stagnant moisture. Addressing soil conditions and possibly replanting in fortified soil might be necessary.
Can root rot spread to my other tomato plants?
Yes, if left untreated, root rot can spread to nearby plants through shared soil moisture or root contact. Always inspect adjacent plants for symptoms, especially if they share the same growing environment. If you find signs of stress or decay on one plant, it is crucial to isolate it from others until you’re certain the problem has been thoroughly addressed, preventing any cross-contamination that could jeopardize your entire harvest. Proactively monitoring surrounding plants can highlight potential early signs of trouble.
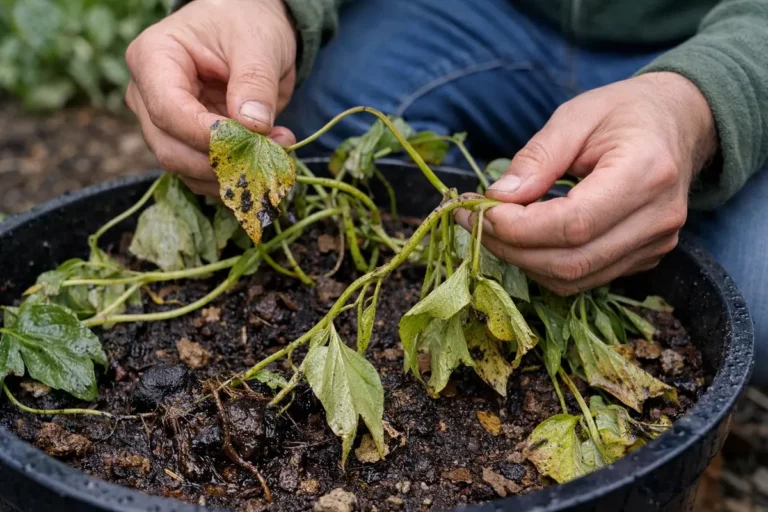
Should I remove wilting leaves from my tomato plants?
You should remove damaged leaves to help the plant focus energy on recovery. However, trim only unhealthy foliage—healthy leaves are vital for photosynthesis and overall growth. Always use clean, sharp pruning shears for this task; a clean cut minimizes the risk of creating entry points for pathogens into already vulnerable plants, promoting a quicker recovery rate overall. Note that regular inspections should follow; continuous monitoring helps catch any further deterioration early.