You may notice your once-vibrant herbs showing signs of distress during the sweltering summer heat, which is why you need to know about Fixing yellowing herbs after transplant shock in summer. This yellowing often occurs due to root shock, where the plants are struggling to adapt to their new environment, leading to drooping leaves and diminished growth. Ignoring this issue can spread stress throughout the plant and weaken its health, but you can address it effectively now by checking the soil moisture and adjusting light exposure to help them recover.
Step 1 – Water Transplanted Herbs Immediately
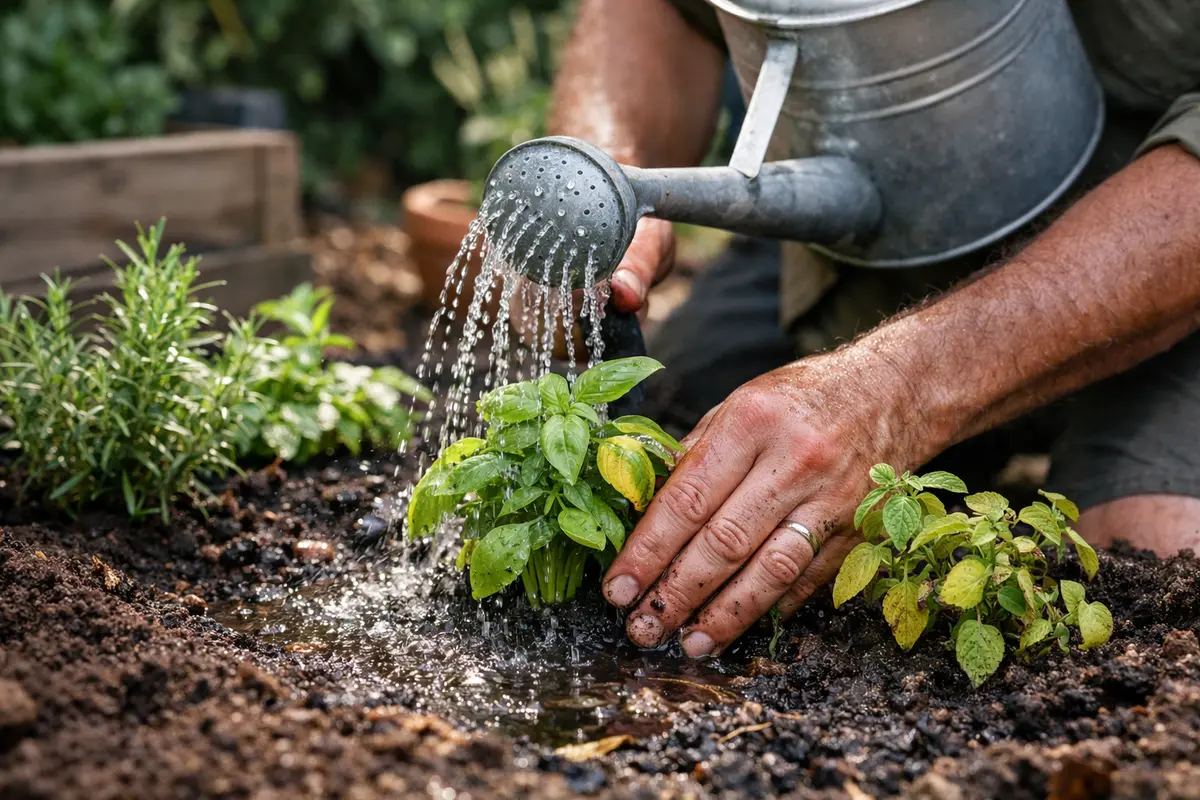
Water the transplanted herbs thoroughly as soon as you notice the yellowing. You should see the leaves start to perk up within a few hours, signaling that the plants are beginning to recover. If the soil is too dry, roots may be unable to absorb moisture effectively, worsening stress during summer heat. Aim to rehydrate the soil to a depth of at least six inches to ensure the roots can access moisture uniformly. If the herbs are not watered immediately, soil moisture levels below 30% can lead to critical signs of damage. Observe that prolonged low moisture can severely hinder recovery, as the root system struggles to access essential nutrients needed for vitality. If you notice the leaves continuing to yellow or drop after watering, the moisture level may still be inadequate.
Newly transplanted herbs typically experience root shock, directly impacting their water uptake. If the soil remains dry for too long, check the leaves for signs of severe dehydration, such as becoming crispy and flaky. This observable outcome results from collapsing cellular structures due to insufficient water, leading to wilting and reduced chlorophyll production, as the plant enters conservation mode to survive. By providing ample water quickly, you can mitigate these effects and stabilize the plants. Remember that checking soil moisture means evaluating below the surface; use a moisture meter or dig your finger several inches deep to confirm that the roots can access moisture. This is especially crucial in raised beds or container gardens, where drying can happen rapidly due to increased drainage.
It’s common for new gardeners to overestimate the moisture retained in transplanted soil and overlook immediate watering. For instance, if you’ve moved the herbs to a sunny location, their water needs can increase significantly. After transplantation, if the top inch of soil feels dry, water it thoroughly until moisture drains from the bottom of the container or feels evenly moist throughout; even dampness at the bottom helps prevent severe stress. Implementing a watering strategy that includes checking moisture levels at least every two days will significantly aid in recovery. If you see wilting even after watering, it’s crucial to verify the drainage of the container or bed; overwatering can also damage roots by suffocating them. Recognize signs of overwatering, such as yellowing leaves that appear limp; if roots cannot access oxygen and nutrients, they may lead to additional complications downstream.
Step 2 – Diagnose Nutrient Deficiencies in Herbs
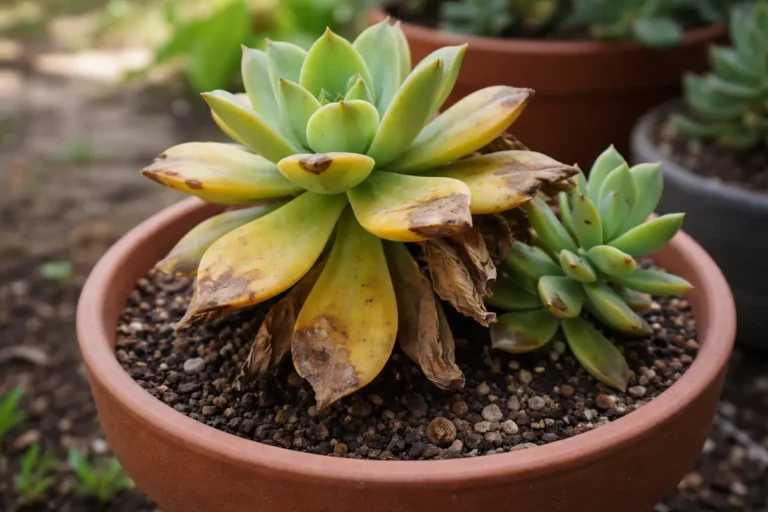
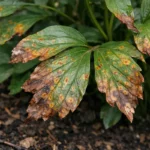
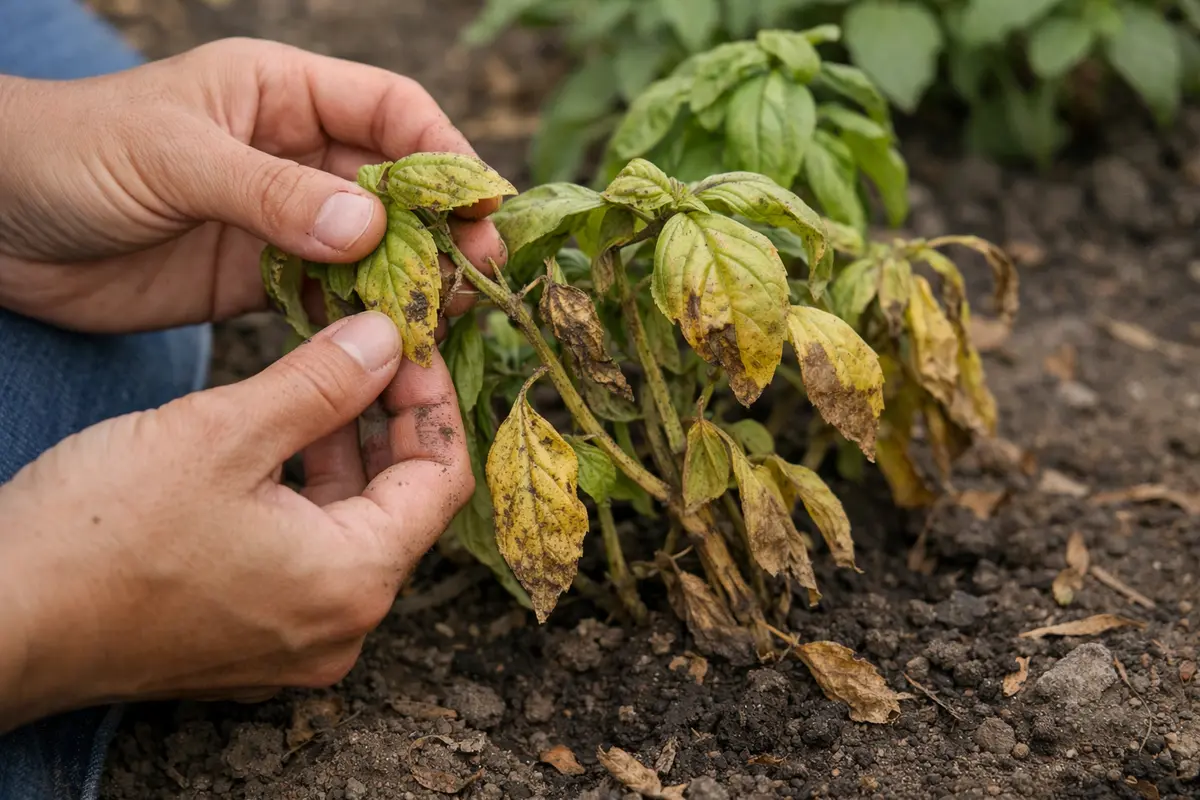
Inspect the leaves for signs of nutrient deficiencies, noting any yellowing or abnormal coloration. You should observe changes in the appearance of your herbs, such as yellowing leaves becoming greener after addressing nutrient issues. Nutrient deficiencies are often a consequence of disrupted root systems that inhibit plants’ ability to take up essential elements like nitrogen, magnesium, or iron. If the leaves show pale yellowing, this is strongly indicative of nitrogen deficiency, while interveinal chlorosis, where the leaf sections turn yellow and the veins remain green, points to iron deficiency especially influenced by high pH levels in the soil.
To correct nutrient deficiencies, perform a thorough soil test to determine specific imbalances. Based on the results, apply a fast-acting organic fertilizer tailored to the specific nutrient needed; for instance, if nitrogen is low, use a nitrogen-rich fertilizer to foster greener growth. Timing is essential; aim to fertilize around two weeks post-transplantation when the roots are settling but still require assistance to absorb these nutrients efficiently.
If your soil feels compacted or gives off an unpleasant sour odor, it might suggest waterlogged conditions that further hinder nutrient availability and root function. For example, heavy clay soils can smother roots, restricting their capability to absorb necessary nutrients. Address any deficiencies with a balanced fertilizer promptly. If signs of nitrogen deficiency persist, augment with compost or organic matter to enhance soil health. Monitoring plant responses post-fertilization is crucial; expect visible signs of recovery, such as new leaf growth, within a week. If improvements are slow, consider assessing other nutrients like phosphorus or certain micronutrients, as a well-rounded approach will maximize plant recovery and vigor.
Step 3 – Fertilize Herbs to Reverse Yellowing
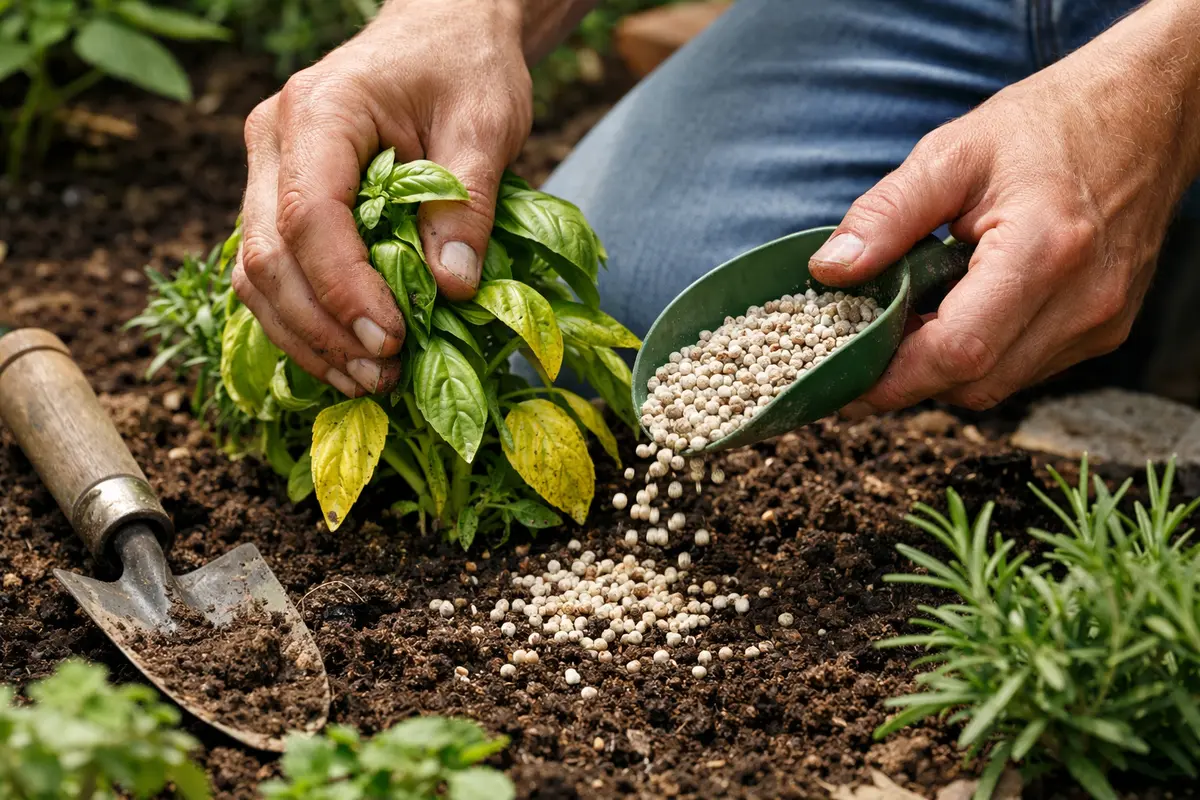
Begin by applying a balanced organic fertilizer to the yellowing herbs, while carefully following the guidelines provided on the package. Within 10-14 days, you should observe the leaves gradually returning to a vibrant green, signaling a recovery from the nutrient deficiencies previously identified. Ensure that you adhere to appropriate fertilization rates; excessive application may lead to fertilizer burn caused by high salt concentrations, which can damage the roots and worsen yellowing issues. Focus on the specific ratios of nitrogen, phosphorus, and potassium in your fertilizer—higher nitrogen levels are often beneficial during the herb’s growth phase—yielding more favorable results. Evaluate your product for slow-release capabilities to ensure a gradual nutrient supply over time.
This revitalization effort enhances chlorophyll development, significantly diminishing the yellowing on the leaves. Herbs suffering from transplant shock often exhaust their energy reserves due to disrupted root systems; therefore, fertilizing can initiate essential recovery processes. Slow-release fertilizers are typically recommended, as they provide a steady nutrient influx instead of saturating the soil immediately, which can potentially overwhelm the plants. Should your chosen fertilizer effectively replenish lost nutrients, plants are likely to rebound better and become less susceptible to future stressors. If soil analysis shows high pH levels, consider incorporating amendments like elemental sulfur to improve nutrient availability, particularly for iron absorption.
Many gardeners mistakenly believe that applying more fertilizer will rapidly boost growth, risking root burn or nutrient lockout, where plants cannot effectively absorb nutrients. Additionally, fertilizing during hot, dry conditions can elevate the risk of burn due to moisture evaporation from the soil surface. To help mitigate this, introducing a light layer of mulch can preserve soil moisture and regulate temperature fluctuations while maintaining stable nutrient levels. After fertilization, closely monitor moisture levels; a decrease in water availability signals the need for an adjustment in your watering schedule to facilitate nutrient absorption. If plants show no improvement after two weeks, reassess your fertilizer choice, and adjust dosage based on specific nutrients requiring replenishment, like iron or magnesium. Continuously monitoring leaf color and texture will be vital in guiding necessary changes to your fertilization strategies, and a proactive approach tends to yield the best outcomes.
Step 4 – Inspect Leaves for Continued Yellowing
Start by checking the moisture level of the soil around your transplanted herbs daily for the first week after the move. Observe the color of the leaves and overall firmness; they should start regaining their green hue and becoming more rigid as the plants adapt. Recheck this condition every two to three days to confirm progress, ensuring that the soil remains consistently damp but not waterlogged.
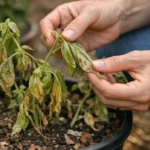
A fully recovered herb plant displays vibrant green leaves with robust, upright stems, contrasting sharply against early signs of yellowing where leaves lose their luster and become limp. While healthy herbs feel firm and resilient to the touch, those starting to decline exhibit a soft or shriveled texture that can convey distress. If the leaves appear chlorotic yet the stems remain firm, look for signs of underwatering to correct the issue.
If yellowing returns despite following the steps, take immediate action by verifying the soil’s drainage. Consider repotting the herbs in fresh, well-draining potting mix to prevent soggy roots. Should the yellowing persist, escalating to a more comprehensive soil test may be necessary to diagnose nutrient deficiencies or pH imbalances affecting the plant’s health.
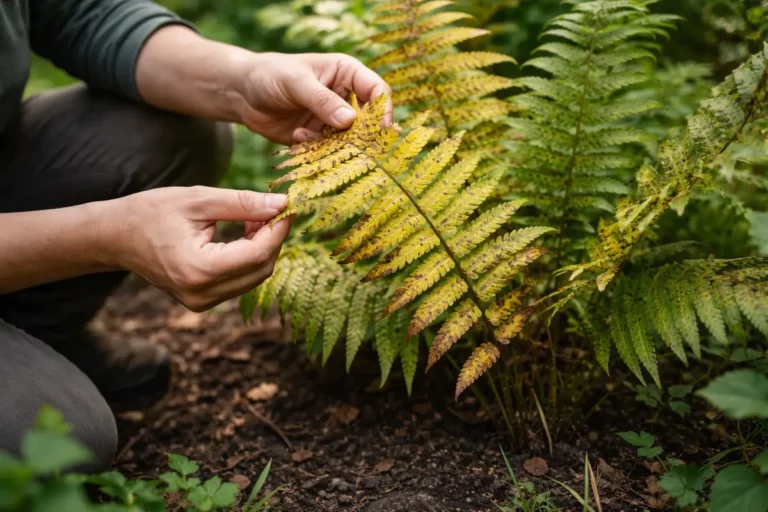
Reevaluate your herbs every three to five days. During these checks, confirm improvements by noting the presence of fresh green growth and the firmness of stems. If you discover new areas of yellowing that weren’t present after your initial interventions, this could indicate persistent stress, possibly due to nutrient deficiencies or pests. Pay special attention to the undersides of leaves, where pests like aphids or spider mites might reside, further complicating recovery. Utilizing a magnifying glass can help you detect these small pests more effectively.
A fully recovered herb will exhibit vibrant green leaves and firm stems—an obvious contrast to the limp and discolored appearance associated with stress. Any change in leaf texture should also be considered; healthy leaves are robust, while unhealthy ones may look droopy or thin. If localized yellowing persists or returns, this may signal targeted stress, possibly from pests or localized nutrient deficiency. Continued yellowing may imply that previous corrections weren’t sufficient — a reevaluation of both the watering and fertilization strategies may be warranted.
If yellowing reoccurs, take a moment to review your watering and fertilization schedules to ensure no overapplication is occurring. You may also want to check the soil for pH levels or additional nutrient deficiencies if conditions do not improve with proactive care. If multiple plants show similar symptoms, systemic issues may be at fault, prompting a broader review of your gardening practices. Don’t hesitate to seek local expertise from community gardens or extension services for tailored guidance. Promote proper airflow between plants, as overcrowding can exacerbate yellowing by creating an environment conducive to diseases that weaken your herbs. Maintaining proper spacing and adjusting plant locations to improve airflow can mitigate stressors and lead to long-term plant health.
FAQ
How long does it take for yellowing herbs to recover after transplant shock?
Typically, herbs can display signs of recovery within one to two weeks after implementing corrective actions such as watering and fertilization. When conditions improve adequately and nutrient levels are replenished, new green growth should begin emerging. If you notice that recovery stalls after the two-week mark, it would be prudent to evaluate light conditions, watering frequency, and potential pest stresses, as these factors can profoundly impact recovery time. Don’t hesitate to adjust light exposure, as too much or too little sunlight can significantly affect healing processes.
Can overwatering affect yellowing herbs after transplanting?
Yes, overwatering can significantly lead to root rot, further exacerbating the yellowing issue by diminishing roots’ ability to absorb vital nutrients. Ensure to conduct regular inspections of roots every few weeks until recovery is evident; roots should avoid appearing dark or mushy. It’s wise to rely on both soil moisture readings and the general health of the plant to determine necessary adjustments. Establishing effective drainage practices is crucial for preventing the recurrence of yellowing by maintaining optimal conditions for root health, which fundamentally supports overall plant vitality.
Should I remove yellowing leaves from my herbs?
Yes, it is advisable to remove severely yellowing or damaged leaves to redirect energy toward healthier growth. This action not only improves the appearance of the plant but also enhances air circulation around thriving foliage, reducing the likelihood of disease and pest infestations. Pruning away damaged leaves encourages new growth, strategically allowing the plant to concentrate resources on green, healthy areas. Regularly maintaining your plants promotes overall health and enhances the chances of successful recovery after experiencing transplant shock. Make sure to use sterilized scissors to prevent transferring potential pathogens.