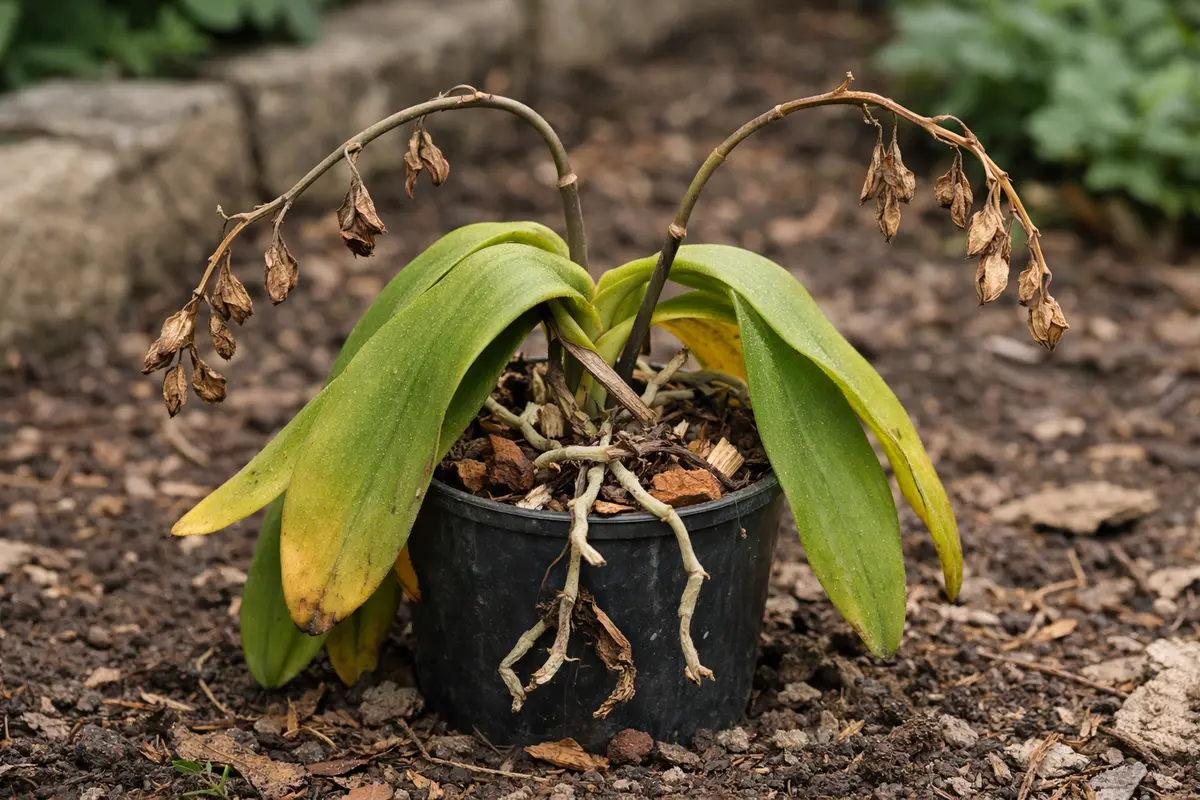
You may notice that your orchid’s leaves are drooping after a stressful transplant, which is why you need to know about fixing drooping orchid leaves after transplant shock. This drooping often occurs due to wilting from inadequate moisture uptake as the plant adjusts to its new environment. If ignored, the situation can worsen, leading to more damage and ultimately stalling growth, but fixing it is possible now if you carefully check the roots and adjust the watering schedule as needed for optimal orchid health.
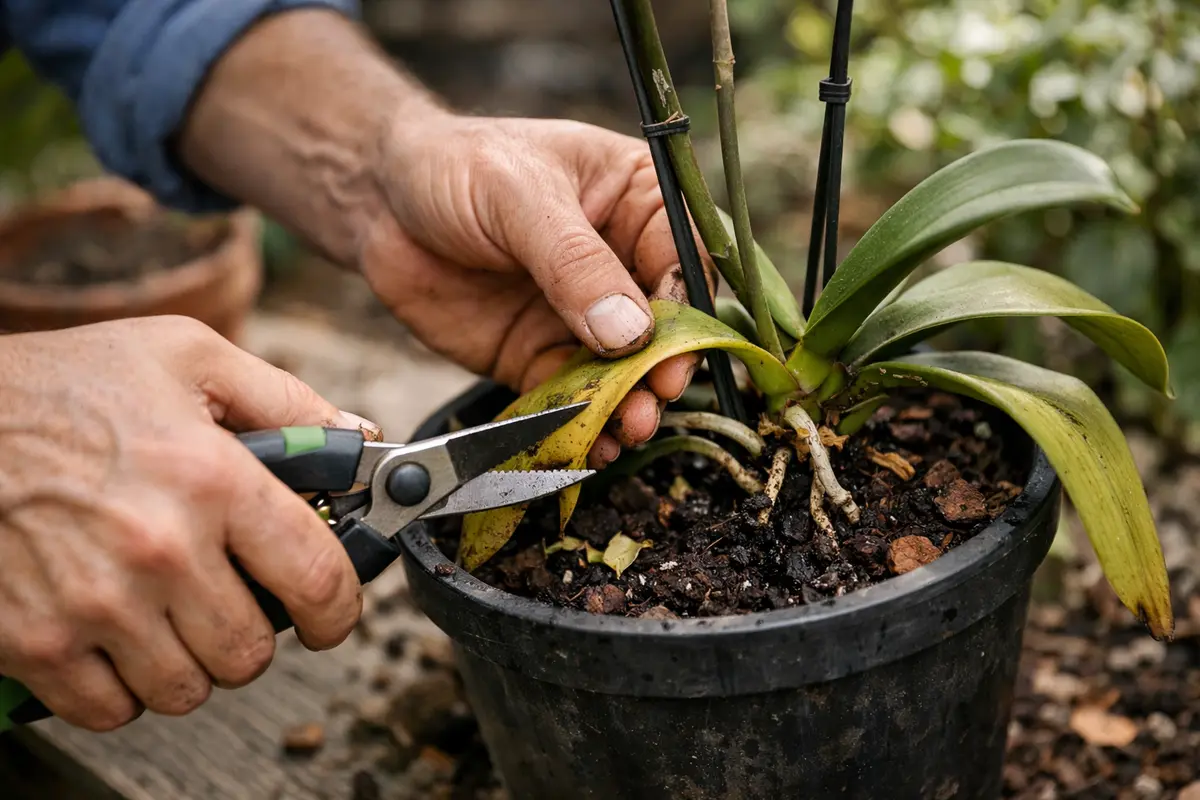
Step 1 – Trim Wilted Orchid Leaves Immediately
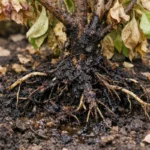
Start by carefully removing the orchid from the pot to examine the roots. Look for any signs of root rot, discoloration, or breaking. Gently rinse the roots with water to clear away soil, and if you find any damaged roots, trim them back with sterilized scissors. After this immediate action, you should notice that the remaining roots appear firmer, and the leaves may begin to perk up as the plant receives better access to nutrients and water. Firmness of existing leaves is a crucial diagnostic factor; if they are still limp after trimming, it indicates further underlying problems.
Acting quickly helps the orchid recover from transplant shock as delayed intervention can lead to further decline in root health. Specifically, if roots remain in a compromised state for too long, the orchid may not properly absorb water or nutrients, leading to persistent drooping leaves. A firm root structure is critical for the plant’s overall absorption capabilities; if you’ve noticed mushy roots, inspect them closely for signs of disease and ensure you utilize only equipment that won’t contaminate healthy areas.
A real-world scenario where timing was crucial involved a gardener who waited too long to assess root health after transplanting. The gardener’s orchid experienced total leaf collapse because they neglected to check the roots for rot, ultimately leading to the death of the plant. If you notice stunted growth and wilted leaves instead of a slight resilience, check for waterlogged conditions in the potting medium. Remember that cleaning instruments used in the cutting process, such as pruners, is essential; substandard hygiene can lead to fungal infections that inhibit recovery.
Immediately addressing visible damage is essential for your orchid’s survival as it systematically eliminates the weak parts. These injured leaves sap energy, making the plant struggle to maintain its health, causing drooping symptoms to worsen over time. In practical terms, cutting a leaf involves using sterile scissors or pruning shears, which helps avoid introducing pathogens, ensuring you make a clean cut ideally at the base of the leaf. This clean approach reduces the risk of further complications like rot or fungal infections that can rapidly compromise the plant.
A common mistake at this stage is hesitating to cut back damaged leaves, hoping they may recover on their own. Waiting too long can weaken the plant further, leading to more severe symptoms like root rot. If you notice excessive moisture accumulating in the pot, leading to soft or squishy areas on your orchid, it’s critical to take action immediately. An effective strategy is to regularly assess leaf condition—leaves should feel firm, bright green, and resilient to touch. A drop in firmness, wilting, or discoloration indicates a need for pruning. If these parameters diminish, it’s a signal to consider removing unhealthy foliage, especially if you see signs of rot at the leaf base.
Step 2 – Investigate Moisture Levels in Orchid Soil
Start by inspecting the roots of your orchid for signs of rot or damage, which can contribute to drooping leaves after a transplant. Remove the orchid from its pot and carefully check the root system, looking for firm, white roots. If you find dark, mushy roots, trim them back and repot the orchid in fresh, well-draining medium to encourage healthy root regrowth, leading to an improvement in the leaves within a few days.
The underlying issue often stems from excess moisture in the soil, which creates conditions for root rot. When roots are damaged, they cannot properly absorb water and nutrients, causing the leaves to droop. If your orchid’s roots are healthy, but the leaves remain limp, it may indicate underwatering, where the roots are dry and unable to support the plant’s needs.
If the soil smells sour upon inspection, it signals anaerobic conditions and root rot; instead of repotting, you should replace it entirely with fresh, dry potting mix. Alternatively, if you notice that your orchid’s leaves have not drooped but are yellowing, check for adequate light levels, as low light can mimic transplant shock symptoms and require you to adjust the plant’s placement instead.
This happens when the soil stays wet or airflow stays low because the underlying issue keeps stressing the roots. Fix the cause by improving drainage or reducing watering frequency. For example, if the soil is muddy and waterlogged, replace the potting mix with a more well-draining medium such as a bark mixture designed for orchids. Once the root issue is removed, the setback should stop compounding, and you should see healthier foliage rather quickly—in some cases, as soon as a week.
Healthy orchid roots need a delicate balance of moisture and airflow. Waterlogged soils can suffocate roots by blocking oxygen and causing root decay, while dry soil can lead to wilting, leaving your plant vulnerable. Monitoring moisture ensures your orchid can access the resources it needs to thrive. Orchids are particularly sensitive; they thrive in humidity levels between 40-70%, and improper watering practices can quickly lead to symptoms of shock. A straightforward practice is using your finger to gauge moisture—if the top inch of soil feels moist, wait a few days before watering. In contrast, if it feels bone-dry beyond this point, it signals a need for immediate watering to prevent severe dehydration.
If you find that the soil texture feels consistently mushy, consider repotting your orchid in fresh, well-aerated mix. Dry soil doesn’t just mean the plant is thirsty; it can start to lose roots if this condition persists. Pay attention to the type of medium used; bark-based mixes provide excellent drainage, and you can supplement with perlite to enhance aeration if needed. If the soil smells foul, that’s indicative of root rot, and the damaged roots should be trimmed away promptly. Should you find the soil bone-dry, it’s essential to thoroughly water the plant until excess liquid runs through the drainage holes. However, ensure you don’t soak it continuously; monitor how quickly the soil dries out again to establish an appropriate watering routine that keeps moisture levels stable.
Step 3 – Fertilize Orchids to Aid Recovery
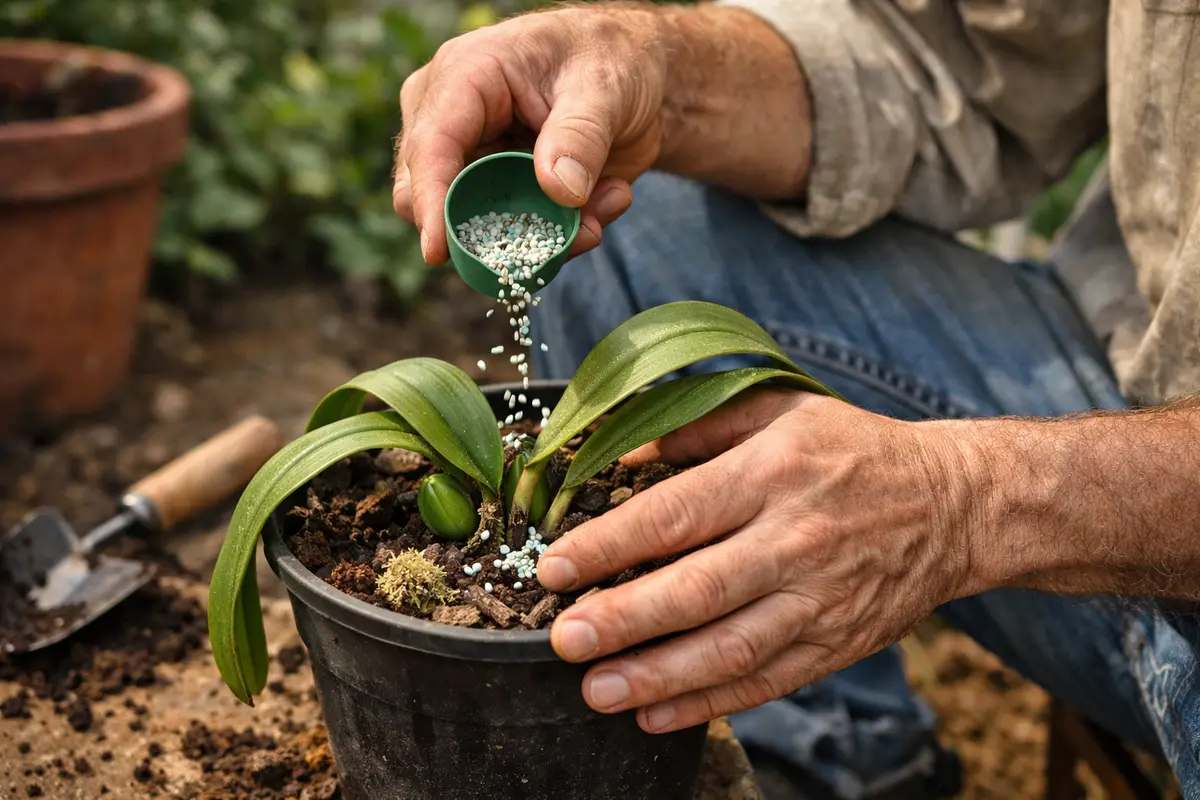
Apply a diluted, balanced orchid fertilizer to your plant to help it bounce back. You will begin to see new growth and greener leaves within a few weeks as the nutrients aid in recovery. This action will address immediate nutritional deficiencies while providing essential elements for stronger growth, significantly impacting the plant’s ability to recover from transplant shock. It’s vital to remember that fertilization should supplement care, never substitute for proper water management and lighting conditions.
Nutrients such as nitrogen, phosphorus, and potassium play a critical role in plant recovery post-transplant. Nitrogen promotes healthy leaf growth, phosphorus supports root development, and potassium aids overall plant health. Applying nutrients while the plant is under stress can be tricky; over-fertilizing can lead to fertilization burn, which might manifest as yellow, browning edges on leaves. However, ensuring soils have good drainage and avoiding over-fertilization are vital to preventing further stress on the plant. A safe ratio for fertilization at this time is diluting the fertilizer to half the recommended strength; this allows for nutrient delivery without overwhelming the plant.
To prevent future issues, switch to a regular feeding routine every 4-6 weeks during the growing season but hold off during dormancy in winter. Keeping an eye on signs of nutrient burn is critical; for instance, excessive yellowing of leaves usually signals over-fertilization. If new growth begins to appear after your fertilization routine, your orchids are on the path to recovery. It’s also beneficial to combine fertilization with your watering routine. For example, watering the plant a day before applying fertilizer can aid in nutrient absorption, especially if the soil was dry beforehand. This proactive approach not only supports recovery but helps ensure the plant gets the nutrients it requires without the risk of over-saturation.
Step 4 – Inspect Orchid Leaves for New Drooping Signs
Check your orchid leaves every few days for signs of improvement or new drooping. You should notice leaves gradually firming up and returning to a more vibrant green over 1-2 weeks. Frequent inspections will help you identify early signs of the problem returning or confirm that your interventions were successful. Observing changes daily can guide your next steps, allowing for timely adjustments to care that may be needed to further aid recovery.
A healthy orchid generally presents leaves that are perky, firm, and uniformly colored without browning tips or significant droop. If, however, you observe the leaves starting to sag again or new yellow spots developing, it might indicate issues such as overwatering or pest infestations. An important aspect of monitoring is understanding that not all drooping is the same. For instance, soft, droopy leaves suggest root rot, while rigidity with slight droop can often relate to environmental stress, such as low humidity or temperature fluctuations. A close examination can differentiate factors; for example, damp soils accompanying drooping may indicate rot, while dry, crinkling leaves could signal underwatering.
If the leaves do not improve within a week, it may be necessary to reassess the care approach, considering factors like soil health and rooting space. Pay special attention to rooting issues that might require re-potting into a more suitable medium; some orchid species require a coarse mix to thrive. You should also monitor for pests like mealybugs or aphids, which can be hidden problems that compound stress on the plant. Ensure you’re aware of the indicators of both healthy recovery and potential setbacks as part of your routine check-ups. If the orchid continues to exhibit poor symptoms or decline, consult with a local gardening expert or a specialized orchid care guide to explore deeper issues, such as potential root damage that might require specialized intervention or expert recommendations.
FAQ
How long does it take for orchid leaves to recover after transplant shock?
Recovery times can vary, but most orchids should show signs of improvement within 1-2 weeks after corrective measures are taken. Maintaining proper moisture and nutrients will significantly speed up this process. Monitoring for fresh growth is a key indicator of recovery; however, patience is essential, as some orchid species naturally take longer than others to respond to treatment, especially those known for slower growth rates. Testing the environmental conditions regularly can ensure that your orchid is in a suitable home.
Can overwatering cause drooping leaves in orchids after transplanting?
Yes, overwatering can severely impact orchid health, leading to drooping leaves due to root rot. It is critical to ensure that the pot has good drainage and that the soil is allowed to dry out slightly between waterings to prevent this debilitating condition. The soil mix should ideally retain some moisture while allowing excess to escape; if the pot feels heavy consistently, that often indicates a water-saturated medium that could suffocate roots and lead to irreversible damage. Keeping a journal of your watering schedule can provide insights into frequency, helping to avoid future mishaps.
Should I remove more leaves if my orchid is still drooping after treatment?
If your orchid continues to show drooping despite proper care, consider removing only additional severely damaged leaves. Prioritize the health of the plant—trimming dead or dying areas can help redistribute energy to new growth. However, you should avoid over-trimming, as excessive removal can stress the plant further. Always evaluate the overall condition of the remaining foliage; a singular focus on a few leaves may overlook essential signals from the remaining plant. Balancing care between recovery and maintaining photosynthetic capacity is critical for bringing your orchid back to health.