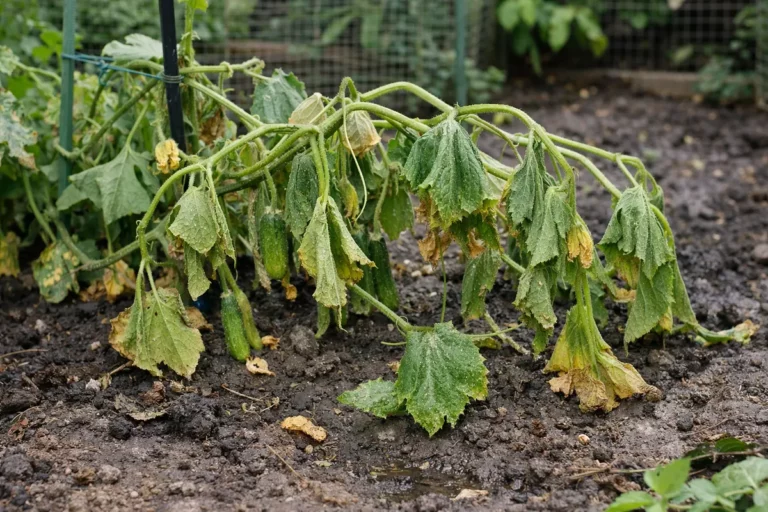
You may notice your potted peace lilies drooping and developing mushy spots on the leaves during overwatering, which is why you need to know how to stop root rot in potted peace lilies during overwatering. This condition occurs when excess moisture leads to rotting roots, depriving the plant of necessary nutrients. If left unaddressed, the problem can spread further, weakening the plant and making recovery harder, but fixing it now is possible if you inspect the roots, reduce watering, and improve drainage.
Step 1 – Trim Damaged Roots in Peace Lilies
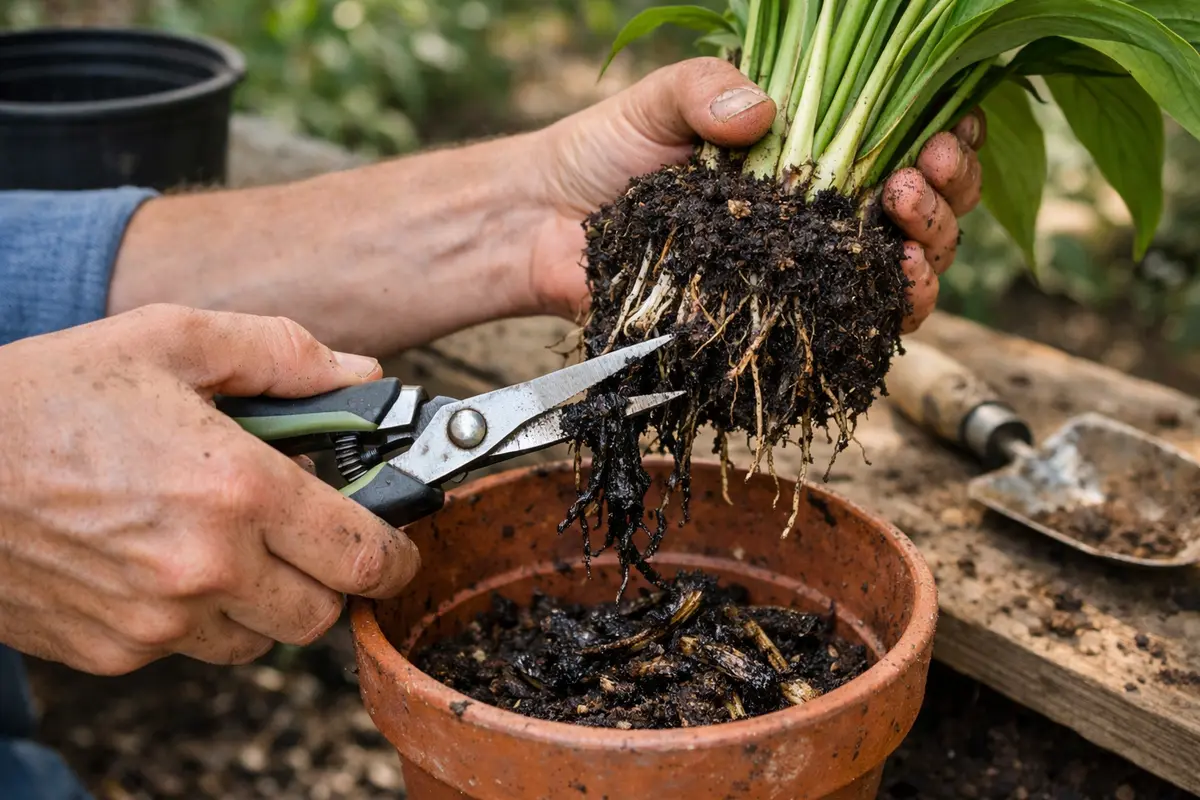
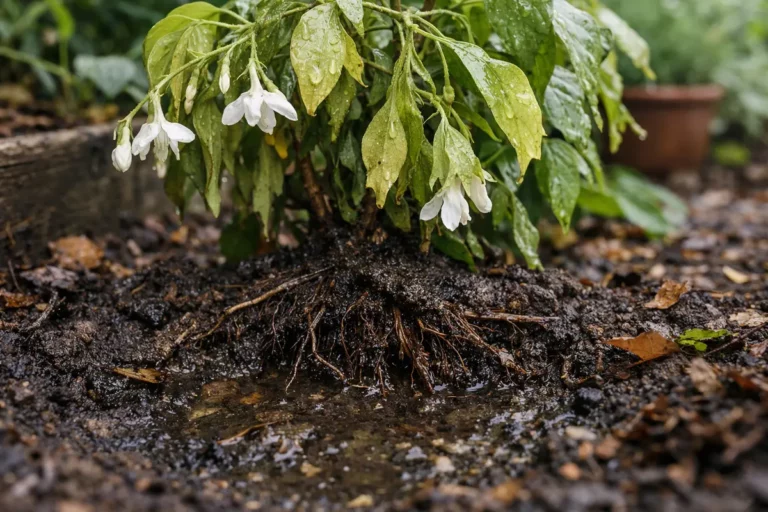
Begin by carefully removing any visibly rotten roots from the plant using sterilized scissors. Upon making these cuts, you will instantly notice the healthier, white roots exposed, contributing to a more vibrant appearance of your peace lily. This initial intervention not only helps in visualizing the extent of the rot but also promotes healthier growth moving forward.
Trimming damaged roots is crucial as it helps prevent the rot from spreading to healthier parts of the plant. Roots exhibiting brown and mushy textures are unable to efficiently absorb water or nutrients, rendering the plant weak and more susceptible to further issues. By cutting away affected sections, you allow the remaining healthy roots to regain functionality, promoting the plant’s overall recovery. In scenarios where minimal root rot is present, this step can effectively save the majority of the root system. In poor drainage conditions, plants may also develop jasmine droop after overwatering.
A common mistake at this stage is delaying the trimming process when symptoms are first noted. Many gardeners might hold out hope for natural recovery, but this can lead to irreversible damage. If you postpone action, the rot may extend to the stem and leaves, inflicting more significant harm and necessitating a much longer recovery period. Furthermore, keep an eye out for a foul smell emanating from the pot; this often indicates that the rot has penetrated deeper. If you notice that the smell worsens upon cutting, it might be necessary to remove even more root material than initially planned.
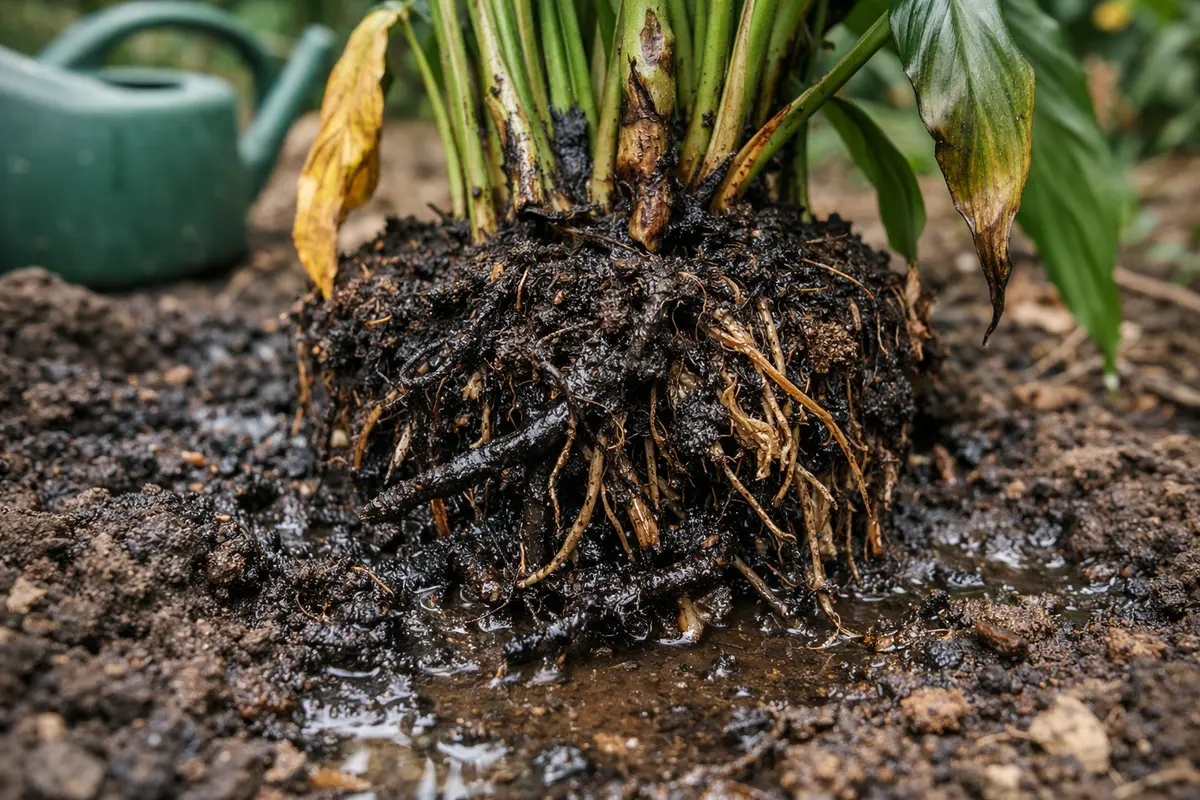
Step 2 – Diagnose Soil Overwatering Issues
First, inspect the soil moisture by inserting your finger about an inch deep. If the soil feels soggy and clumps together, promptly stop watering and allow the soil to dry out completely. Within a few days, you should notice the leaves of your peace lily begin to perk up and regain turgor.
Overwatering leads to soil saturation, preventing oxygen from reaching the roots, which can suffocate them and promote fungal growth causing root rot. In affected plants, the roots may turn brown or black and feel mushy, while a healthy root system remains firm and white. If the soil looks dry yet the plant is wilting, inspect for root issues or other stress factors.
If the soil smells sour, it indicates anaerobic conditions from excessive moisture. Replace the soil with fresh potting mix and make sure the pot has drainage holes. Alternatively, if the leaves are yellowing without wilt, this may indicate a nutrient deficiency rather than root rot, necessitating a different approach altogether.
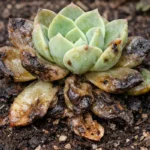
Identifying issues with soil moisture is vital because it reveals the underlying problem instigating root rot. When soil remains perpetually soggy, it suffocates the roots and creates a conducive environment for fungal proliferation. This excess moisture blocks oxygen absorption over time, which is essential for root functionality. Without it, the plant struggles to thrive. Monitoring moisture levels during various seasons is key; for instance, peace lilies may retain water differently in humid climates compared to arid conditions. Excess moisture often leads to problems like root rot in indoor succulent.
If the soil emits a foul odor, consider switching to a well-draining potting mix specifically designed for houseplants. Ignoring these clear signs could lead to escalating root rot issues, requiring even more drastic measures later. If you observe that the soil stays overly damp despite decreasing watering frequency, it may be time to repot the plant with a container that has improved drainage capabilities. Notably, if the pot lacks drainage holes, this is a critical factor that needs immediate correction; without drainage, excess water will remain trapped, leading to further complications.
Step 3 – Replant Peace Lily in Fresh Soil
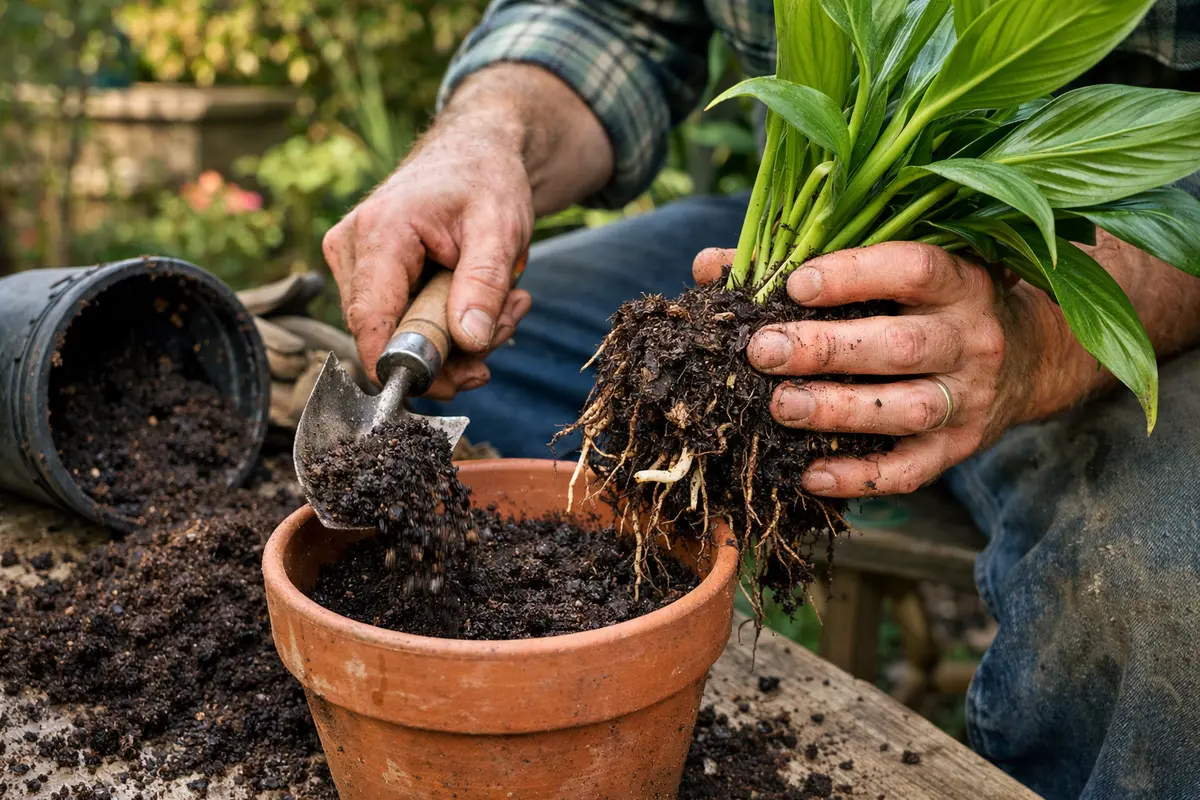
Start by repositioning the potted peace lily to a bright, indirect light location and reduce watering frequency to once per week. Check the soil moisture two inches down before watering, ensuring it dries slightly to prevent further root rot. Within a couple of weeks, you should see new leaf growth, indicating the plant is recovering.
The recovery timeframe may vary; typically, healthy regrowth can be observed within three to six weeks in optimal conditions. Strong, upright leaves and new shoots are signs of restoration, while yellowing leaves indicate ongoing stress. If your peace lily has not shown any improvement in that period, check the root system for remaining dead roots or insufficient drainage.
Avoid the mistake of over-fertilizing during recovery, as it can exacerbate stress on the plant. Instead, focus on nourishing soil and avoiding any chemical inputs for at least a month. If you notice no growth but the leaves are firm, check for excessive moisture retention in the soil, which may indicate lingering root rot.
Replanting essentially provides a clean slate for the roots, allowing them to recover free from any rot present in the old soil. This fresh medium guarantees that the plant receives essential nutrients while enhancing drainage and aeration—both vital for healthy growth. Consequently, this process not only eradicates lingering rot but also rejuvenates the plant, catalyzing a more robust recovery. When moving the plant, avoid any rough handling of the roots, as they can be fragile.
However, exercise caution post-replanting; avoid overwatering immediately after transferring. Many gardeners mistakenly believe that additional moisture will quicken recovery, but doing this can aggravate existing issues. Allow the top inch of soil to dry out before watering again, as this practice promotes root health and prevents soggy conditions. Remember to observe how quickly the soil dries; if it remains wet for more than several days, re-evaluate your watering schedule and soil type to prevent further complication. In some cases, using a soil moisture meter can empower you with precise feedback on your soil’s health and help adjust your care routine accordingly. In poor drainage conditions, plants may also develop root rot in potted strawberries.
Step 4 – Avoid Overwatering During Growth Season

Start by ensuring your peace lily’s pot has adequate drainage holes and using well-draining potting mix. By taking these actions, you will prevent excess water from pooling at the roots, significantly reducing the risk of root rot.
Overwatering often occurs in environments with high humidity or poorly draining soil, leading to conditions where the roots suffocate. By implementing drainage solutions, you directly address the root cause, establishing a routine that promotes the proper circulation of air and water in the soil. If you notice yellowing leaves, check the moisture level in the soil; if it’s soggy, you may need to adjust your watering schedule. In poor drainage conditions, plants may also develop wilting tulips after prolonged rain.
During the winter months, incorporate a slower watering schedule as indoor heating can dry out the air, deceptively reducing the need for moisture. Additionally, consider using a moisture meter to help gauge when to water, ensuring that your peace lily does not stay too wet. If you find the meter reads too high while leaves still droop, check for compacted soil or root entanglement.
Preventing overwatering fosters a healthy environment wherein moisture levels can be balanced effectively. During the growing season, your peace lily will require regular moisture, but excess water can precipitate rot unless managed accurately. Maintaining appropriate soil moisture levels not only encourages healthy growth but also aids in staving off root problems from manifesting. This balance can be particularly challenging if the peace lily is indoors, as environmental factors such as heating or air conditioning can lead to rapid soil drying.
Adapt your watering regimen according to seasonal changes that may alter your plant’s requirements. For instance, during the summer months, when temperatures rise, your peace lily may require more frequent watering compared to the cooler winter months. Additionally, closely monitoring the moisture level in your pot is crucial, especially if your peace lily is exposed to varying humidity levels, as changes can drastically affect the plant’s water needs. Furthermore, be vigilant about environmental factors like drafts or heat sources that may cause the soil to dry out faster than expected. Recognizing these signs can mitigate water stress, preventing potential recurrence of root rot issues as seasons shift.
Step 5 – Check Peace Lily Leaves for Recovery Signs
Start by checking the moisture level of the soil in your potted peace lily every 3–4 days using your finger or a moisture meter. Observe the top inch of the soil; if it feels overly damp or soggy, it is likely overwatered. Recheck the soil moisture consistently for signs of improvement or deterioration before watering again to prevent future root rot. In poor drainage conditions, plants may also develop root rot in potted cacti.
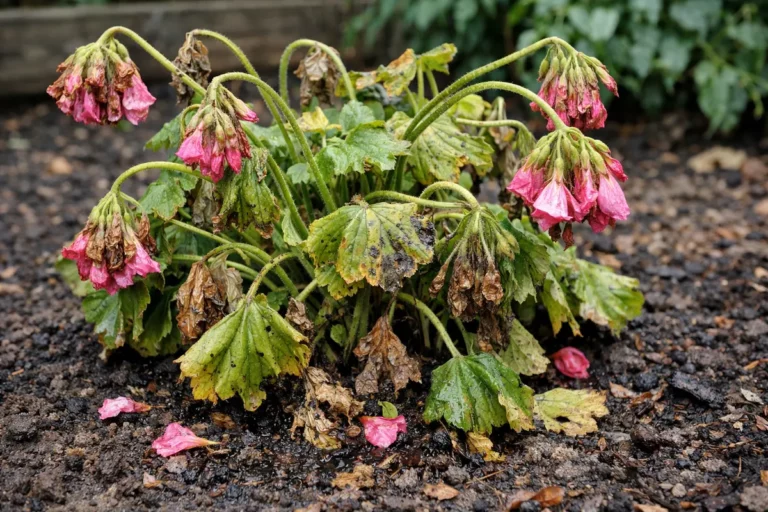
A fully recovered peace lily exhibits firm, glossy leaves with a vibrant green color and upright growth. In contrast, early signs of root rot reemerging include wilting, yellowing leaves that feel mushy to the touch, and an overall droopiness of the plant. If you encounter browning leaf tips, inspect further; they might indicate overwatering in combination with poor drainage.
If signs of root rot return despite previous interventions, immediately stop watering and allow the soil to dry out completely. In severe cases, consider repotting the peace lily in fresh, well-draining soil and check the roots for damage. If rot is extensive, trim away affected roots before repotting to help restore the plant’s health.
Monitoring the plant is essential for keeping track of recovery progress. Healthy leaves typically present themselves as firm with a vibrant green hue, signaling recovery from root rot. If you observe limp or yellowing leaves, it may point to remaining stress on the plant or a recurrence of root issues. Additionally, be on the lookout for new signs of wilting, which may indicate further distress. If the new growth appears distorted or stunted, it could suggest that the plant’s recovery process is still incomplete.
If you continue to notice problematic signs irrespective of your efforts, consider re-examining the roots for any lingering rot. It’s crucial to intervene proactively; should your peace lily fail to show improvement in a week, you may need to reassess drainage solutions or investigate potential pest issues that could negatively impact overall plant health. Sometimes, unexpected pests can destabilize even a recovering peace lily, making vigilance key during the recovery process. If pests such as spider mites or mealybugs are present, they can compound problems, so integrating pest management alongside recovery strategies is advisable.
FAQ
How long does it take for peace lilies to recover from root rot?
Recovery from root rot in peace lilies can take anywhere from a few weeks to several months, depending on the severity of the damage and how promptly you address the root issues. You’ll notice improvements as healthier new leaves begin to grow and existing leaves perk up, indicating that the plant is regaining normal function. Regular checking for improvements should be scheduled weekly to gauge progress.
Can root rot spread to other plants?
Yes, root rot can easily spread to neighboring plants if the affected plant is in close proximity, particularly when water from the sick plant drains into others. Ensuring proper spacing among your plants and addressing moisture issues are effective strategies to prevent spread. Using separate trays for pots or maintaining isolation for any infected plants can also help minimize risk.
Should I remove all affected parts of the peace lily?
Yes, it is critical to remove all visibly affected roots and any dead or dying leaves as soon as they are detected. This practice not only helps mitigate the potential spread of rot but also increases the chance of the overall health and recovery of the plant, enabling it to focus its energy on rejuvenating unaffected areas. Not removing all affected segments can certainly prolong recovery time and worsen the initial root issues.