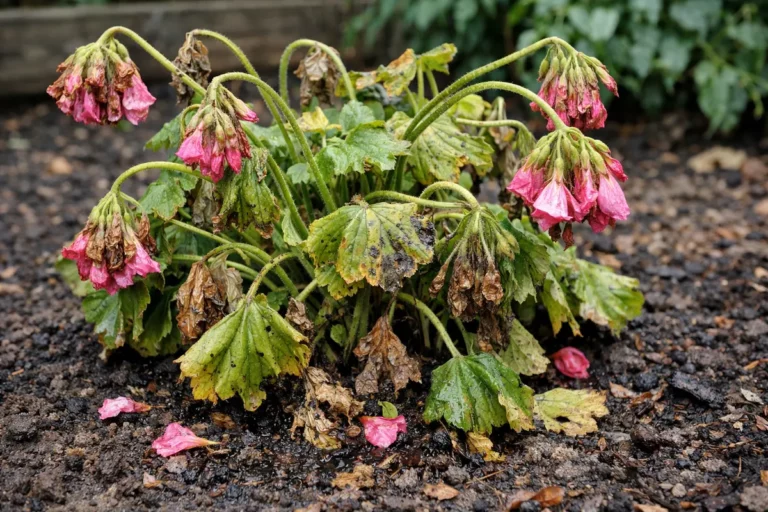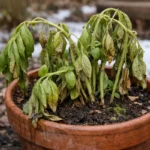
You may notice your beautiful tulips starting to droop and appear lackluster after prolonged rain, which is why you need to know how to fix wilting tulips after prolonged rain. This wilting occurs as excess moisture can lead to mushy stems, preventing them from standing upright and absorbing nutrients effectively. If left unaddressed, this issue can worsen, ultimately weakening the plant and leading to more damage. However, fixing it is possible now—just check the soil drainage and adjust your watering routine to bring them back to life. Focusing on immediate and effective steps can prevent long-term decline.
Step 1 – Trim Wilting Tulip Stems Immediately
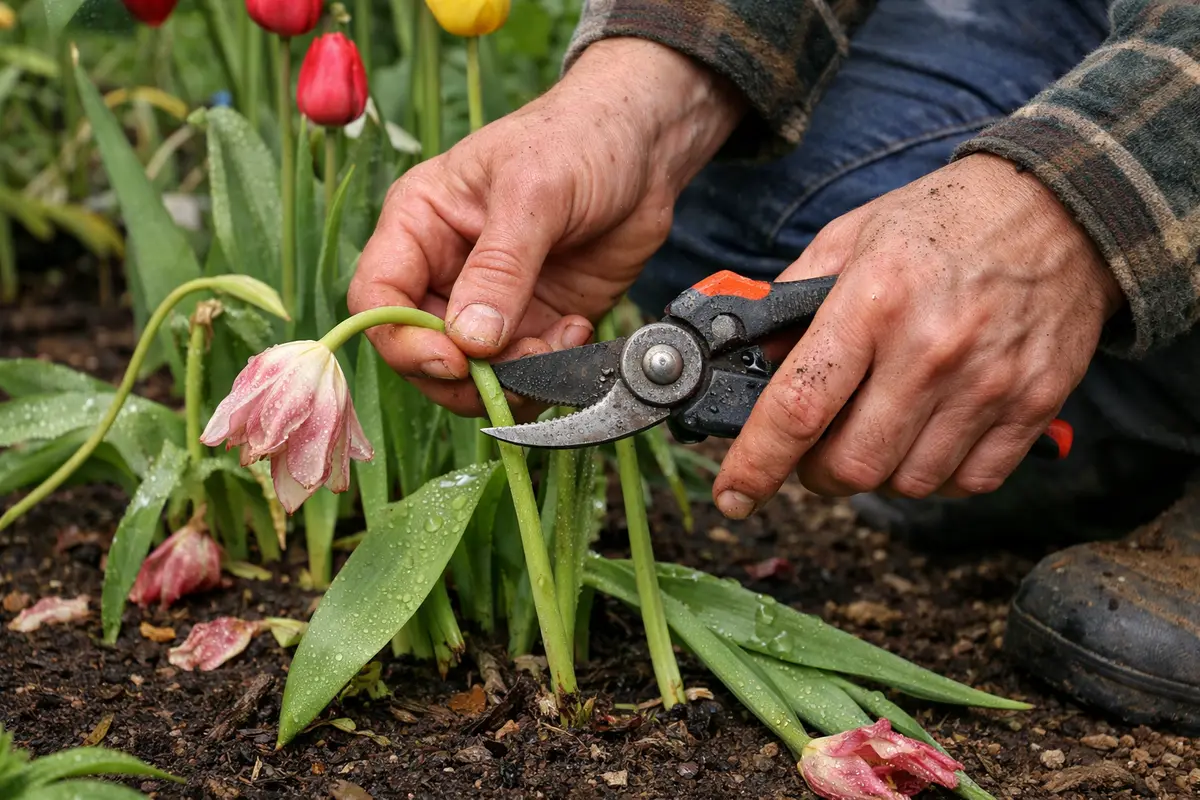
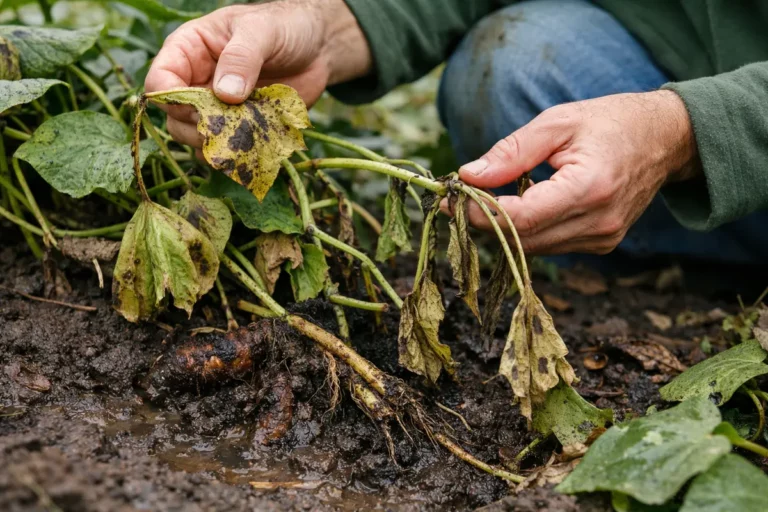
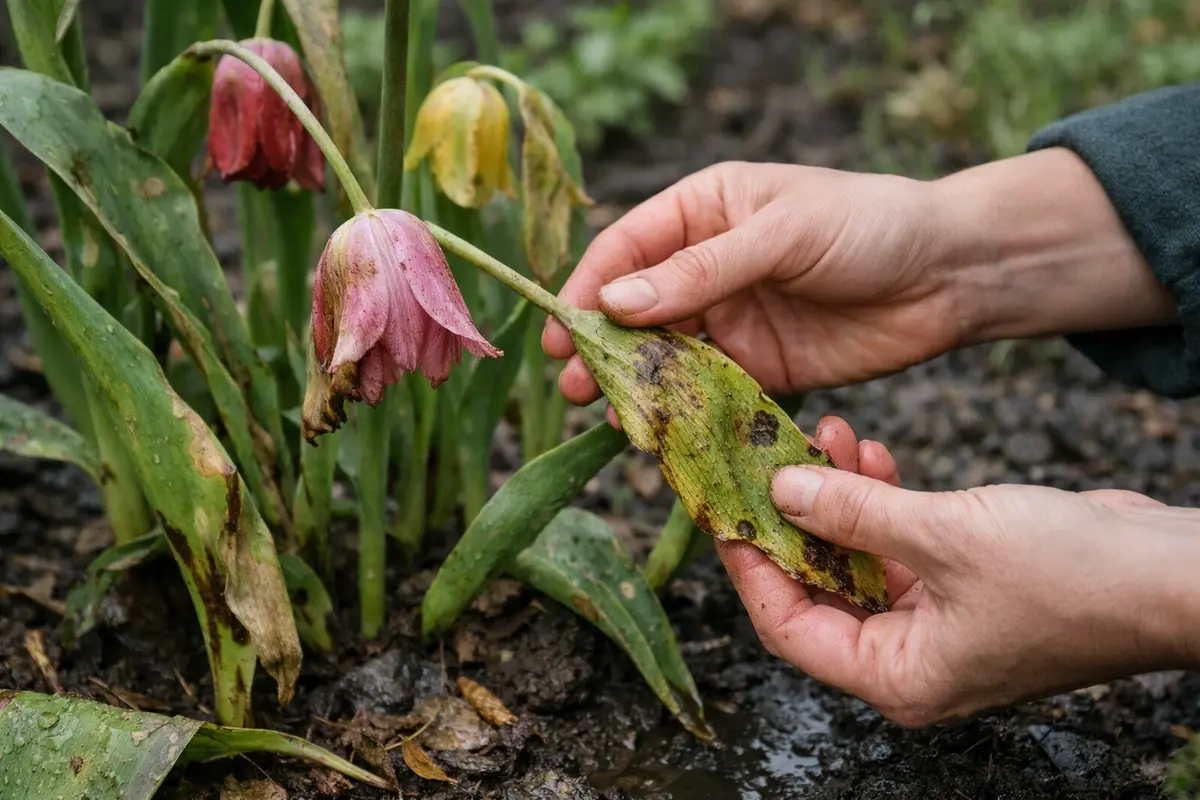
Start by gently lifting the wilting tulips from the soil to examine their roots. Look for signs of rot or damage; if the roots are mushy or dark brown, trim away the affected areas with sterile pruners and replant the healthy sections in fresh, well-draining soil. After performing this action, you should see a slight uptick in turgor pressure in the remaining leaves within a few hours, indicating the plants are beginning to recover.
Acting fast is crucial for tulips because prolonged moisture can lead to root rot, which compromises their ability to absorb essential nutrients and water. If left untreated, the plant will struggle to regain its vitality, potentially leading to total collapse. Healthy roots appear firm and white, while damaged roots develop a mushy texture; if the roots are still firm yet the plant remains wilted, check the moisture level in the surrounding soil. In poor drainage conditions, plants may also develop jasmine droop after overwatering.
In one case, a gardener delayed action for a week, leading to the complete loss of their tulip bulbs due to rot, while another who acted swiftly salvaged their plants by replacing the soil, resulting in a vibrant bloom the following season. A common mistake is to simply add fertilizer instead of addressing root health first; without proper roots, nutrients won’t be effective in revitalizing the tulips.
Tulips, like many flowering plants, can become energy deficient when stressed. By removing wilting stems, you allow the remaining healthy parts of the plant to flourish without the drag of the unhealthy sections. This technique is crucial, especially when the plant is recovering from excessive moisture levels, as wilting indicates stress, which may lead to more severe conditions if untreated. Pay close attention to how quickly leaves perk up after you’ve trimmed; in favorable conditions, you may see immediate improvement within a day or so. For instance, if healthy leaves regain their turgor quickly, it signals that your intervention has begun to work, further motivating you to continue nurturing the plant.
A common mistake gardeners make at this point is overlooking this initial trimming, thinking it will recover naturally. However, without this intervention, the plant will struggle to allocate nutrients effectively, resulting in sluggish recovery. For instance, if you leave wilted foliage unchecked, it competes with the healthy parts for nutrients and light, leading to further decline. Removing limp foliage allows sunlight to reach the healthier leaves and can speed up photosynthesis, improving overall plant health. If left unchecked, however, the risk of fungal infections increases markedly, as wilting tissues becomes susceptible to pathogens. Always remember, you should aim to prune as soon as possible after spotting wilting to prevent the situation from escalating.
Step 2 – Diagnose Excessive Water Drainage Issues
Next, assess the soil around the tulips to identify any water drainage issues. You might observe that the soil remains soggy and compacted, which impedes root respiration. This identification is essential as it allows you to address the root cause of the wilting effectively. A visual check can provide insight; if the soil appears darker than usual or if puddles form after rain, these signs indicate an urgent need for drainage solutions. Stick your finger into the soil up to two inches (about 5 cm); if it feels consistently wet at this depth, further action is necessary. If soil moisture readings remain consistently high, it may indicate that your tulips are sitting in waterlogged conditions. In poor drainage conditions, plants may also develop root rot in potted cacti.
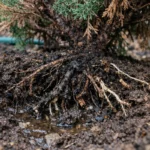
Excessive moisture leads to anaerobic conditions, which suffocate the roots and foster root rot. Identifying heavy, saturated soils is vital; roots often appear brown and mushy in severely over-saturated areas. Understanding this mechanism helps you realize the importance of ensuring proper drainage; without it, the tulip roots suffocate, causing visible stress in the plant. Factors contributing to poor drainage may include soil type or the location of nearby structures that retain water. Notably, heavy clay soils often hold onto water, with roots struggling to absorb even basic nutrients. As conditions progress, you may begin to see leaf yellowing—not just wilting—which signals deeper issues. Should you notice a shift in your previously robust tulips, it can be a clear sign to take immediate action.
If you discover the soil has a sour smell, indicating rot, replace the affected soil immediately. Otherwise, you may need to amend the current soil to include organic matter, enabling better aeration and drainage. Incorporating about 20% compost or peat moss can significantly improve drainage. If your tulips are located near a foundation or drainage ditch, consider whether the area is inherently too damp; if you still find persistence in sogginess after making amendments, think about elevating your planting beds or relocating your tulips to a drier area. If the situation is dire and drainage problems are severe, consult drainage specialists for a thorough assessment of your garden and to recommend effective solutions that will improve overall garden health.
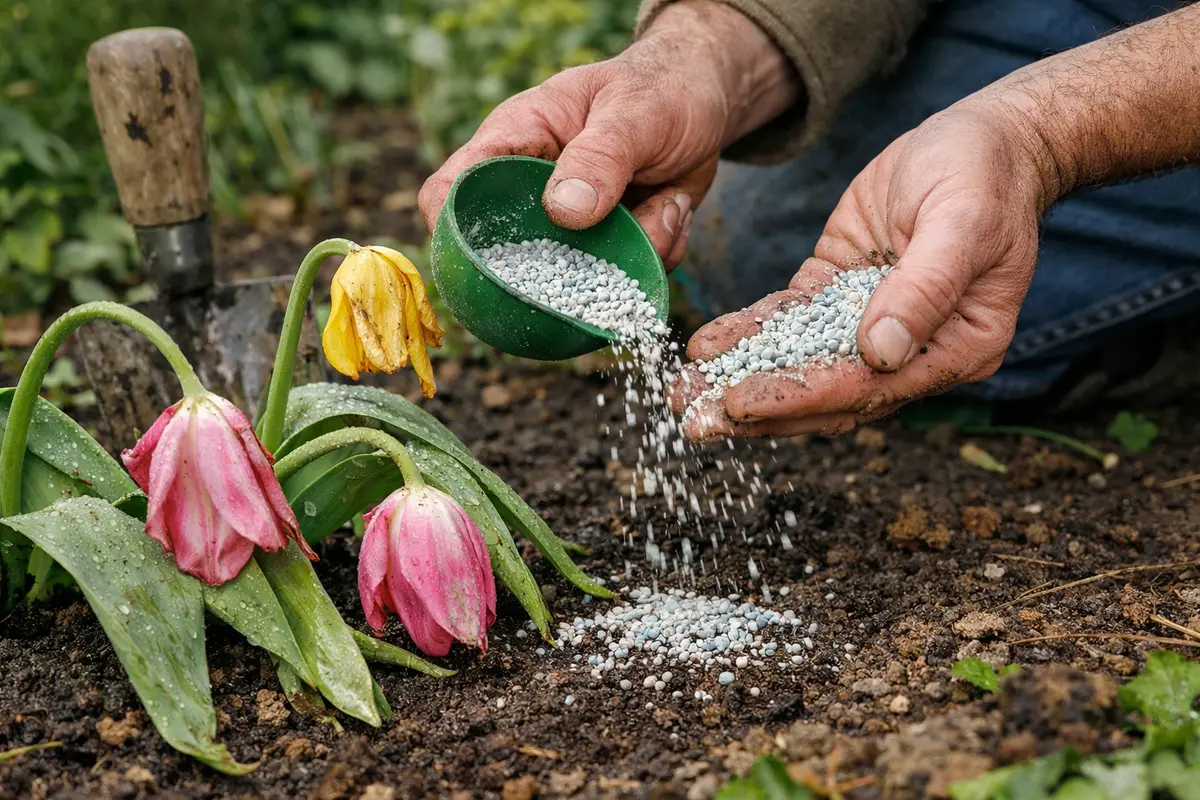
Step 3 – Feed Tulips Nutrients for Recovery
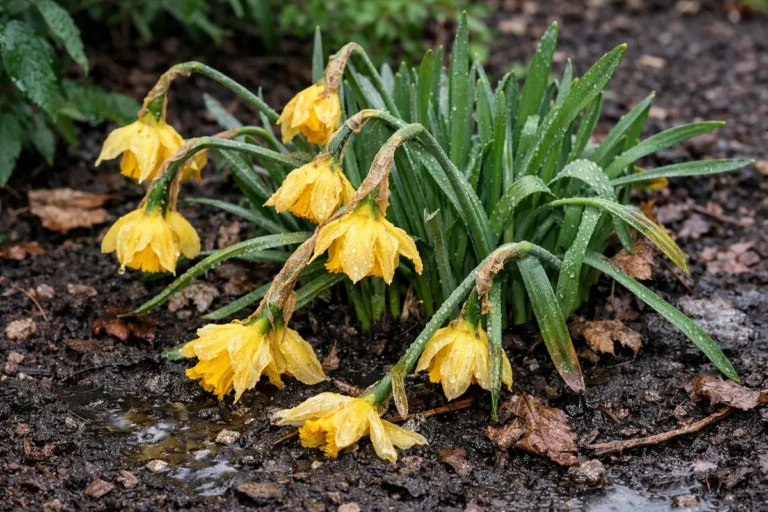
Start by removing any soggy, waterlogged soil surrounding the tulips to improve drainage, and stake the tulips if they are leaning due to excess moisture. You should notice the petals becoming firmer and standing upright as the tulips begin re-establishing their structure. To prevent future wilting after rain, ensure that the planting area has well-draining soil and consider adding mulch to reduce soil compaction. If you apply mulch around the base, aim to use a layer of about two to three inches (5 to 7.5 cm), which can prevent weeds and retain moisture more effectively. Excess moisture often leads to problems like root rot in potato plants.
Tulips typically show signs of improvement within a few days after addressing the drainage issue, but prolonged exposure to waterlogged conditions can lead to root rot. If you notice yellowing leaves in addition to wilting, that indicates an unhealthy environment caused by recurring rain saturation that can weaken the plant’s roots and overall vitality. If not this → check for adequate drainage solutions in your soil composition. You will also want to note that if wilting continues, it may signify a more systemic issue in your garden’s watering practices.
A common mistake during recovery is over-fertilizing in hopes of quick revitalization, which can further stress the already weakened tulips. Instead, allow the tulips to recover naturally first, and only apply a balanced fertilizer if the wilting persists for more than a week. Timing adjustments may include waiting for the soil to dry before watering or fertilizing, especially after heavy rainfall. Late-season rains could lead to additional challenges; if your region experiences tail-end precipitation events, consider adjusting watering schedules based on present conditions. When feeding is off, expect signs such as if petunia plants turn yellow.
Feeding tulips provides them with the necessary essential nutrients to replenish their energy stores and promote new growth. Nitrogen boosts foliage health, while phosphorus supports root and flower development, making these nutrients critical during recovery. The optimal application rate for a balanced fertilizer is typically around 1.5 ounces per square foot of planting area, but ensure you evenly distribute it to avoid nutrient burn on the root systems. If you observe weak growth, increase the frequency to a bi-weekly schedule but only if conditions point towards nutrient deficiency moving forward.
A common misstep is over-fertilizing, especially after a rainy period, which can lead to nutrient burn and greater stress for the tulips. Monitor your tulips closely after fertilization; if the leaves begin to appear scorched or bleached, you may need to reduce the application amount or even skip a feeding cycle. When applying fertilizer, always follow it with a thorough watering to support nutrient absorption without overwhelming the plant’s systems. Avoid fertilizing just before a predicted rainstorm, as this might wash away precious nutrients before the roots can absorb them. It might take a couple of applications over weeks to gauge real recovery, so patience and observation are key during this process.
Step 4 – Check Leaves for Signs of New Blooms
Inspect the leaves and stems of your tulips for signs of new blooms and healthy foliage. After a week or two, check for vibrant green leaves and numerous buds forming. Regular observations during this period help you monitor the recovery progress effectively, and will enable you to catch any further issues early. Each week, plan a quick check aligned with your watering routine; consistency creates a habit that catches potential problems earlier. If new buds start emerging, that’s a significant positive indication your interventions are working, and consider adjusting your care routine based on visible plant health.
A fully recovered tulip will show firmly upright leaves with no drooping or yellowing. New buds should be visible within two weeks, a reassuring sign indicating the plant is recovering from its earlier stress caused by excessive moisture. However, if this ideal condition isn’t reached, and signs of drooping or browning appear again, it is indicative of persistent poor conditions. This could mean residual overwatering issues, and persistent wilting may need another comprehensive check on soil health and drainage. It’s critical to assess if additional amendments or even relocation are necessary to improve conditions for future growth. In poor drainage conditions, plants may also develop root rot jade in plant.
If you see signs of wilting return despite previous interventions, it may be time to reassess drainage and soil conditions thoroughly. Using a soil moisture meter can help; if readings persist above ten on a scale of one to ten (where ten indicates overly wet conditions), those damp conditions are still negatively impacting your plants. You might need to add sand or organic matter to improve soil drainage more effectively. Clearing any debris that can block drainage paths in your planting area is also critical to ensure your tulips receive the best conditions for recovery moving forward. Being proactive about observing the recovery stages will maximize the chances of success for your tulips.
FAQ
How long will it take for my tulips to recover?
After implementing corrective measures, you should start to see improvement in your tulips within a week. Full recovery, including blooming, may take a little longer depending on the initial severity of the stress. Several factors can affect recovery time, including the specific conditions of your soil and the local climate. In severe cases, such as prolonged immersion in waterlogged soil, full recovery may extend into the full blooming season before you can see the anticipated vigor restored in your plants.
Can overwatering spread rot to healthy tulips?
Yes, overwatering can indeed spread root rot among healthy plants if they are located near an affected area. This spread often occurs when roots sit in saturated soil, creating ideal conditions for rot to flourish. Ensuring proper spacing and drainage can help mitigate this risk and maintain a healthy garden environment. If tulips are cramped close together in overly moist soil, any bacterial or fungal infections can easily transfer among them, compounding the problem and leading to wider failures within the planting bed.
Should I remove all damaged parts of the tulips?
While trimming off wilting parts is essential, only remove those that are severely damaged or not showing signs of recovery. Healthy leaves will contribute to the plant’s energy needs, promoting a full recovery. Over-trimming or taking away too many leaves can stress the plant further, as it needs those green parts to generate food through photosynthesis. It’s important to assess the viability of each leaf and stem before making any cuts. Remember, recovering plants rely on each leaf for energy; remove only what appears dead or too damaged to recover for best results.