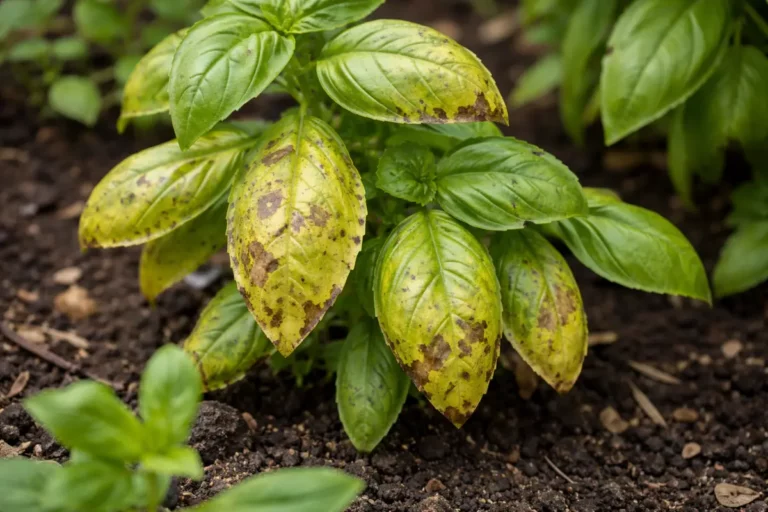
You may notice your shallot plants developing yellowing leaves during the heat of summer, which is why you need to know how to treat yellowing leaves on shallot plants while growing. This yellowing often indicates nutrient deficiencies or stress, leading to weakened foliage and unsightly damage. If left unchecked, the problem gets worse, potentially stalling growth and weakening the plant, but fixing it is possible now if you inspect the soil, adjust your watering schedule, and improve nutrient supply.
Step 1 – Trim Yellowing Shallot Leaves Immediately
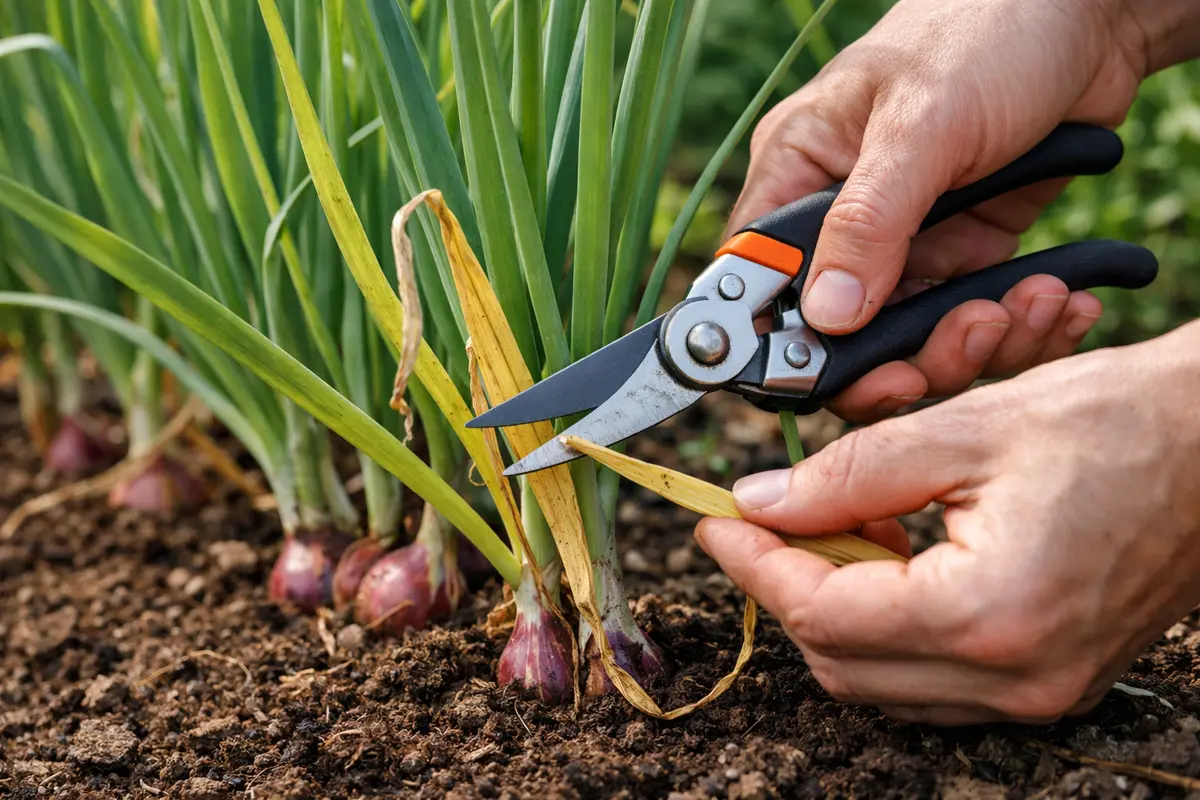
First, remove any yellowing leaves from your shallot plants by cutting them at the base with clean, sharp scissors. This reduces the risk of further disease while allowing the plant to focus its energy on healthier foliage and growth. You should notice a more vibrant green color returning to the remaining leaves within a few days, alongside a boost in overall vigor.
Acting swiftly is crucial because yellowing leaves often indicate nutrient deficiencies or stress, which can lead to a decline in growth if left unaddressed. For instance, if you deal with nitrogen deficiency promptly, the plant can redirect resources to remaining healthy leaves, whereas delayed action might exacerbate the issue, leading to stunted growth. If the yellowing is due to a lack of water, then ensuring the soil is consistently moist can help revive your shallots effectively.
A real-world example is a gardener who ignored the initial signs of nutrient deficiency until the yellowing spread throughout the entire crop, resulting in significant yield loss. In contrast, a neighbor quickly addressed the first few yellow leaves by conducting a soil test and adjusted nutrient levels accordingly, ultimately enjoying a successful harvest. Many gardeners mistakenly apply only water without investigating the cause, which can delay effective treatment.
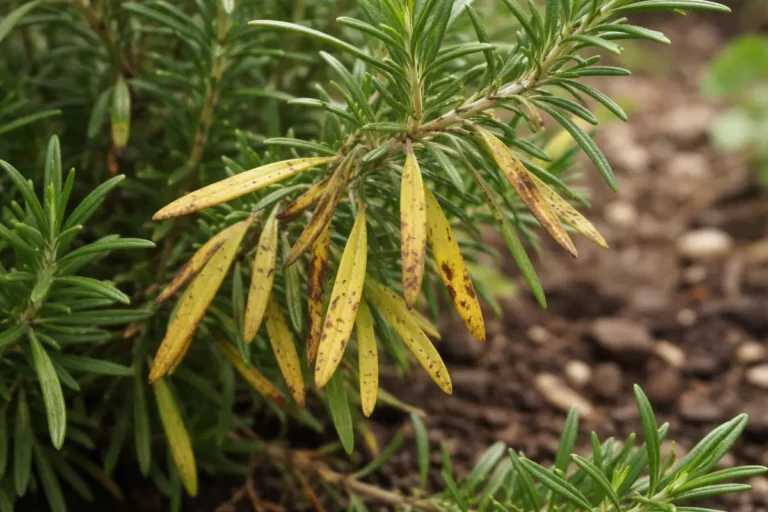
Yellowing leaves signal that the plant is struggling, often due to environmental stressors or nutrient shortages. When you remove these affected leaves, you essentially help redirect the plant’s resources towards remaining tissues. Consequently, less energy is wasted on parts that won’t recover. Observe closely; if yellowing starts at the base and progresses upwards, it often suggests systemic issues like root rot or nutrient deficits caused by environmental factors, including overwatering or poor drainage. When trimming, aim for leaves with at least 1-2 inches of healthy green tissue remaining to ensure the plant retains enough foliage for photosynthesis. If the yellowing is only at the tips, removing the tips instead of the whole leaf might be sufficient, allowing for more green surface area to gather sunlight.
A common mistake here is neglecting to trim the compromised leaves promptly. For instance, if you wait too long while others show signs of yellowing, the condition can worsen, leading to further dieback and a slower recovery process. If the yellowing persists on the upper leaves, this could indicate inadequate nutrient uptake due to root health issues. Quickly addressing the issue typically involves not just the visible leaves but also assessing the stem for any underlying problems. For example, soil that appears excessively wet or compacted might be the cause of root issues that lead to yellowing; if so, consider improving drainage and assessing your watering practices. Most growers will see improvement once the unhealthy parts are removed, making it easier for the remaining leaves to thrive. Regular maintenance checks should follow, ideally every week, to catch any reemergence of yellowing early.
Step 2 – Check for Nutrient Deficiencies in Shallots
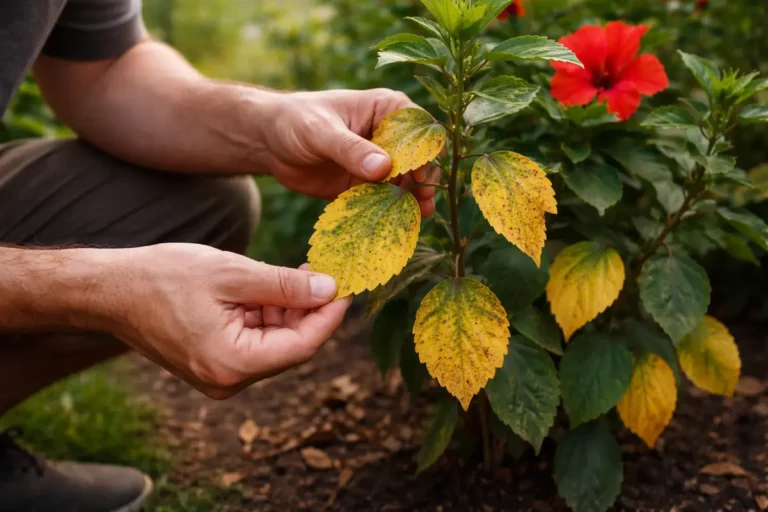
Inspect the soil for signs of nutrient deficiencies immediately after trimming. You should notice a change in soil texture and color, indicating whether it contains essential nutrients. Identifying nutrient gaps enables relevant corrections that will foster healthy shallot growth. A soil test kit can provide specific measurements; if your soil pH is below 6.0, you might need to address nutrient lockout caused by acidity, which can render vital nutrients unavailable to the plant. Observe how yellowing can differ as lower pH affects nutrient availability; for instance, while nitrogen is primarily affected at low pH, calcium may become too limited, which is critical for healthy growth. Additionally, if you notice a chalky or crusty appearance on the soil surface, it can indicate excessive alkalinity and affect nutrient uptake.
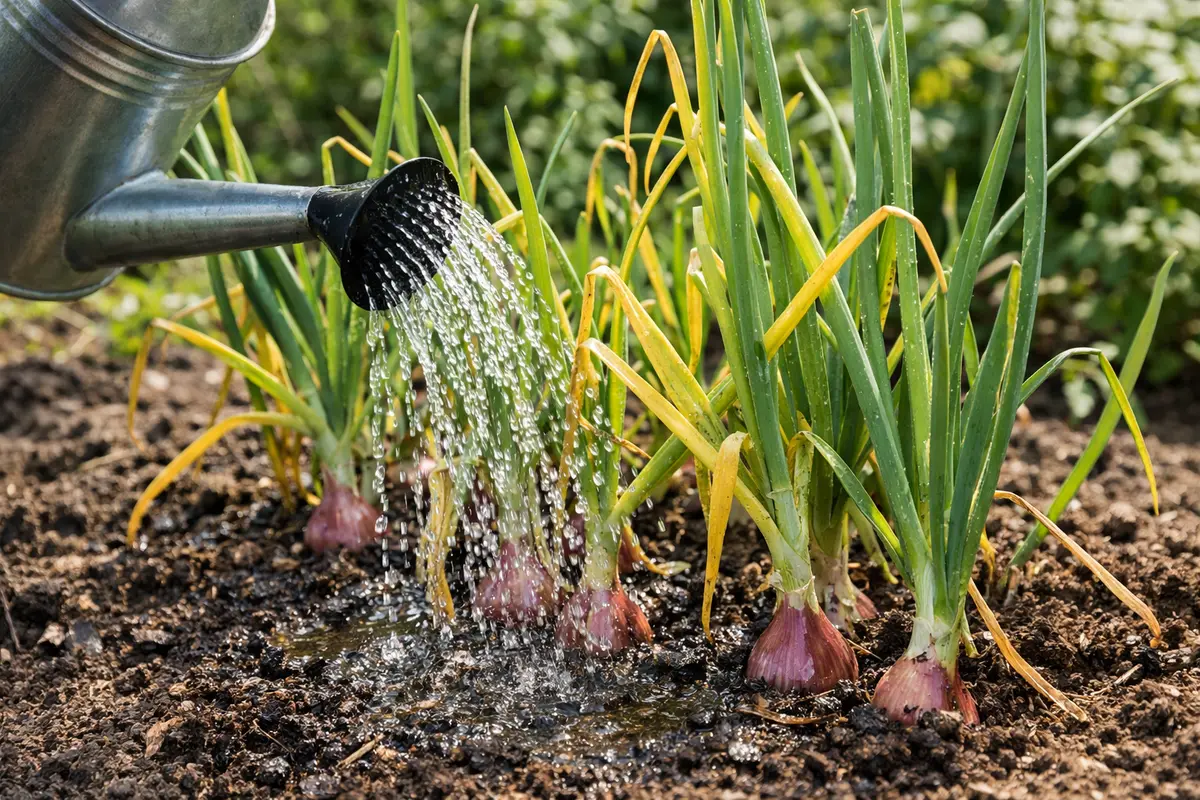
A common cause of yellowing leaves in shallots is insufficient nitrogen or other key nutrients that feed plant processes. If the soil lacks vital components like nitrogen, potassium, or phosphorus, the plant can exhibit yellowing as a stress response. Testing the soil’s nutrient levels will guide targeted amendments to correct this deficiency. If you notice a particularly pale yellow, consider that a sign of nitrogen deficiency, while yellowing of older leaves can point to a potassium shortage; check leaf tips for browning as another sign of potassium inadequacy, which indicates a need for immediate intervention. Insufficient phosphorus may also cause slow development and yellowing, particularly in younger plants. Record soil test results to determine if repeat amendments are necessary based on the observed recovery. If you are dealing with a related issue, petunia plants turn covers a similar problem in detail.
If you find that the soil is overly acidic or lacks basic nutrients, add organic fertilizers accordingly. For instance, if you spot a sour smell or have very low pH readings, consider incorporating lime to neutralize acidity. However, if it does not improve within a week, address potential overwatering, which could be compounding the issue—check drainage by sticking your finger into the soil; if it feels soggy deeper than 2 inches, adjust your watering schedule. In cases where nutrient amendments don’t show an effect, consider switching to a water-soluble fertilizer that provides faster results for immediate nutrient uptake; liquid fertilizers can show signs of effectiveness in as little as 48 hours. Conversely, if overly frequent fertilization occurs, it can burn roots, leading to additional stress characterized by yellowing; reassess and regulate application frequencies. Keep a calendar for fertilization and watering schedules to avoid over-application.
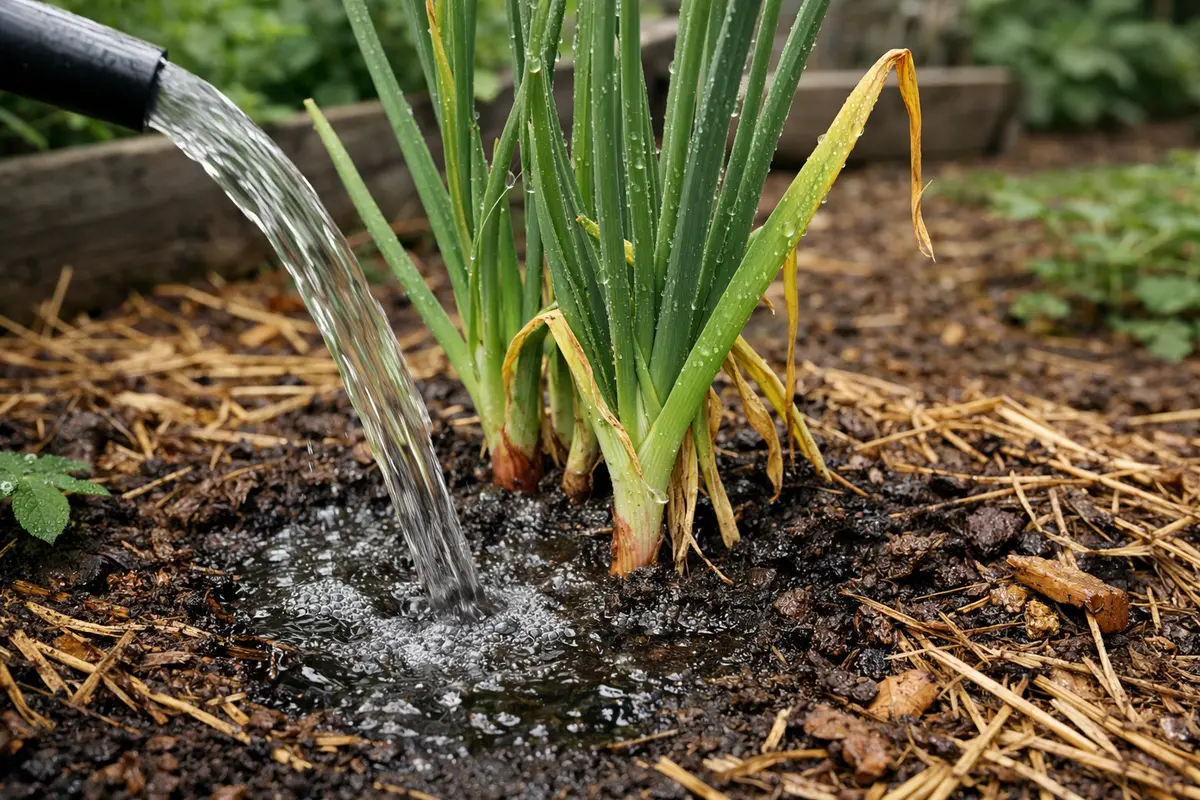
Step 3 – Water Shallots to Revive Yellowing Foliage
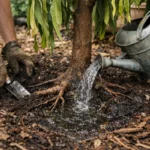
Water your shallots deeply to revive the yellowing foliage. Within a few hours, you should see the leaves begin to perk up and regain some turgidity. Ensuring adequate moisture levels can quickly bolster the plant’s resilience against stressors. Aim for a thorough soaking that reaches at least 6-8 inches deep into the soil; shallots prefer consistent moisture but require well-draining soil to prevent root rot. Use a moisture meter to confirm soil hydration levels, as evenly moist soil is crucial for growth; if readings show you’re on the dry side, increase watering frequency. However, if readings continuously indicate wetness, cut back to avoid drowning the root system, which can cause yellowing.
Correct watering is critical for shallots, especially during hot weather. This vegetable thrives in well-draining soil that retains moisture without becoming soggy. Excess water can lead to root rot, while drought stress leads to yellowing. Striking the right balance helps in maintaining optimal growth; yellowing can appear overnight after heavy rainfall, indicating that you may need to adjust your watering practices following such events. Pay attention to the moisture level after rainfall; if the surface appears dry yet dense and muddy deeper down, that may require corrective measures like adding organic matter to improve drainage or even temporarily relocating the shallots to raised beds. Always check your watering pattern and adjust based on seasonal changes; in drier months, increase frequency, while in rainy periods, reduce amounts.
Consider incorporating mulch around the base, especially during dry periods. This will help to retain soil moisture and maintain an even temperature, protecting the shallots from further stress. Additionally, be cautious; overwatering could lead to other issues like fungal problems, which emerge when soil remains too wet for extended periods. Regularly check the top inch of soil before watering to avoid unnecessary saturation; if the top inch feels dry, it’s time to water again. If water pools around the base of the plants, inspect your drainage to make sure it is functioning properly and not contributing to root issues. In high-humidity conditions, consider reducing the frequency of watering to prevent creating an environment conducive to root diseases, and always ensure any standing water is promptly dealt with. A related fix is explained in prevent aphids collard if you want to compare approaches.
Step 4 – Inspect Shallot Plants for New Yellow Leaves
Recheck your plants for any signs of new yellow leaves every 3-5 days. You should observe whether the new growth is healthy and a vibrant green, indicating that recovery efforts are effective. Close monitoring will help catch any resurgence of the yellowing early on; symptoms can escalate rapidly, often manifesting in new yellow leaves that emerge as a response to ongoing nutrient deficiencies or pest damage. If newly emerging leaves exhibit any discoloration, it’s crucial to scrutinize other factors like soil condition and watering habits immediately; each new leaf should show vigorous growth, or else underlying issues might persist. If there is a recurring yellowing, consider possible causes like inadequate sunlight exposure or ongoing pest activity affecting various plants.
A fully recovered shallot plant will exhibit strong, green leaves and firm stems, signaling good health. In contrast, newly developing yellow leaves can indicate that lingering issues remain unresolved. Look for signs like soft or limp leaves as red flags; these symptoms can be a direct indication of pest infestations or continued nutrient deficiencies that escaped initial evaluation. If you only see yellowing on new leaves but the older leaves remain vibrant, you may need to adjust the fertilizer specifically to boost younger plant growth. Sometimes, nutrient amendments take time to take effect, so combinations of foliar sprays alongside soil amendments may yield better results. Alternatively, swift application of a balanced fertilizer specifically designed for leafy vegetables can quickly correct slight imbalances.
If you notice yellowing reappearing, reassess your watering practices and nutrient regime immediately. A fallback action might involve adjusting watering frequencies or reconsidering fertilization strategies to ensure a robust nutrient supply. Additionally, check for pests during inspections; soft-bodied insects like aphids can sap the vigor of your shallots, leaving them susceptible to further stress. Look for small clusters of aphids under leaves; if found, introduce beneficial insects like ladybugs or use insecticidal soap as a manageable treatment. If all else fails, consult with a gardening professional to analyze potential underlying issues; recognize when to seek expertise—typically if multiple plants exhibit similar symptoms, and self-correcting techniques yield no beneficial results. Look at neighboring plants too; if they also show signs of distress, the issue is likely environmental and may require a broader diagnosis.
FAQ
How long will it take for my shallots to fully recover from yellowing leaves?
Recovery can take anywhere from a few days to a couple of weeks, depending on the severity of the issue and how quickly you address root causes like nutrient deficiencies or water issues. Consistent monitoring and proper care practices, such as timely watering and fertilization, will significantly enhance recovery time. Keep daily notes for reference which can help you determine effective actions in the future, including identifying patterns of stress symptoms related to environmental changes.
Can yellowing leaves spread to other shallots in my garden?
Yes, yellowing leaves can signal underlying problems that might affect nearby plants, particularly if related to pest infestations or environmental conditions. It’s essential to isolate affected plants and assess the overall garden health to prevent the issue from spreading. Take note of whether the surrounding plants also show signs of stress, as this can help you determine if the problem is environmental or specific to individual plants; neighboring plants may experience stress or nutrient competition if the soil remains unaddressed, which can be compounded in smaller garden spaces.
Should I remove more leaves if the yellowing continues?
You should remove any persistently yellow or deteriorating leaves to preserve the health of the plant. However, focus on identifying and addressing the root cause rather than continually trimming leaves. This proactive approach not only improves plant health but can also prevent future occurrences; if leaves won’t regain their color within a week after the initial intervention, it indicates that external factors remain unresolved. Remember that removing too many leaves can also stress the plant further, so ensure only truly irrecoverable parts are cut away and do not trim all leaves in a single session. Overzealous trimming may cause further stress, so patient observation is key.