You may notice your jasmine droop after a heavy rain or excessive watering, which is why you need to know “Why does my jasmine droop after overwatering.” This drooping can be caused by the roots sitting in waterlogged soil, leading to mushy roots and yellowing leaves. If left unchecked, the situation gets worse, ultimately weakening the plant, but it’s possible to fix it now by checking the drainage, adjusting your watering schedule, and removing any affected roots.
Step 1 – Inspect Jasmine for Wilting Signs
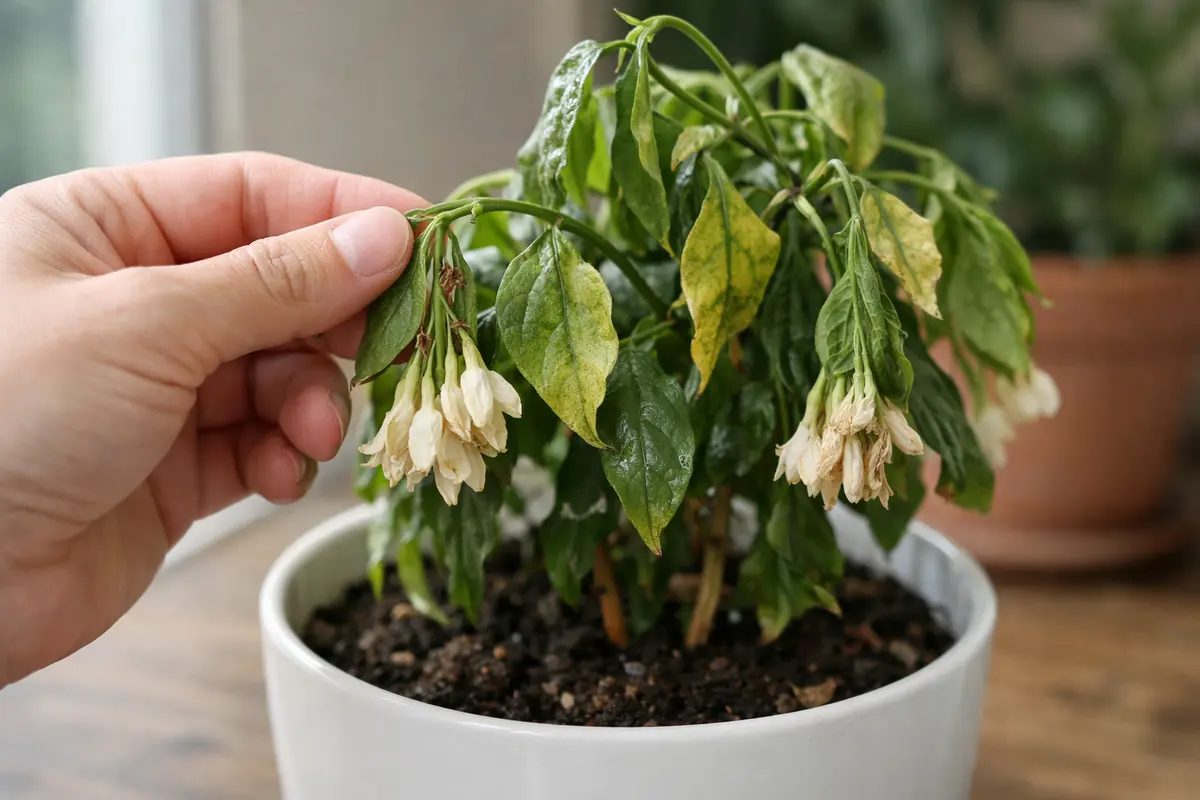
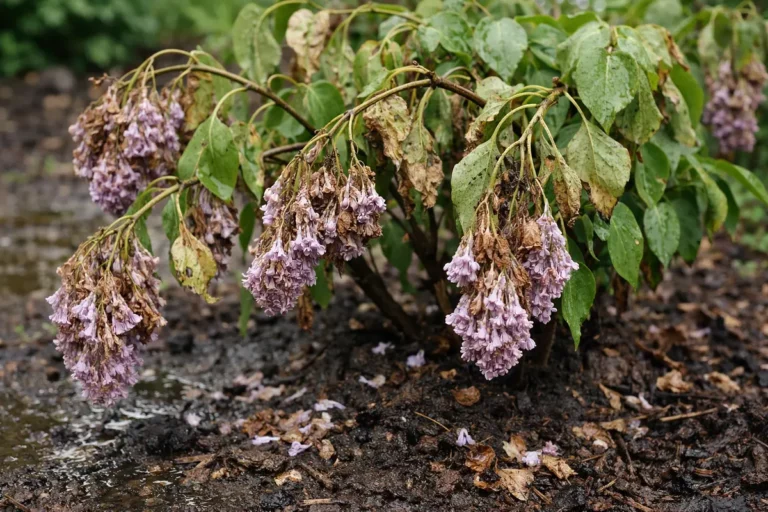
Start by checking the leaves and stems of your jasmine for signs of wilting or drooping. You should see which leaves appear yellowing, limp, or shriveled within moments of your inspection. Pay particular attention to the leaves’ edges; if they are browning or crispy, this is an urgent sign of moisture issues. If it feels soft to the touch or the leaf edges are becoming translucent, immediate action is warranted.
This inspection is crucial because wilting leaves indicate that the plant is struggling with water uptake, leading to stresses that can cause irreversible damage. Identifying the state of the leaves helps you formulate a plan to address the issue promptly. The drooping occurs due to waterlogged soil preventing oxygen from reaching the roots, which must be addressed immediately to promote recovery. If you see the leaves droop within a few hours of watering, it indicates excessive saturation, requiring an immediate diagnosis.
Many gardeners overlook the need for inspection after watering, believing that plants simply need more water. Failing to observe the wilting closely can lead to a misunderstanding of the problem, possibly causing deeper issues like root rot. If the leaf tips are soft and brown while the stems are firm, there may be recovering potential; however, limp stems usually indicate severe overwatering issues. A quick evaluation of the soil’s consistency can also offer insights: soil that lacks moisture will crumble easily, while overly wet soil may clump together. It can also be helpful to assess the overall condition of the soil—if it remains excessively wet days after watering, an immediate intervention is needed before further harm occurs. If you are dealing with a related issue, petunia plants turn covers a similar problem in detail.
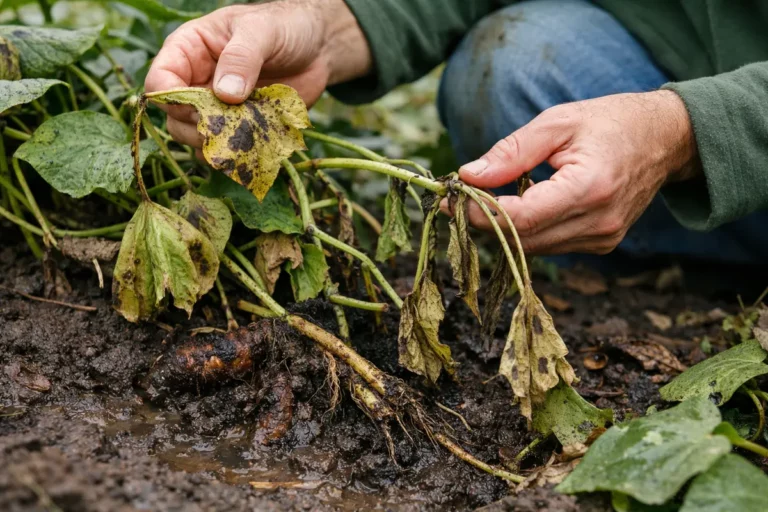
Step 2 – Diagnose Overwatering Effects on Roots
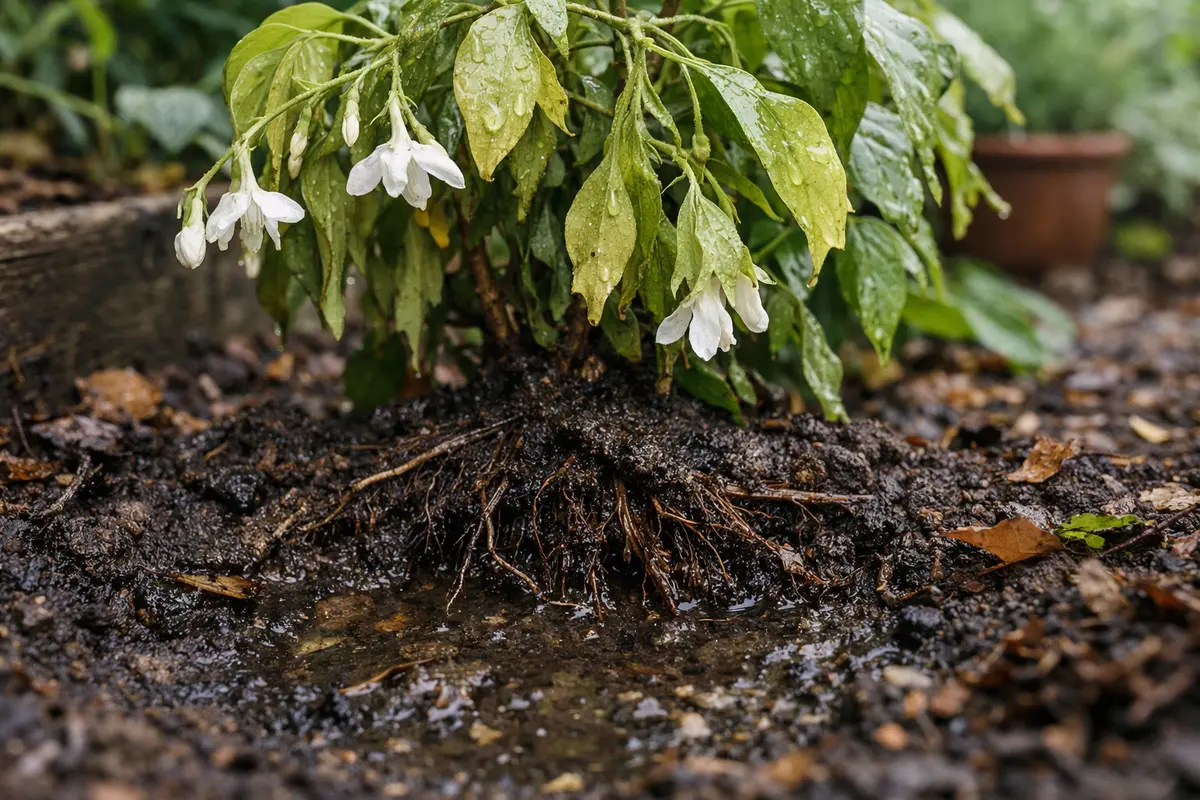
Check the soil moisture by inserting your finger about two inches deep into the soil. If the soil feels excessively wet or has a sour smell, you need to address the overwatering to prevent root rot. A good diagnostic step includes visually inspecting the potting medium; it should not be saturated with water, nor should it be compacted and dense. If you notice the soil clumps together without crumbling and feels cool to the touch, this indicates excessive moisture retention, signaling trouble for the roots.
Understanding the moisture levels is vital because if the soil retains too much water, it will lead to oxygen deprivation in the roots, resulting in their decay. The roots become mushy and unable to absorb nutrients, leading to further wilting and stress in the plant. If you notice a soft, watery texture on roots when checking, they are likely already suffering from rot. A proper diagnosis lets you take the right corrective measures swiftly and can save the roots from permanent damage before it’s too late. A related fix is explained in compacted soil around if you want to compare approaches.
If you find that the soil is overly moist but detects no sour odor, this suggests waterlogging without full root rot, allowing for potential recovery with immediate action. Conversely, if it smells sour or vinegar-like, you might need to remove the plant from the pot, clean the roots, and repot it in fresh soil. Many novice gardeners tend to water again even when the soil is potentially saturated, incorrectly assuming the plant needs more moisture. If roots feel mushy upon inspection, consider that they are struggling to survive. If you notice a dry, crumbly feel in the top layer of soil but the deeper layers remain moist, this contradicts your watering strategy. Be quick to provide the right corrective measures to avoid prolonged stress.
Step 3 – Adjust Watering Schedule for Jasmine Recovery
Reduce watering frequency significantly, allowing the soil to dry out completely before the next watering. You will observe the leaves starting to regain some firmness within a few days, signaling that the roots are beginning to recover and can take up moisture again. Aim for a solid drying period of at least a week to ensure the soil has time to aerate, allowing stale water to dissipate. If the weather is particularly humid, extending this drying period may be necessary.
Adjusting the water schedule is important because jasmine requires balanced moisture levels; allowing too much saturation can lead to further root damage and requires time for the soil to re-establish a healthy moisture balance. This balance allows plants to engage in the crucial process of photosynthesis and root growth simultaneously. Drying the soil provides the opportunity to begin aerating again, leading to healthier growth. Be cautious of your environment as well; warmer, dry conditions may speed up drying rates, but cooler, soggier weather will require more frequent checks.
A common mistake during recovery is the impulse to fertilize in an attempt to speed up growth; however, this can further stress the plant already struggling with root issues. Instead, focus just on providing proper watering conditions, allowing your jasmine time to normalize. If you notice new shoots or greener leaves emerging, that’s a clear indication that your jasmine is headed towards recovery. Remember, recovery takes time, and patience is key. If you observe leaves softening again following a watering, it may indicate that the soil is still too wet—reassess before continuing with any further watering. For a closely related scenario, see yellowing leaves peace.
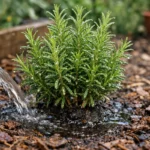
Step 4 – Water Jasmine Properly to Avoid Overwatering
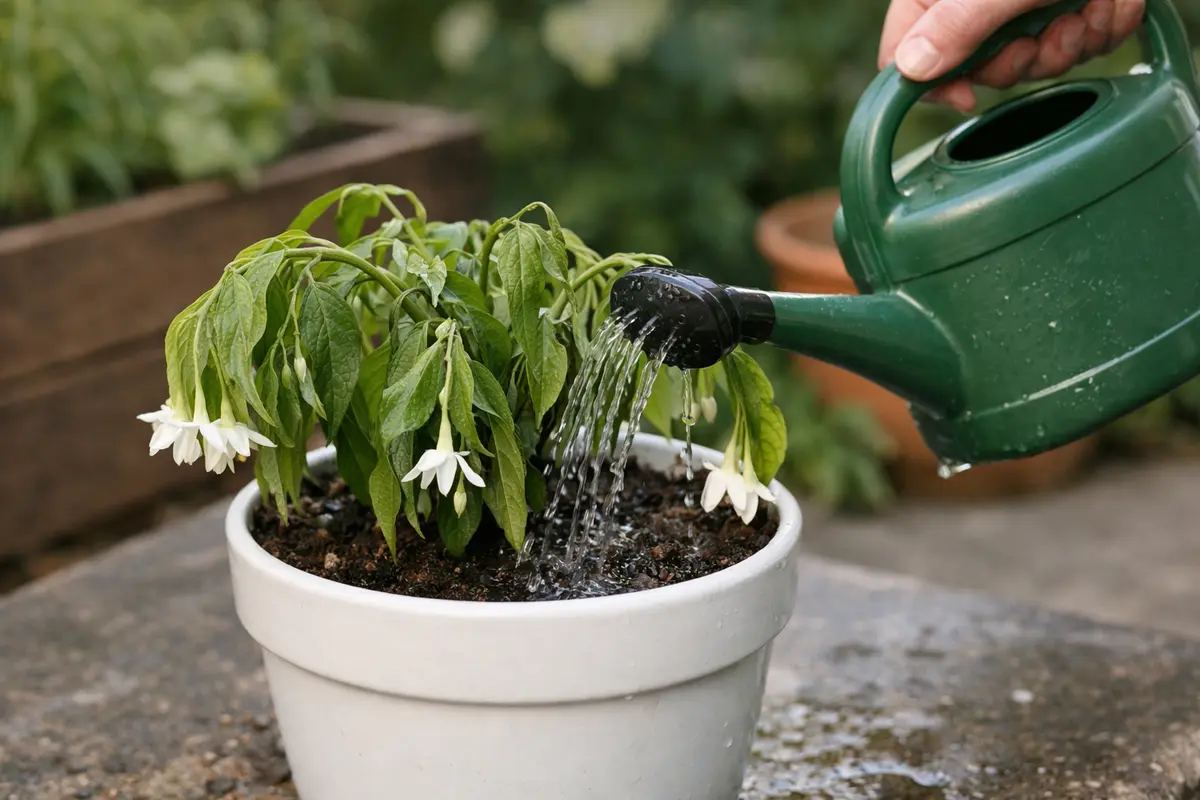
Start by allowing the top inch of soil to dry out completely before watering your jasmine again. This practice will help prevent drooping leaves, ensuring your plant maintains its upright posture and overall structure.
Overwatering occurs commonly in humid environments where the soil retains moisture, diminishing oxygen levels around the roots. By letting the soil dry between waterings, you reduce the likelihood of root suffocation and allow jasmine roots to access the necessary air, thus preventing recurring drooping. If your jasmine droops when the environment becomes excessively moist, check the drainage and adjust your watering routine accordingly.
During the colder months, decrease water frequency as temperatures drop and soil moisture evaporates more slowly. If jasmine leaves continue to droop despite less frequent watering, assess for additional issues like root rot, which may indicate the need for repotting in fresh soil for better drainage.
A proper watering routine allows for better moisture control and prevents recurrence of overwatering. Over time, your plant learns to rely on this schedule, resulting in robust root structure and healthy upward growth. Factors such as humidity and temperature significantly affect how quickly your jasmine absorbs moisture; therefore, be prepared to adjust as conditions change. A good rule of thumb is to keep a journal of your watering schedules; tracking will help you spot trends in your jasmine’s responsiveness to moisture changes.
During fall and winter, lightly reduce the frequency, as jasmine tends to slow its growth. Many gardeners make the mistake of not adjusting for seasonal growth patterns and treat all times equally, leading to overwatering. If the jasmine is in a cooler room, consider cutting your watering schedule in half compared to summertime. Frequent checks during these transitional periods can save you from potential stress on your plant—watch for changes closely and adjust accordingly. Lastly, if you detect signs of leaf drop or yellowing again, consider whether it’s time to put your watering journal to use in reassessing your frequency.
Step 5 – Check Jasmine Leaves for Signs of Improvement
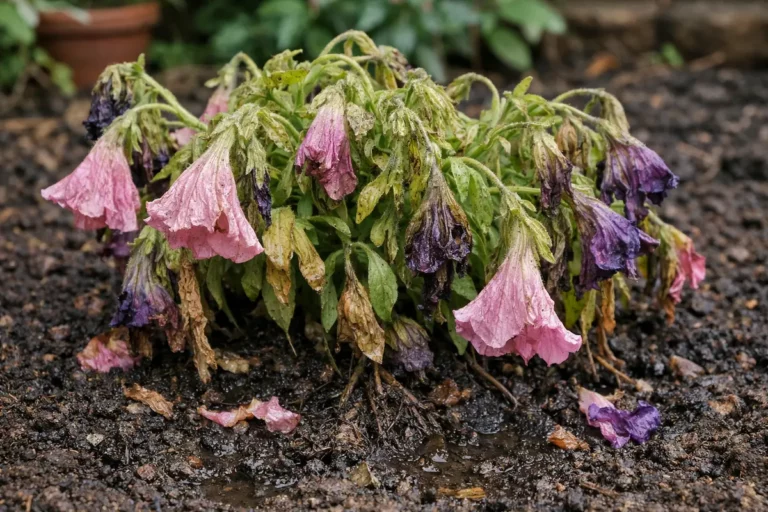
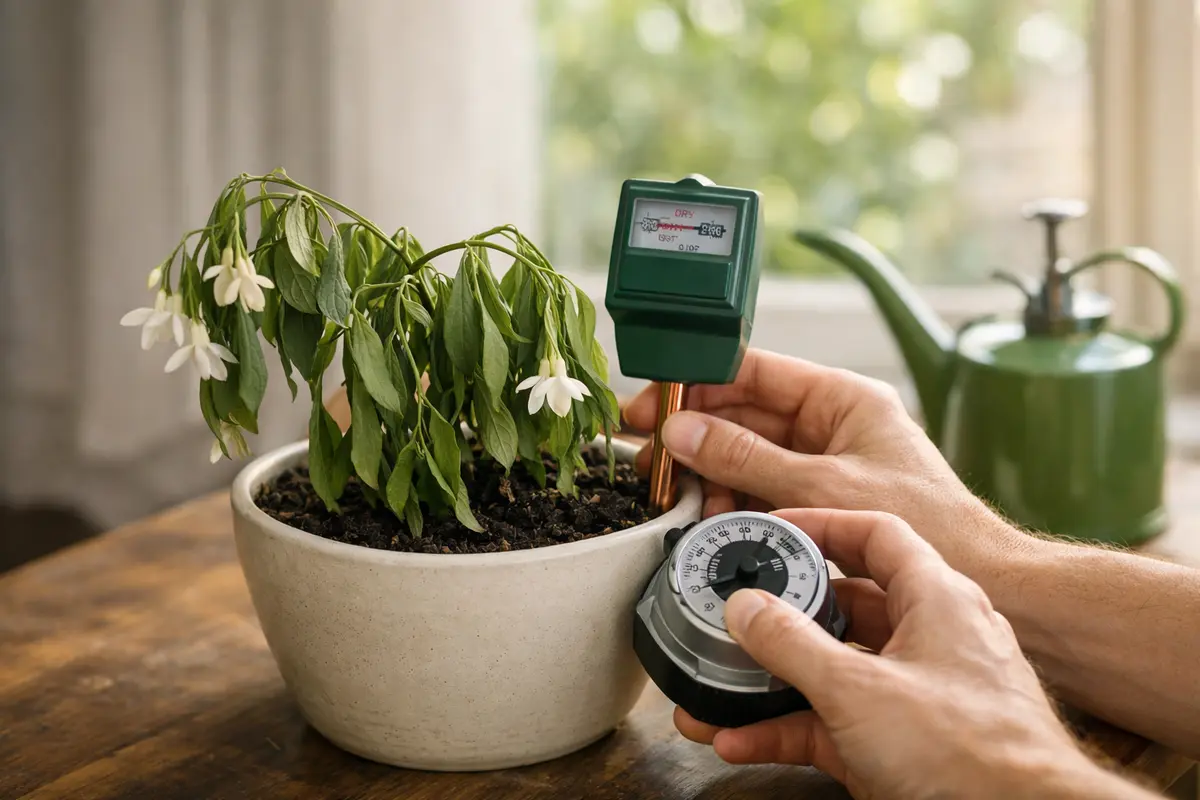
Start by checking the soil moisture level with your finger or a moisture meter. Insert your finger up to about two inches into the soil; if it feels soggy or overly wet, this confirms overwatering. Observe the leaves closely for signs of drooping or yellowing, and recheck the moisture level every few days to monitor recovery progress.
A fully recovered jasmine plant features upright leaves with a vibrant green color and firm texture, indicating that it has absorbed sufficient moisture. In contrast, early signs of the problem returning include leaves that begin to droop again or develop a soft, mushy texture—a clear indication that you might have reverted to overwatering. If you don’t see these supportive signs, re-evaluate your watering schedule to ensure it’s not overly frequent.
If the problem returns despite adjusting your watering habits, consider altering your potting mix to improve drainage, or repot the jasmine in fresh soil. In extreme cases where no improvement occurs, it may be necessary to consult a local gardening expert for further analysis and specific treatment options.
A fully recovered jasmine will display vibrant, upright leaves without any drooping or discoloration, indicating effective water management has been reestablished. The roots should also appear healthy upon inspection; check if they are firm rather than mushy, and look for signs of white, healthy tissue. If any yellowing persists despite other signs of improvement, it may indicate additional stress that requires further intervention. Signs like new leaf growth can signal recovery, while spots or wilting may require digging into potential underlying issues such as pests.
If the drooping returns, particularly if the soil feels soggy again, it’s time to consider transplanting into dryer, better-draining soil. Many gardeners overlook the importance of soil composition, which can significantly influence water retention. If a well-draining potting mix isn’t helping, switching to a more suitable blend with additional perlite or sand could make a significant difference. A quick review can also reveal any compacted roots that might be stifling your jasmine’s recovery, necessitating repotting for improved vitality. Always look for signs of improvement closely and be ready to adapt your strategy based on what you observe; flexibility is crucial in nurturing delicate plants like jasmine, especially during recovery periods.
FAQ
How long will it take for my jasmine to recover after overwatering?
Recovery can take anywhere from a few days to a few weeks, depending on the severity of the overwatering damage. Observe your jasmine closely for new growth; this is a key indication of recovery. If the leaves begin to upright themselves again, that’s a further indicator that recovery is progressing positively. Once the plant stabilizes, you can expect visible changes within ten to fourteen days.
Should I remove affected parts of my jasmine plant?
Yes, if you notice leaves that remain yellowing or wilting after correcting the watering issue, it’s best to snip them off. This action helps redirect energy from damaged foliage to new growth. Always use clean pruning shears to prevent any potential contamination that can lead to additional issues. Ensure you cut back only to healthy tissue to promote rejuvenation of the plant without hindrance.
What signs indicate that my jasmine will not recover?
If the roots appear mushy and the plant shows no signs of improvement after a week, it indicates that root rot may be set in, and recovery may be unlikely. In such cases, you might need to consider repotting or propagating healthy cuttings instead. Look for any signs of blackened roots—those sections are unlikely to revitalize and should be removed to encourage new growth from healthier root sections. Make sure to allow established roots to dry slightly as they recover, keeping them healthy for optimal growth.