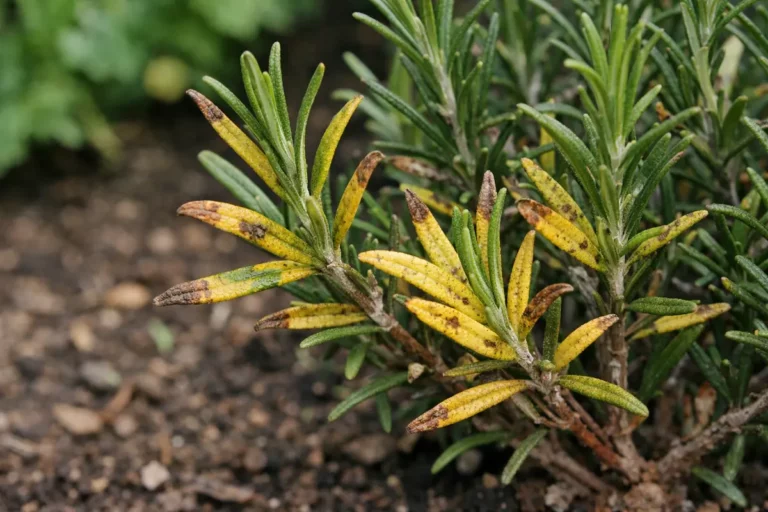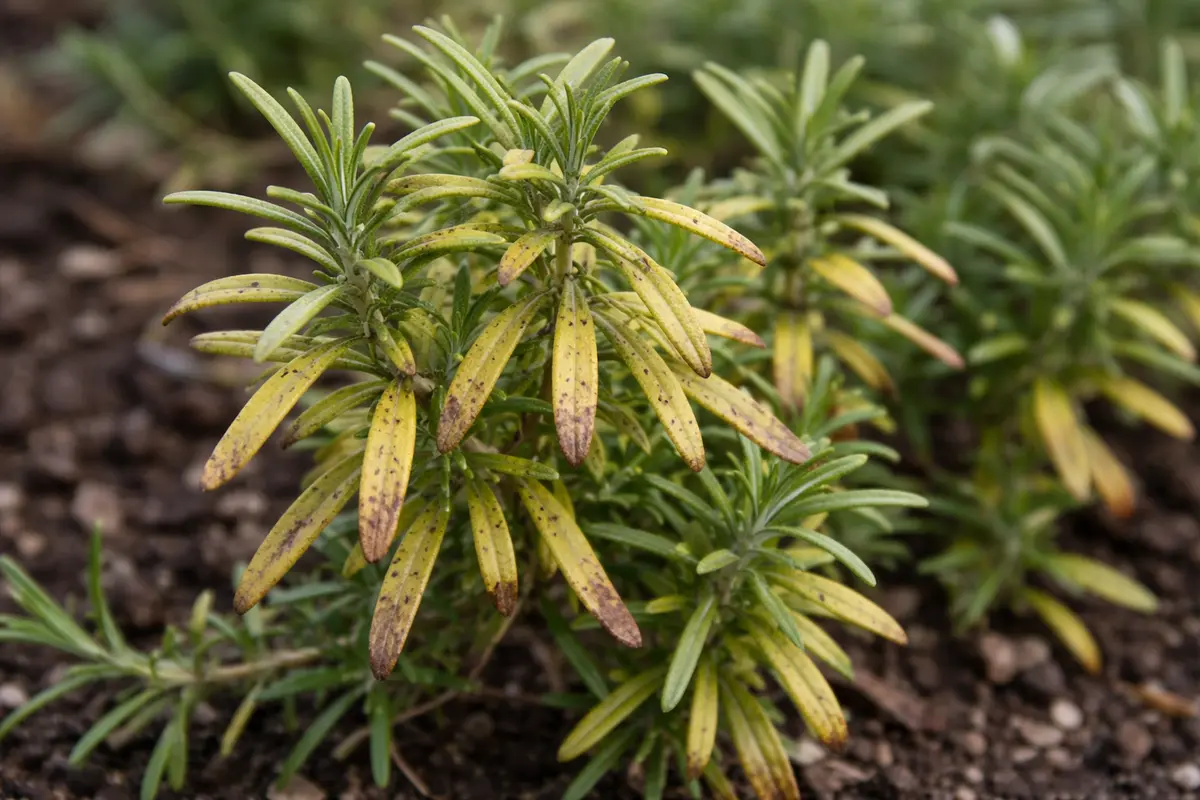
You may notice that your rosemary plant’s leaves are turning yellow during the colder months, which is why you need to know why are my rosemary leaves turning yellow in winter. This yellowing is usually a result of stress from colder temperatures or poor soil drainage, leading to damage in the foliage. If left unaddressed, the problem can worsen and weaken the plant, but you can still fix it by adjusting watering practices and improving drainage. Act now to inspect the roots and monitor temperature conditions regularly for the best results.
Step 1 – Trim Yellowing Rosemary Leaves Promptly
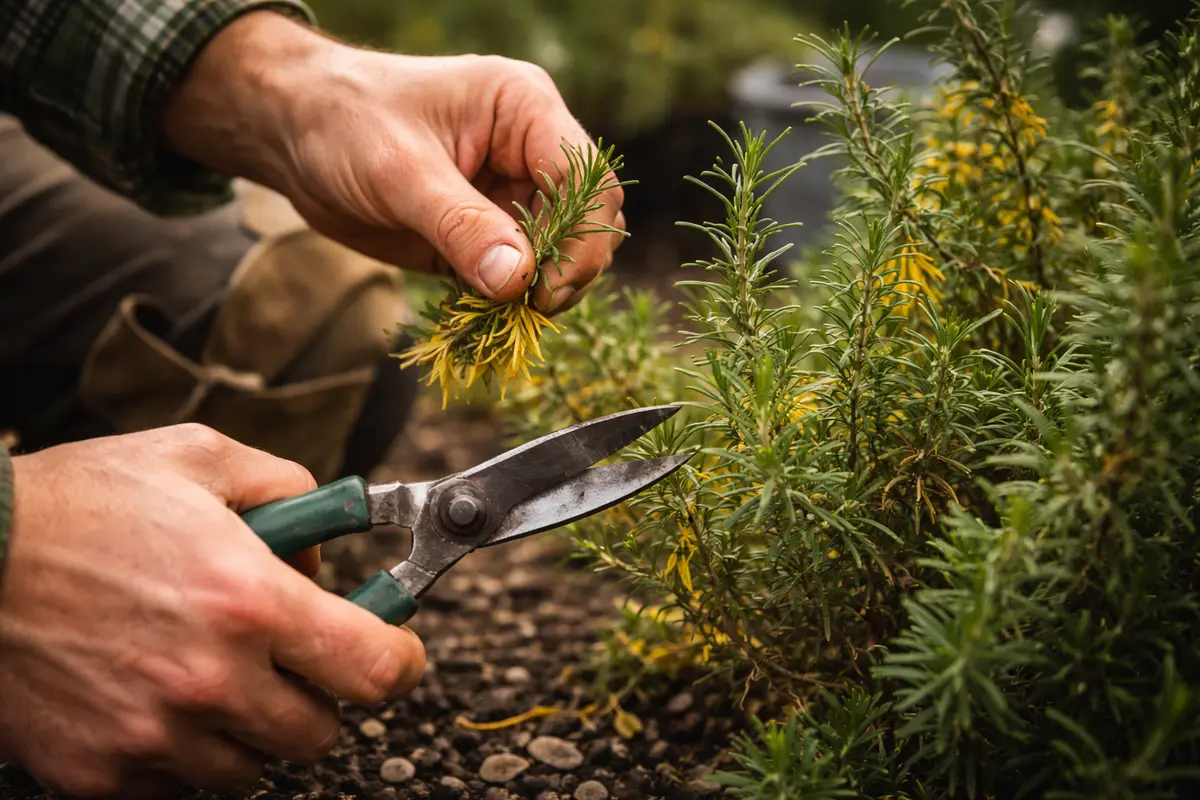
Begin by cutting away any yellowing leaves from your rosemary plant using clean, sharp pruning shears. You should see the overall appearance of the plant improve, looking tidier and potentially healthier within a day. This immediate action helps reduce the stress on the plant, allowing the remaining green leaves to thrive and contribute more effectively to the photosynthesis process. If you notice excessive yellow leaves, trim back approximately one-third of those affected to stimulate recovery.
Removing yellow leaves is critical because it encourages the plant to direct its energy towards healthy foliage rather than supporting dying parts. Rosemary is sensitive to moisture loss and stress during winter, and yellow leaves indicate they are not photosynthesizing effectively, which can lead to further decline if not addressed quickly. By trimming the affected leaves, the plant can redirect nutrients to healthy areas, bolstering its chances for recovery and new growth. Be vigilant about making clean cuts at the base of each yellowing leaf; this prevents potential disease transmission and allows the plant to recover more efficiently.
A common mistake gardeners make is to wait too long before trimming yellow leaves, thinking they will recover naturally. For instance, noticing the change weeks ago yet delaying means the plant continues to struggle unnecessarily. Consequently, if this step is postponed, you risk significant foliage loss, making recovery harder for your rosemary. If the yellowing has progressed, check for any soft, mushy spots among the healthy leaves, as these can indicate deeper problems that require further intervention. If you see any brown or black spots forming on the remaining leaves, it’s crucial to increase your vigilance and reassess the plant’s conditions to prevent worsening health. Additionally, utilize sterilized scissors to minimize the risk of introducing pathogens as you prune.
Step 2 – Examine Soil Quality for Rosemary Health Issues
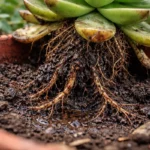
Inspect the soil’s moisture level and drainage quality around your rosemary. If the soil feels overly saturated or compacted, it may lead to root stress, visible through yellow leaves. You will see a reduction in yellowing if you improve soil quality and drainage by loosening it and adjusting your watering habits. Consider using your finger to probe the top few inches of soil; if it feels wet, hold off on watering to avoid exacerbating root rot, which could cause even more yellowing. In cases where the soil is dry an inch down, consider an immediate, but measured, watering session to refresh the plant.
Healthy rosemary requires well-draining soil to prevent root rot, especially in winter when the plant is less active. Excess moisture can suffocate roots, leading to nutrient deficiencies and the characteristic yellowing. Good soil conditions help maintain the appropriate moisture balance, allowing roots to breathe and uptake nutrients more efficiently. If you’re growing in a pot, ensure that there are adequate drainage holes, and think about mixing in perlite or sand with your soil to enhance drainage—this can significantly improve overall plant vitality. Corners of the pot where water collects can lead to decay; therefore, rotating the pot periodically can also help avoid over-saturation of one particular side.
If the soil emits a sour smell as you evaluate it, this indicates potential rot or unhealthy conditions. In such cases, you should repot the plant into fresh, well-draining soil to rejuvenate its growth environment. Alternatively, if your rosemary’s roots appear healthy but are still yellowing, consider that it may be a light deficiency or nitrogen shortage that you’ll need to address next instead. Weak sunlight during winter months can also stifle the plant’s vigor—place it near a bright window or under grow lights for additional support. Make sure to observe the soil condition weekly; if you see any crusty residue on the surface, it could indicate excessive salts, prompting another soil change to rejuvenate your rosemary.
Step 3 – Provide Nutrients to Revive Aging Rosemary
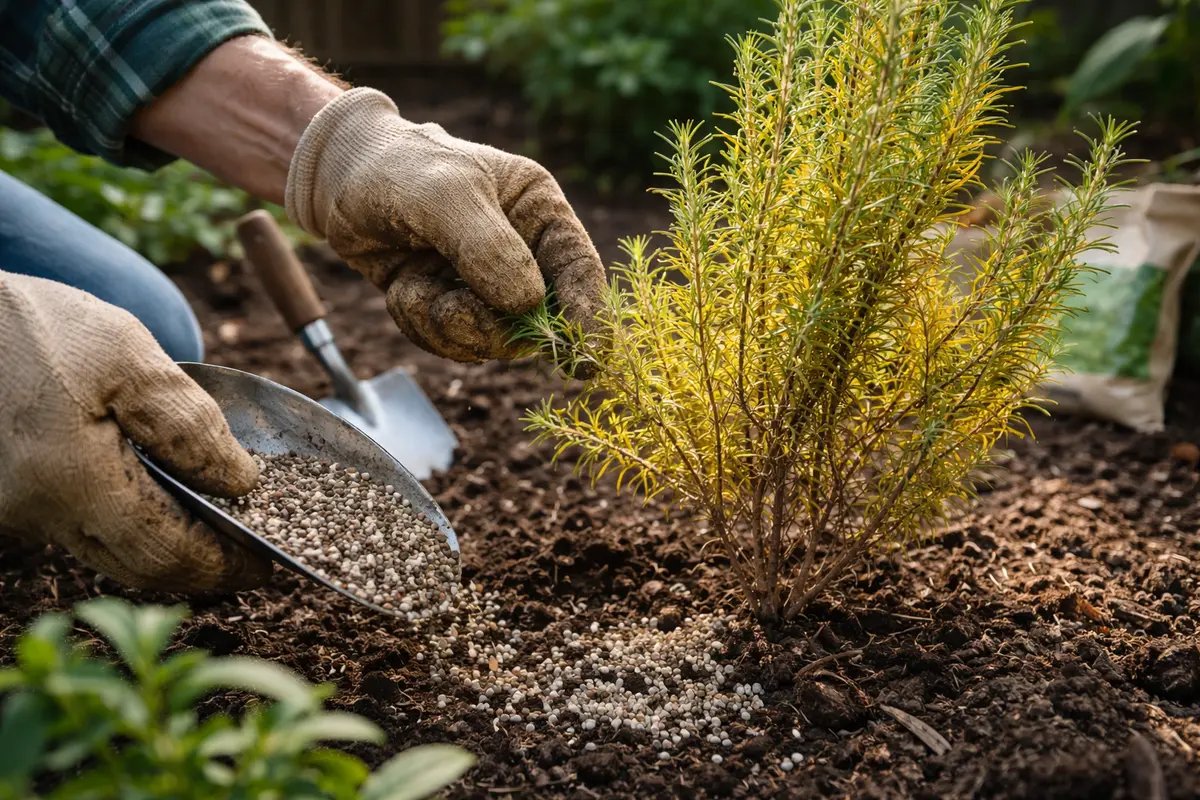
Apply a balanced fertilizer designed for herbs to your rosemary plant, following package instructions for dosage. You should notice an improvement in leaf coloration, with green hues becoming more vibrant and fewer yellowing leaves, typically within a week. Ensuring that your rosemary receives proper nutrients is crucial for its health during the challenging winter months when the soil nutrients can be rapidly depleted. A careful approach in fertilizing can enhance the plant’s ability to recover without risking root damage. If yellowing persists despite fertilization, adjust the dosage slightly as may be needed, but always adhere to recommended guidelines to avoid burning the roots.
Nutrients like nitrogen, phosphorus, and potassium are essential for rosemary’s recovery and growth, especially when it’s stressed. Weak or yellowing foliage can be a sign that your plant is lacking these critical macronutrients, particularly in winter. Fertilization not only provides the necessary elements but also revitalizes the plant’s metabolic functions, encouraging it to produce healthier, greener leaves. Watch how the overall structure of the plant becomes sturdier as you nourish it, noting any new shoots that may appear as a sign of successful fertilization.
A common pitfall is over-fertilizing, which can lead to salt build-up in the soil and further stress the plant. Apply fertilizer carefully and observe how your rosemary responds. If the yellowing does not improve after the recommended dosage, consider reducing your watering frequency, as overly wet soil can hinder nutrient absorption and exacerbate the yellowing during the winter months. This is especially important if you notice any crusty soil surface or signs of burnt leaf tips, suggesting too much fertilizer concentration. Also, remember to fertilize only when the plant is actively growing; fertilizing during dormancy can lead to nutrient lockout, making any recovery efforts ineffective. Always give the fertilizer time—at least one week—before making further adjustments.
Step 4 – Shield Rosemary from Cold Winter Weather
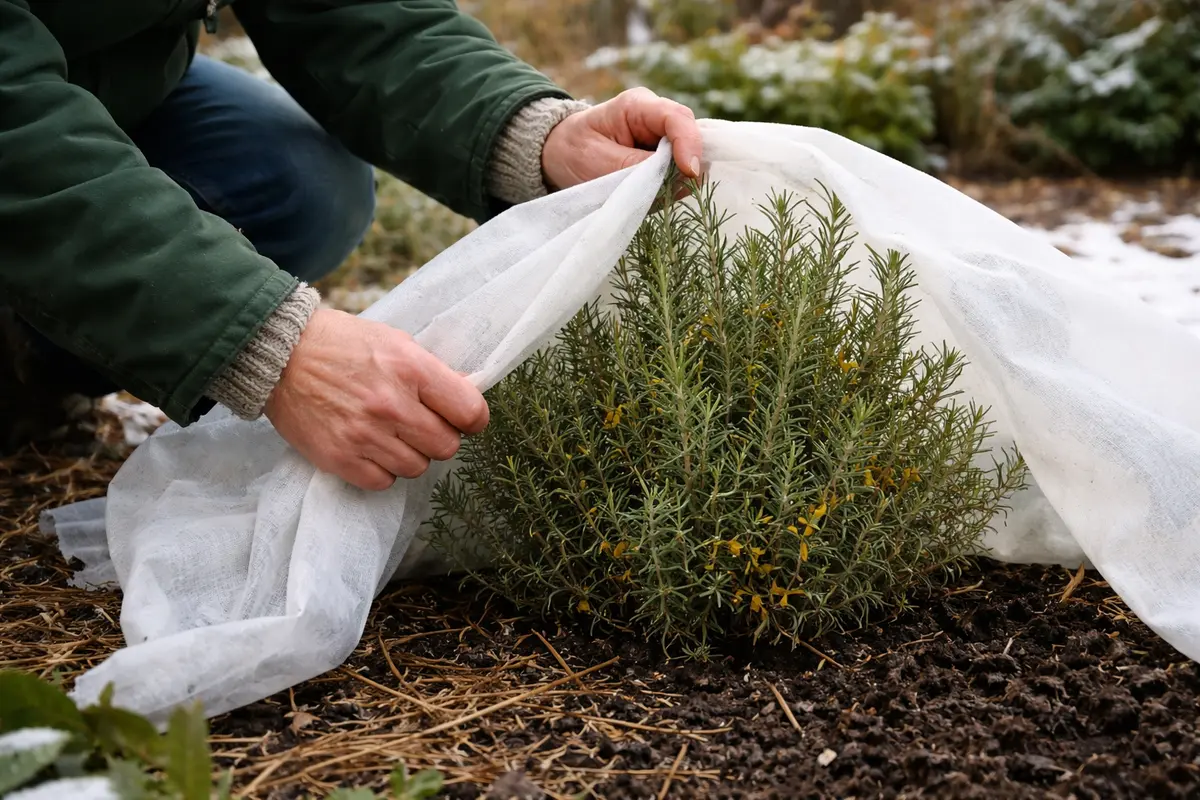
Cover your rosemary plant with burlap or a frost blanket during particularly cold nights, ensuring that it is adequately protected from harsh elements. This protection will help maintain warmth and reduce the risk of freezing, leading to a healthier winter experience for your plant. Implementing this habit can significantly reduce stress on the plant, allowing for continued growth and vigor even in colder conditions. Additionally, if your rosemary is in a pot, consider bringing it indoors on extremely cold nights to avoid any potential frost damage.
Cold temperatures can cause significant stress for rosemary, which generally thrives better in milder winter climates. By shielding the plant from harsh winds or frosts, you reduce the risk of cellular damage leading to yellowing leaves and other detrimental effects. It also helps maintain a more stable soil temperature, benefiting root activity during winter. Observe the specific temperature patterns in your region; if nighttime temperatures drop below 20°F (-6°C), covering the plant is crucial to prevent irreversible damage. You might also want to create a windbreak with straw or other organic material that could help buffer against biting breezes during the plant’s most vulnerable months.
In some regions, especially those with unforeseen temperature drops, night covers are more critical. If your rosemary is in a pot, consider moving it to a protected location, such as against a wall or in a sheltered nook, which can provide additional warmth and reduce exposure to chilling winds. Likewise, if you find your plant is too exposed, think about planting it in a location that receives some shelter from harsh winds during winter. Monitoring forecasts can help you anticipate necessary protection days ahead, especially if unseasonably cold weather is predicted. If frost warnings arise, do not hesitate to act quickly; the survival of your plant could hinge on just a few extra degrees of warmth.
Step 5 – Inspect Rosemary Foliage for New Yellowing Each Week
Start by checking the soil moisture level and ensuring the pot has adequate drainage. Observe the rosemary leaves for any signs of greening or new growth; healthy stems will feel firm and stand upright. Recheck these conditions every few days to see if the leaves improve or if yellowing persists.
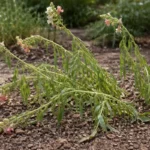
A fully recovered rosemary plant will display vibrant green leaves with a strong, aromatic scent, while early signs of the problem returning will include a duller color and a softer, drooping texture. Pay attention to the base of the stems; if they appear mushy or discolored, this may indicate root rot returning. If the leaves are yellowing but the stems remain firm, the issue may still be water-related.
If the yellowing returns despite following the steps, consider repotting the rosemary in fresh, well-draining soil to combat potential root issues. Additionally, adjust your watering schedule to allow the plant to dry out more between waterings, and ensure it receives sufficient light. If problems persist, inspect for pests or diseases that may require intervention.
A recovered rosemary should show vibrant green leaves and possibly even new growth if your care strategies have been effective. Conversely, if the leaves begin to yellow again or wilt, this may indicate that either the watering routine needs adjusting or that pests like spider mites could be present. Early detection of these issues allows for faster intervention and helps prevent a recurrence of yellowing. Be particularly attentive to the undersides of leaves, where pests often hide; using a magnifying glass can assist in spotting tiny spider webs, which signal a mite infestation. Additionally, check for any discolored spots or webbing, as these could signal other pest issues needing immediate attention.
If you notice yellowing returning despite your efforts, examine the plant for pests like spider mites or aphids, which can stress the plant even in winter. This stress often appears as a cluster of yellow leaves at the tips or edges. Other potential reasons could be inadequate sunlight; make sure your rosemary still receives sufficient light during winter. If the plant has been properly maintained but sudden yellowing occurs again, it may be time to inspect the roots for diseases or consider repotting in fresh soil to ensure optimal growing conditions have been restored. Look for signs of root rot, such as a foul odor or mushy roots, which can be confirmed by gently removing the plant from its pot for a quick assessment. This thorough inspection and log-keeping will provide invaluable data about your plant’s health variations over time.
FAQ
How long does it take for rosemary to recover from yellowing leaves?
Typically, after addressing the issues causing yellowing, rosemary takes about one to two weeks to show clear signs of recovery. You might see new green growth and healthier leaves if your corrective actions were successful, indicating that the plant is rebounding effectively and that the stress factors have been mitigated. Regular monitoring during this period will help confirm its health trajectory.
Can yellowing leaves on rosemary spread to other plants?
Yellowing leaves are usually not contagious but can indicate underlying issues like root rot or nutrient deficiency that affect the garden environment. It’s wise to monitor surrounding plants for similar symptoms, as they may also be experiencing related stress factors due to similar environmental conditions. Ensure that your plants all receive adequate care to minimize the chance of cross-issues.
Should I remove all yellowing leaves from rosemary immediately?
Yes, removing yellowing leaves as soon as possible helps redirect the plant’s energy toward new growth. This practice prevents the plant from dedicating resources to damaged foliage, ultimately improving its health and resilience. Carefully assess each leaf’s viability to ensure that only the dead or dying foliage is removed, leaving the healthy parts to thrive further. If you encounter reluctance to prune, remember that this step is essential for the plant’s recovery.