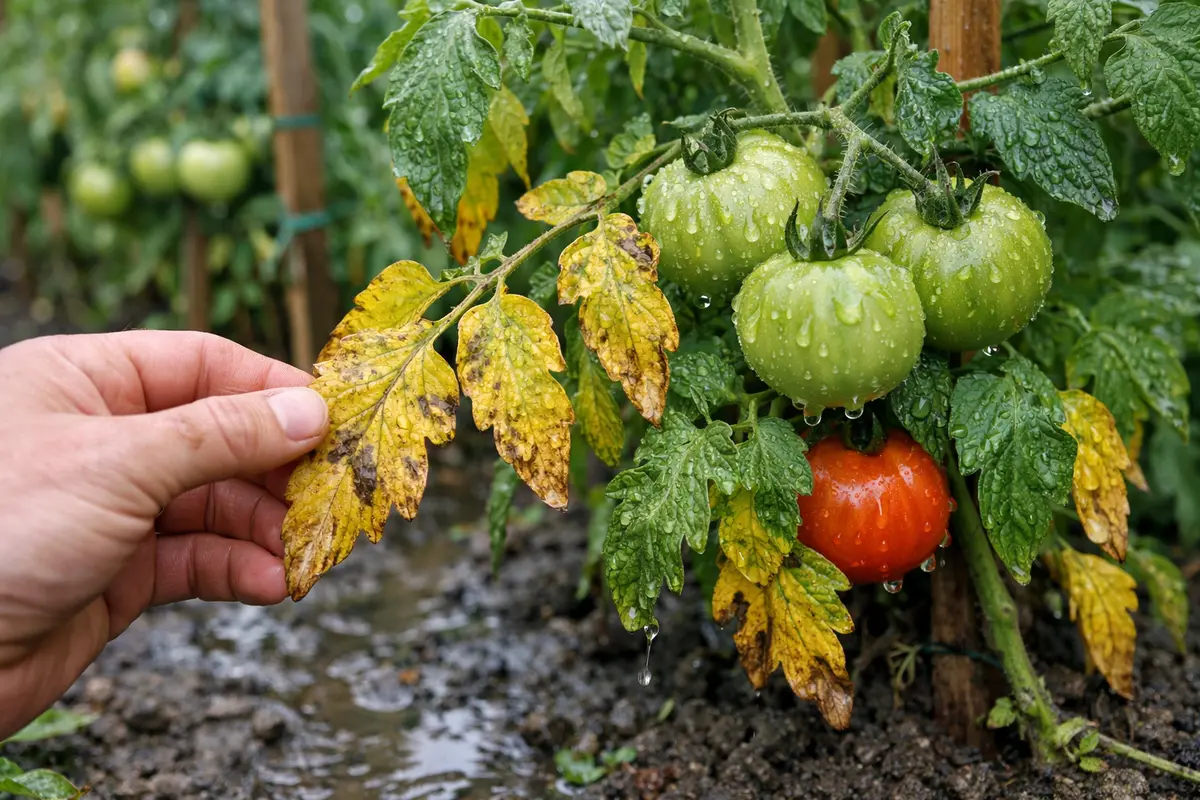
How to fix yellow tomato leaves after heavy rain becomes urgent when you notice fresh damage spreading after watering or after a cold night. If you wait, the decline continues; the damage can spread further, and recovery takes longer to achieve. Start by removing the worst affected growth right away, then check the roots and correct the cause before the next watering.
Step 1 – Stop Yellow Tomato Leaves After Heavy Rain Immediately
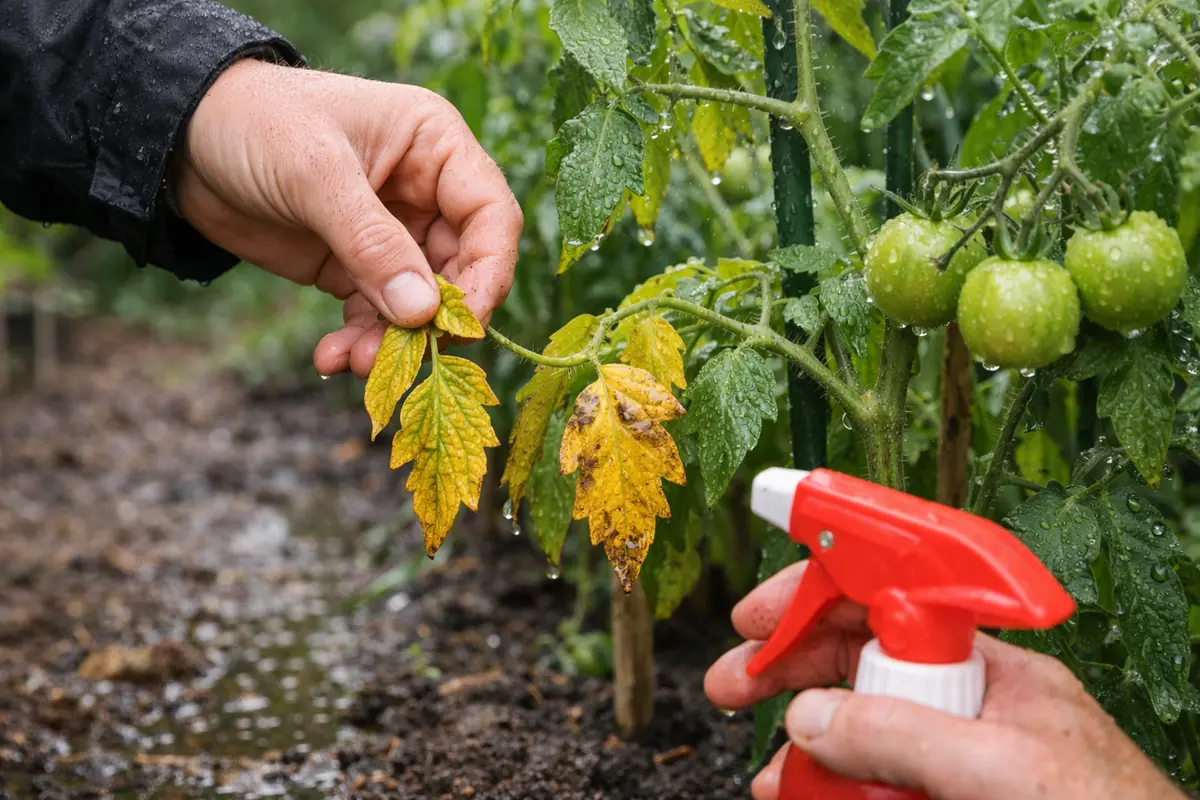
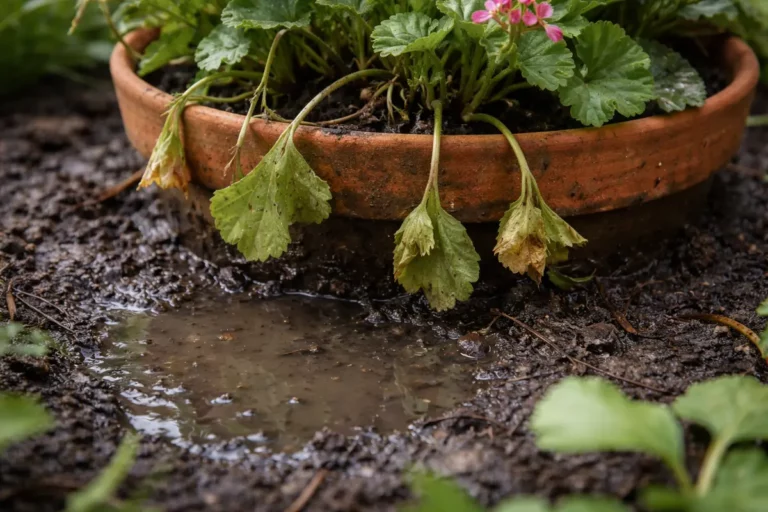
Begin by gently removing any severely affected leaves from your tomato plants. This will help to reduce the stress on the plant and prevent the spread of potential diseases that could thrive in the damaged tissue. After this action, you’ll observe that the plant appears less cluttered, allowing healthier leaves to benefit from increased light exposure. The goal is to maintain the overall vigor of the plant while facilitating its natural recovery process. Expect to see a noticeable difference; the removal of unsightly and unhealthy leaves helps shift the plant’s focus to nurturing its remaining leaves.
Removing yellow leaves instantly reduces the plant’s energy consumption, directing its resources toward maintaining healthier foliage. The root systems of tomato plants struggle when they absorb excessive water, leading to root rot and subsequent leaf discoloration if not addressed quickly. This foliage clean-up is beneficial not just for aesthetics; it optimizes the plant’s health by minimizing environments where pests and fungal infections thrive, safeguarding your garden. When performing this task, observe the overall condition of the plant to identify if additional actions are necessary, such as supporting droopy branches.
A common mistake at this stage is to hesitate or delay the leaf removal, thinking that the plant will magically rebound. This often leads to further yellowing and systemic issues. It’s crucial to use clean, sharp scissors to prevent cross-contamination between plants, which can exacerbate any existing conditions. As you assess the plant, pay close attention to any water-soaked or mushy areas that may require additional trimming. If you notice drooping stems or wilting foliage in other parts of the plant, it’s a signal that systemic stress may be present, warranting immediate intervention. By swiftly attending to the damage, you increase the chances for healthy growth to resume sooner. If you notice a continued decline despite taking action, consider a consultation with an expert gardener as a precaution against severe issues.
Step 2 – Identify and Correct the Cause
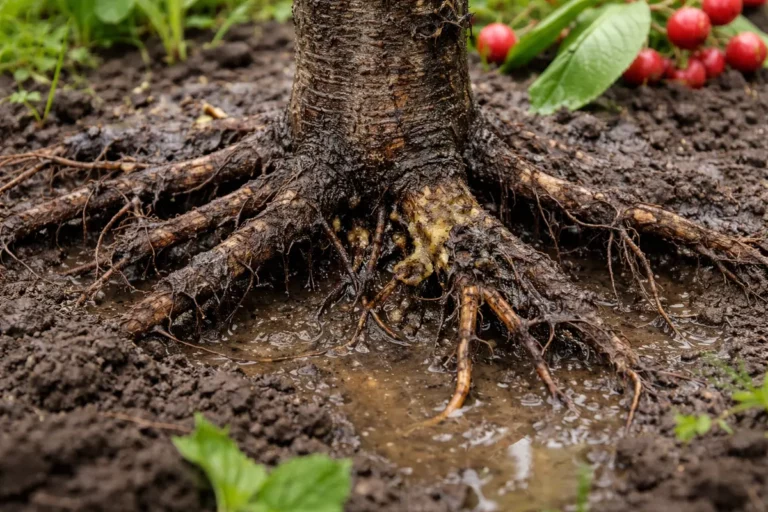
Next, inspect the soil for drainage issues and address them immediately. If the soil feels overly saturated or waterlogged, it’s essential to improve drainage by aerating the soil or relocating the plant to a more suitable spot. When aerating, use a garden fork to gently poke holes in the soil, allowing trapped air to circulate and excess moisture to disperse effectively. Aim to create at least 6-8 holes per square foot, each about 6 inches apart, which ensures adequate aeration. You should observe that the soil around the roots begins to feel more even and crumbly rather than compacted and dense. This change promotes healthier root systems and overall plant vigor.
Improving drainage is crucial because waterlogged soil deprives the roots of oxygen, causing them to become less effective at nutrient absorption. The yellow leaves are a visible symptom of this oxygen deprivation and resultant nutrient deficiency. If you can effectively address the water retention, including insights on watering humid weather that map to the same mechanism, issue, the overall health of your plants will typically begin to recover shortly after. Additionally, implementing a drip irrigation system or ensuring proper spacing between plants can help maintain moisture balance without a risk of waterlogging. Aim for a spacing of 18-24 inches between plants to encourage airflow and reduce excess humidity around the foliage.
If your tomato plants are planted in clay-heavy soil that retains too much water, consider replacing it with a more draining medium or incorporating organic matter like compost. This improves soil structure and allows for better aeration. Aim to blend in at least 30% compost with your existing soil to enhance drainage capabilities significantly. Be aware that if you notice an unpleasant, sour smell in the soil, it indicates a more serious issue, often resulting from anaerobic conditions, that may require immediate action to amend. If the problem persists beyond your efforts, it may be necessary to consult with a local extension service for soil evaluation. Keep in mind that two weeks after making these corrections, you should start seeing signs of improvement in both leaf color and overall plant vigor.
Step 3 – Restore Plant Health
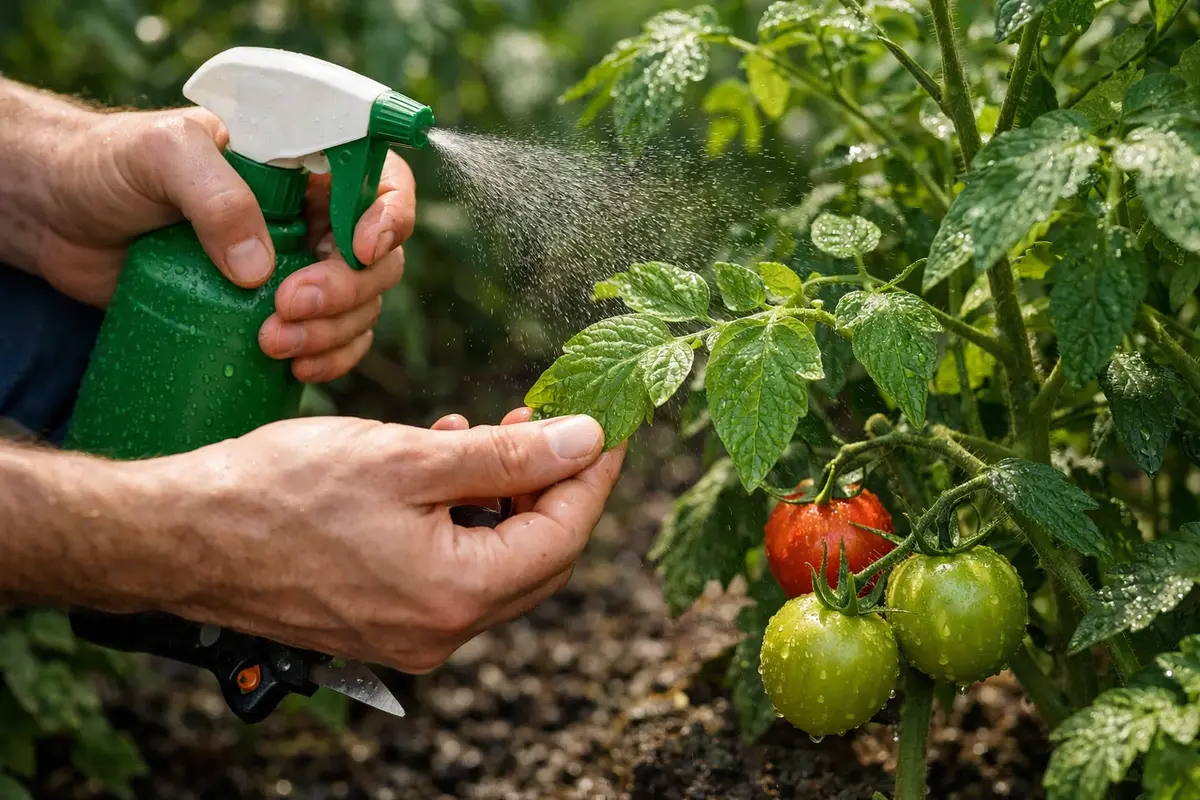
Keep follow-up care steady and let the plant recover over the next few days without rushing fertilizer. You should see new growth that stays clean and firmer stems as recovery progresses. For fertilization, introduce a balanced blend, such as a 10-10-10 NPK formulation, only after the plant has had time to stabilize—typically after about a week of recovery. This ensures that the plant does not become overwhelmed with nutrients, aiding in recalibrating its health.
Giving it time to settle and not rushing fertilization during the first week of recovery is essential. New growth should return cleaner over the next few days, typically about a week after initial interventions. Older damage may persist, yet the trend should improve, reflecting the firming up of existing leaves and stems. Noticing an increase in the number of healthy leaves indicates the plant’s gradual return to nutritional balance.
Providing a nutrient boost helps compensate for past deficiencies caused by poor root health. As they recover, you should also see an improvement in their overall growth structure; plants will appear fuller and taller, and flowering may resume, indicating a return to vitality. To maximize effectiveness, fertilize in the early morning or late afternoon to avoid burning roots due to heat exposure. Factors like soil temperature, moisture levels, and light conditions can greatly influence recovery time, so ensure that the plants receive adequate sunlight and warmth to facilitate this process. Aim to ensure that your plants receive at least six hours of direct sunlight each day. When fertilizing, stick to routine applications every two to four weeks, following the recommended dosages provided on the fertilizer packaging based on your chosen product. If yellowing begins to return after fertilization, check below the soil’s surface for signs of rot, adjusting your watering schedule based on the actual moisture content detected.
Step 4 – Prevent Yellow Tomato Leaves After Heavy Rain from Returning
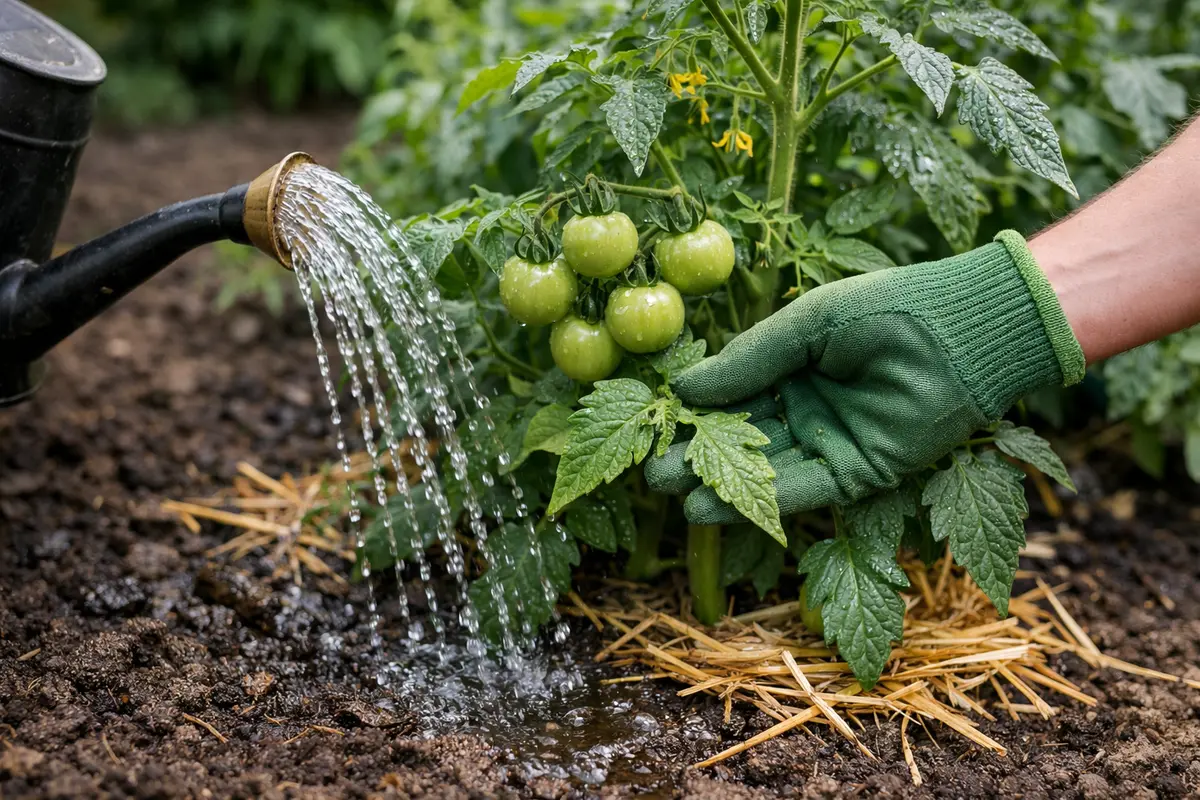
Reduce repeat flare-ups by making it a habit to inspect after watering and before humid weather. Keep it from returning by adjusting your watering schedule and monitoring before the next wet spell. Once conditions shift, repeat the same prevention checks established previously. The plant should bounce back faster each time the routine is in place, as you’ll be continually reducing environmental stressors.
Consistent monitoring of moisture and environmental conditions mitigates risks associated with heavy rains. For instance, elevating your planters slightly on a well-draining substrate or using self-draining pots designed specifically for tomato plants allows excess water to escape quickly after heavy rainfall. If planting directly in the ground, evaluate your site for drainage opportunities, such as graded soil to prevent pooling; this slight change can significantly enhance plant health and longevity, aiming to slope the ground away from the plant by at least 1 inch over 3 feet.
During rainy seasons, tilt the soil surface away from the base of the plants to create a natural drainage path. Furthermore, adding a layer of mulch, such as straw or wood chips approximately two inches deep, on top of the soil helps retain moisture levels more evenly while preventing excessive waterlogging. If the weather forecasts suggest intense, continuous rain, consider temporarily covering the plants with a tarp to protect them from extreme dampness, which minimizes the recurrence of water-related stress on the leaves. It’s also advisable to remove the tarp once the rain stops to ensure that the plants can breathe and receive necessary sunlight. This proactive approach is critical in maintaining your plants’ health through adverse weather conditions; it may also be beneficial to have a flexible covering plan in place for quick deployment in anticipation of heavy rain.
Step 5 – Monitor and Follow Up
Check again every 2-3 days over the next 7 days and watch the new growth for signs of improvement. You should look for cleaner new leaves, firmer stems, and no fresh damage or spreading stress. Observing the changes during this period is essential for determining the effectiveness of your mitigation strategies. If yellowing appears to be stabilizing, it indicates that your interventions are working.
Rechecking every 2-3 days for the next 7-10 days will enable you to keep an eye on new growth while watching out for fresh damage or any resurgence of old symptoms. If fresh damage appears or the problem returns, revisit the correction step and repeat the treatment. If the fix appears to be holding, with new growth maintaining its color and firmness, the ongoing regimen you’ve implemented is yielding positive results.
A fully recovered tomato plant will exhibit vibrant green leaves and steady growth, while the overall structure should appear robust and thriving. If you begin to see further yellowing after your treatment, it may indicate a return of moisture issues, pest interference, or even nutrient imbalance. Watch for any wilting, mottling, or spotting on the leaves, as these can signal underlying health issues that may require more in-depth intervention. If spotting is coupled with a sticky residue, it may suggest pest activity necessitating swift action. If your efforts to stabilize moisture and health do not yield results, consider consulting a local gardening expert or extension service for targeted advice regarding persistent issues. Observing the signs of distress regularly is vital, as some conditions may escalate in severity and necessitate professional intervention to save your plants. Maintaining a proactive stance ensures optimal conditions for recovery and growth.
FAQ
How long does it take for tomato plants to recover after yellowing leaves?
Recovery typically takes about one to two weeks after taking corrective actions, depending on the severity of the damage and environmental conditions. During this time, you should see new healthy leaves starting to emerge, which are key indicators that proper care measures are effective. Good moisture management and ensuring sunlight can both significantly enhance recovery timeline, often leading to quicker improvement in overall plant health.
Can yellowing leaves on tomato plants spread to other plants?
Yes, if the yellowing is due to a fungal disease or pests, it can indeed spread to nearby plants. It’s essential to monitor your garden closely and take prompt action if you notice signs of similar issues in your other plants. Isolation of affected plants may be necessary to prevent spreading, especially if you suspect that soil-borne diseases are present. Ensure thorough cleaning of tools and hands after handling affected plants to minimize cross-contamination risks; this may mean using a bleach solution to sanitize tools between uses.
Should I remove all the yellow leaves from my tomato plants?
Yes, remove all severely yellow or damaged leaves to prevent any potential spread of fungal spores. However, leave some healthy foliage intact to ensure the plant can continue to photosynthesize effectively and remain strong during recovery. Removing too much can stress the plant more than necessary. Ideally, aim to keep 50% or more of the healthy leaves during the initial trim while closely observing the plant’s response to any changes you’ve made. If you notice a rapid recovery, you can reassess for any further trimming if needed.