You may notice your collard greens exhibiting a troubling change when the cold weather sets in, which is why you need to know why are my collard greens turning yellow in cold weather. This yellowing indicates a nutrient deficiency, often exacerbated by low temperatures that stress the plants. If left unaddressed, this issue can worsen, leading to weakened plants, but fixing it is possible now by inspecting your soil, adjusting nutrient levels, and watering appropriately.
Step 1 – Inspect Collard Greens for Frost Damage
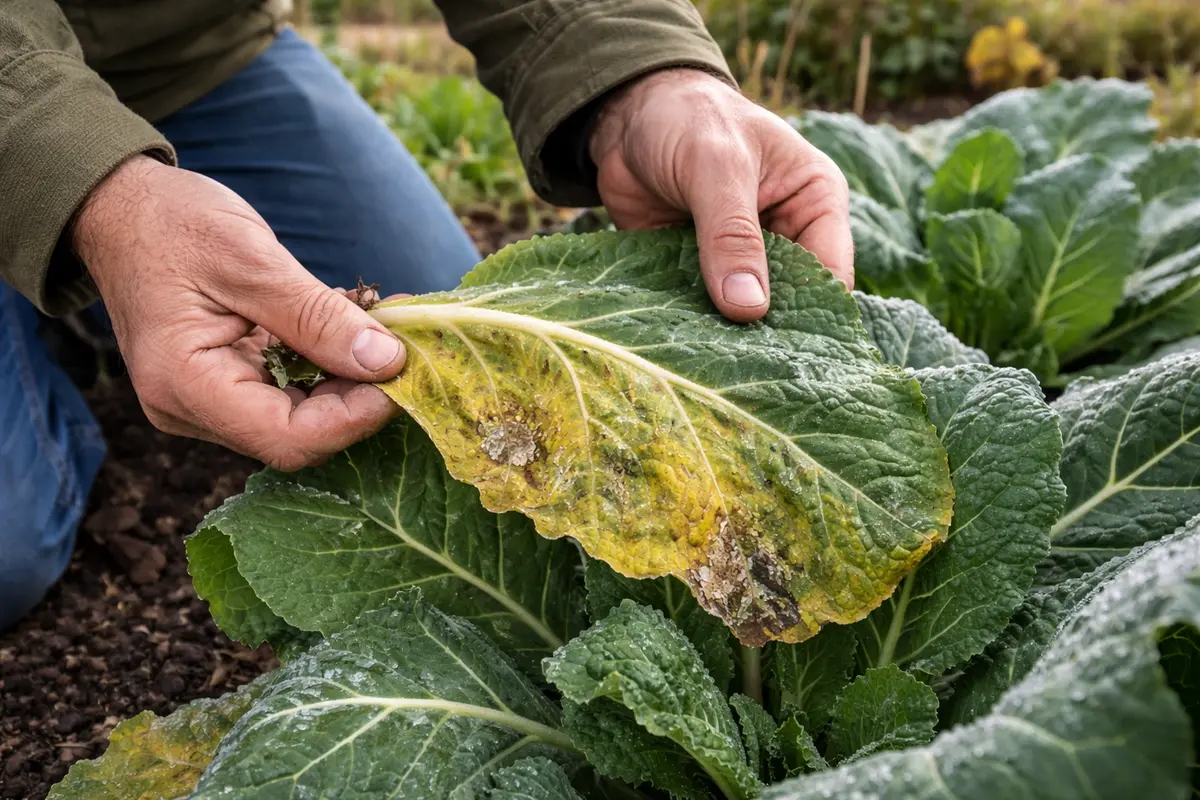
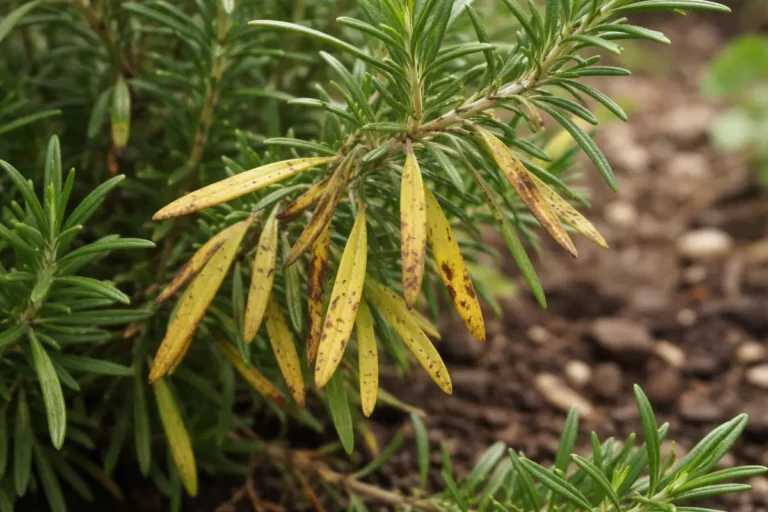
Inspect the leaves for any signs of frost damage immediately. Look closely for a wilted appearance, soft, mushy patches, or a water-soaked look that indicates cold stress. Focus on the tips and edges, as they typically show browning first, a clear indicator of frost impact. If you find distinct frost spots that appear translucent or somewhat clear, keep in mind that these may progress to dark spots if left unchecked; thus, regularly inspecting your plants after cold nights can help catch damage early before it worsens and becomes more difficult to manage.
Frost damage occurs when temperatures dip below 32°F (0°C), causing the plant’s cell walls to rupture. This damage directly impairs nutrient and water uptake capabilities, creating a cascading effect that leads to yellowing and decay if not addressed promptly. A visible glossy sheen on the leaves may indicate frost impact because these damaged areas can retain moisture, making it easier to miss the signs at first. After particularly cold nights, check for frost crystals still present on the leaves in the morning; their visibility may help gauge the severity of the frost event. If frost crystals remain for an extended time, it’s a clear sign to take action before any further damage occurs.
Gardeners often mistake frost damage for a simple nutrient issue, which can delay necessary actions. When identifying damage, if the tips of leaves have turned brown but the base remains green, frost could be the primary culprit. Delayed recognition can lead to further stress responses, evidenced by complete leaf drop or accelerated deterioration of the overall plant health. If new foliage emerges, curling or discoloring distinctly from the frost-damaged older leaves could indicate a secondary stress response that must be addressed urgently to avoid total loss. Should you discover frost damage, take precautions to shield the plants from future cold snaps, potentially using row covers.
Step 2 – Assess Your Soil Nutrient Levels
First, check the soil temperature around your collard greens. If it’s below 50°F (10°C), the cold conditions may be causing yellowing leaves. To correct this, cover your greens with row covers or mulch to help insulate the soil, which should lead to a improvement in leaf color within a few days as temperatures stabilize.
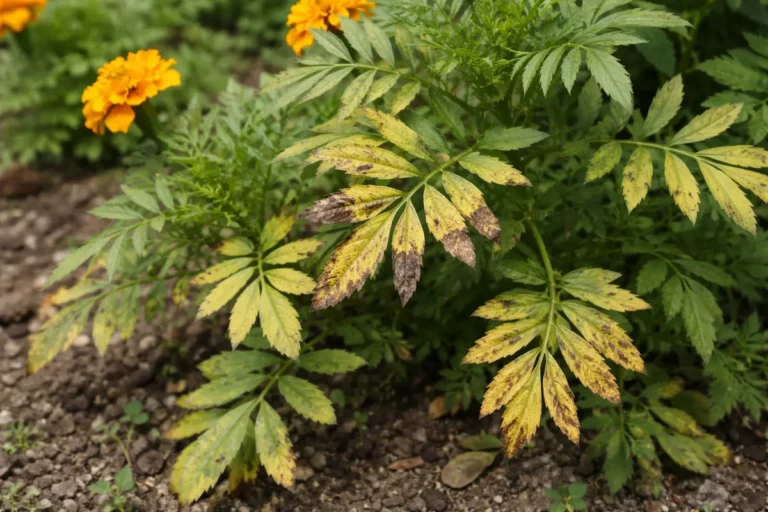
The yellowing of collard green leaves in cold weather often results from a lack of nutrient uptake by the roots, which struggle to function effectively in cooler soil temperatures. When soil is too cold, roots encounter slowed biochemical processes, inhibiting their ability to absorb essential nutrients, especially nitrogen. If your leaves are yellowing while remaining firm, it indicates nutrient deficiency rather than decay, so evaluate your soil temperature for further assessment.
If the leaves have a mushy texture in addition to yellowing, root rot could be at play instead of nutrient deficiency. In this case, check for overly wet soil conditions; if the soil feels waterlogged, reduce watering and improve drainage to help save the affected plants. This differentiation is crucial because while nutrient deficiency needs additional feeding, root rot requires addressing moisture levels first.
Collard greens require specific nutrients to thrive, and deficiencies—especially in nitrogen or magnesium—can cause pronounced yellowing. These issues become particularly concerning if colder weather has slowed nutrient absorption due to frost or excessively wet soil conditions. During prolonged cold spells, compacted soil exacerbates nutrient deficiencies; when soil becomes too wet, it can suffocate roots and lead to nutrient lockout, which diminishes the plant’s resilience. Therefore, assessing soil moisture before any amendments is crucial; if your soil appears overly saturated, it’s an indicator that root issues may already be developing and necessitating immediate attention.
If you notice your soil feels overly compacted or lacks organic material, adding compost to improve drainage and nutrient availability is advisable. Aim for a mixture that is at least 50% compost, ensuring it is well-aged and rich in nutrients; poor-quality compost can further depress nutrient levels instead of enhancing them. Additionally, while assessing moisture content, if the soil remains overly wet or saturated, allow it to dry out slightly before adding compost to avoid compounding root stress and potentially aggravating the situation. If past cropping has not included sufficient replenishment, expect significantly lower overall nutrient levels, making it essential to act immediately to revitalize your collard greens.
Step 3 – Fertilize Collard Greens for Nutrient Recovery
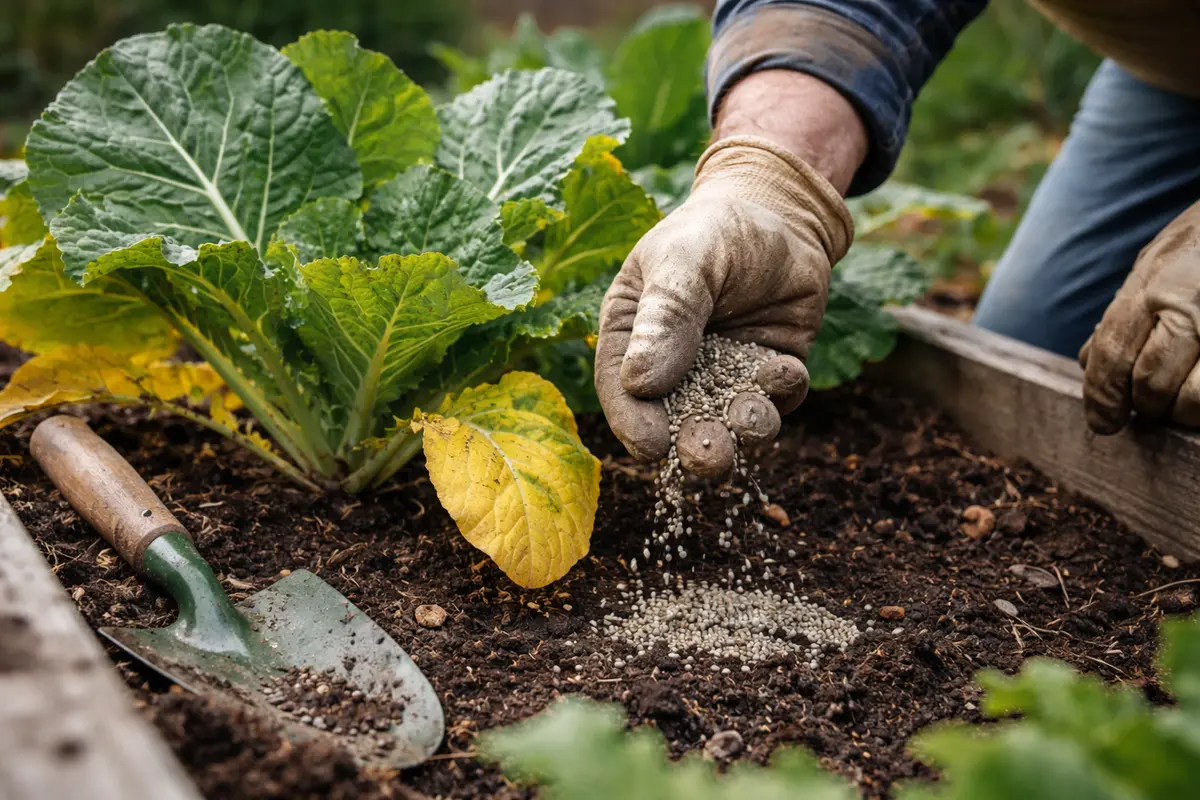
Apply a balanced fertilizer, such as a 10-10-10 mixture, directly to the base of the plants. Proper application should result in noticeable changes; within a week, you should see new green shoots emerging on previously yellow leaves, signaling successful nutrient restoration. Ensure the fertilizer is evenly spread across the soil without touching the roots, spacing it a few inches away to prevent the risk of burning your plants. Fertilizing in the late morning can also help improve sunlight absorption, enhancing the plant’s recovery while maximizing nutrient uptake efficiency.
Fertilizing helps replenish the nutrients lost during cold months and supports vigorous recovery growth. Fertilizers rich in nitrogen specifically target chlorophyll production; when roots receive essential nutrients, they can better support leafy growth and restore the plant’s overall health. The best time to fertilize is immediately following irrigation when the soil is moist since this enhances nutrient absorption and encourages quicker recovery. Indicators of initial success include a strong response in leaf color regaining its vibrancy or lush texture, showcasing that your plants are beginning to rebound positively from stress.
A common mistake at this stage is over-fertilizing, fueled by the belief that more nutrients will equate to quicker results. This approach can lead to nutrient burn, characterized by darker green edges paired with burnt tips on leaves—indicative of apparent stress within the plants. Stick strictly to the recommended application rates on the fertilizer package and closely monitor the plants’ health post-application. If after a week you notice little to no changes in color or growth patterns, it may be time to reevaluate the conditions both in the soil and the overall health of the plants; explore more intensive treatments or potential root problems.
Step 4 – Shield Plant from Cold to Prevent Yellowing
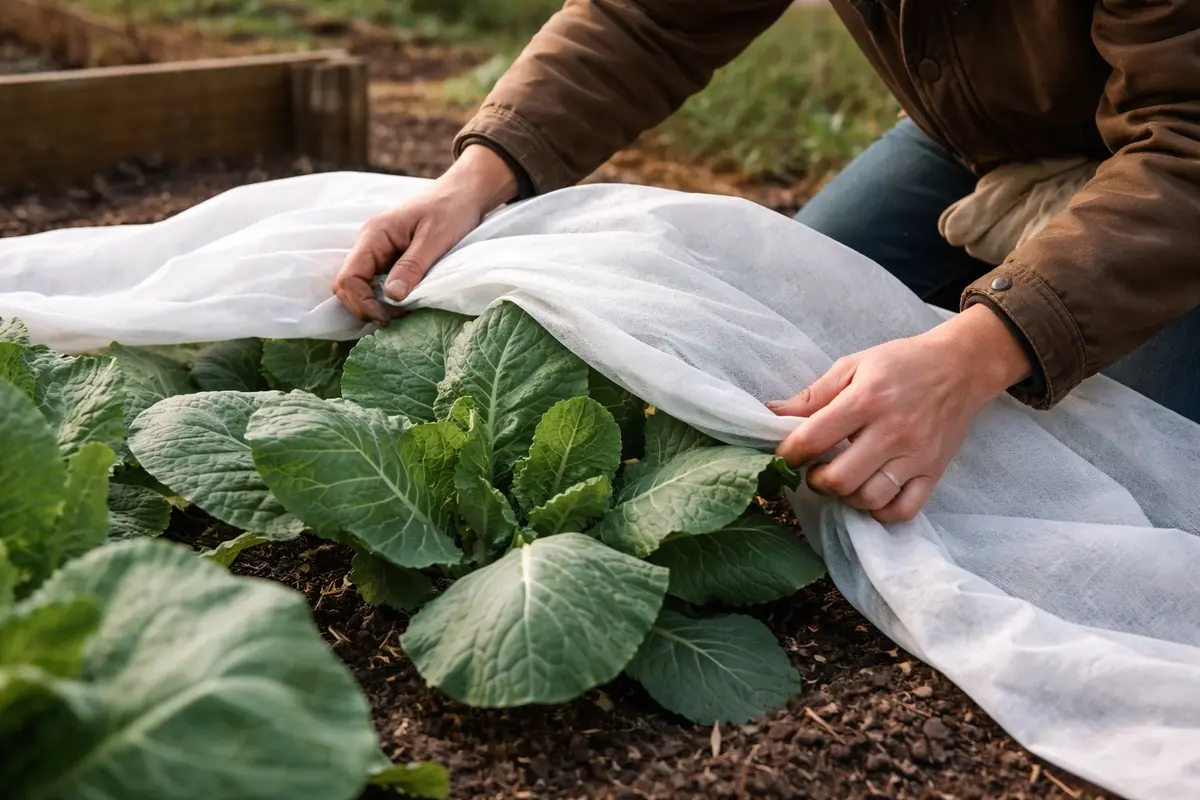
Cover your collard greens with row covers or blankets before nightfall if frost is forecasted. These protective measures ensure the plants remain healthier and exhibit reduced instances of yellowing, as they help maintain consistent warmth around the foliage. Use lightweight fabric to ensure sunlight can still penetrate while creating a beneficial microenvironment that warms the plants—it’s best to cover the greens before evening temperatures drop significantly, allowing them to retain heat throughout the night.
Cold weather stresses plants, causing them to use more energy reserves in survival efforts, leading to yellowing leaves as the plant may sacrifice lower foliage growth for survival. By covering the greens, you help maintain a moderately warmer microclimate, protecting the plants from frost and harsh winds that further exacerbate stress. On exceptionally cold nights, consider using a thermometer to monitor temperatures inside the cover, allowing you to determine when to add or remove layers based on real-time measurements in your growing environment to ensure optimum conditions. Container mixes that leach quickly can lead to stop drooping ferns during.
For gardeners in southern regions, where winter temperatures may not be as extreme, adjustments to your covering method may be necessary—lightweight materials that allow sunlight through while still providing protection can be more beneficial without suffocating the plants. In addition, if cold weather patterns persist in your area, investing in cold frames could become a more permanent solution for protecting crops from unexpected temperature drops or harsh conditions. Many new gardeners overlook precautionary protective measures, resulting in significant losses; remaining proactive is crucial, as it can differentiate between seasonal abundance and crop failures.
Step 5 – Look for New Growth After Treatment
Monitor your collard greens every few days for signs of new growth and overall leaf health. Look closely for fresh green shoots indicating recovery, typically within a week after implementing corrective measures. Focus on assessing leaf firmness and overall vibrancy; wilting or drooping can signal lingering nutrient issues if new growth does not appear within expected timeframes. Immediate responses directly after care actions can indicate whether the plants are repositioning themselves for health.
Indications of recovery include firm, bright green leaves and the emergence of new foliage. If new leaves develop but still exhibit some yellowing, it may point to ongoing nutritional needs that must be addressed further—monitoring these changes can help distinguish between simple recovery and potential complications. Even small changes, such as leaves regaining rigidity and returning to their natural sheen, indicate beneficial progress. Regular observation will reveal whether previous actions have led to a healthy response and expansion, or if further care is required for long-term vitality.
If you notice that new growth remains sluggish or yellowing persists, reassess soil moisture and nutrient levels regularly, particularly after rain events that may exacerbate already limiting conditions. Monitoring to ensure overzealous watering does not occur is vital; overwatering can lead to stress through compaction or root rot. If, after a couple of weeks, you observe no signs of recovery, consider adjusting your fertilization approach or investigating potential root rot; in more severe cases, replacing the soil or replanting may become necessary if soil quality remains poor following inspections for compactness or depletion.
FAQ
How long does it take for collard greens to recover from yellowing?
Typically, you can expect to see signs of recovery within a week after corrective measures, such as fertilizing or providing frost protection, have been implemented. However, the timeline for full recovery often hinges upon the severity of the initial damage; consistently providing warmth and keeping nutrient availability high can significantly influence how quickly the plants rebound. Regularly monitoring for new green growth becomes fundamental, as the speed and consistency of recovery indicators may vary considerably among collard greens.
Can yellowing spread to other plants in the garden?
Yellowing itself is not a contagious issue; however, it can indicate environmental stress that may impact neighboring plants if not managed effectively. Continuing to keep a close eye on conditions and addressing stressors promptly can prevent similar yellowing issues from arising in nearby plants. By maintaining balance throughout your entire garden, healthy plants will foster resilience against pests and diseases that often manage to invade stressed plants.
Should I remove the yellow leaves from my collard greens?
Yes, removing any severely yellow or damaged leaves will promote healthier growth among your collard greens. Trimming these leaves encourages the plant to direct its energy toward producing new, vigorous growth, rather than struggling to sustain unhealthy foliage. However, it’s essential to avoid excessive removal—aim to trim only leaves that are more than 50% yellowed or damaged, as over-trimming can introduce additional stress to the plant. Regular assessment and maintenance to refine balance through selective pruning will support sustainable growth moving forward.