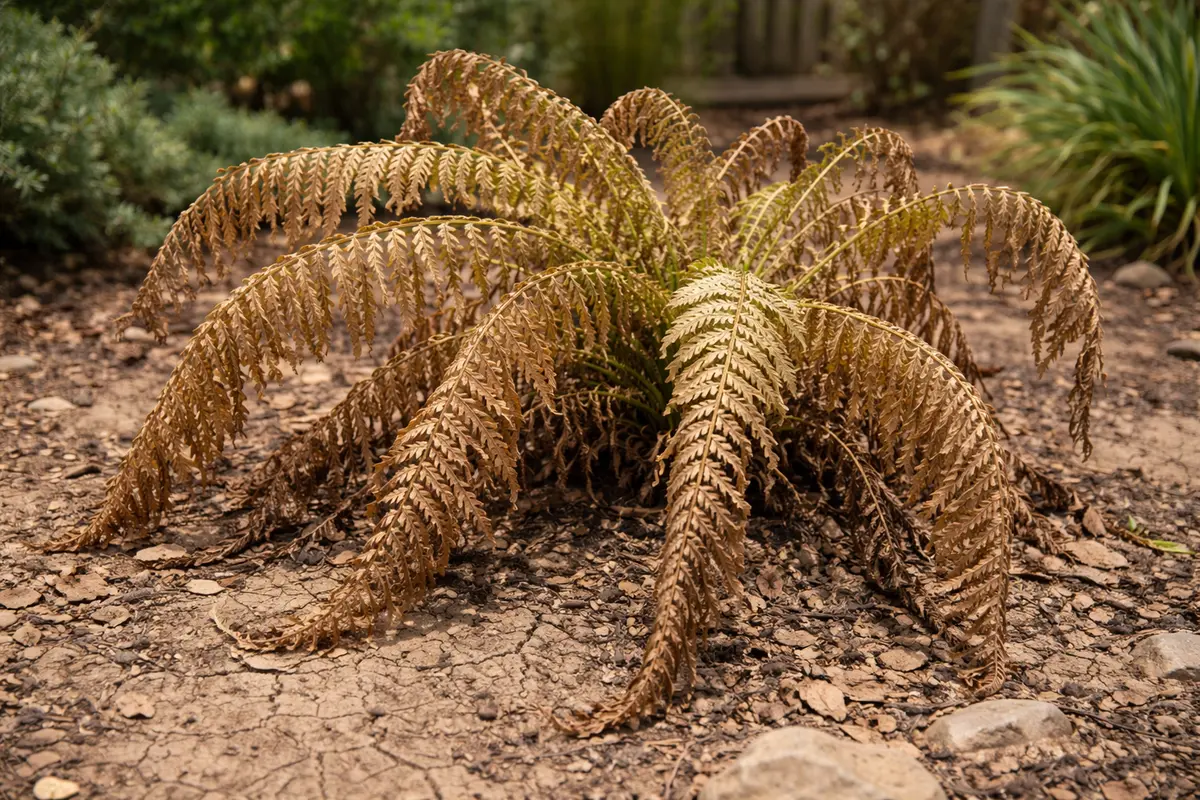
You may notice your ferns start to droop and lose their lush green color during the heat of the summer, which is why you need to know how to fix wilting ferns during dry summer months. This wilting often occurs because the plants are not receiving enough moisture, leading to discoloration and drooping leaves. If left unaddressed, this condition can worsen and weaken the plant, making recovery more difficult. Fortunately, it’s possible to revive them now by checking the soil moisture and adjusting your watering routine.
Step 1 – Water Wilting Ferns Immediately
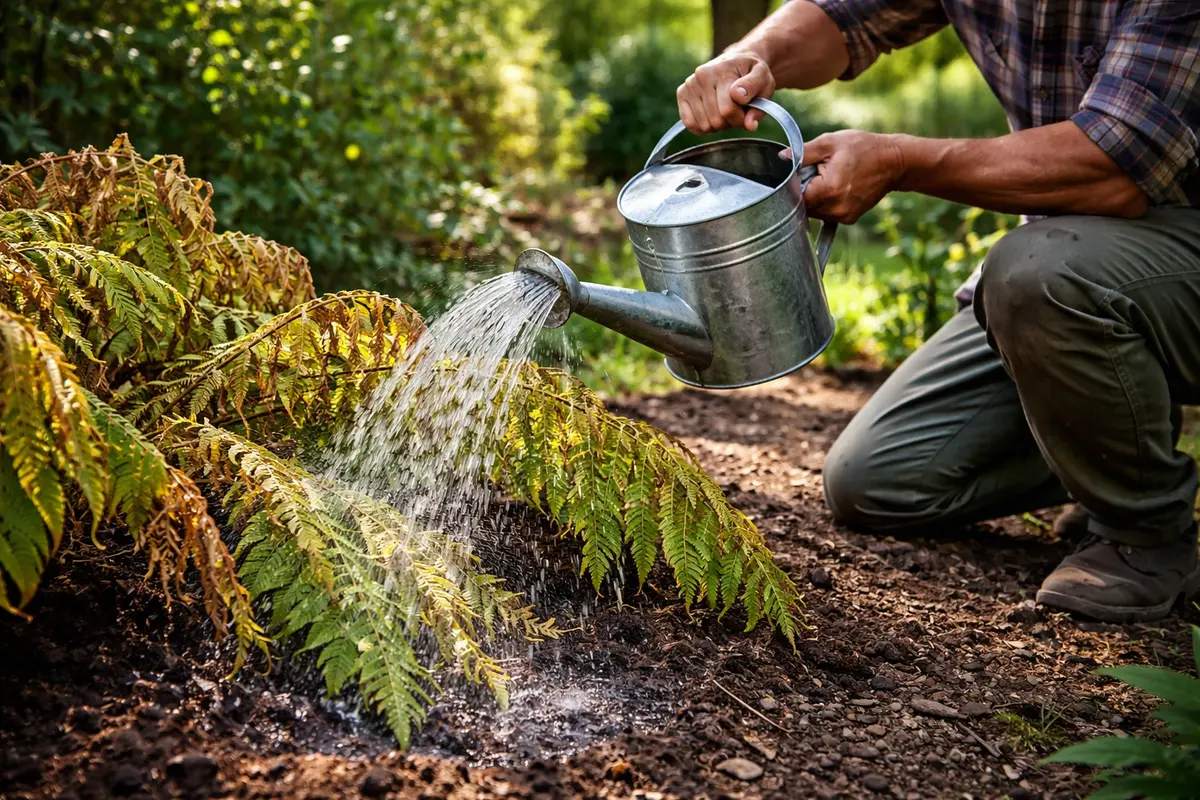
Water the ferns deeply to rehydrate the soil, aiming to saturate the top two to three inches. You will notice the leaves perk up within a few hours as the plant absorbs the moisture. If your ferns are in pots, apply about one gallon of water per fern; for garden beds, ensure that the equivalent moisture penetrates the soil down to at least six inches. This depth encourages root absorption, crucial for recovering from wilting scenery. If you notice that the leaves are still drooping after a few hours, rather than assuming adequate water is received, check how deeply the water is reaching. If the soil stays dry more than two inches down, consider repeating the watering process. A quick surface check isn’t enough; push your finger down until you feel resistance to truly know the moisture level.
Immediate watering can significantly ameliorate wilting ferns because it replenishes the water content in the soil. Keeping the soil adequately moist not only revitalizes the plant but also helps prevent further water loss due to evaporation, which is critical in dry conditions. For best results, consider using a watering wand to direct water gently at the base of the ferns, allowing the soil to absorb moisture gradually. This method also prevents oversaturation on the surface, which can lead to shallow root growth. Without quick intervention, the stress from dehydration can cause plant cells to collapse, leading to irreversible damage. Each drooping leaf signals cellular distress; hence, timely hydration acts against cellular collapse, restoring turgidity to the fronds. If you miss that critical window, the resilient cells may not recover fully, leading to further wilting. Aim to conduct this immediate watering step every 3 to 4 days in peak summer heat, particularly if rainfall is insufficient.
A common mistake during this time is applying water too sparingly or not reaching the root zone effectively. Ensure the water penetrates at least six inches below the surface, especially if your ferns are located in sandy soil that drains quickly. Observing brown, crispy leaf edges signifies the need for intensive hydration—address this promptly. If watering doesn’t yield immediate improvements within a few hours, check the soil moisture levels around the base of the plant. Use your fingers to gauge the soil; if it feels dry several inches down, reapply additional water until you reach that saturation level. Remember that under-watering can lead to stunted growth—if wilting persists despite repeated watering efforts, it may indicate a bigger issue like root rot or disease that requires immediate attention. In circumstances where the potting mix feels excessively dry, consider placing the pot in a basin of water for about 30 minutes to allow saturation without drowning the roots.
Step 2 – Analyze Sun Exposure Affecting Ferns
Examine the fern’s location and the light it receives throughout the day. You will find that adjusting the position or providing shade can immediately reduce leaf burn and minimize further wilting. Aim for a location that receives filtered sunlight or indirect light for at least part of the day; this will help safeguard against the intense drying effects of full sun exposure. If you notice that in the afternoon the sunlight is overly harsh, it could trigger immediate wilting, so make temporary adjustments to offer protection. For example, if you see direct sunlight hitting the ferns during the hottest part of the day—typically from 10 a.m. to 4 p.m.—consider moving them or installing shade cloth swiftly.
Ferns thrive in lightly shaded environments; exposure to direct sunlight can quickly cause excessive moisture evaporation from the leaves, exacerbating wilting. Prolonged sun exposure results in scorched leaves, effectively damaging their ability to photosynthesize. Identifying a suitable spot or providing temporary shade protects the leaves from the sun’s harsh rays and allows the plants to recover and maintain hydration. If it’s not feasible to relocate your outdoor ferns, consider using temporary solutions like an outdoor shade cloth or even a garden umbrella during peak sunlight hours. If you relocate your ferns to a shadier spot, watch for improved leaf appearance within 48 hours as moisture retention stabilizes and fronds start to regain their vibrant green color. Alternatively, consider the use of mulch around the base of the plant to create a cooler, more humid microenvironment. A layer of organic mulch—such as shredded bark or straw—can also help retain soil moisture and regulate temperature levels.
If the ferns are still wilting after relocating them to a less sunny spot, assess the soil quality to ensure it retains adequate moisture. In heavy clay soils, excessive water retention can lead to soggy roots, while sandy soils risk draining too quickly. For instance, if you find that your freshly watered ferns are still wilting in sandy soils, you should consider using a potting mix designed for ferns that retains moisture more effectively. Additionally, mixing organic matter such as coconut coir or pine bark will enhance moisture retention without suffocating the roots during dry spells. These quick adjustments are critical, particularly before your plants develop chronic wilting or long-term stress symptoms that could hamper their recovery. Monitoring for indicators like leaf droop in relation to weather conditions can provide insights into how well your ferns adapt to shifting temperatures.
Step 3 – Add Humic Acid to Revitalize Ferns
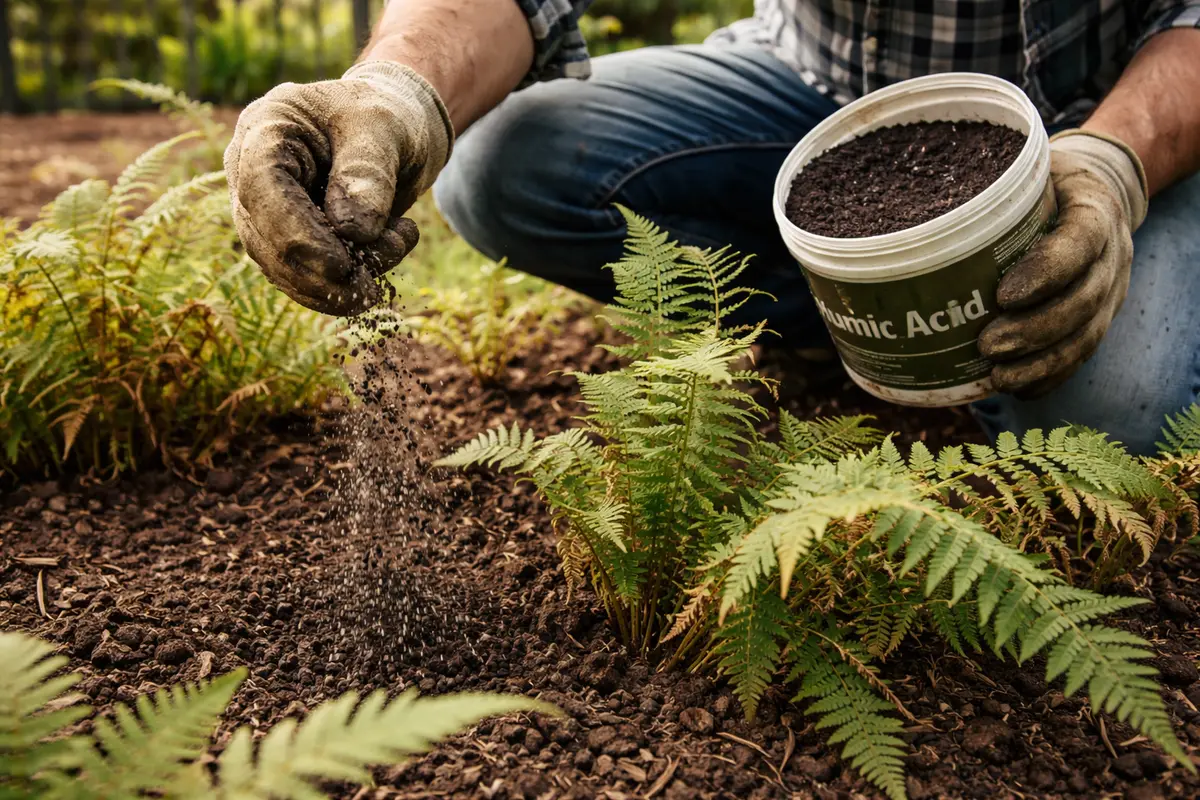
Mix humic acid into the soil around the base of your ferns to improve nutrient uptake and promote growth. Over the course of a week, you should observe an increase in new leaf growth as the plant begins to regain its vigor. Generally, applying about one tablespoon of humic acid per gallon of water will ensure that the mixture covers a broader area effectively. After mixing, water the soil again gently to help the humic acid permeate deeply into the ground. Ensure that this mixture is evenly distributed in the root zone to maximize nutrient absorption.
Humic acid acts as a natural soil conditioner, enhancing soil structure to facilitate nutrient absorption while retaining moisture. By improving aeration and permeability, it aids ferns in accessing nutrients more efficiently, a crucial aspect for recovering from wilting. When mixed into the soil, humic acid forms bonds that enhance nutrient uptake, ensuring your ferns receive the essential elements they need to thrive. As the humic acid integrates into the root zone, your plants significantly increase their resilience to drought stress. If your soil is particularly poor or compacted, and you notice slow recovery, consider repeated applications within that month to establish a better foundation for health. Look for visible indications of recovery, like the emergence of new fronds, within seven days as your plants respond positively to enhanced conditions.
A common mistake is to overapply humic acid without observing its effects on the plants first. If the ferns do not show visible signs of recovery after a week, reconsider your application amounts. Heavy applications can lead to nutrient overload, resulting in toxicity that may harm the plants. In such cases, consulting a local nursery or extension office for tailored advice could uncover other underlying concerns, such as the need for additional micronutrients. If your ferns are still exhibiting signs of wilting after one week, consider revisiting your overall fertilization schedule; sometimes, adjusting the timing of feeding can offer immediate benefits. A good maintenance routine for fertilization includes monitoring other elements like nitrogen or potassium levels, particularly if leaf yellowing accompanies wilting—the dual symptoms may hint at nutrient deficiencies.
Step 4 – Check Fern Leaves for New Wilting Signs
Inspect the fern leaves every few days for signs of wilting or nutritional deficiency. You should look for fresh growth and returning color, indicating that recovery is taking place. Signs of regrowth usually appear as small, vibrant fronds emerging from the base of the plant, a precursor to fuller foliage as the health of the plant improves. If those new fronds are still developing limpness, it can indicate inadequate watering or ongoing environmental stressors. Be vigilant about inspecting not just older fronds but also new growth for clues on overall health. Examine the leaf surface for any discoloration or spots; they can provide hints that require urgent action.
A healthy fern should display vibrant green fronds and show no signs of browning or limpness. If the leaves remain limp or develop further discolored patches, this signals that your plant may require immediate further intervention, such as adjusting watering frequency or considering additional soil amendments. Regular checks help ensure consistent moisture levels, which are vital for ongoing health. For instance, if your ferns droop again shortly after previously addressing their hydration, escalate by increasing your watering frequency; consider transitioning from weekly to bi-weekly check-ins during peak summer heat. Furthermore, if results are stagnant after addressing the wilting, thinking about your potting mix components—perhaps even introducing a dedicated fern feeder—may prompt improvements. If you’re still seeing poor growth despite these efforts, testing the pH of your soil may reveal it is too acidic or alkaline for optimal fern health.
If the problem returns despite your efforts, it may be necessary to consult a gardening professional for in-depth solutions. Inspecting your watering routine is key; if you are watering only once a week, this schedule might need adjustment based on the current high temperatures or sudden dry spells. Additionally, it is vital to monitor for potential pests. Pests like spider mites or aphids can exacerbate wilting conditions by sucking moisture from the leaves, ultimately stressing plant vigor. If wilting returns after addressing previous issues, further interventions may be required, which can include specific pest control treatments or even exploring disease impacts. If the plant continues to wilt or shows signs of pest infestation, seeking professional help sooner rather than later can prevent more severe damage across your garden. Keeping a log of water amounts and visible plant responses can be a practical tool to evaluate what is effective over time.
FAQ
How long will it take for my ferns to recover after watering?
Ferns often show improvement within a few hours of adequate watering, with noticeable perkiness returning as they absorb moisture. Complete recovery, including regrowth of new leaves, may take a week or longer depending on the severity of the wilting and the ongoing environmental conditions impacting the plants. Regular maintenance afterward can further expedite recovery, particularly with ongoing checks for pest issues or nutrient demands.
Can the wilting spread to other plants nearby?
Yes, if the wilting is caused by pests or diseases, there is a risk of spreading to nearby plants if not addressed promptly. Regularly checking all plants for signs of pests or diseases not only helps to safeguard your garden but also allows for quick action to prevent spreading. Particularly, pay attention to the undersides of leaves, as pests often hide there, leading to unnoticed infestations that can lead to broader garden issues.
Should I remove damaged leaves from my ferns?
Yes, removing severely damaged leaves can help the plant focus its energy on recovery. Pruning away any fronds that are entirely brown or limp promotes new growth and improves airflow around the healthy parts of the plant. This strategy also reduces the risk of fungal or bacterial infections that thrive in stagnant, moist conditions that can hinder overall plant health. After pruning, maintain a consistent watering schedule to allow new growth to establish effectively.