You may notice your pumpkin plants struggling when temperatures soar, which is why you might be wondering, “Why do my pumpkin leaves turn yellow during heat waves?” This yellowing is often a result of stress from excessive heat, leading to wilting and damage in the leaves. If not addressed promptly, this condition can worsen and weaken the plant, but you can improve the situation by checking their water levels and adjusting their environment to provide some relief.
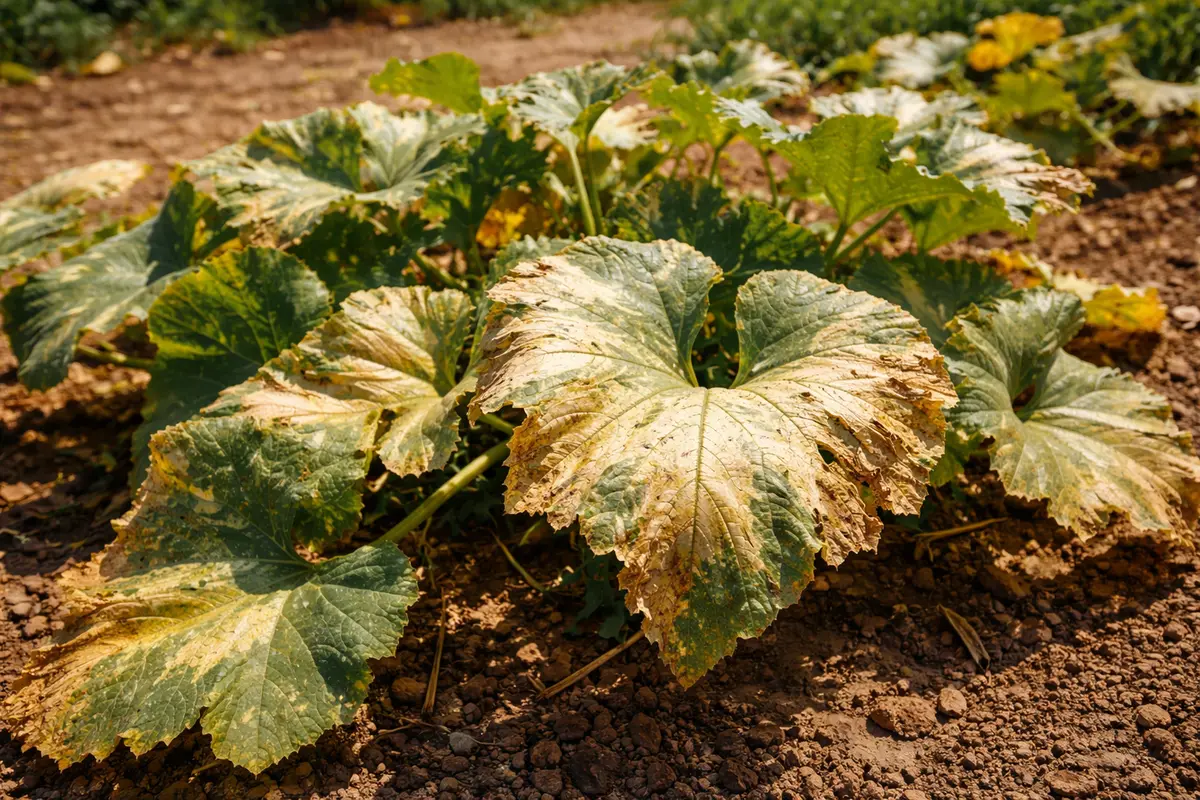
Step 1 – Inspect Pumpkin Leaves for Sunburn Damage
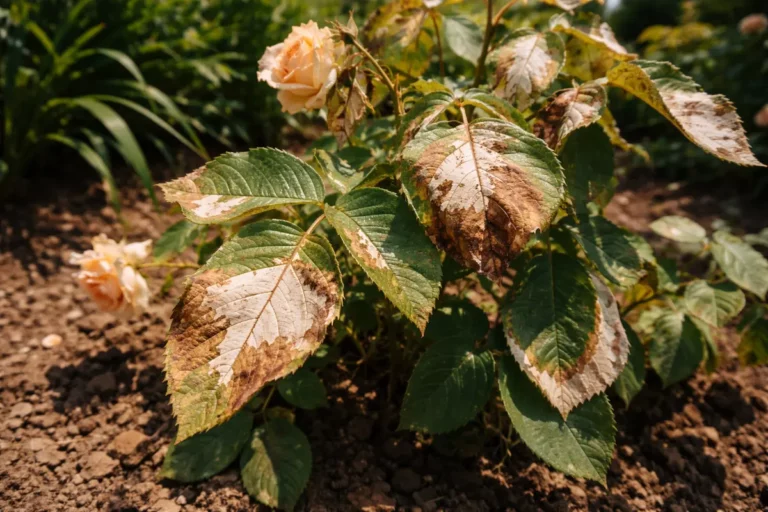
Check the pumpkin leaves for visible signs of sunburn or scorch. Within hours, you’ll notice the leaves are no longer wilting as severely, and some may even show a slight recovery in color. Look closely for areas where the leaf tissue has turned a bright yellow or white; these are signs of sunburn damage requiring immediate attention. A quick check ensures that damage can be managed before any permanent effects set in.
Performing this inspection is crucial because sunburn typically causes the leaves to dry out and become crispy. Left unchecked, this damage will worsen, leaving the plant more vulnerable to diseases and pests. Rapid action prevents the spread of the issue to other parts of the plant. For instance, if you observe a section of the plant that has rapidly crisped up post-sun exposure, it may correlate with a recent day of extreme heat rather than a gradual problem. In extreme cases, if the sunburn progresses, you may find large patches of leaf tissue dying off, reducing photosynthesis capacity.
A common mistake at this stage is focusing solely on removing the affected leaves without assessing the broader condition of the plant. If the leaves are dry and crispy but the stems still feel firm, this could indicate that water stress and heat exposure are the real culprits needing attention. Ensure your pumpkins are receiving adequate shade; experimenting with shade cloth can help diffuse harsh sunlight in the afternoons. If other leaves appear droopy or wilted, it signals the need for more immediate care strategies. Additionally, if left too long, this can lead to defoliation, severely impacting yield.
Step 2 – Diagnose Nutrient Deficiency in Pumpkin Plants
First, check the soil moisture levels around your pumpkin plants; if the soil feels dry several inches down, water thoroughly. By providing consistent moisture, you will likely see a reduction in the yellowing of the leaves within a few days as the plants begin to recover from water stress.
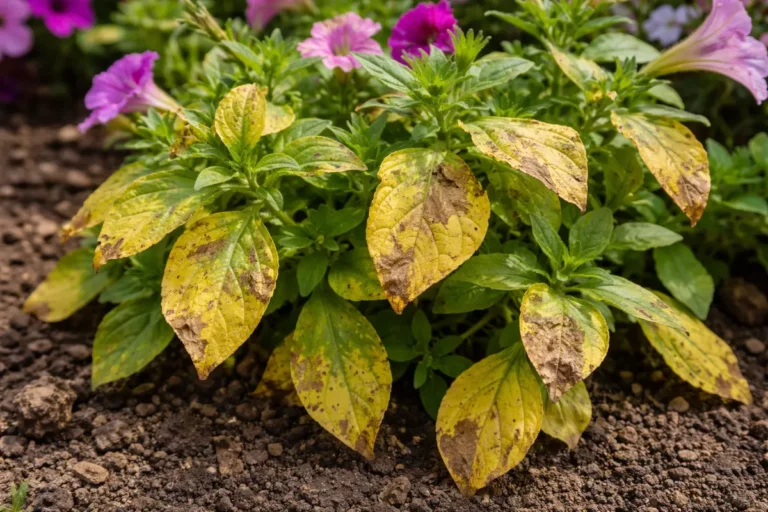
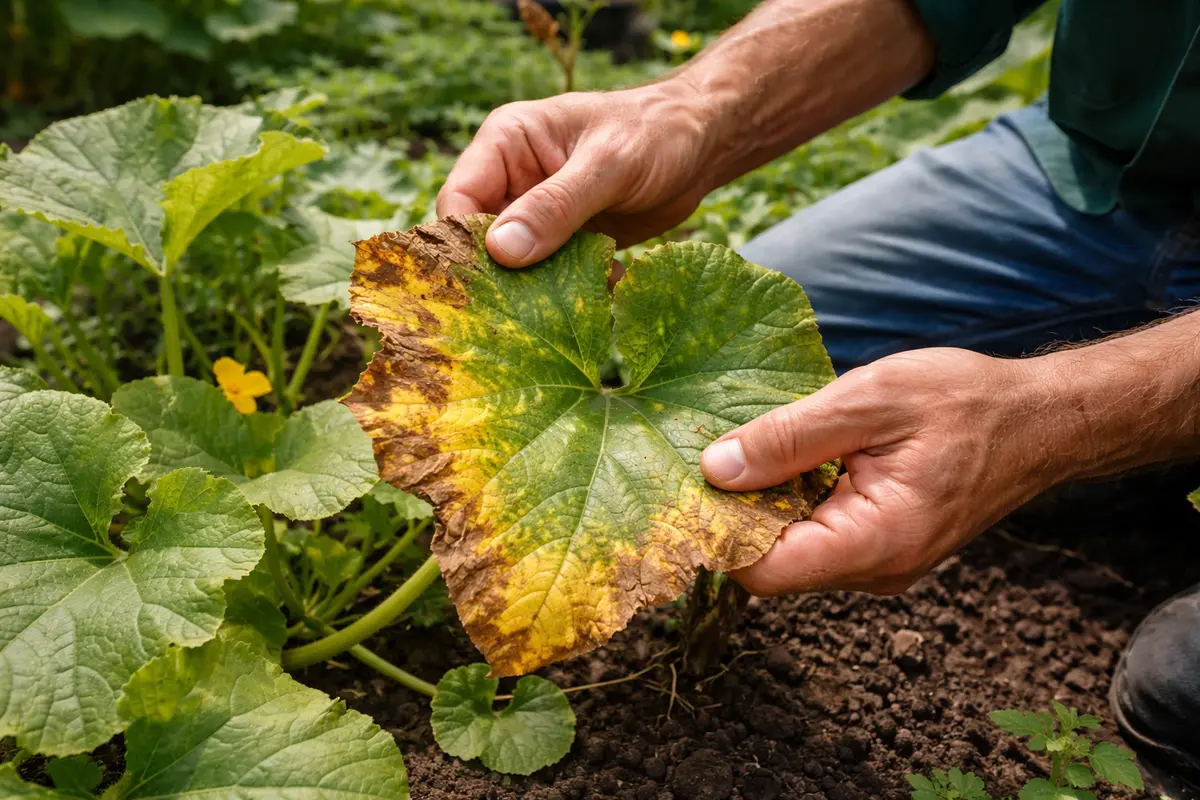
During heat waves, pumpkin leaves may turn yellow due to dehydration caused by high temperatures and insufficient moisture in the soil. The heat increases evaporation from the soil and the leaves, leading to stressed roots that struggle to absorb water, resulting in yellow leaves. If the leaves appear speckled yellow instead of a solid yellow, this could indicate a nutrient deficiency rather than just water stress.
If the soil is moist but the leaves remain yellow, check for pest infestations such as aphids which can also cause discoloration. If you identify aphids on the undersides of leaves, treated by using insecticidal soap will be necessary to restore healthy foliage.
Checking for nutrient deficiencies helps understand the plant’s needs. Nutrient-rich soil enables the plant to recover better from stress but can suffer during heat waves without essential nutrients. If there is an imbalance, especially low nitrogen or potassium, the leaves may yellow further. For example, if you see the lower leaves yellowing while the tops remain green, it could indicate that the plant is pulling nutrients from older leaves to sustain newer growth, signifying a possible deficiency. Depleted soil can also lead to stunted growth or poor fruit set if not promptly rectified, so early detection is key.
If soil tests indicate low pH and insufficient nutrients, mix compost or organic fertilizers to boost nutrient levels. Conversely, if the soil has a sour smell or waterlogged texture, consider addressing root rot before adding additional nutrients. If you notice a noticeable gap in plants’ nutrient uptake, such as discolored young leaves versus greener older ones, your soil may need immediate amendment to shift back to healthy levels. Testing periodically, especially after heavy rain, is vital, as nutrients can leach away quickly in a saturated environment, leading to quick changes in plant health.
Step 3 – Water Pumpkins Deeply to Assist Recovery
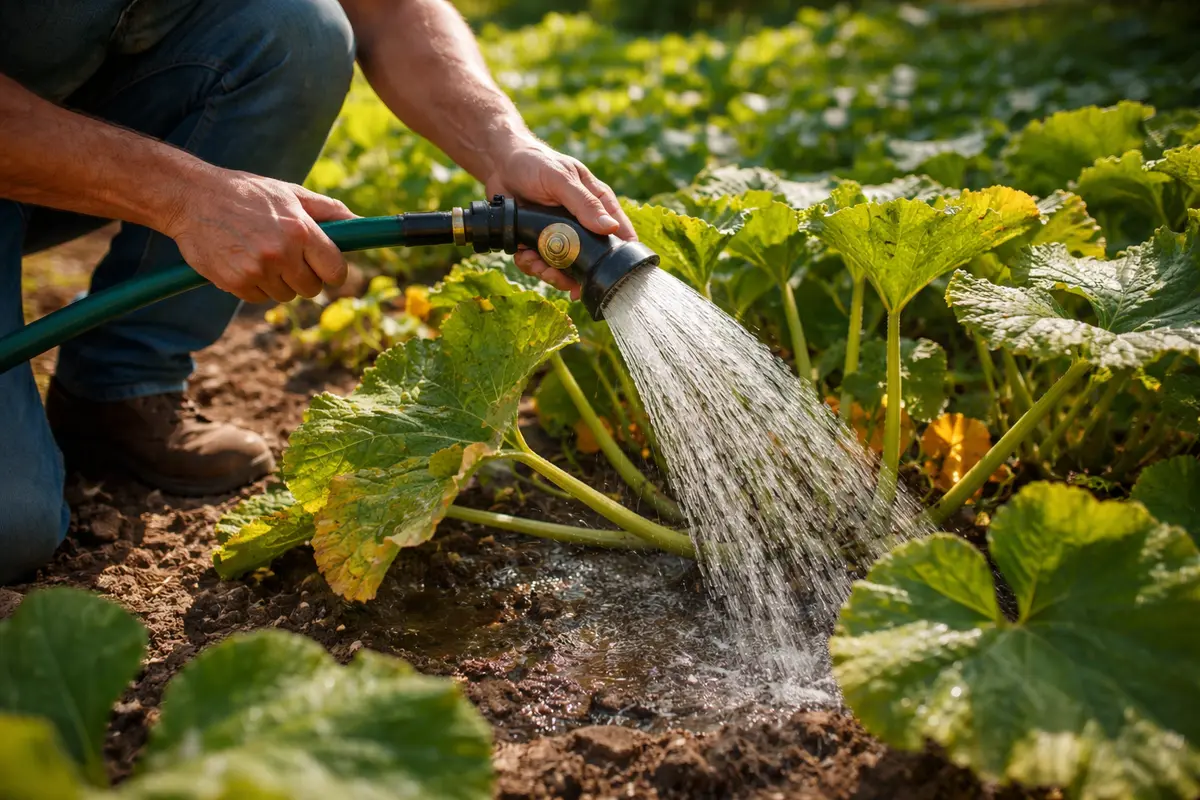
Water your pumpkin plants deeply, ensuring that moisture reaches at least six inches below the soil surface. You should begin observing improved leaf turgidity within a few hours, indicating that the plants are rehydrating. Monitoring the soil moisture levels with a moisture meter can provide additional insight into irrigation needs; aim for maintaining a soil moisture level of about 50%. If the plant’s leaves perk up but soon droop again, it may suggest an inconsistency in watering frequency.
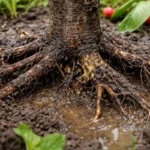
Deep watering improves root health, enabling plants to utilize moisture effectively in hot conditions. Frequent shallow watering can lead to surface roots resulting in increased stress during heat waves. Allowing the soil to dry between deep waterings promotes deeper root growth, which is essential for heat resilience. Notably, if overwatering occurs, root systems will struggle to absorb oxygen, potentially causing rot and subsequent yellowing. In situations where the soil becomes too saturated—typically after heavy rain—drainage should be monitored closely.
A critical mistake to avoid during recovery is overwatering. Pumpkins thriving in overly saturated soil may develop root rot, which halts recovery and could kill the plants. Instead, aim for a consistent watering schedule; during high heat, consider watering every 1-2 days while reducing this during cooler periods. Pay attention if you observe yellowing flowers or fruits dropping prematurely; this may indicate inadequate water uptake or stress that compels you to refine your irrigation strategy to maintain balanced moisture levels while avoiding waterlogging.
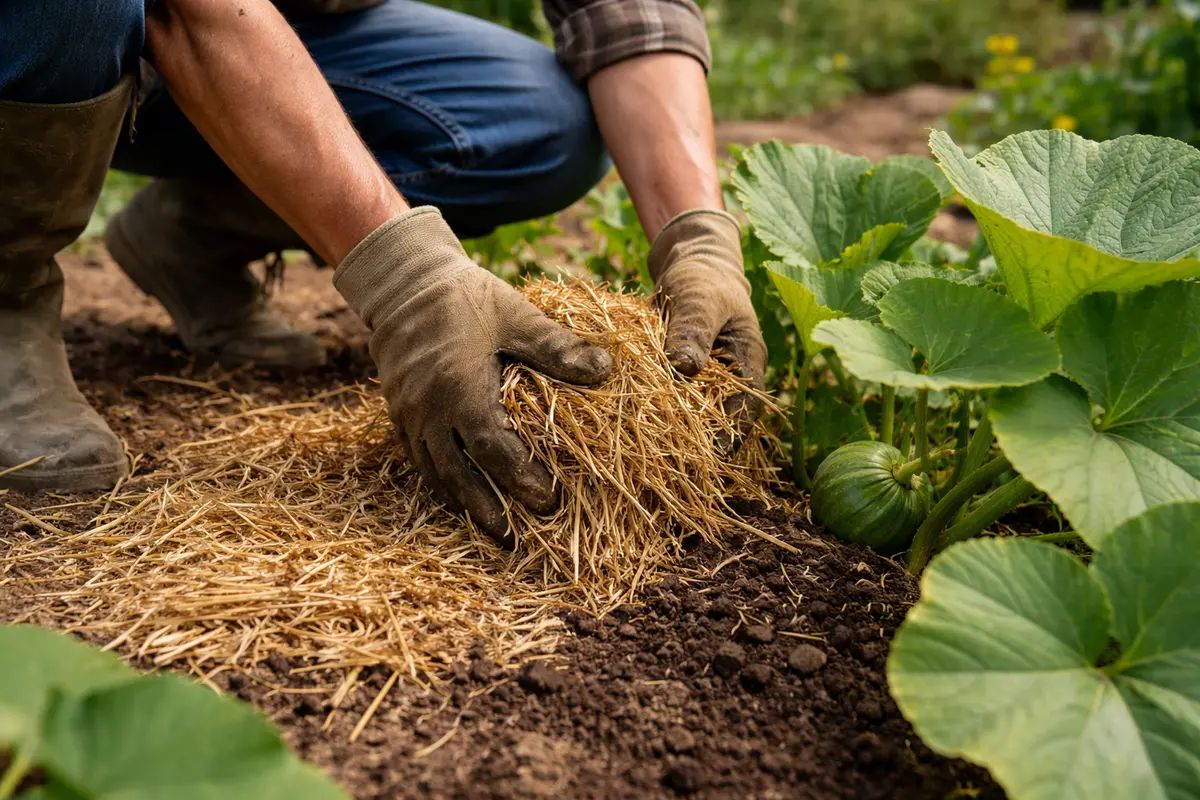
Step 4 – Mulch Around Pumpkins to Retain Moisture
Start by providing consistent irrigation to your pumpkin plants, ensuring they receive about an inch of water weekly. This practice will keep the soil consistently moist, preventing the leaves from turning yellow during extreme heat conditions.
Heat waves intensify plant stress, leading to yellowing leaves due to dehydration and nutrient deficiencies. Regular watering mitigates this issue by maintaining soil moisture and nutrient availability, which is crucial when contrast environments exist, such as a well-watered garden versus one with parched soil. If leaves still appear yellow, check the soil’s nutrient levels regularly.
During prolonged heat spells, consider adding a layer of mulch around your pumpkins to retain moisture and lower soil temperatures. This strategy not only aids in preventing yellow leaves but also protects roots from heat stress, especially in regions where temperatures can fluctuate dramatically.
Mulching acts as an insulator against heat and prevents moisture loss in the soil. Organic mulch not only minimizes evaporation but also adds nutrients back into the soil as it breaks down. This layer suppresses weeds that otherwise compete for precious water and nutrients. Regular mulching after rain or watering can significantly enhance the retention of essential moisture for the roots during heat waves. If plants are showing significant stress despite mulch, assess the type of mulch used; some materials, like straw, may provide superior insulation compared to others like bark, which can break down slower.
If temperatures fluctuate seasonally, adjust your mulch thickness accordingly. A thicker layer in the peak summer months helps counteract the heat, while reducing the amount in fall can help prevent fungal diseases that thrive in overly moist conditions. For example, if you noted heavy rain recently but then the temperatures spike, recheck the mulch’s effectiveness—if it has compressed significantly, consider replenishing it. If new seedling weeds emerge, remove them promptly as they can quickly absorb water and nutrients, leading to increased competition that could further stress your pumpkin plants. Identifying weeds early is crucial, as they may harbor pests that also threaten your pumpkins.
Step 5 – Check Leaves for New Yellowing After Rain
Inspect your pumpkin leaves every few days after rainstorms for any signs of new yellowing. You should notice that healthy leaves remain green and vibrant; in contrast, yellowing after rain may indicate recurrence of stress or disease. If after rainfall, you see new yellowing localized around lower or older leaves, it may point to nitrogen deficiency or root stress. Being vigilant post-rain allows you to address issues before they evolve.
During monitoring, assess whether plants are regaining their turgidity and producing new leaves. Healthy plants should exhibit no new yellowing if the previous steps have effectively addressed the issues at hand. Early detection of any returning symptoms allows for immediate intervention before further damage occurs. If the existing yellowing expands or new symptoms arise, particularly brown spots or wilting, re-evaluate both your watering and fertilization strategies. For example, if you’ve fertilized recently but notice a delay in recovery, the soil may not be taking up nutrients properly, signaling a possible adjustment in soil texture or pH.
If the yellowing returns despite following these recovery steps, consider reevaluating water drainage and nutrient levels in the soil. Alternately, check for potential pest infestations that might require more advanced treatments to ensure the longevity of your pumpkin plants. Implement preventive measures such as introducing beneficial insects to keep pest impacts minimal while reinforcing soil health concurrently with growth factors. It’s crucial to perform this step promptly to reduce the risk of pests, which can more easily proliferate in stressed plants!
FAQ
How long does it take for pumpkin leaves to recover from heat stress?
Recovery from heat stress can vary, but typically you should see improvement in leaf firmness within a few days of proper watering and nutrient application. Full recovery may take up to two weeks, depending on the extent of damage and environmental conditions. If after two weeks there is still no improvement, revisit the plants’ environment and nutrient levels to track down any overlooked needs.
Can nutrient deficiency spread to other plants?
Nutrient deficiencies generally do not “spread” like diseases but can affect the overall health of nearby plants. If specific plants deplete soil variety, the nearby flora will also struggle under the same environmental conditions. Improving the soil with compost or organic fertilizers can help mitigate this risk and create a healthier growing environment. If left unaddressed, those deficiencies can collectively weaken your garden ecosystem, making them prime targets for pests and diseases.
Should I remove yellow leaves right away?
It’s best to only remove severely damaged yellow leaves once you’ve stabilized the plant’s condition. Removing leaves before addressing the underlying causes can lead to further stress and hinder recovery. If yellow leaves seem to multiply even with interventions, check underlying conditions including soil health, moisture balance, and pest presence before proceeding with cutbacks. This approach helps ensure that you’re not merely treating the symptoms, but actually rectifying the root cause.