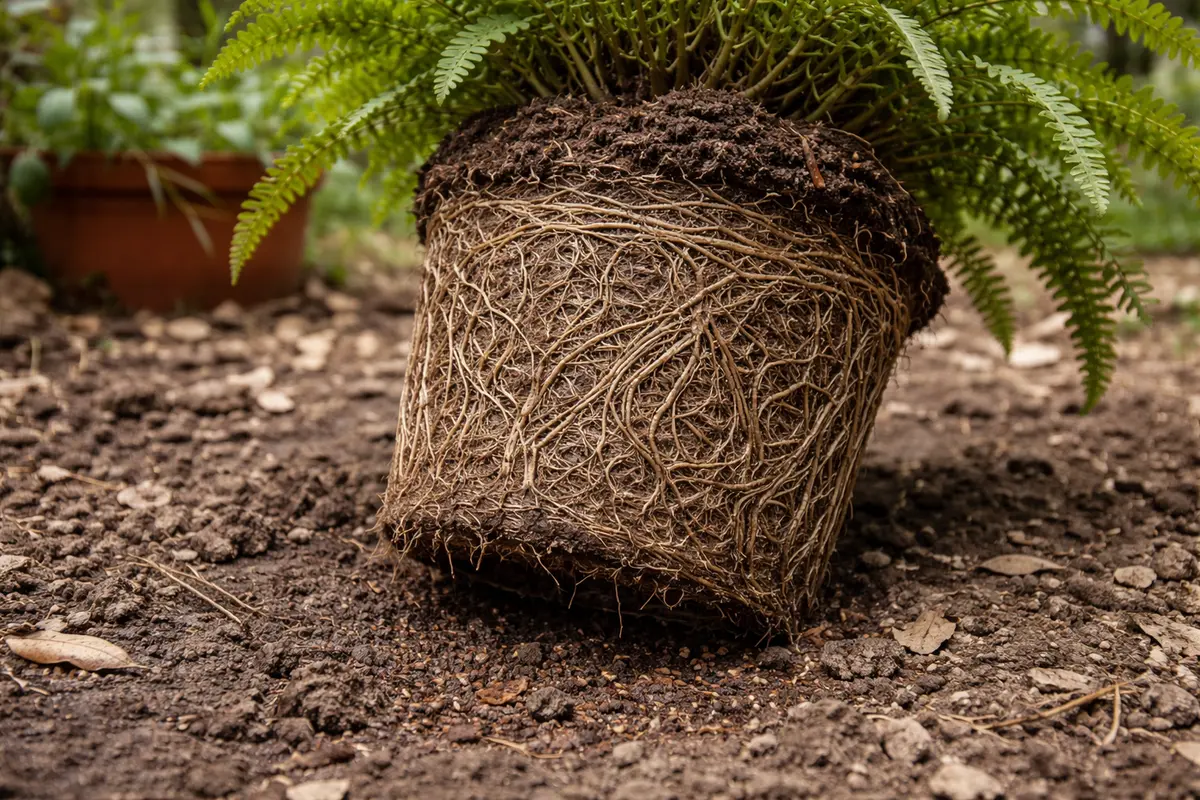
You may notice your indoor fern looking stressed during the warm months, a clear sign that you need to know how to treat root bound conditions in indoor fern. This often manifests as drooping leaves and stunted growth, caused by the plant’s roots outgrowing their pot and lacking room to expand. Ignoring this issue sets the plant back, leading to more damage if you don’t inspect and adjust the potting conditions promptly.
Step 1 – Repot Root Bound Ferns Immediately
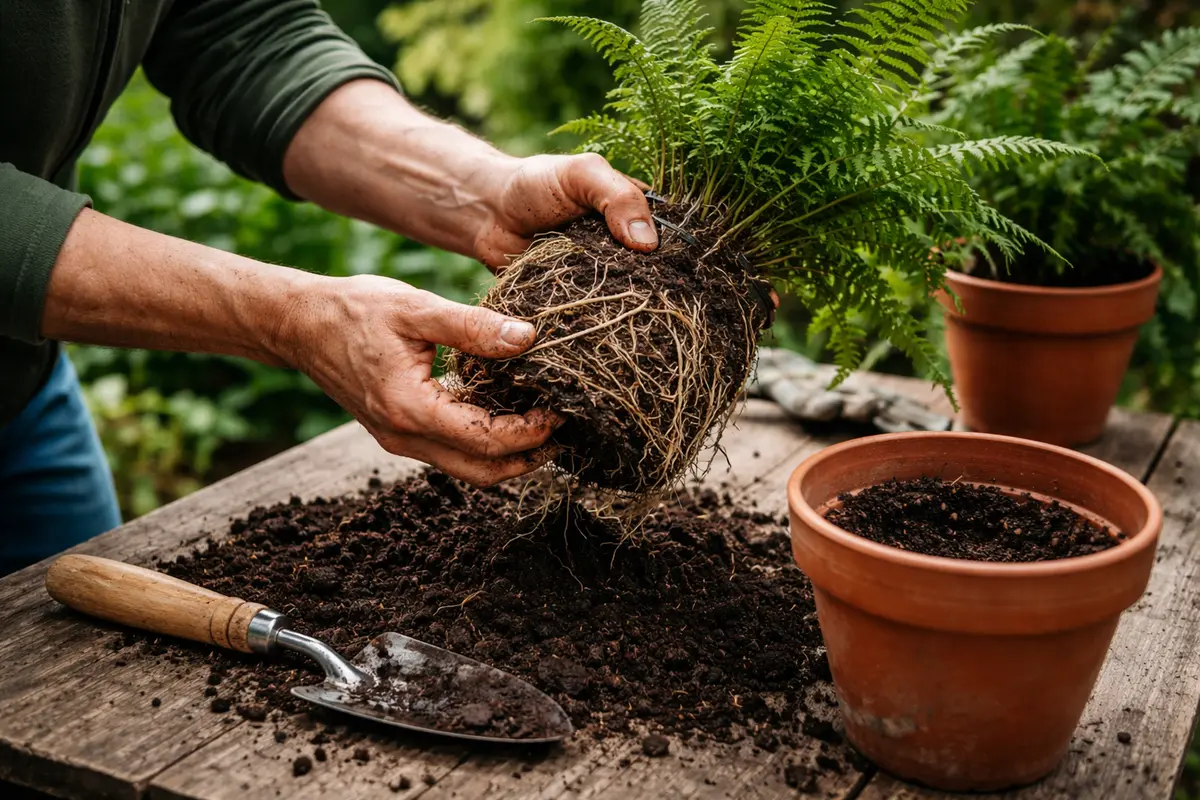
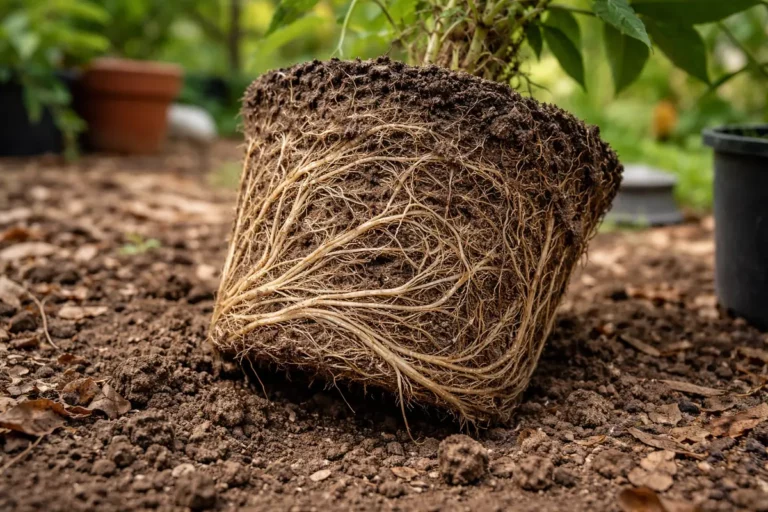
Start by carefully removing your fern from its pot to check its root condition. If the roots are tightly encircled and constricted, gently tease them apart with your fingers to create space and promote healthier growth. You should immediately notice the roots loosening, which indicates that the plant is no longer under excessive strain.
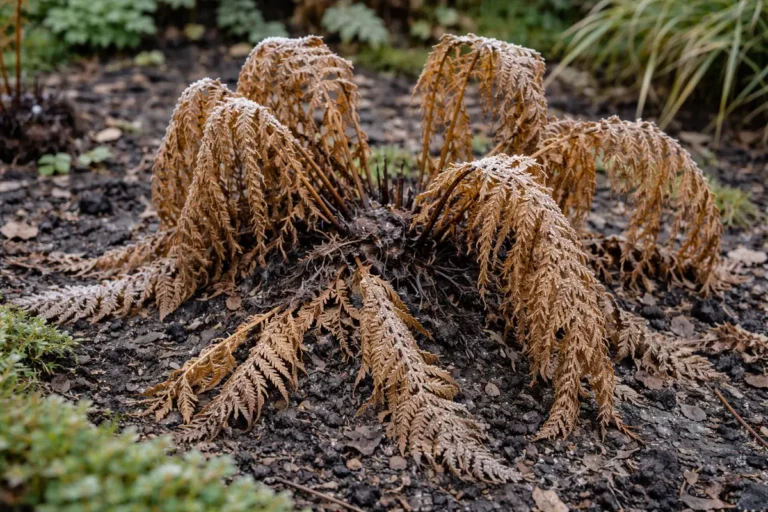
Acting fast is crucial because ferns that remain root-bound will exhibit signs of stress, such as browning fronds or stunted growth. By intervening quickly, the plant can redistribute electrolyte levels and water absorption effectively, ensuring that vital nutrients reach every part of the fern. If you delay, the roots may die off, leading to irreversible damage and a much harder recovery phase.
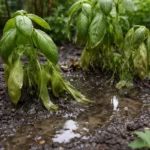
For instance, a gardener once delayed repotting a root-bound Boston fern and later found that the fronds had turned completely brown and started to drop. Many mistakenly think that periodic watering can fix root-bound issues, but this can exacerbate the problem; if your fern shows wilting despite adequate watering, check the root condition to confirm if it’s time to address root binding.
Acting quickly prevents the roots from becoming severely damaged and allows the fern to regain its vitality. If left untreated, the roots can become so constricted that they start to die back, leading to stunted growth and eventual decline of the plant. A visibly weakened fern may show yellowing leaves or slow growth, signaling distress that could worsen without prompt attention.
A gardener once ignored signs of root binding until the fern’s leaves turned brittle and dropped off. Had they addressed the issue sooner, they could have salvaged the plant, but instead, they rushed to repot an already distressed specimen, compounding the problem. If you see any wilting or yellowing, check for roots sticking out of the drainage holes as the first diagnostic measure.
Repotting is crucial because tightly packed roots restrict water and nutrient uptake, leading to poor health. When roots continue to grow in confined spaces, they can’t function effectively, which is particularly critical for ferns due to their sensitivity to drought conditions. If neglect persists, you may find the outer layer of the root even starting to disintegrate due to lack of aeration. Acting swiftly ensures the plant can regain access to moisture and nutrients for immediate recovery. Additionally, selecting a pot that is one size up—typically 2–4 inches larger in diameter—gives the roots more room to expand.
A common mistake is to assume that simply trimming the leaves of a wilting fern will fix the problem. However, without addressing the root issue, the underlying condition will persist, potentially worsening with time. For example, ferns left in root bound conditions for too long may show signs of serious decline such as brown tips on leaves or stunted growth, and fail to recover despite good care afterward. Ignoring these immediate signs could cause permanent damage if not addressed promptly.
Step 2 – Diagnose Overcrowding in Fern Soil
First, remove the fern from its pot and gently loosen the root ball to identify the root-bound condition. If the roots are tightly coiled or circling the pot’s sides, you should quickly see them begin to respond positively after repotting—this may include perks in leaf hues or direction of growth.
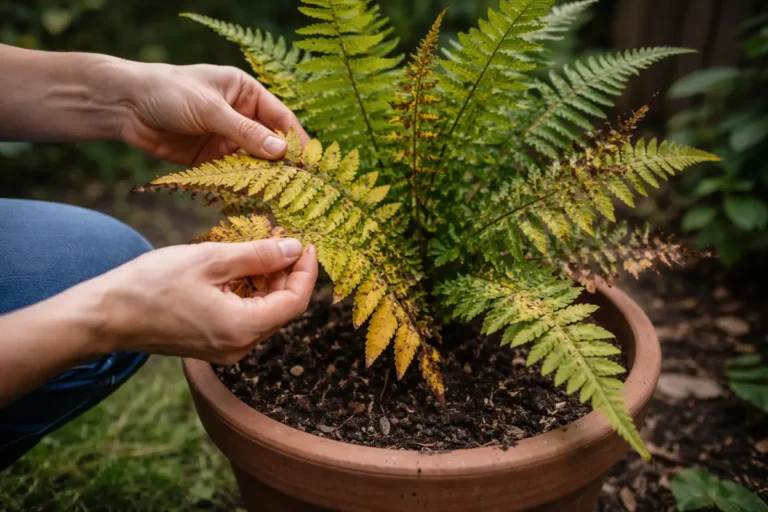
Root bound conditions occur when the plant has outgrown its pot, causing roots to constrict and compete for space and nutrients. As roots crowd together, they can become waterlogged, stunted, or even rot, resulting in pale, wilted fronds. In contrast, if you observe crisp or brown leaf tips, this may indicate underwatering rather than root binding; each symptom provides key insight into the plant’s needs and status.
If the soil emits a sour odor, this suggests poor drainage and potential root rot rather than just a root bound issue; in this case, replace the soil and trim away any dead roots before transferring to a larger pot. Alternatively, if you find soil that is too dry and hard, watering the plant well may alleviate the symptoms without needing repotting.
Root bound plants experience stress because their roots cannot access adequate water and nutrients, leading to stunted growth and browning leaves. In healthy soil, roots have room to grow, allowing them to absorb moisture and nutrients effectively. In contrast, a root bound fern exhibits signs of dehydration and nutrient deficiency despite regular watering and fertilization. If your fern shows these symptoms but the potting mix is moist, check the roots for binding.
If the soil smells sour or appears overly wet, it indicates potential root rot rather than simple root binding. In this scenario, remove the fern, prune away any decayed roots, and transfer it to a fresh, dry potting medium. Alternatively, if you observe algae or white crust on the surface, it could suggest that the pot is too small, but proper soil conditions exist; in this case, just increase the pot size to improve drainage and airflow.
Soil overcrowding occurs when the root system has exceeded the capacity of the pot, making it difficult for the roots to absorb water and nutrients. This not only hampers growth but also contributes to conditions such as root rot if the soil becomes overly saturated. Recognizing this issue promptly allows gardeners to take corrective measures, such as repotting into a larger container with fresh soil that contains perlite or sand to improve aeration and drainage. If the soil is too dense, it will keep moisture trapped, worsening the situation over time.
If the soil emits a sour smell upon excavation, it indicates root degradation, suggesting that root rot may already be present. Therefore, if you find this smell, consider completely replacing both the soil and the pot to ensure a fresh start for your fern. This should include cleaning the new pot with a diluted bleach solution to kill any lingering pathogens. Also, watch for signs of pests that might thrive in dark, overcrowded root zones, such as fungus gnats or root aphids, which can further compound the problem and interfere with your fern’s recovery.
Step 3 – Water Root Bound Ferns to Revitalize
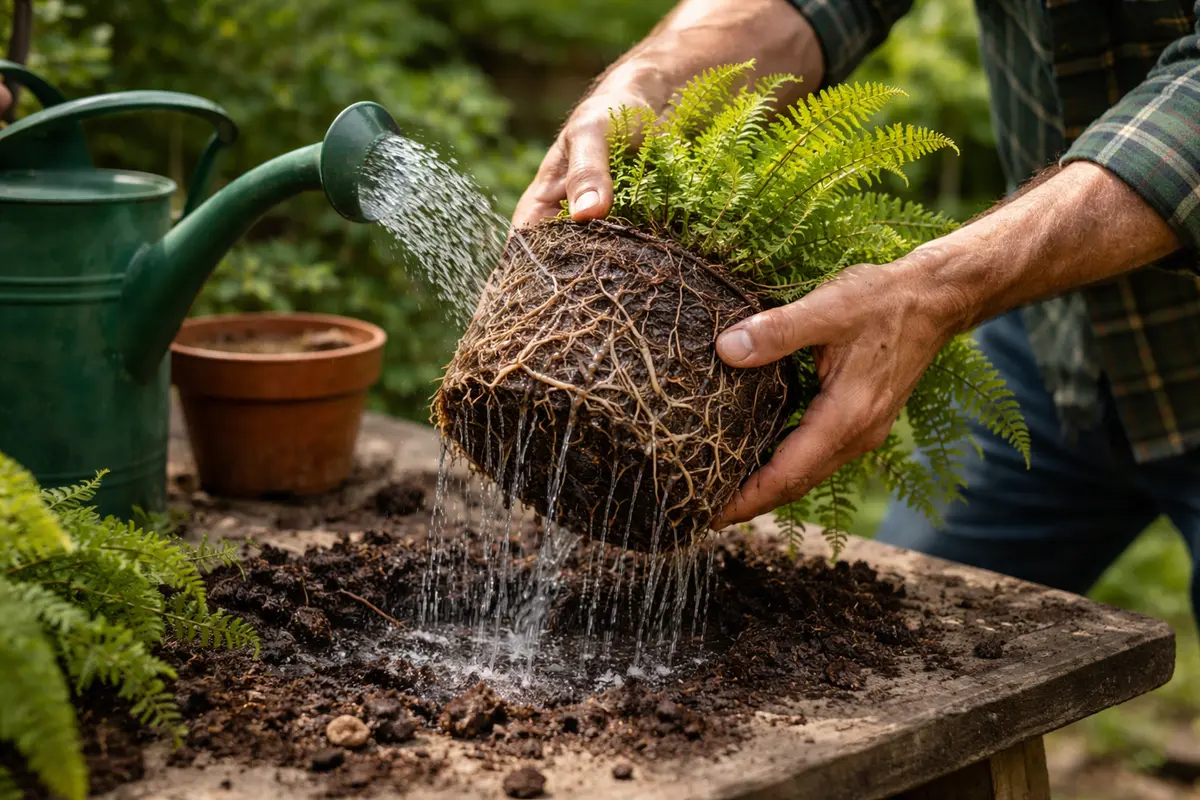
Water the fern gently but thoroughly after repotting it. You will see the leaves begin to perk up within a few hours, indicating that the plant is responding positively to the added moisture. Use a watering can with a small spout to avoid saturating the soil too quickly. This restorative action helps the plant recover from the stress of being root bound. Ensure that water runs through the drainage holes at the bottom of the pot, signifying that the soil has absorbed enough moisture.
Proper watering allows moisture to penetrate the newly aerated soil, which aids in reviving the plant’s health. If the soil is adequately moist but the plant is still wilting, it indicates deeper issues within the root system. This could mark the need for further inspection, such as looking for signs of root disease or split roots. This process can take a few days; observing the fern daily while making notes about its recovery can help you assess the steps taken accurately and judge whether additional actions are needed.
A common pitfall during this phase is over-watering; this can lead to waterlogged soil and a renewed risk of root rot. Therefore, ensure the pot has adequate drainage holes and allows excess water to escape. If the soil is still wet two days after the initial watering, hold off on additional watering until the surface dries out. Adjust your watering schedule based on the plant’s response and environmental conditions, such as increased humidity levels in your home or alterations in temperature, for optimal recovery.
Step 4 – Avoid Overwatering to Prevent Root Issues
Monitor your watering routine to avoid overhydrating the fern. You will notice healthier growth patterns develop as you establish a consistent schedule. This helps prevent future incidents of root bound conditions by allowing the roots to get what they genuinely need. One effective method is to stick your finger about an inch into the soil to check moisture levels; if it feels dry at the tip, it’s time to water.
Establishing a careful watering schedule addresses the key factor that often leads to root problems—excess moisture trapped in soil without adequate drainage. Ferns typically require a balance of moist but not soggy soil, so understanding the ideal conditions can prevent overwatering. This is particularly true during the growing season when soil moisture levels need close attention. It’s advisable to switch to a lighter soil mix that retains moisture but allows for excellent drainage, ensuring that water can flow freely.
During the hotter months, consider increasing the frequency of light watering rather than heavy soaks to ensure the roots remain hydrated without becoming overwhelmed. Alternatively, in winter, reduce the watering frequency as growth slows and the plant requires less moisture. A common mistake during colder months is watering on the same schedule as the summer months; that can easily lead to over-watering and root decay. Adjusting your routine fosters a healthy environment where the fern can thrive and prevent root issues.
Step 5 – Inspect Fern Leaves for Recovery Signs
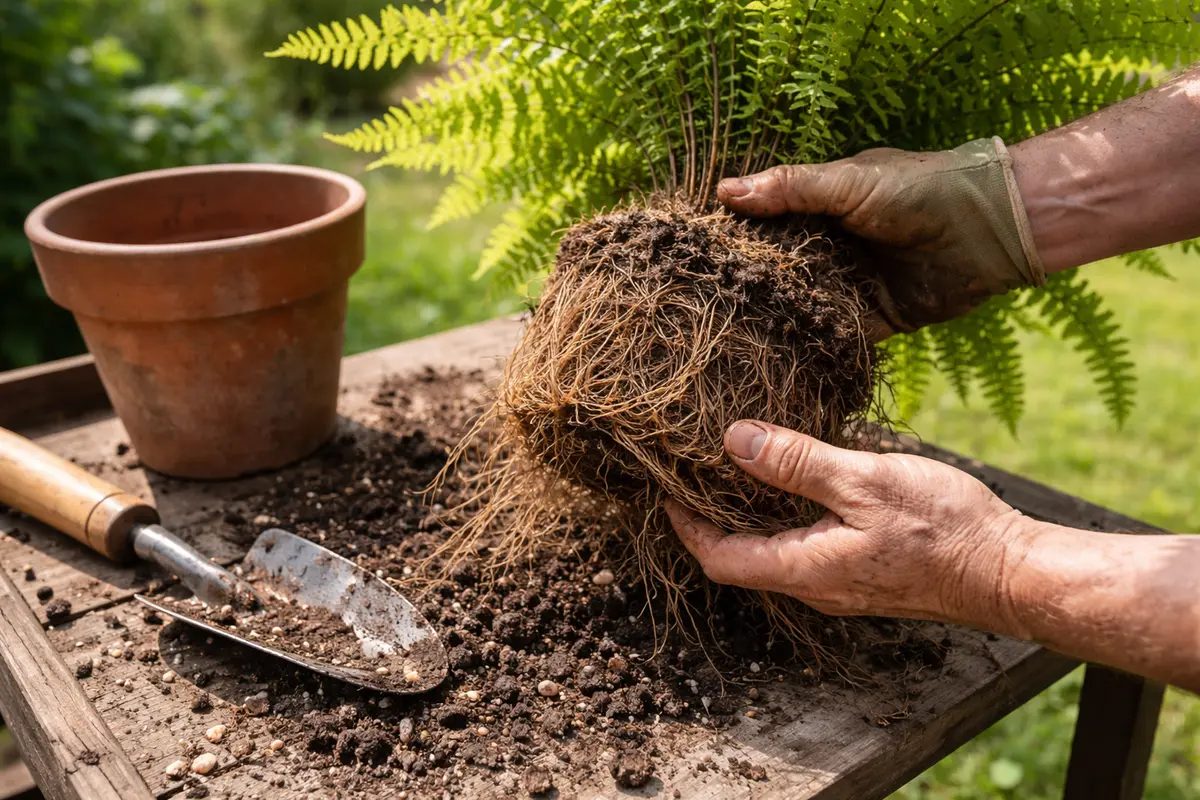
Start by checking your fern’s roots every month to monitor for signs of being root bound. Look for roots peeking out of the drainage holes or spiraling around the perimeter of the pot. If you notice these signs, reassess your plant’s conditions every two weeks to determine if it needs repotting or additional care.
A fully recovered fern displays lush, vibrant fronds that are evenly spaced and stand erect, contrasting sharply with early signs of returning root-bound symptoms, such as stunted growth or yellowing leaves. If the leaves start curling or turning brown at the tips while the overall texture appears limp, these may indicate the beginnings of root issues again. If not this → check for water retention or drainage issues in the potting mix.
If signs of root binding reoccur despite your efforts, consider repotting the fern into a slightly larger pot with fresh potting soil to refresh nutrient availability. Alternatively, adjust your watering schedule to ensure the plant isn’t becoming overly hydrated or dehydrated. Monitoring its adaptation closely for the next few weeks will help determine if further adjustments are needed.
A fully recovered fern will show healthy, vibrant green foliage, with leaves regaining their resilience. If you notice new fronds pushing through, that’s a clear step in the right direction. Take note that if the leaves start to develop spots or still remain limp despite appropriate care, that could signal a recurrence of root issues or nutrient deficiencies that may need further correction. An inspection of the soil conditions paired with leaf health could reveal more about potential underlying problems.
If recovery is not evident within a week, consider adjusting your care regimen by checking for water levels or potential pests. In cases where symptoms persist despite following the steps, and the plant appears to be worsening, make sure to address any existing root rot or drainage issues immediately. Sometimes, a firmer intervention may be necessary, such as switching to a pot with better drainage or considering a less aggressive growing medium that can provide the right balance between moisture retention and aeration.
FAQ
How long does it take for a fern to recover from being root bound?
Recovery timelines can vary significantly based on the severity of the root-bound condition and environmental factors. Generally, ferns can start to show improvement within one to two weeks if the proper care is taken following repotting. Keeping optimal moisture levels and ensuring adequate sunlight can accelerate this process, especially if the ferns are returned to ideal lighting conditions. Pay attention to visible signs such as new frond growth as indicators of health restoration.
Can root bound conditions spread to other plants?
While root bound conditions typically affect only the individual plant, poor soil health can lead to broader issues in the surrounding area. If the roots begin to decompose, the bacteria can affect nearby plants—especially if they share the same soil or container. It’s essential to address these issues immediately to prevent spread. Inspect nearby plants frequently if you suspect root issues in one plant, as they may share similar growing conditions and thus similar problems.
Should I remove leaves from a wilted fern?
Removing wilting leaves is not always necessary, as they can still provide nutrients back to the plant if trimmed correctly after the plant has adjusted. Focus initially on addressing the root issue first—only remove unhealthy leaves if they show signs of rot or prevent new growth. This careful approach aids in the overall recovery without risking harm to the plant’s recuperative process. Always ensure your cutting tools are sterilized to prevent any potential disease spread during the process.