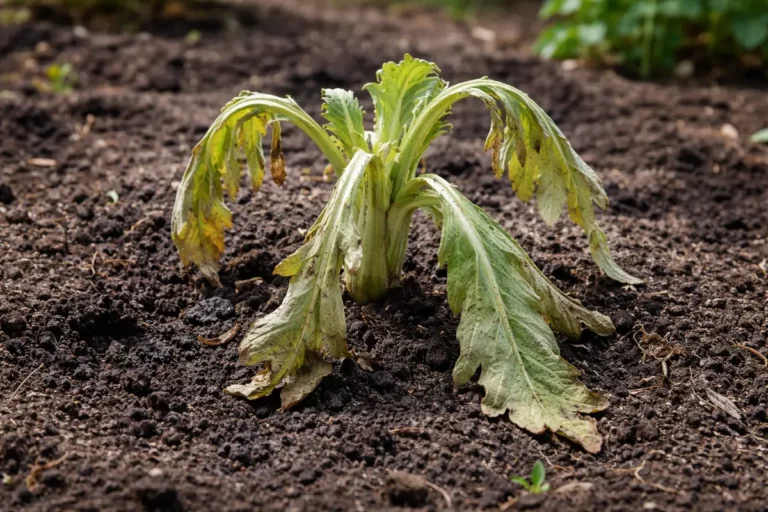
You may notice your daffodils drooping and looking less vibrant after they have been recently transplanted, which is why you need to know how to fix drooping daffodils after transplant shock. This wilting is often caused by stress from root disturbance and adjustments to their new environment. If left unchecked, the drooping can worsen, ultimately weakening the plant and setting it back in growth. Fortunately, you can revive them by adjusting their watering routine and inspecting the soil conditions. Implementing careful diagnostics and timely interventions is key to their successful recovery.
Step 1 – Water Daffodils Immediately After Transplant
Start by relocating the drooping daffodils to a more stable spot in the garden, ensuring they are not crowded by other plants. Immediately, you should notice that they no longer experience the strong competition for resources, allowing for improved airflow around their leaves.
Acting quickly is crucial because drooping daffodils are under stress from transplant shock, which can disrupt their ability to absorb nutrients and water. If not addressed promptly, the plant may continue to weaken, ultimately leading to poor root establishment and the risk of dying off entirely. In contrast, daffodils that are swiftly placed in a suitable environment can begin to perk up within a day or two, reestablishing their energy levels.
A real-world example of effective timing occurred when a gardener hurried to reposition their daffodils after noticing drooping within a few hours of transplantation, resulting in vibrant blooms within weeks. In contrast, waiting several days led another gardener to find their daffodils wilting further, necessitating more drastic interventions for recovery. If the leaves remain limp despite relocation, check for excessive moisture at the roots.
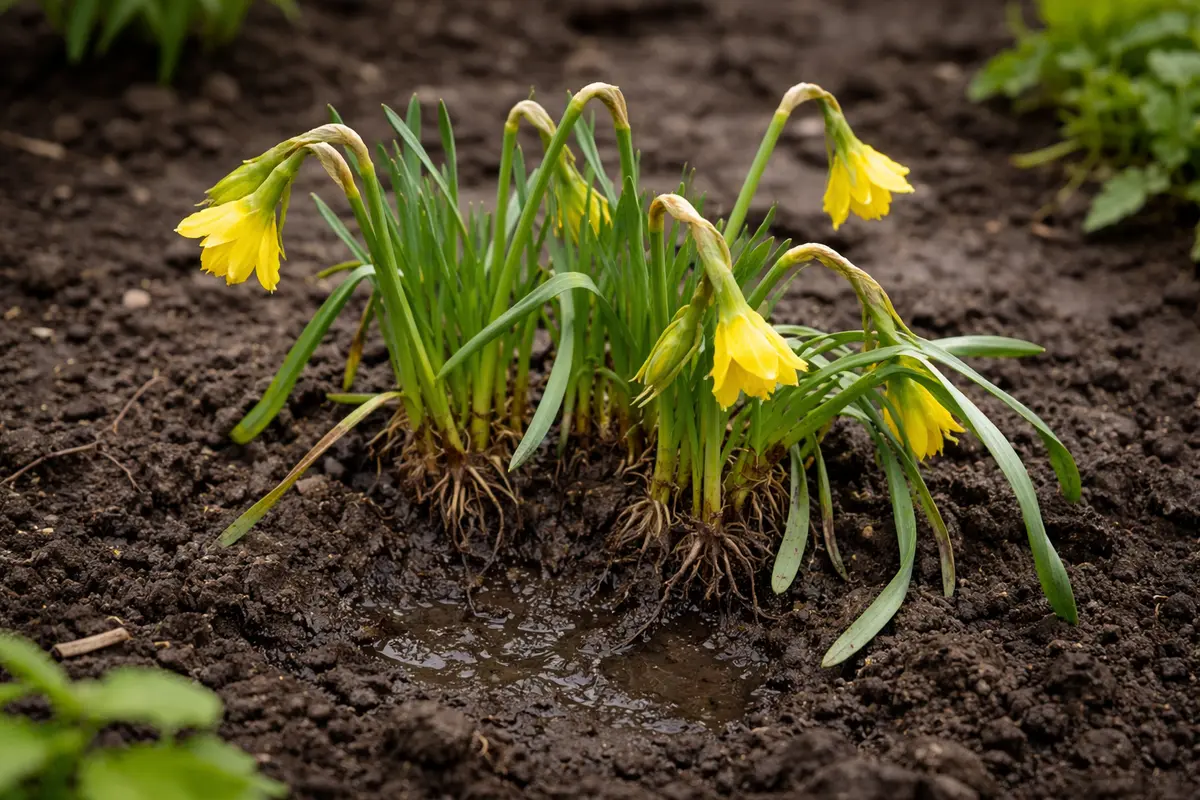
Daffodils particularly need water to re-establish their roots after being disturbed during the transplant. When they don’t receive adequate moisture shortly after transplanting, they may enter a state of shock, evidenced by drooping leaves. If your daffodils are in clay soil, they can often retain too much water, which also leads to root stress. If you notice that the soil is parched or has formed hard clumps, it’s a sign the roots might be struggling to absorb what little moisture is available. They thrive when the soil remains consistently moist but not waterlogged; too little water can lead to dehydration, while too much can suffocate the roots. Always watch for moisture levels, as this will guide your next steps in care.
Many gardeners mistakenly think that watering them thoroughly will damage the roots or create waterlogged conditions, leading them to underwater their plants. However, it’s crucial to ensure that the soil remains moist right after transplanting, as it gives the plant a better fighting chance against transplant shock. If you find that the soil is too dry or hard, it’s essential to water them to discourage further dehydration. Observing soil texture can help; dry, powdery soil indicates the necessity for water, whereas overly clumped, heavy soil may suggest excessive watering. Over time, if you suspect the leaves continue drooping despite following the guidelines for watering, consider checking for signs of root damage, which may indicate improper planting depth or broken roots. By addressing these critical early steps, you can enhance your daffodils’ chances of thriving.
Step 2 – Assess Soil Conditions Causing Droop
First, assess the root zone of your daffodils by gently loosening the soil around their base to improve aeration and drainage. Observe if the soil is compacted or overly wet; adjusting these conditions should help the plants stand upright within a few days. If the soil has a hard, crusty surface, it suggests that the roots are likely having difficulty establishing themselves, leading to persistent drooping.
When daffodils experience transplant shock, the roots may struggle to absorb water and nutrients due to poor aeration or excess moisture. If the soil is too compacted, it hampers root development, while waterlogged conditions lead to root rot, both of which exhibit drooping leaves. Look for physical signs such as wilting, yellowing, or blackened tips on the leaves, which indicate distress. If the leaves show signs of wilting alongside their droopiness, this is a clear signal that water uptake is compromised—indicating the need for corrective action.
If the soil smells sour or has a mushy texture, it indicates root rot, which requires immediate action such as improving drainage or repotting in fresh soil if the situation does not improve. Alternatively, if the soil is dry and crumbly, ensure you provide consistent moisture without overwatering, as the lack of hydration can also contribute to drooping foliage. Regularly check the moisture levels by embedding your fingers or a moisture meter into the soil to a depth of at least two inches. This simple test can immediately inform you if the soil remains too dry or if excess moisture is leading toward decay.
Soil conditions play a significant role in how well transplanted plants recover. When daffodils experience transplant shock, their roots may struggle to absorb water if the soil is too compacted or dry. Overly saturated soil can also smother roots, leading to oxygen deprivation and further drooping. For instance, if the topsoil feels dry while deeper layers retain moisture, roots may not be able to access adequate hydration, leading to poor recovery. A quick moisture test, where you dig down about 2 inches, can help illustrate the condition of the soil where roots have settled.
In many cases, gardeners ignore soil conditions and only focus on the plant’s appearance. If you notice that the top layer of soil looks dry but other sections feel wet, a root zone issue may exist. This oversight can lead to severe over or underwatering, which could potentially stunt recovery time considerably. If the soil appears waterlogged yet the plants are still wilting, look for signs of root rot or fungal infestations that could indicate the need for remedial action like repotting into well-draining soil. If your daffodils were planted in a heavy clay soil, consider amending the soil with composted materials to improve drainage and overall health, as this will promote stronger root growth in the long run.
Step 3 – Fertilize Daffodils to Aid Recovery

After the initial watering has settled, apply a balanced, slow-release fertilizer designed for spring flowering plants. You should notice an improvement in growth vigor and vibrancy within a week or two as the plants begin absorbing the necessary nutrients. The fertilizer should ideally contain a higher phosphorus level to promote root development specifically. To meet this need, granular fertilizers with an N-P-K ratio of around 5-10-5 can be beneficial. Follow the manufacturer’s instructions; generally, one tablespoon of fertilizer per square foot of soil is recommended for optimal nutrient delivery.
Nourishment is vital during this recovery phase, as daffodils often struggle with nutrient uptake immediately following transplant. Application of fertilizer supplements crucial nutrients in the soil that support overall growth. For example, phosphorus is particularly important as it aids in root development, allowing the daffodils to stabilize after transplanting. Following application, monitor your plants closely to assess their response to the nutrients. Pay special attention to the leaves; healthy leaves should be vibrant, rich green, and devoid of any browning or curling at the edges, indicating effective nutrient absorption.
A common mistake involves over-fertilizing during this stage, believing that more will equate to better growth. In practice, it’s essential to adhere to the recommended dosage, as excess nutrients can lead to nutrient burn—this phenomenon occurs when too much fertilizer concentrates in the soil. If you see signs of fertilizer burn, represented by leaf edges browning or wilting despite adequate water, flush the area with water to dilute the concentration and wash away excess fertilizer residues. This counteraction can mitigate symptoms fairly quickly. In cases where severe damage occurs, consider halting fertilization or switching to a diluted solution until the plants regain their vigor. Be mindful of the growing conditions; in cooler weather, fertilization needs may be limited, as the plants may not actively absorb nutrients as efficiently.
Step 4 – Look for New Growth in Daffodils Regularly
Start by checking the soil moisture level regularly, ensuring it is consistently damp but not waterlogged. Additionally, observe the color and texture of the leaves; they should be bright green and firm, not yellowing or wilting. Establish a routine to recheck these conditions every few days, creating a habit of closely monitoring their response to care strategies and assessing if recovery is on track.
A fully recovered daffodil will display erect, vibrant green leaves that are firm to the touch, indicating optimal hydration and health. If these signs are absent and the leaves begin to droop again, they may develop a wilted or soft texture along with a yellow tint, raising alarms about ongoing stress or disease. Likewise, if you notice flat, droopy stems juxtaposed with healthy leaves, check the soil conditions—overly saturated soil may suggest the possibility of root rot due to poor drainage.
If drooping returns despite following the care steps, examine the drainage of the pot or soil, as poor drainage can lead to serious issues. It’s also advisable to adjust watering frequency or enhance the soil by incorporating perlite or sand to improve aeration. If you have thoroughly addressed these aspects and still see no improvement after a week, consider re-transplanting your daffodils into fresh, well-draining soil to rejuvenate their growth environment.
Monitoring for new growth is vital as it directly reflects whether your removal of transplant shock measures has been effective. Newly emerging shoots signify that the daffodils are re-establishing their roots and moving away from a stressed state back towards vibrancy. Should the plants show no new growth or continue to wilt, it may indicate that underlying issues related to soil quality or moisture levels remain unaddressed. For example, pest infestations can also pose a significant risk; aphids, which thrive in weakened plants, can impede their recovery by sucking moisture from tender new foliage. A thorough inspection should be carried out, covering both soil and pest conditions. If pests are evident, treatment should be initiated promptly to mitigate their stress impact on your daffodils. As an extra precaution, remember to check the undersides of leaves for hidden pests that may thrive out of sight.
FAQ
How long will it take for my daffodils to recover from transplant shock?
Recovery from transplant shock can vary based on conditions, but typically you should start seeing improvements within 1-2 weeks with proper care. During this period, environmental factors such as temperature, moisture, and sunlight exposure may also influence recovery timing. Continued monitoring for signs of new shoots and improved leaf structure will indicate a successful transition to their new home.
Can transplant shock spread to other plants in my garden?
Transplant shock is specific to individual plants and does not spread like a disease. However, poor soil conditions affecting one plant could potentially stress neighboring plants, so maintaining balanced soil moisture levels is vital for the overall health of your garden. If you’ve just transplanted several daffodils, keep an eye on their conditions closely as they mature, observing any persistent health warnings that could suggest broader systemic issues impacting multiple plants.
Should I remove drooping leaves from daffodils affected by transplant shock?
It’s recommended to leave drooping leaves in place for now, as they may still contribute energy back to the plant during recovery. Even in a weakened state, these leaves can photosynthesize, helping provide energy essential for the plant’s recovery efforts. Wait until your plants exhibit signs of new growth before trimming any damaged foliage, as protecting viable leaf structures can be beneficial in supporting overall health during rehabilitation. Additionally, before engaging in any cutting, assess if other sections of the plant remain viable; the health of these areas could influence potential recovery strategies moving forward.