If you’ve observed your petunias drooping heavily after a downpour, knowing how to fix drooping petunias after overwatering is critical. This drooping often results from waterlogged soil that suffocates roots, causing wilting and potential root rot. If ignored, the condition can spread, leading to severe damage and delaying recovery. Start by inspecting the soil — if it feels overly wet, adjust your watering habits to encourage better drainage and restore air to the roots.
Step 1 – Trim Wilting Petunia Stems Immediately
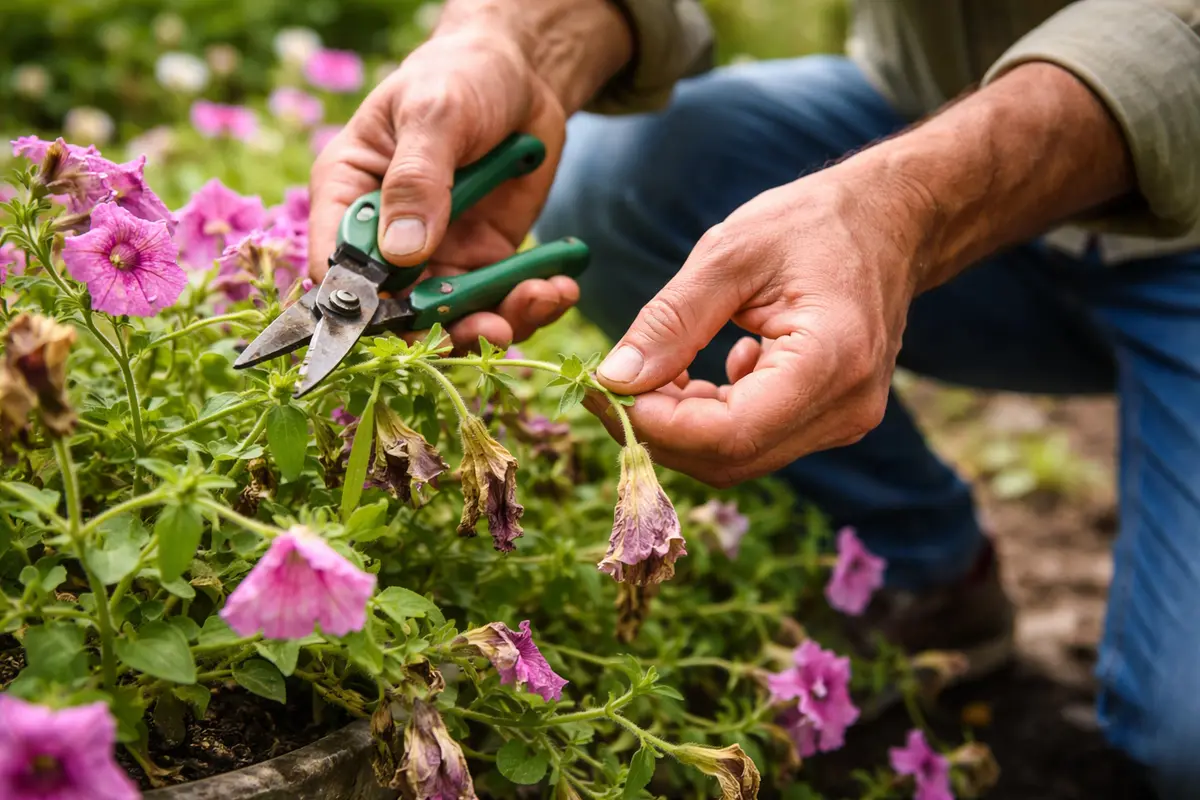
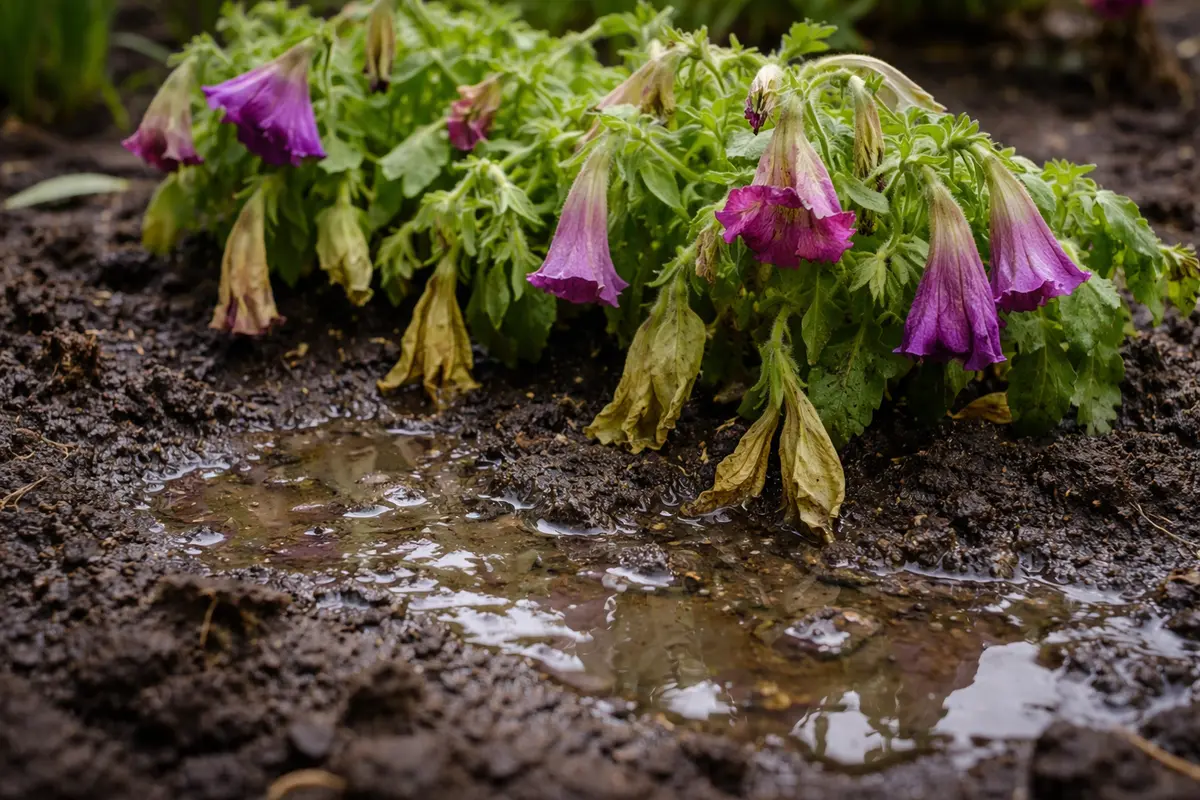
Start by cutting back the wilting petunia stems just above a healthy leaf node. You should see an immediate improvement in the plant’s overall appearance as some leaves start to perk up within a few hours, indicating a reduction in energy drain from affected areas.
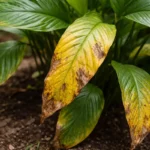
Acting fast is crucial because petunias, when overwatered, can experience root rot within 24 to 48 hours, cutting off necessary oxygen and nutrients. When their roots become oxygen-deprived, the plants exhibit a rapid decline, resulting in irreversible damage if not addressed promptly. If the leaves remain droopy for too long, the chlorophyll production decreases, leading to yellowing foliage.
For example, a gardener once noticed this problem after a heavy rain and delayed action, leading to a significant loss of blooms. In contrast, those who promptly adjusted watering practices often found their petunias revived beautifully. If leaves are turning yellow instead of just drooping, check for root rot signs and adjust your potting mix accordingly.
Acting quickly is vital because overwatered petunias experience root oxygen deprivation, which can lead to root rot if unresolved. If you delay, the roots become increasingly damaged, and the plant risks losing its ability to absorb nutrients—this manifests as drooping leaves and wilting flowers. If the soil remains too wet, check for waterlogged roots by gently removing the plant to inspect them.
For instance, a gardener once noticed drooping petunias and waited too long to address the issue, resulting in the plant’s decline and eventual death. Conversely, another gardener intervened promptly, and within days, the drooping subsided and new growth began. Many mistakenly leave overwatered plants in place without addressing drainage, which exacerbates the problem instead of alleviating it.
Begin by pruning the wilting stems, as this immediate action prevents further energy drain from your petunias. This step is critical because drooping indicates the plant has absorbed too much water, causing the stems to weaken. Without intervention, those stems could rot or harm surrounding healthy growth, spreading issues throughout the plant. Make clean cuts above healthy leaf nodes to encourage new growth, and always clean your shears with rubbing alcohol before and after to minimize the risk of introducing pathogens. Quick intervention reduces the potential spread of any underlying issues, such as fungal infection, while enhancing air circulation around remaining healthy stems for improved viability.
In many cases, gardeners delay pruning, mistakenly believing the plant will improve on its own. However, allowing wilted stems to remain can lead to further decline, as unhealthy parts drain resources from healthier portions. A common error is to disregard the need for immediate action, hoping conditions will self-correct. If you notice any signs of mold or fungal growth around the cuts, treat them promptly with fungicide to prevent further complications. If too much of the plant appears wilted, focus only on the most affected areas while preserving as much healthy foliage as possible, aiding quicker recovery. Always ensure to remove any stems that have begun to decay, as they can harbor diseases and significantly hinder overall growth.
Step 2 – Diagnose Overwatering Impact on Petunia Roots
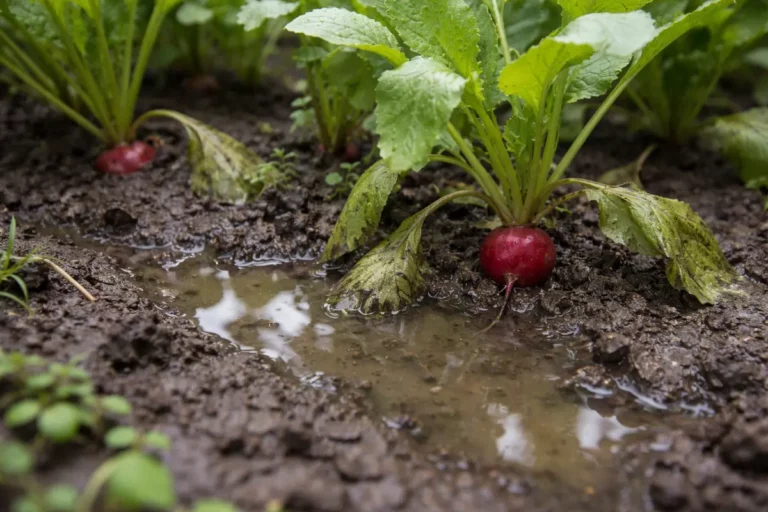
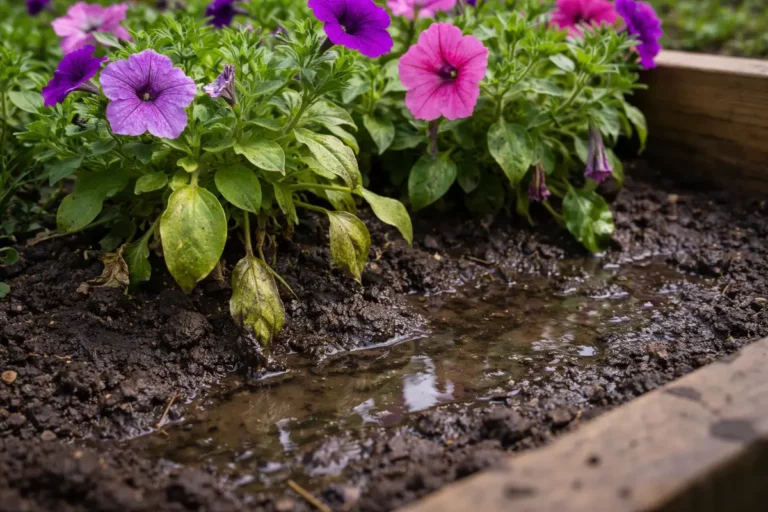
Check the root zone for signs of overwatering immediately. You will likely notice a soggy texture and dark, muddy appearance in the soil, which indicates the roots are likely drowning. If you gently pull the plant, it should meet some resistance; if it slides out too easily, this is a clear sign that the roots are compromised. Conducting this check will reveal the condition of the root system and inform the necessary corrective action. Use a probe or stick to assess moisture levels deeper down, ideally 2-3 inches below the surface, as this can indicate retention issues below the surface.
This situation occurs because petunias thrive in well-draining soil, and overwatering hinders oxygen circulation in the root zone, which can stunt growth and promote root rot. When roots decay, it leads to worsening symptoms if not corrected swiftly. Inspect the roots by gently removing the plant from the pot; healthy roots should be white and firm, while decaying roots will be brown and mushy. If the roots feel sludgy or emit a rotten odor, immediate action is necessary. Conduct this inspection right after heavy watering or rainfall to address potential problems before they escalate.
If your petunias are in clay-heavy soil, this condition significantly contributes to drainage issues. Heavy soils exacerbated by overwatering create water retention, leading to an almost swamp-like environment around the roots. They may begin to rot, and if you notice a sour smell near the plant, it’s critical to act by changing the soil or aerating it to improve air circulation. If, despite reducing your watering frequency, the soil remains excessively wet, consider replacing the soil type for better drainage. Failing to take this step can allow root rot to develop, ultimately leading to the need to discard the plant. A well-aerated soil promotes healthier root systems, so prioritize improving drainage promptly.
Step 3 – Replant Petunias in Dry Soil Mix
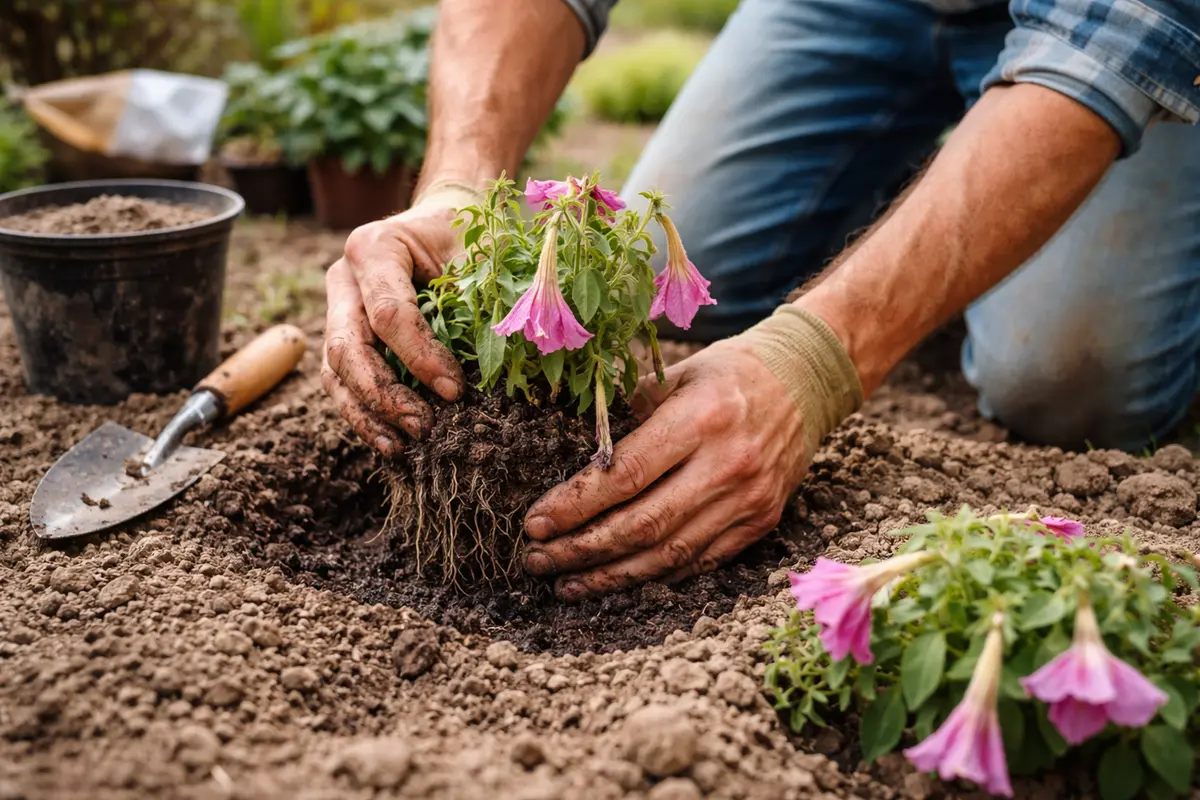
Start by replanting your petunias in a fresh, well-draining soil mix to facilitate recovery. You should notice signs of improved vigor and healthier growth within a few days. Select a mix that incorporates perlite or sand for enhanced drainage, characterized by a lighter texture than traditional garden soil. Recovery begins when you create a hospitable environment for root growth, allowing your petunias to access moisture without becoming waterlogged. A mix ratio of 2:1 or 3:1 perlite to standard potting soil is typically effective for improving aeration.
This transition to a drainage-focused soil mix is crucial as it allows excess water to escape while enabling air circulation around the roots, fostering optimal growth conditions and reducing root rot risk. Without this necessary change, petunias may struggle to recover from overwatering. Ensure your new pot includes drainage holes; pots lacking this feature can worsen moisture retention. Additionally, adding a layer of gravel at the bottom can further enhance drainage, preventing soil from clogging the holes and aiding in moisture regulation. If you find that moisture levels remain high despite replanting, consider choosing a pot style that encourages better airflow.
Your first move is to avoid burying the stems too deeply in the new mix, as this can trap excess moisture around the base. Keep your petunias at the same planting depth to prevent further issues. If buried too deeply, new growth may become stunted, struggling to push through the soil. Fill the new pot halfway with the dry mix before positioning the plant inside, and add soil around the edges without covering the stem base. Watch for light exposure; using a mix that dries quickly is essential, so ensure your plants are situated where sunlight or airflow helps with drying. If uncertain about moisture, leave the base of the plant slightly exposed to encourage faster drying. If replanting does not bring immediate improvement, check your watering schedule, and adjust according to the current weather and soil moisture conditions. If your petunias continue to droop, check for potential pests or diseases that could be affecting their health.
Step 4 – Inspect Petunias for New Growth Weekly
Inspect your petunias weekly for new growth and signs of vitality. Watch for leaves firming up and reaching toward the light, indicating that the plant is responding positively to care. Begin this observation process immediately after your corrective actions and continue weekly. New growth generally appears at the tips of the stems and should start developing within a week if conditions are favorable. If any new growth appears stunted, assess moisture levels and practice more controlled watering. Regular monitoring is crucial; if leaves begin to curl or turn yellow instead of flourishing, this signals further stress that requires immediate attention. Early detection of these signs can prevent further health decline.
For the next week, continue your inspections to monitor the recovery process effectively. A fully recovered plant will exhibit new bud formation and leaves that push outward rather than droop down; this is a key indicator that your interventions are working. As new growth emerges, confirm the health of the young leaves—healthy new leaves are usually bright green and strong, while any pale or yellowing leaves may indicate nutrient deficiencies or other stress that requires attention. Conversely, if yellowing leaves or persistent drooping return, it indicates that further intervention is necessary. Documenting your observations can help in spotting patterns; for example, if new leaves wilt shortly after appearing, it may indicate drainage issues or pest activity. Use these observations to enhance your ongoing care regimen based on empirical data.
If after two weeks your petunias show no signs of improvement, check the root zone for further inspection. It may be necessary to change the soil again or verify that the current conditions, such as water exposure and available light, are conducive to their growth and health. Ignoring these follow-up steps can result in retracing old issues, prolonging your plants’ recovery time. If the surrounding flora thrives while your petunias struggle, consider adjusting their location. Also, reassess light exposure; petunias thrive in full sun, requiring at least six hours of direct sunlight daily. If issues persist, it may be beneficial to test the soil pH. Petunias thrive in slightly acidic to neutral soil (pH 6.0 to 7.0), and deviations could impact their ability to absorb nutrients. Testing with a simple pH kit is a practical step, and minor adjustments can be made by adding sulfur to lower pH or lime to raise it, should issues arise.
FAQ
How long does it take for drooping petunias to recover?
Recovery for drooping petunias can take from a few days to a couple of weeks, depending on the degree of overwatering. Consistent monitoring and proper replanting can significantly expedite this process. Signs of improvement, such as newly formed buds and healthy leaf growth, are good indicators of recovery. If problems persist beyond two weeks and no fresh growth is noticed, deeper issues may need to be addressed, such as checking for root rot or confirming adequate light and nutrient levels.
Will my petunias still bloom after overwatering?
Yes, petunias can still bloom after recovering from overwatering. Once the plant heals, you should see new blooms appear within weeks as the energy returns to the previously stressed areas. The timing of blooming can also depend on the season and environmental conditions, with peak bloom time typically in warmer weather. Ensure that your petunias receive adequate sunlight as they recover, as this is crucial for triggering those blooms. If you’re managing recovery during cooler periods, it might take slightly longer for flowers to emerge, as temperatures affect growth rates.
Should I remove affected parts while they recover?
It’s advisable to remove any dead or severely wilted parts of the plant to promote better airflow and growth. This helps overall plant health during its recovery phase. Pruning unhealthy sections encourages new growth and focuses the plant’s energy where it can be effective. If you are hesitant about removing sections, be observant; if a stem feels rubbery or dark compared to others, it’s time for pruning to avoid further issues. Taking a strategic approach in which you only remove the most affected areas can help preserve the overall structure of the plant, supporting quicker recovery.