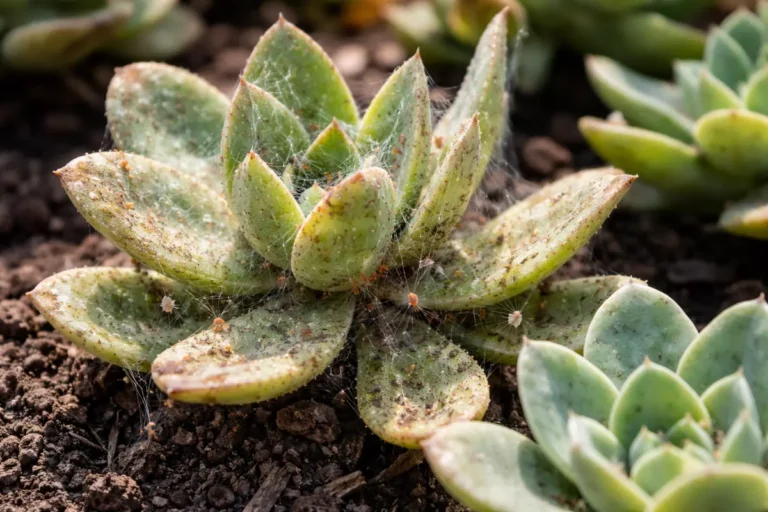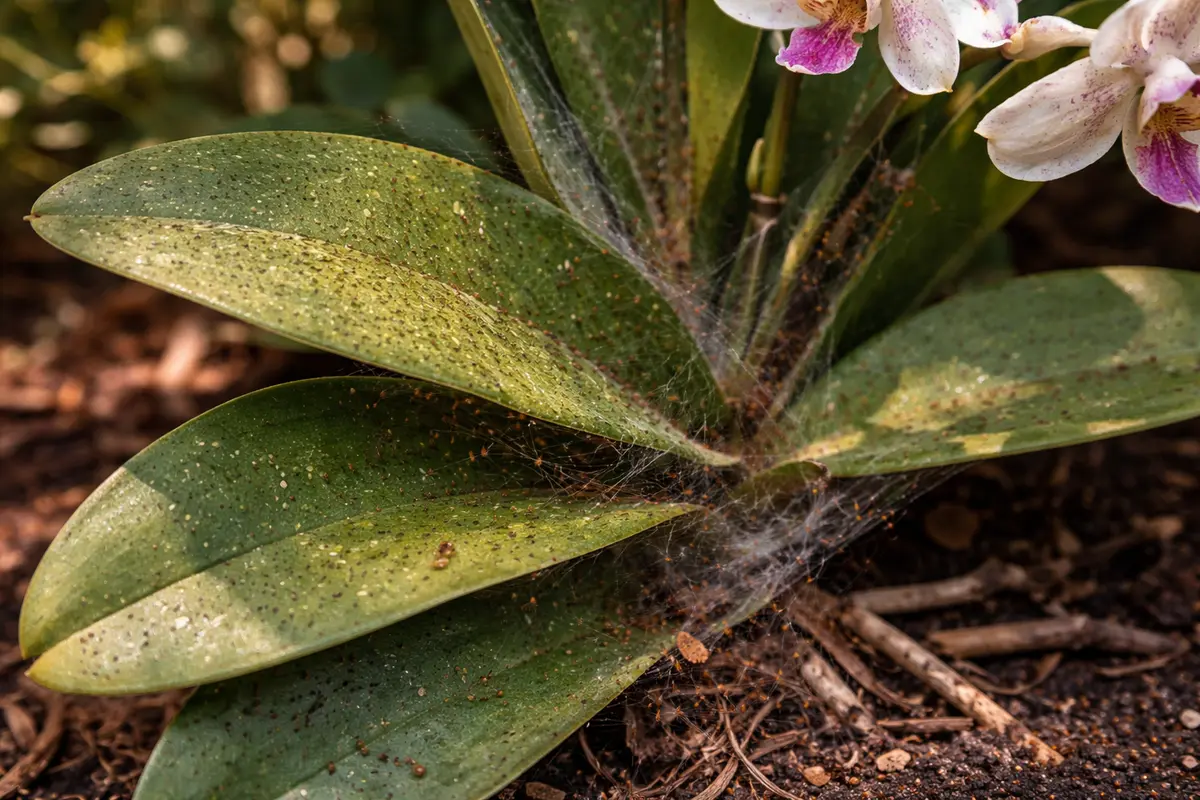
You may notice tiny webs and stippling on your orchids during the dry air of winter, which is why you need to know how to fix spider mites on orchids in dry air. These pests suck the sap from your plants, causing yellowing and spots on the leaves that can lead to serious damage. If left untreated, the issue can spread rapidly, weakening the plant and making it harder to fix, but you can still improve the situation by checking the plants closely and adjusting humidity levels.
Step 1 – Spray Insecticidal Soap on Affected Orchids
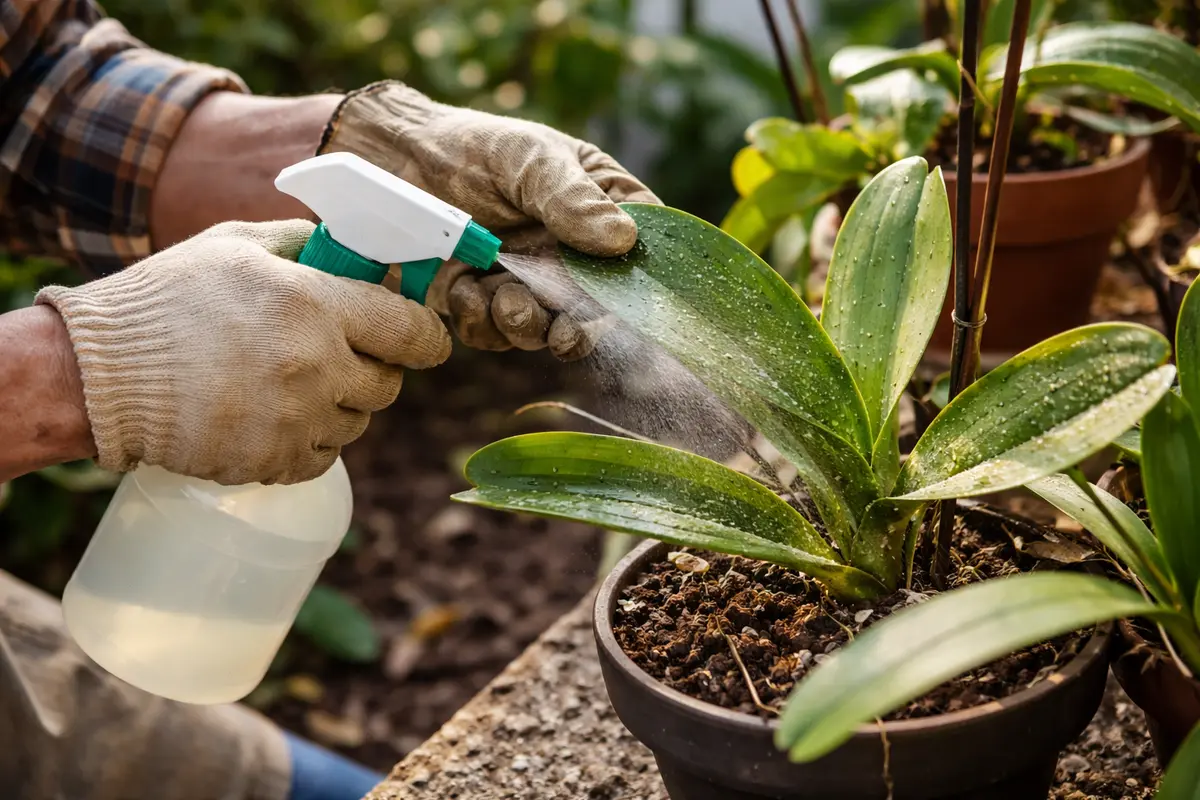
Spray insecticidal soap on the affected orchids immediately. You should see a reduction in spider mite activity within just a few hours, as they are suffocated by the soap’s coating. Ensure thorough coverage of both the upper and lower sides of the leaves, where these tiny pests prefer to hide. It’s vital to use enough soap to drench the surfaces adequately; aim to spray until the leaves shine lightly without causing runoff, which can dilute the effectiveness. Mistakes often occur when gardeners underestimate the amount of soap needed, resulting in insufficient coverage that allows spider mites to survive.
Insecticidal soap disrupts the protective outer layer of spider mites, suffocating them. This immediate action is crucial; delaying treatment allows the infestation to grow, making control more challenging and time-consuming. Spider mites thrive in dry conditions; hence, addressing them swiftly in your environment is critical. After the application, observe for signs of activity reduction, such as fewer visible webs and less movement on leaves, which typically happen within a day. Should you see no observable reduction in spider mite activity after this timeframe, consider repeating the treatment or switching to a stronger pesticide.
A common mistake at this stage is to apply insecticidal soap only when the orchids appear healthy, overlooking the possibility of a hidden infestation. Many gardeners believe treating visible damage is enough, failing to confirm the presence of spider mites first. You can further inspect by shaking the leaves over a white piece of paper; if you see small specks that move, they could be spider mites. Remember to focus on the undersides of leaves—failure to address these areas can allow remaining mites to survive and regenerate. Additionally, if you notice that damage persists after treatment, this could mean that either the initial soap treatment was inadequate or the infestation is more severe than anticipated, necessitating additional treatments or measures.
Step 2 – Examine Humidity Levels in Orchid Environment
Check the humidity levels in the area where your orchids are kept. If the humidity is below 40%, you will need to take steps to increase it, creating an unfavorable environment for spider mites. Using a hygrometer provides accurate measurements of the humidity, helping you determine your next best course of action. Regularly checking during particularly dry periods, like winter, will help you stay alert to sudden drops that can encourage spider mite resurgence.
Maintaining higher humidity inhibits spider mite reproduction, as these pests thrive in dry conditions. Orchids naturally prefer and thrive in humid environments; therefore, ensuring adequate moisture helps your plants while simultaneously limiting mite activity. You can increase humidity by regularly misting the orchids or placing a pebble tray filled with water nearby, which allows evaporation to raise local humidity levels. Regular monitoring for optimal humidity can help dictate if additional measures, such as grouping plants together for moisture retention, are needed. If you find that humidity is still low after attempting these methods, consider moving your orchids to a more humidity-friendly location in your home, possibly away from heating vents.
If you discover that your humidity frequently drops below the desired levels, consider investing in a humidifier or creating a shallow water tray nearby. However, be cautious if your orchids are in direct sunlight; rapid evaporation from excessive heat can undermine your efforts to raise humidity. Pay special attention to newly repotted orchids—they will require more immediate moisture to adapt and thrive. Conversely, if the humidity remains consistently high, it can lead to mold growth. Be vigilant for signs such as greasy leaves or a musty odor, which indicate that the moisture levels may need adjusting. In such cases, adequate airflow around your orchids becomes essential to maintain a thriving environment.
Step 3 – Mist Leaves to Aid Orchid Recovery
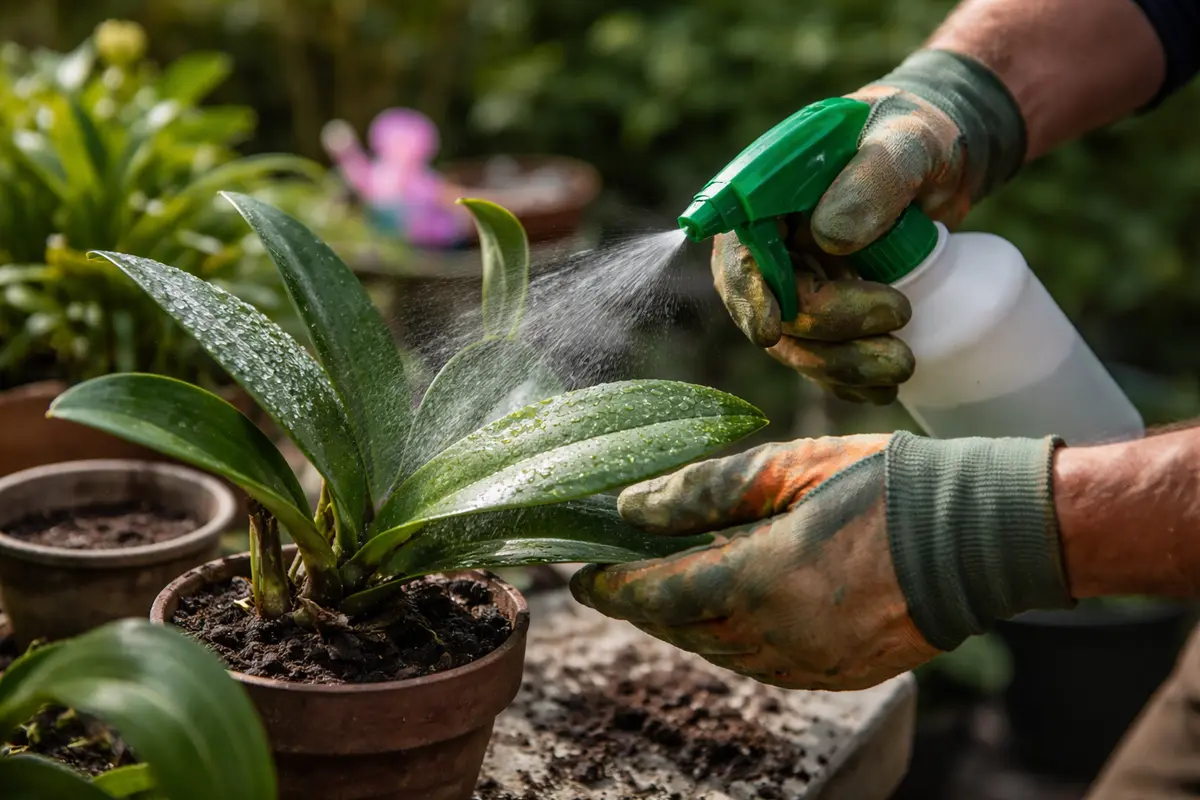
Start by increasing humidity around your orchids by placing a humidifier nearby or using a pebble tray filled with water. As the humidity rises, watch for the return of new leaf growth and the resumption of blooming on your orchids, signaling that they are bouncing back from spider mite damage.
Recovery from spider mites can take from a few weeks to a couple of months, depending on environmental conditions. Healthy regrowth includes vibrant green leaves that are free from webs and speckling. Increased humidity and consistent watering will speed recovery, whereas prolonged dry air or neglect in watering can hinder the process; for instance, a dry orchid may show stunted growth while a properly maintained one exhibits thriving, fresh shoots. If not showing new signs of growth, check for lingering pests or insufficient humidity levels.
Avoid the temptation to over-fertilize during recovery, as this can stress the plant further. Instead, focus on providing an appropriate water and humidity balance that encourages natural regrowth without introducing additional nutrients. Orchids suffering from spider mite damage may not need high nitrogen fertilizers until they show robust new growth, so wait for noticeable improvement before resuming regular feeding schedules.
Recovery from spider mites in dry air can take several weeks, depending on the humidity levels and the extent of damage. Healthy regrowth is often marked by fresh green leaves and perhaps blooming buds, while a lack of progress may indicate ongoing stress or mite activity. If the regrowth appears stunted, check that your humidity levels are consistently between 40-70%.
During recovery, avoid overcompensating with excessive water or fertilizer, as this can lead to root rot. If you notice yellowing leaves, reassess your watering schedule, as this can signal that the roots are overwhelmed from being kept too moist.
The recovery timeline typically spans two to four weeks, depending on the original mite infestation severity. Healthy regrowth is marked by vibrant new leaves that emerge without webbing, indicating that the spider mites have been sufficiently managed. Environmental conditions, such as maintaining higher humidity and reducing stressors, can fast-track recovery, whereas low light levels and persistent dry air may hinder progress. If new leaves appear yellow or stunted, check your watering routine. A common oversight during this step is to over-fertilize in hopes of accelerating growth rather than allowing the plant to recover naturally with adequate care. Monitoring soil moisture ensures that roots have time to recover without becoming waterlogged.
Avoid overwatering during recovery, which can lead to root rot if the orchid sits in excessively moist soil. Orchids thrive in drier conditions, so ensure the potting medium dries out between waterings. If the leaves appear shriveled or yellow, reassess your watering schedule; if they feel firm and healthy, your moisture levels are likely appropriate. Daily misting not only aids the orchids in recovering by raising humidity around the leaves, but also promotes healthier growth and minimizes stress from the spider mite infestation. By increasing humidity, you directly combat the conditions that spider mites favor, aiding recovery. As a progress marker, you should observe new growth within a week, which signals that your orchids are responding well to the care regimen. If, however, after a week you see no new growth or the leaves remain dry and crisp, consider adjusting both the humidity tactics and the regularity of misting.
However, be cautious not to overwater; the purpose of misting is to enhance humidity without saturating the soil, as an overly moist environment can lead to root rot. Some gardeners mistakenly assume that misting alone will resolve the spider mite issue, but it should function as part of a comprehensive treatment approach that includes insecticidal soap. For instance, if after misting the leaves show dark spots or start to soften, this could be a sign of root problems arising from excessive moisture and a compounding spider mite issue. Adjust your practices accordingly to avoid further complications. Clear monitoring of leaf texture and firmness directly informs your next steps and indicates how effectively you are managing overall plant health amid recovering from the spider mite challenge.
Step 4 – Avoid Overwatering to Deter Spider Mites
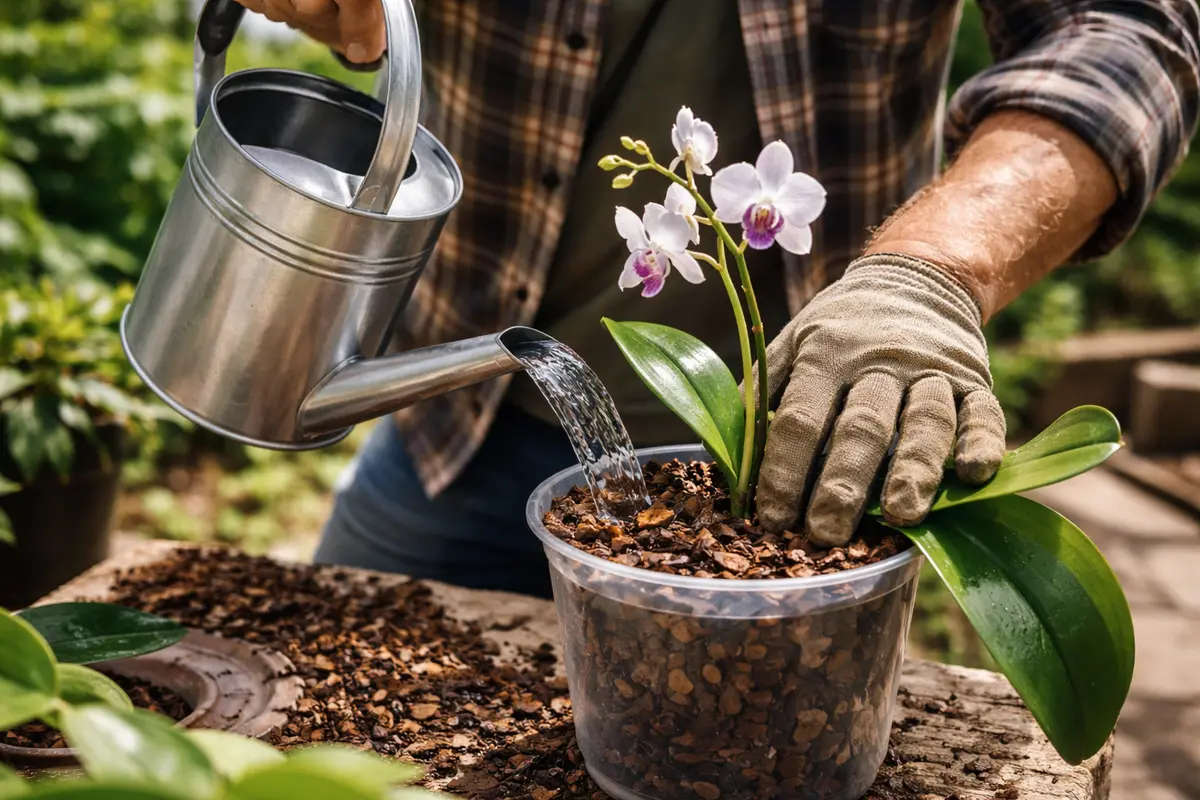
Avoid overwatering your orchids to deter further spider mite infestations. Consistently check the top inch of the potting medium before watering, as overly wet conditions can attract pests and lead to serious root issues. Generally, allowing the top inch to dry out before watering again helps maintain a balanced moisture level that supports the plant’s health while deterring pests. If you find your orchids are regularly sitting in damp soil, despite appears to be dry on the top, consider leveraging a moisture meter to paint a clearer picture of soil conditions below the surface.
Overwatering is equally as detrimental as under-watering, creating conditions conducive to fungal diseases and stressing the plants out. This stress reduces your orchids‘ ability to cope with spider mite populations, making them more vulnerable. Establishing a consistent watering routine helps maintain plant health; be mindful, as prolonged sogginess can lead to root rot, which only complicates the orchid’s recovery. On particularly hot days, be alert to the speed at which moisture evaporates, adjusting your watering habits accordingly. Should the potting mix under your fingers feel squishy or overly moist, reassess your watering schedule to avoid any detrimental impacts.
If the potting medium is perpetually soggy, repotting the orchids into a well-draining mix designed for orchids may be a necessary step. This assists in retaining just enough moisture to avoid drying out but drains effectively after watering. Additionally, monitor rainfall and adjust your watering schedule based on the season and humidity levels—during high humidity months, evaporation rates decrease significantly. If you start seeing rapid yellowing of leaves alongside a persistently soggy medium, consider repotting as an urgent step to save the plant from further distress. Pay special attention to the response of your orchids; signs such as wilting or softening leaves signal an urgent need for reevaluating watering practices.
Step 5 – Inspect Orchid Foliage for New Spider Mite Activity
Start by monitoring your orchids for spider mites, checking the undersides of leaves for tiny, discolored spots or fine webbing, which can indicate an infestation. Pay attention to the overall condition of the leaves—firmness and color are key indicators of health. Recheck your plants every few days to catch any resurgence early, particularly after any interventions you’ve made. A proactive approach often uncovers issues before they escalate into a resurgent infestation, allowing for timely intervention.
A fully recovered orchid displays vibrant, green leaves that are free of spots and webbing, with a smooth texture. In contrast, early signs of spider mites returning may include yellowing leaves that appear to be stippled or mottled, alongside a noticeable fine webbing at leaf joints. If the leaves feel rough or dusty, check again for signs of new activity. Setting a regular inspection schedule based on your environmental conditions can reinforce early detection efforts — for instance, checking in every two to three days might be adequate in dry conditions, while humid periods might require less frequent checks.
If spider mites return even after following all precautions, consider increasing humidity around your orchids, as dry air can exacerbate the problem. If mite populations persist, you may need to apply a stronger miticide or consult with a professional for targeted treatments. Always reassess the growing environment to prevent future outbreaks. Noticing any new pests can prompt immediate action to secure your established healthy plants, as leaving them unchecked may introduce problems that extend to other plants in your collection.
Early observation of these symptoms can aid in catching any returning spider mites before they escalate into a severe infestation. Should you see identical signs reemerging after a few days of treatment, it could point to the insufficiency of the initial methods, prompting a reevaluation of your approach. A well-cared-for orchid typically displays vibrant, unblemished leaves, indicating that recovery is in progress. Yet, if you spot small white dots and persistent webbing, it often necessitates a second treatment—or a review of the current environmental conditions for potential adjustments. Additionally, if you frequently encounter recurring infestations, implementing a rotating schedule for pest control applications may be necessary to prevent spider mite populations from developing resistance.
FAQ
How long does it take for orchids to recover from spider mite infestations?
Orchids typically start showing improvement within a week following treatment, but total recovery may take longer based on the infestation’s severity and the overall health of the plant. Careful observation of your orchids is essential; when you start noticing new growth, you can be more confident that the infestation is under control, although full health restoration might extend up to a month.
Can spider mites spread to other plants in the house?
Yes, spider mites can easily spread to nearby plants if left unchecked. It’s advisable to isolate infested orchids until the infestation is fully controlled to prevent the risk of spreading to healthy plants. Long-term infestations on your orchids may result in visible damage to neighboring flora, so implementing preventive measures like regular inspections can be beneficial. Checking the undersides of leaves on nearby plants for any signs of mite activity helps keep the issue contained.
Should I remove the spider mite-infested leaves from my orchids?
Yes, removing heavily infested leaves can significantly help reduce the spider mite population. However, be sure to carefully execute this process so as not to stress the plant further; dispose of the removed leaves well away from your other plants. Always use clean scissors or cutting tools to prevent the introduction of further pests or diseases, and wearing gloves can prevent transferring unwanted materials from one plant to another.