You may notice your outdoor succulents showing signs of distress during winter, such as wilting leaves and mushy roots, which is why you need to know how to treat root rot in outdoor succulents during winter. This condition arises when overwatering or poor drainage allows roots to sit in water, leading to rotting and eventual damage. If left unaddressed, the issue can spread, weakening the plant and making recovery harder, but fixing it is possible now; you can inspect the soil, cut away rotten roots, and improve drainage to help your succulents bounce back.
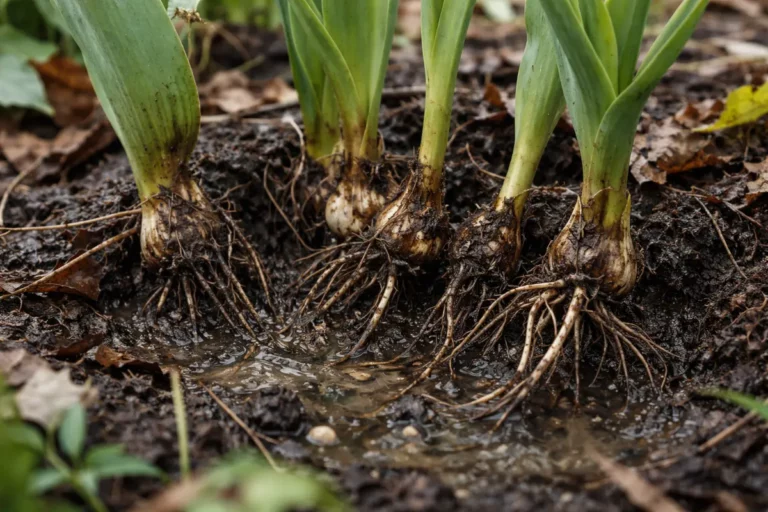
Step 1 – Remove Excess Soil from Affected Succulents
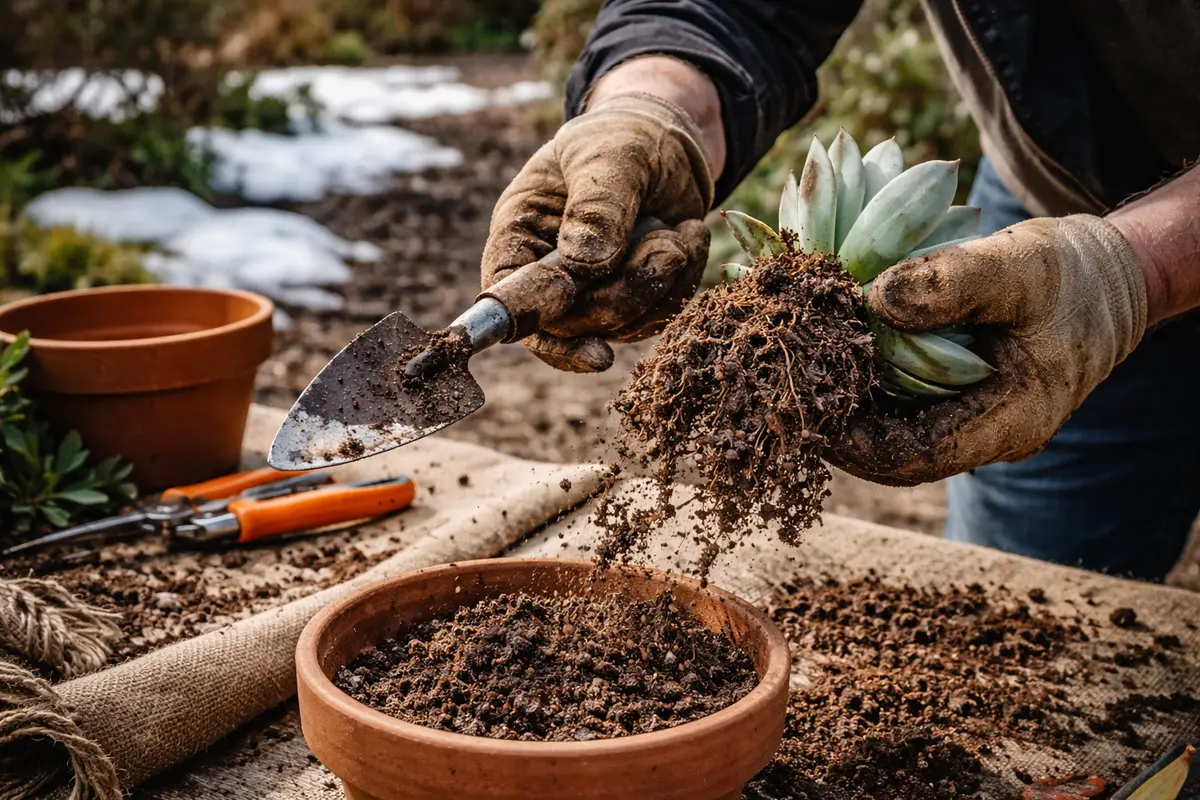
Start by carefully removing the succulent from its pot and gently shaking off the excess soil clinging to the roots. You will notice the roots becoming more visible and any excess moisture being reduced. Examine the root system for signs of rot, which will appear as black, mushy roots. If you find affected roots, trim them away with sterilized scissors, ensuring you leave behind healthy, firm roots. By doing this, you will see improved airflow around the remaining roots, which is vital for their recovery.
Acting quickly is crucial because root rot can spread rapidly in cooler temperatures, which slows the plant’s metabolism and recovery. If left untreated, the plant’s roots will continue to decompose, leading to systemic failure where the entire plant could succumb to fungal pathogens. If the roots are mushy, act promptly; if you notice firm roots with no smell, check for other watering issues.
A gardener noticed a quick turnaround after taking swift action against root rot in their outdoor succulent during a winter storm. By removing the affected roots immediately, the plant eventually thrived, while a neighbor who delayed intervention lost their entire collection to rot within weeks. Many gardeners mistakenly think waiting for warmer weather will help, but the cold only exacerbates the rot situation. Remember, timely action can often make the difference between recovery and loss.
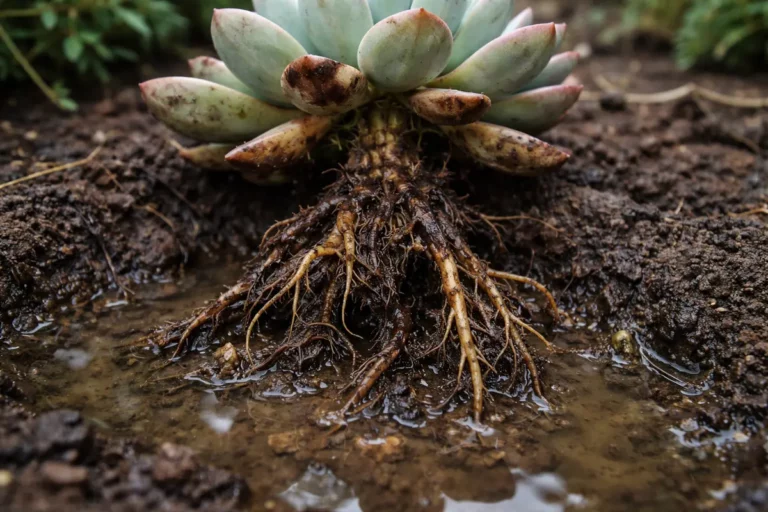
After removing excess soil, it is essential to assess the condition of the remaining roots. If the remaining roots feel firm and healthy, you can proceed with repotting into dry, well-draining soil. If they are still soft or show signs of decay, you will need to repeat the inspection and further trim any unhealthy roots.
A common mistake at this stage is rushing the clean-up without thoroughly checking root health. For instance, skip the inspection phase and you might overlook damaged roots that demand attention. In practice, many gardeners focus on soil removal alone, inadvertently neglecting to prune away unhealthy roots that contribute to the ongoing rot issue. Observing how roots feel—firm versus mushy—can significantly aid in deciding what to keep and what to remove, ensuring a healthier plant moving forward.
Step 2 – Diagnose Improper Drainage Around Roots
Check the drainage conditions around the succulent roots immediately. You should notice whether the soil drains poorly or is excessively soggy, indicating inadequate drainage. If excess water collects around the roots, it will intensify the risk of root rot and hinder overall plant health.
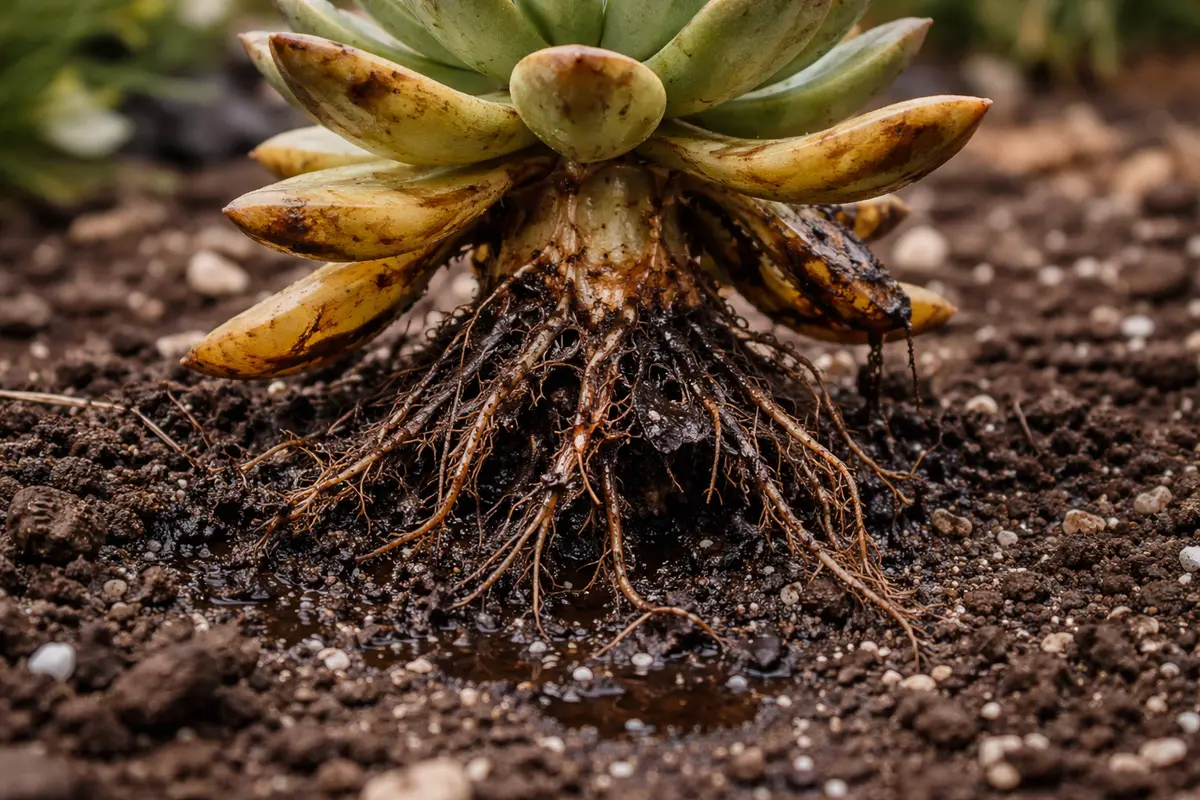
This happens because poor drainage can trap excess moisture around the roots, significantly increasing the likelihood of rot. For instance, if you observe large clumps of soil that retain water longer than others, this condition can impede root health. Signs above ground, such as wilting leaves or discoloration, often originate from this underlying issue, confirming the importance of a thorough assessment. Stick a finger into the soil to a depth of two inches; if it feels damp, take immediate action to improve drainage.
If roots still appear healthy but the soil emits a sour odor, replace the soil entirely. The foul smell indicates anaerobic conditions, suggesting potential fungal growth that could quickly lead to root rot, even if the roots seem intact visually. In this case, removing the plant and refreshing the soil is crucial to restoring proper drainage. Enhance your watering practices and consider using raised beds or pots with drainage holes to prevent these issues in the future.
Step 3 – Replace Soil and Replant Succulents
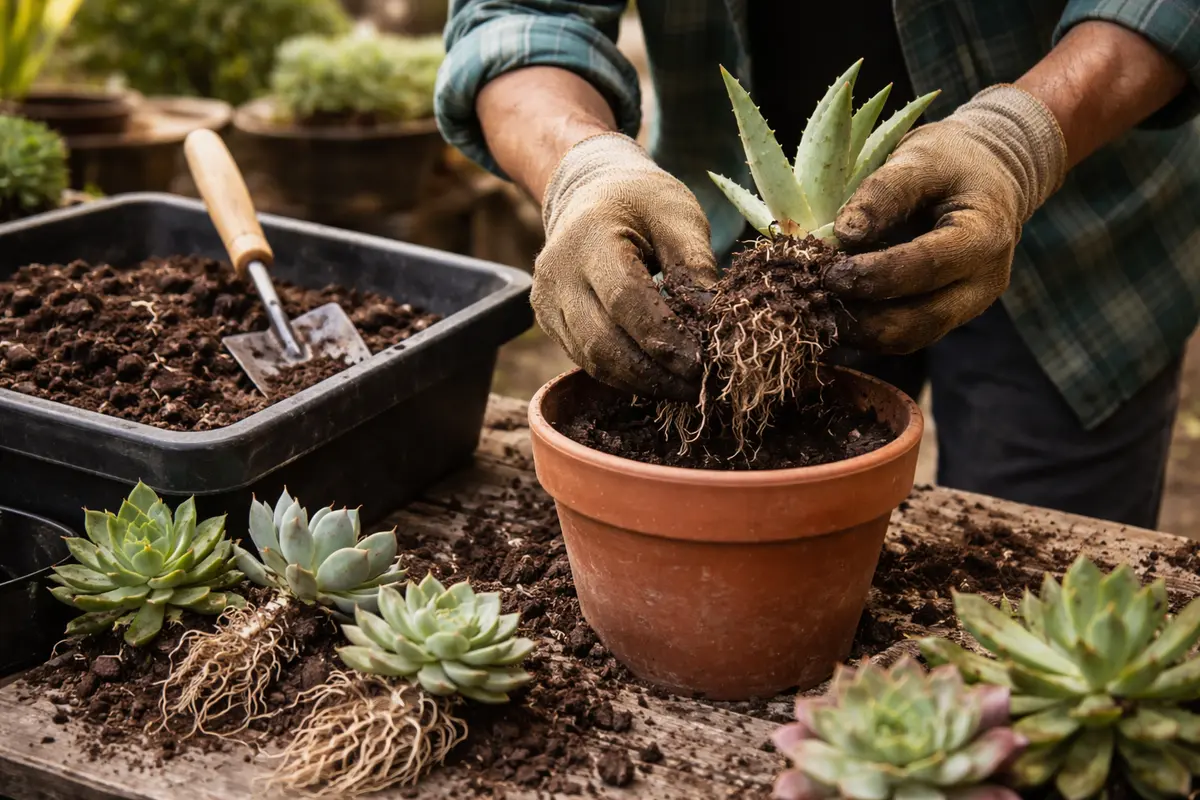
Start by replacing the old soil with fresh, well-draining succulent mix to encourage root recovery. You should see improved firmness in the leaves and a reduction in any mushiness within a week or two, indicating the succulents are stabilizing.
Once situated in their new soil, most outdoor succulents will show visible signs of new growth within 2 to 4 weeks when provided with warmth and minimal humidity. Healthy plants will exhibit firm, plump leaves emerging from the center; however, insufficient sunlight due to poor placement may hinder growth. If the plants seem to be struggling in a shaded position, check their placement and move them to an area with better light exposure.
During the recovery phase, be cautious not to overwater, as too much moisture can induce root complications. Generally, watering once a month is advisable, but if the topsoil remains damp, reduce the frequency to prevent further issues. Should you notice yellowing leaves, check that fertilizer is not being applied prematurely, as this can put additional stress on the recovering roots.
Replacing the soil not only rejuvenates the growing medium but also enhances airflow to the roots, which is essential for recovery. Utilizing cactus or succulent soil mixes containing sand or perlite improves drainage and root functionality. A well-aerated soil structure is vital for nutrient absorption, particularly critical during the winter months when plant activity may slow down.
When replanting, avoid the common mistake of over-watering. While it’s tempting to hydrate the plants right after replanting, excess moisture can counteract the benefits of the fresh soil. Hold off on watering until the top inch of soil feels dry, which may take a few days to establish equilibrium. Observing signs such as the returning firmness of leaves can indicate when to resume normal watering schedules, ensuring healthy root establishment and reducing water-related stress.
Step 4 – Water Only When Soil Is Completely Dry
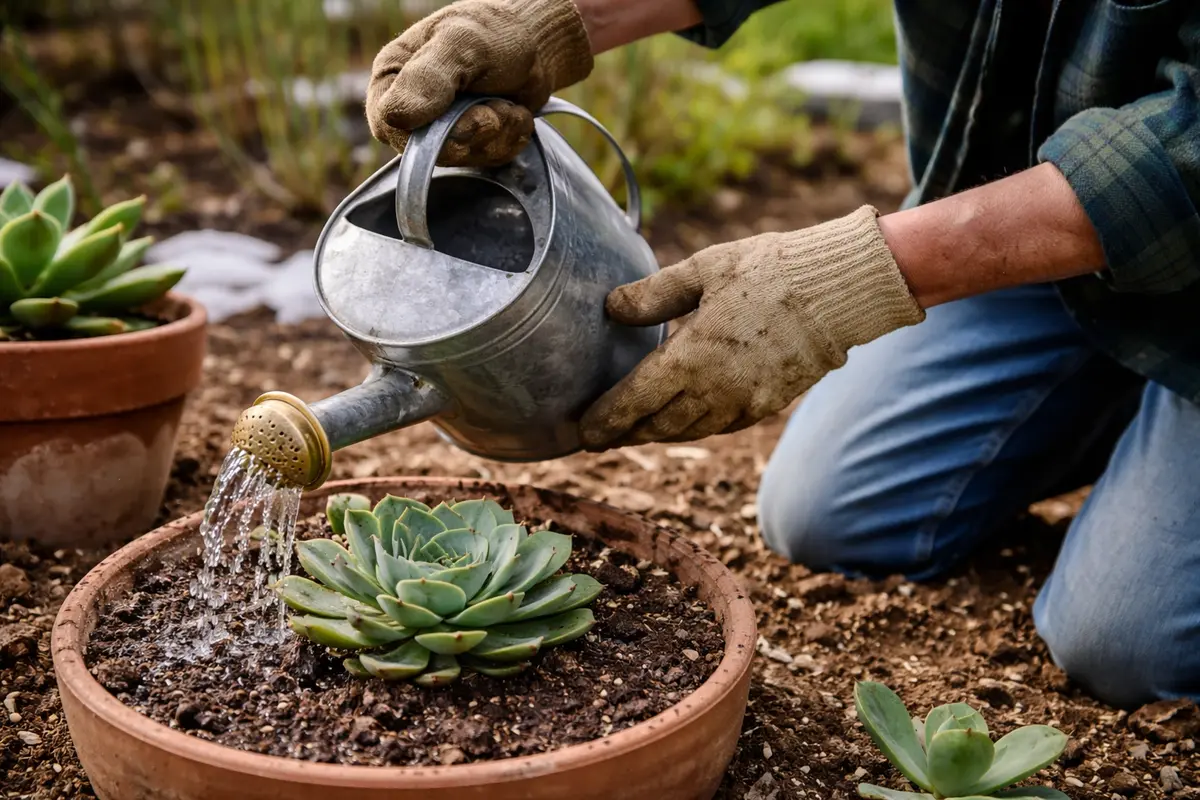
Begin by observing the moisture level in your succulent’s soil. When the top inch feels completely dry, it’s time to water, preventing root rot and ensuring proper hydration.
From here on, establish a watering routine based on the soil’s dryness with these specific actions: Water your succulents every three weeks in winter, checking soil moisture two days before your scheduled watering. If the soil still feels wet, wait another week before checking again. Additionally, if the temperature drops unexpectedly, extend the waiting period to four weeks. Compare your succulents: those in well-draining soil will exhibit a firm, plump appearance when adequately hydrated, while overly moist soil will cause leaves to become mushy and discolored.
Following the weather forecast can also help you manage watering effectively. If rain is predicted, delay watering as excess moisture can lead to root rot. In particularly wet areas, consider moving pots to an elevated location or indoors during heavy rains to protect against standing water. This provides a crucial opportunity to avoid excess moisture and keep your succulents thriving.
If your watering routine leaves you unsure about moisture levels, use a moisture meter. If it reads wet after your usual drying time, adjust your schedule accordingly. Make it a habit to check soil moisture weekly for the best results, allowing your succulents to stay healthy and properly hydrated throughout the winter.
Step 5 – Look for Signs of New Growth in Succulents
Start by checking your succulents every week for signs of root rot, particularly after heavy winter rains. Observe for changes in leaf color, which may turn brown or translucent, and inspect for mushy stems that indicate decay. Recheck the soil moisture every 7 days, allowing it to dry completely before watering to prevent further disease spread.
A fully recovered succulent will display firm, plump leaves and a vibrant green color, contrasting sharply with the earlier signs of yellowing or wilting leaves often associated with root rot. If the plant begins to display soft, blackened stems again, it’s a clear indication that the root rot issue may be returning, prompting immediate action.
If symptoms of root rot reappear despite previous treatments, remove the affected plant from its pot and examine the roots for any remaining rotten areas, cutting away any black or mushy sections. If the problem persists, consider repotting the succulent in fresh, well-draining soil to reduce disease spread; doing so will ensure any residual pathogens are minimized in the new environment.
Regularly checking for new growth is vital because it signifies the revival of the plant from root rot conditions. New shoots or changes in leaf rigidity reflect healthier roots that can absorb nutrients and water effectively. The acknowledgment of visible changes can sometimes appear within two weeks of correcting cultivation practices, indicating a favorable recovery trajectory. A well-timed intervention can yield quick improvements, showing that the steps taken were effective.
If the leaves remain limp after a few weeks, it may signal a continued problem with root health or excess moisture retention in the soil. Should visible decay reappear, it can be wise to repeat the replanting process with fresh soil. If recovery remains stalled despite your efforts, seeking professional advice might be necessary, especially for rarer succulent varieties that could have additional care requirements. It’s essential to trust your observations; discoloration or limpness might mean something deeper within the growing conditions is still amiss.
FAQ
How long does it take for succulents to recover from root rot?
Recovery from root rot can take anywhere from a few weeks to several months, depending on the severity of the damage. Once conditions are made favorable, like good drainage and proper watering, you may begin noticing signs of recovery within two to three weeks. Consistency in care is key, so maintaining routine checks on soil moisture is crucial.
Can root rot spread between succulents?
Yes, root rot can spread, particularly if the same soil or potting medium is used for multiple plants. It’s essential to disinfect any tools or containers used with an infected plant and ensure that susceptible plants remain monitored for any signs of distress. Performing regular checks can prevent spreading issues as well.
Should I remove all affected parts of the succulent?
Yes, any visibly rotten or mushy parts should be carefully trimmed away to stop the spread of decay. However, be cautious to only cut away damaged tissue without removing too much of the healthy plant, allowing it to recover effectively. Cleaning tools with disinfectant can further prevent the risk of spreading pathogens into the remaining healthy sections.