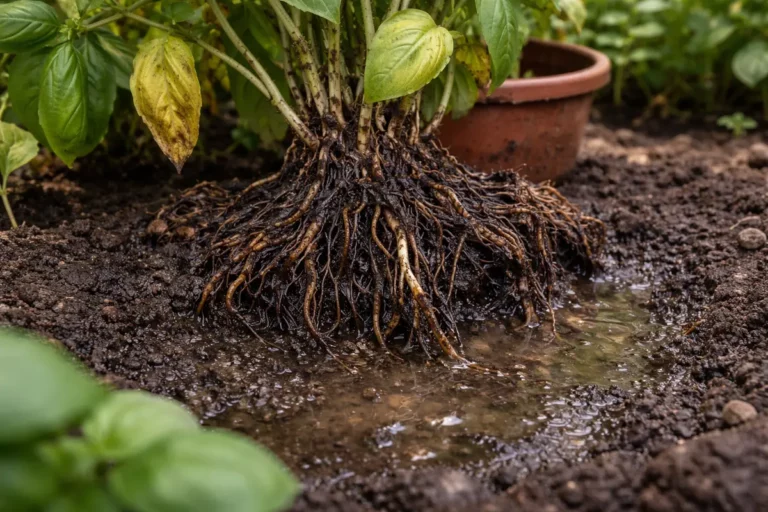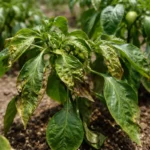
You may notice your potted ferns looking particularly droopy and discolored after heavy rainfall, which is why you need to know how to treat root rot in potted ferns after heavy rainfall. This condition often leads to mushy roots and yellowing leaves, signaling that your ferns are suffering from poor drainage and excess moisture. If left unchecked, the problem can spread, weakens the plant, and sets the plant back significantly. It can even lead to the death of your ferns. However, fixing it is possible now—just remove the damaged roots and improve the potting mix to ensure better drainage and air circulation.
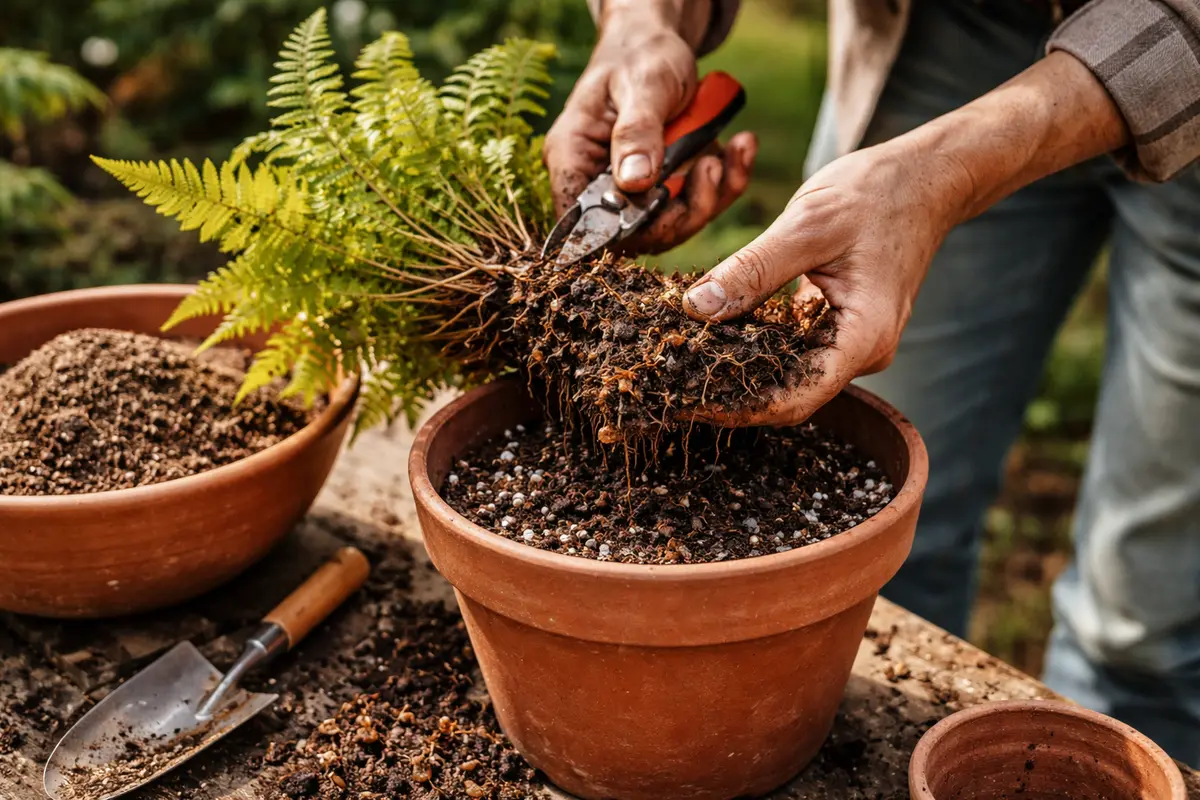
Step 1 – Trim Damaged Fern Leaves After Rainfall
Start by gently removing the potted fern from its container to inspect the root system. Carefully shake off excess soil to reveal the roots, and look for any dark, mushy, or rotten roots. Signs of damage should be evident, such as a foul odor or a noticeable difference in texture, indicating root rot has occurred; if these signs are visible, act quickly to minimize further damage.
Acting fast is crucial because fern roots lack the sturdiness of other plants and can deteriorate rapidly when waterlogged. If left untreated, the damaged roots will not be able to absorb nutrients, leading to a decline in foliage and potential death of the plant. Healthy roots should appear white and firm, while rotting roots turn brown and mushy; if you see white roots, affirm good health and address watering habits, while if not this → check for drainage issues.
A gardener once waited too long to intervene, leading to a total loss of a prized fern, as its roots completely rotted away. Commonly, gardeners might mistakenly remove only the visibly affected roots without assessing remaining roots’ condition. This oversight can lead to ignoring other parts of the root system that may also be compromised.
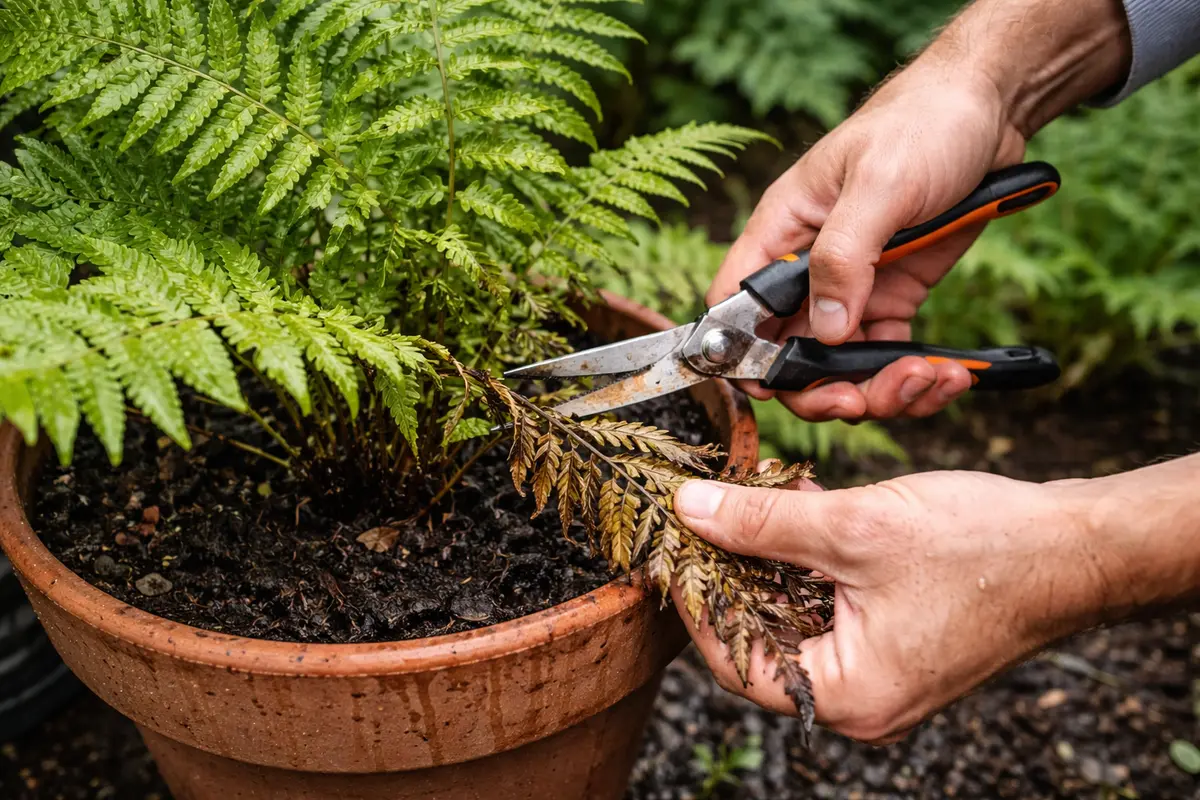
Trimming damaged foliage is critical because it removes any parts of the plant that are already infected or compromised, allowing the healthy parts to thrive. If these damaged leaves are left on the fern, they will continue to hold moisture at the leaf base, promoting further mold or rot development. The sooner you make these cuts, the quicker the plant can stabilize and begin to heal. Recovery can show signs such as deeper green foliage merely days after your initial pruning; initially, look for any wilting leaves to become more buoyant.
A common mistake at this stage is not removing enough of the damaged material. Some gardeners might hesitate and only trim the visibly affected leaves, but if the stems or roots are also mushy or discolored, they must be removed as well. If you wait too long before making these cuts, the chances of saving the healthy parts diminish significantly. If you encounter stems that are sappy or pulpy to the touch, it’s crucial not to hesitate to remove those too, as they contribute to the moisture captured in the pot, fostering root rot. Furthermore, observe if the greenery seems sluggish post-trim; sluggish growth can indicate that more damage is lurking below the surface.
Step 2 – Analyze Soil for Excess Moisture Issues
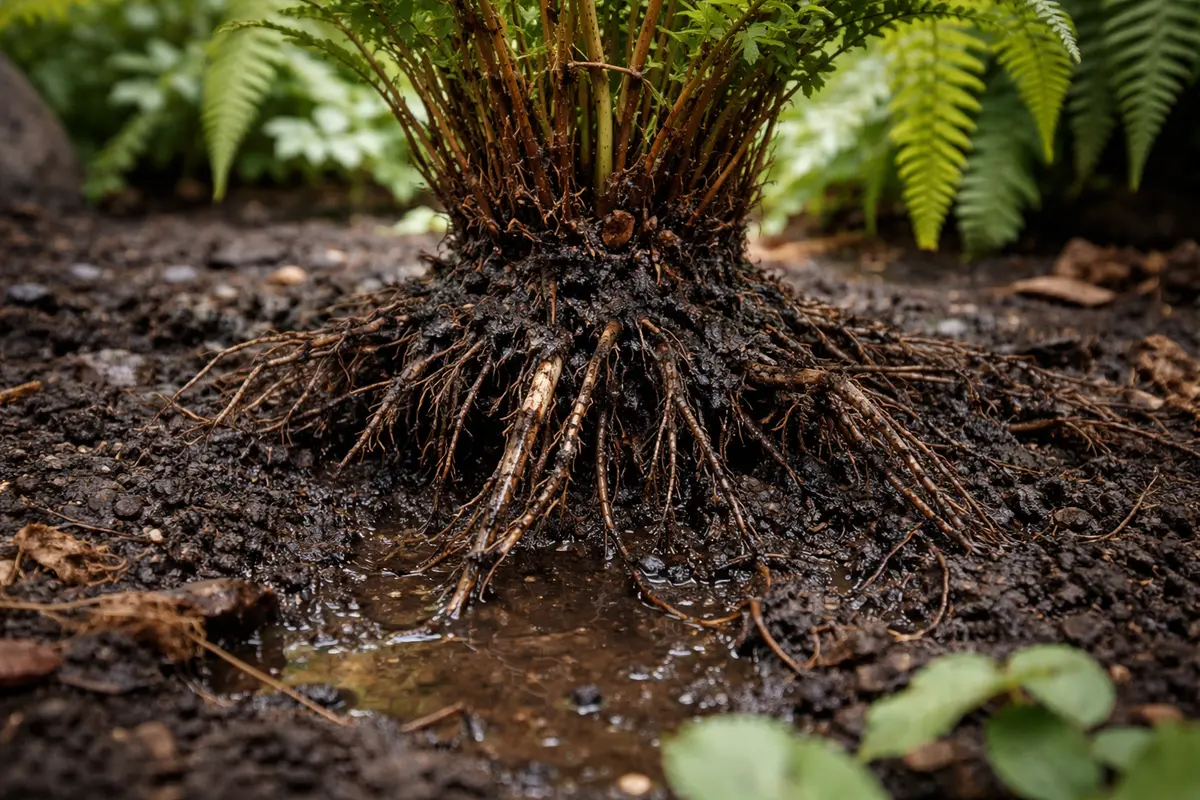
Inspect the soil surrounding your ferns for excess moisture. You should see that the soil surface is dry, rather than soggy or waterlogged. Doing this helps confirm whether overwatering or poor drainage is the root cause of the issue. Pay attention to the texture; loose soil means better drainage. If you stick a finger into the soil and it feels overly sticky and wet, this is a clear sign that the soil is retaining too much moisture.
Soil that remains excessively wet can lead to root rot, as ferns require well-draining soil to absorb nutrients efficiently. Roots deprived of air because of saturated soil will begin to rot, ultimately leading to the overall demise of the plant. If the soil stays too wet for an extended period, the fungi that contribute to root rot will thrive, compounding the issues already faced. If you want to encourage healthy growth, ensuring the soil stays damp but not soaked is key; if you notice puddles forming on the surface, take immediate corrective action.
If the soil still appears overly wet, consider switching your fern to a coarser, well-draining potting mix. A mix containing perlite or sand can improve drainage significantly compared to traditional potting soil. Conversely, if the soil seems dry and you still find root rot present, check for compacted soil that may be retaining water around the roots. If you find your hands dirty with muddy soil while inspecting, that’s a sign that your potting mix is clumping, which could be allowing too much moisture to linger. Not only does compacted soil hinder drainage, but it can also trap harmful gasses, leading to a potentially hostile root environment.
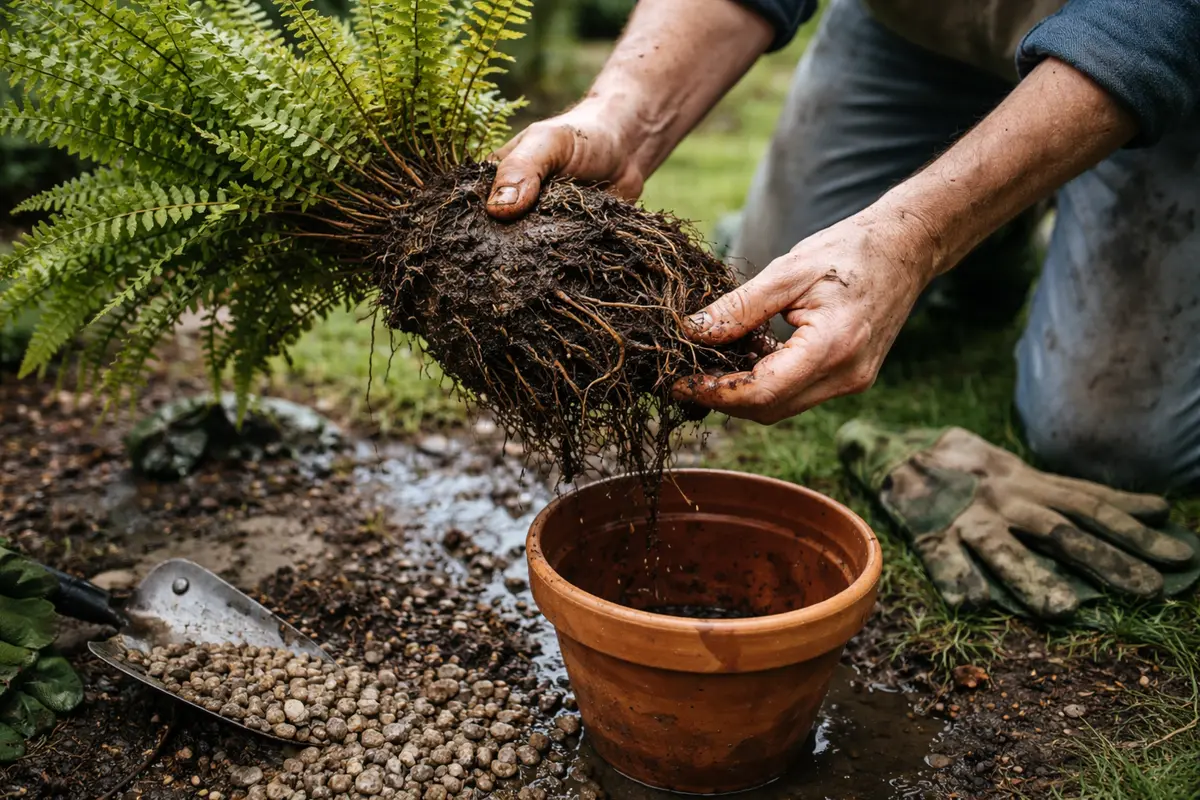
Step 3 – Repot Fern in Dry, Well-Draining Soil
Start by removing the potted fern from its container and gently shaking off excess soil while checking the roots. Trim away any dark, mushy, or foul-smelling roots that’s indicative of serious rot. After replanting in dry, well-draining soil, place the fern in a bright location with good airflow; within a week, you should see new leaf growth or stable remaining leaves indicating some recovery.
Realistic recovery can take several weeks, with noticeable improvements typically visible at the two to three-week mark. Healthy regrowth includes fresh leaves unfurling and a firm texture in the remaining roots. Conditions that speed recovery include a warm temperature and well-aerated soil, while low light or persistent moisture slows it; if your fern shows no growth by the second week, check if the soil is still too wet.
Avoid over-fertilizing during recovery, as excess nutrients can overwhelm the struggling roots and disrupt their healing. If the fern shows signs of wilting despite adequate watering, it may not yet need any additional fertilizer, so check the moisture level in the pot before making adjustments.
Step 4 – Ensure Proper Drainage During Heavy Rains
Start by elevating your potted ferns using pot feet or a small platform to ensure proper drainage. Doing this will prevent water from pooling, allowing the soil to dry slightly between watering sessions, which reduces the risk of root rot. Look for pots with drainage holes that allow excess water to escape, an important feature to check in conjunction with elevation.
Heavy rainfall can saturate the soil, creating a wet environment that promotes root rot, especially in containers without adequate drainage. By elevating your pots, you facilitate better airflow and drainage, addressing the root cause of the problem, which helps the ferns breathe and prevents fungal growth. To gauge the effectiveness of this method, observe if water collects in the lower drainage areas after heavy rain; this can signal a need for further adjustments.
During the spring and summer, when rainfall is frequent, consider using a moisture meter to check the soil’s humidity level regularly. If you notice consistently high moisture, switch to a well-draining soil mix that retains nutrients while allowing excess water to escape, preventing root rot from recurring. Recognizing the difference between proper moisture levels versus saturation is key; if you have trouble distinguishing, trust your moisture meter as a reliable guide. Additionally, inspect your pot’s drainage system regularly—if you find it impeded by soil buildup, take action to clear it.
You need a well-draining environment for ferns because they thrive in moist but not soggy conditions. Installing a drainage layer of gravel or stones at the bottom of the pot can help facilitate water flow away from the roots. Moreover, amending the potting mix with sand or perlite can ensure air and water move freely through the soil, preventing water from pooling. If you find your pots sitting in a basin or saucer that collects water, be diligent in emptying it after rainfall; it can be beneficial to do this right after storms.
In wetter seasons, keep an eye on the weather forecast and be proactive. If heavy rain is expected, consider moving your potted ferns to a covered area to prevent flooding. Creating a routine of checking drainage after storms can help you catch and address excess moisture before it leads to rot. If ferns are situated in areas where runoff accumulates, relocating them temporarily until the weather clears might be necessary. Assess how far standing water has crept toward your plants; if it’s visible, they might need rescuing. Furthermore, if mulch is installed in your pots for protection, remove it temporarily during extremely wet periods, as it may trap moisture against the potting mix.
Step 5 – Inspect for Root Recovery Signs Weekly
Start by checking the soil moisture level in your potted ferns, focusing on the top inch of soil. Look for signs of excess water, such as a soggy texture or blackened roots visible through the drainage holes. Recheck this every few days until the soil begins to dry out and the fern’s leaves show signs of revival, like decreased wilting and improved color. If you still notice any moisture issues, it’s essential to revisit previous steps, as they may need reinforcement.
A fully recovered fern exhibits vibrant green leaves, displaying a healthy sheen and sturdy, erect fronds. In contrast, early signs of root rot returning include yellowing fronds and a mushy texture at the base of the leaves. If the undersides of leaves become browning, crispy, or exhibit a sour smell, check for mold or fungal growth at the root level, indicating ongoing problems. Seek new leaf growth — branches or sprouts emerging can signal the fern’s recovery; if they prove absent, that indicates further evaluation is necessary.
If the problem returns despite following these steps, remove the fern from its pot and inspect the roots again, discarding any brown or mushy sections. Alternatively, consider repotting the fern with fresh, well-draining soil to allow for better air circulation and moisture control in the future. You may need to adjust the potting location, especially if the issue continues; a more sheltered position may ultimately help your ferns thrive as they recover. Plan for the long-term health of your fern— if discoloration appears at the tips, that’s often a sign of root trouble.
When evaluating recovery, check whether the leaves are becoming more turgid, indicating they are absorbing water better. Look for a resurgence of fresh growth, such as lateral branches or shoots, as an encouraging sign that the plant is bouncing back. If the leaves start to droop again or maintain a yellowish appearance, these symptoms signal that additional root issues may still be affecting the plant. A clear distinction to watch for is whether growth seems vigorous or continues at a standstill; compare weekly frothy growth to the more stunted previous efforts.
If root rot symptoms persist despite your weekly inspections, reassess your watering habits and soil quality. Consider repotting the fern again if the soil seems compacted or continues to retain moisture. It’s crucial to determine the underlying causes if the health of the fern doesn’t improve, as sometimes deeper issues may require adjusting your care routine entirely. If roots are congested and are not establishing well in a new pot, you may need to upsize or move to a more permeable pot to facilitate growth. This transition not only helps with drainage but also allows for better root health overall with more space.
FAQ
How long does it take for a fern to recover from root rot?
Recovery from root rot can take anywhere from a few weeks to several months, depending on the severity of the condition and the steps taken to remedy it. Signs of recovery may include new leaf growth within a month or so, indicating the plant is on the mend. However, patience is essential, as recovery phases can vary significantly between different species of ferns; some may take longer to adapt effectively to new conditions.
Can root rot spread to other plants?
Yes, root rot can spread to other plants if they share the same soil or if there is cross-contamination through gardening tools. It’s vital to ensure that all tools are sanitized after handling infected plants and that affected plants are isolated until the issue is fully resolved. Transferring soil from a contaminated pot can lead to new infections, so ensure that you use distinguishable pots or labels to avoid further cross-contamination.
Will a fern fully recover from root rot if treated?
Many ferns can fully recover from root rot when treated promptly. By addressing moisture issues, repotting into appropriate soil, and monitoring their health, you can foster a conducive environment for their return to health. Remember that ongoing assessment is critical to ensure changing conditions, such as humidity and temperature, do not inhibit recovery.