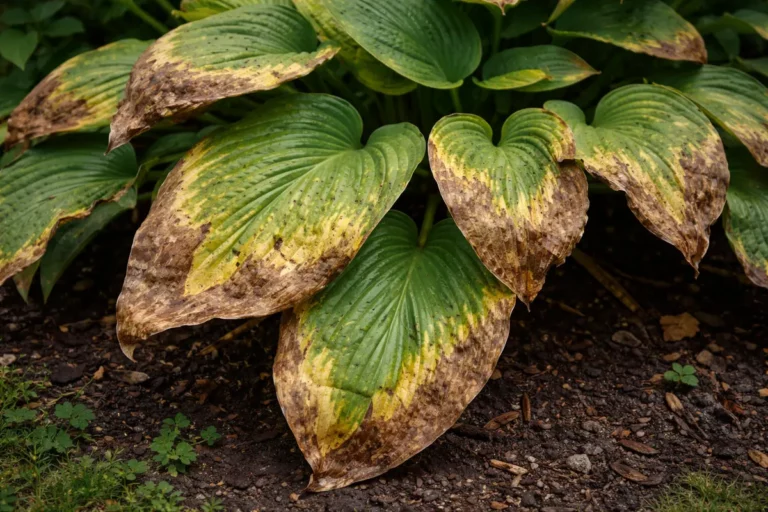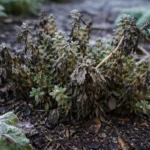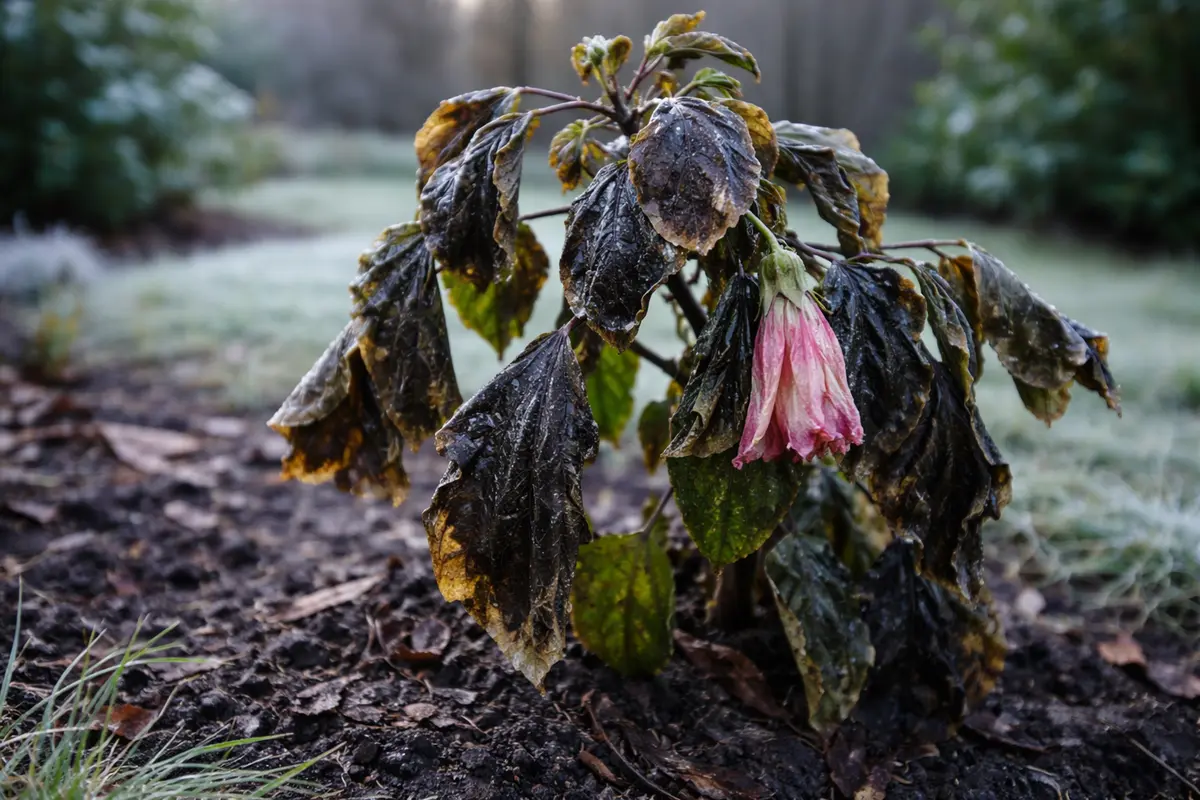
You may notice your hibiscus plants developing unsightly browning leaves during the chilly nights of early spring, which is why you need to know how to fix browning leaves on hibiscus after cold nights. This discoloration occurs due to cold stress, causing leaf damage that can manifest as wilting and drooping. If left unaddressed, the damage can spread, weakening the plant and making recovery harder. Fortunately, fixing it is possible now; you can inspect the affected leaves, cut away the damaged parts, and adjust their care to promote healthy growth.
Step 1 – Inspect Hibiscus Leaves for Immediate Damage
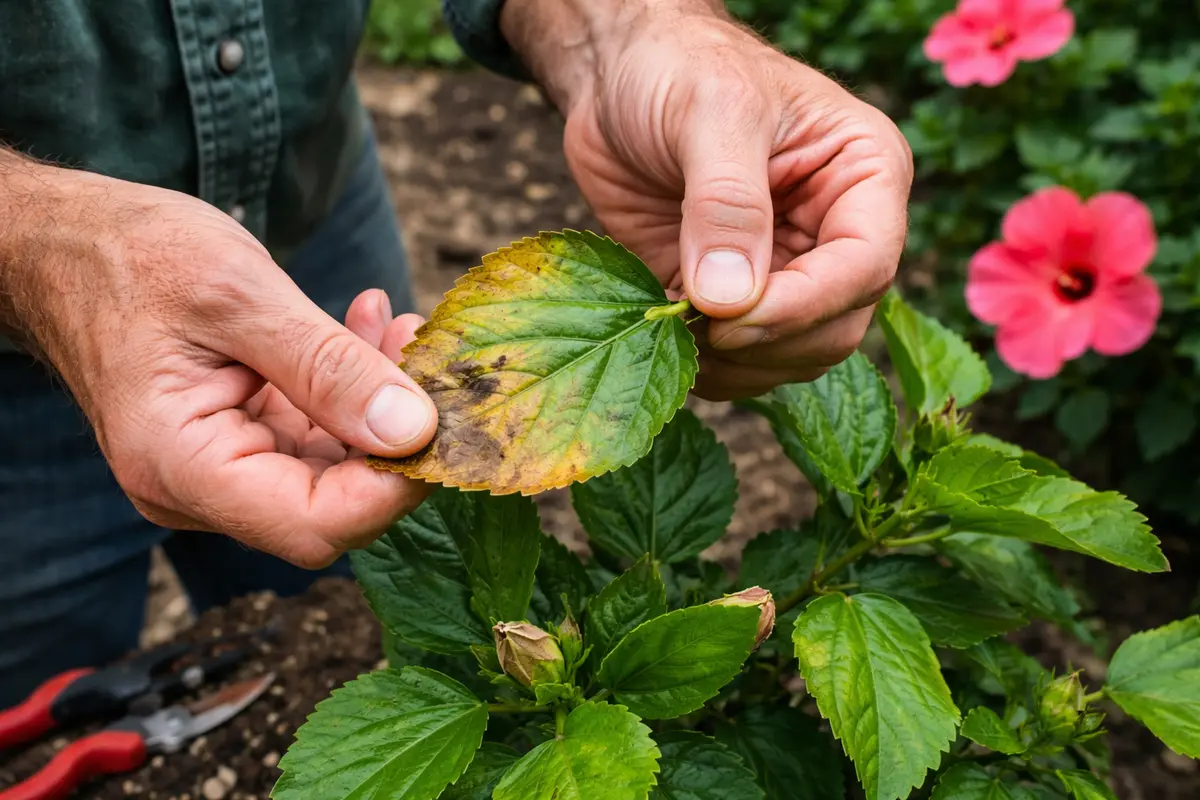
Remove any visibly damaged leaves immediately. You should see that the remaining leaves start to perk up within a few hours as the plant begins to stabilize. This action also prevents further strain on the root system, which is crucial for recovery. If the remaining healthy leaves bounce back quickly, it indicates the plant’s resilience, but if they continue to droop, it suggests a more serious underlying issue.
Inspecting the leaves is essential to identifying the extent of the cold damage and preventing the issue from worsening. Cold nights can lead to cellular dehydration, causing tissues to become crispy and discolored. Look closely at the color variations—if browning edges occur without full leaf death, it points to less severe damage. The sooner you act, the more likely you are to minimize lasting damage, as cold-stressed plants are often at risk for secondary issues, such as fungal infections, especially if temperatures fluctuate again soon after.
A common mistake gardeners make at this stage is assuming that all leaves will simply bounce back after cold exposure. Many may leave damaged foliage intact, thinking it will recover over time. In reality, neglected leaves that are left to wilt can accelerate the process of decline, especially if other stressors, like pests or diseases, are present. Always prioritize the removal of unhealthy foliage to help redirect energy toward recovery. When cutting leaves, use clean tools to avoid introducing pathogens that could further stress the plant. This health measure is especially important if there are signs of early disease, as a thorough yet gentle pruning can prevent spores from taking hold.
Step 2 – Diagnose Cold Stress Effects on Hibiscus
Check your hibiscus for signs of cold stress and assess environmental conditions. Observing symptoms like limp leaves, discoloration, and soft stems can indicate that the plant is experiencing severe cold stress. Understanding these signs is critical to successfully treating your hibiscus. If leaves appear thin and crinkly, this could suggest dehydration due to cellular breakdown from cold exposure. If your hibiscus shows leaf damage but is still producing new foliage in other areas, it’s an encouraging sign that recovery might be possible with diligent care.
Cold stress disrupts the plant’s ability to uptake essential nutrients and water, leading to languid growth and discoloration. When exposed to low temperatures, the cellular structure of the leaves may become compromised, resulting in visible damage. Properly diagnosing this stress also involves checking soil conditions; if it is over-watered or too dry, it could complicate recovery efforts. For instance, if the soil feels extremely dry, but the leaves are droopy, the plant may require immediate watering. On the other hand, if the soil is soggy, avoid watering further until it has had a chance to dry out.
If your hibiscus shows signs like wilted leaves but retains firmness in its stems, this suggests that the damage is moderate and the plant may recover with appropriate care. Conversely, if you find both limp leaves and soft stems, the situation could be more critical, necessitating intensive care or even a need for professional treatment. Every observation informs your next step—keeping a record of changes can help clarify how the plant responds to treatment. For example, if you notice significant leaf drooping after logical watering, that could indicate underlying issues like root rot. Such identification is crucial for healing.
Step 3 – Water Hibiscus to Encourage Leaf Recovery
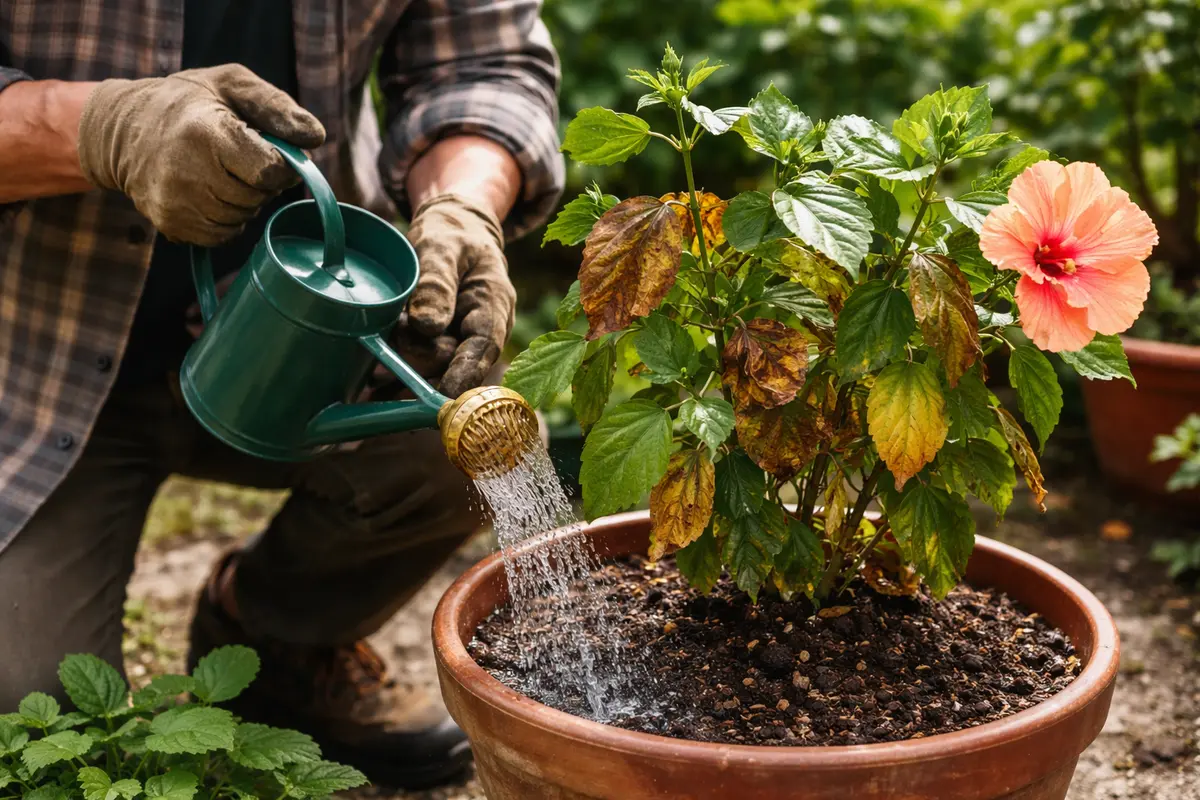
Water the hibiscus deeply to encourage recovery. You should see the leaves lifting and regaining turgidity within a few hours following watering. This process is important as it helps the roots absorb moisture, combating the dehydration that occurs due to cold stress. Aim to provide at least 2–3 inches of water, allowing it to soak down to the root zone. If the soil is dry but crumbly when touched, it indicates that the plant is not receiving adequate moisture. Timing is also crucial; early morning watering is often best as it allows excess moisture to evaporate throughout the day.
Proper hydration is critical for recovery because it replenishes the lost moisture in the plant cells and aids in metabolic functions. Substantial recovery generally occurs when the plant’s roots can reestablish their water and nutrient uptake. Monitor the leaf texture closely: once the leaves are firm and full, you know hydration has improved. Aim to examine the soil’s moisture regularly; if it remains dry a day after watering, reconsider the watering schedule to ensure consistent hydration.
A mistake many gardeners make here is overwatering after cold damage. While it’s important to rehydrate the plant, excessive water can drown the roots and lead to root rot, especially if the soil drains poorly. Inspect the drainage holes regularly to ensure they are clear; if you see water pooling in the saucer, stop watering until the soil dries slightly. Be cautious of symptoms indicating overwatering, such as a yellowing of leaves or a foul smell from the soil, signaling anaerobic activity. If removing excess water doesn’t yield improvement, inspect for root health, as compromised roots require immediate attention.
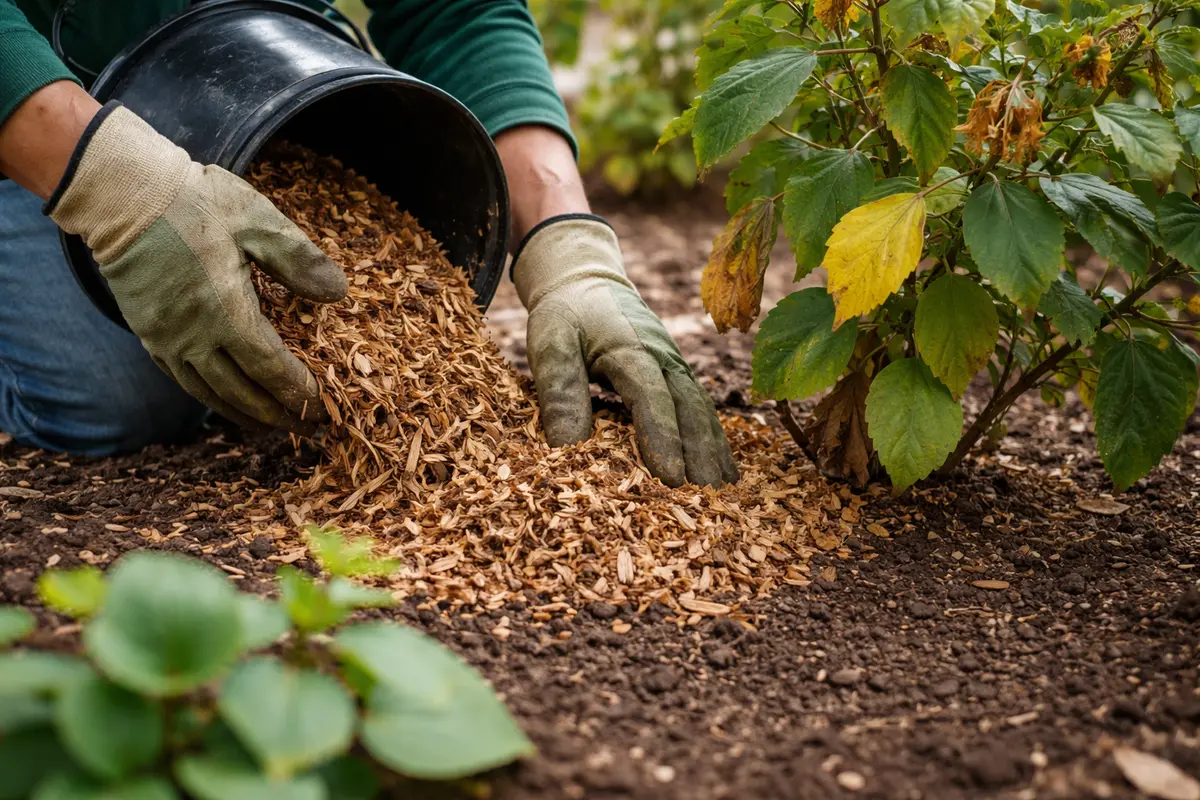
Step 4 – Mulch Around Hibiscus to Prevent Cold Damage
Start by covering your hibiscus plants with a frost blanket or burlap on nights when temperatures drop below 50°F. This action creates an insulated barrier, preventing leaf browning and promoting vibrant foliage as temperatures warm up again. If immediate protective measures are taken, you’ll likely see reduced damage even on the most fragile plants.
Cold nights can lead to leaf browning in hibiscus due to exposure to frost, which damages plant tissues. By implementing a frost cover on chilly evenings, you address the main trigger of cold stress, allowing the leaves to retain their green color and structural integrity. If your hibiscus is not showing improvement, check that the cover is not too tightly secured, as this can trap moisture and promote mold. Proper coverage should offer warmth without suffocating the plant; if moisture accumulates, it may lead to fungal infections.
During the fall, increase your preventative measures by placing a heat source, like string lights, around the hibiscus to provide extra warmth on particularly cold nights. Additionally, be aware that sudden temperature drops in early spring may require the same protective measures to ensure continued leaf vitality. While these solutions should work well, be mindful of their potential to fail under variable conditions. For instance, if temperatures unexpectedly fall below normal, even hardy measures might not suffice if used late in the season.
The use of mulch is effective because it retains moisture, which can prevent dry soil that results from fluctuating temperatures. Organic mulches such as straw, shredded bark, or wood chips will decompose over time, contributing valuable nutrients back into the soil. During colder months, the insulation that mulch provides keeps the root zone at a more stable temperature, crucial for maintaining plant health. It’s beneficial to apply mulch in early fall to prepare hibiscus for winter’s chill, ensuring that the roots are well-protected from the cold. Reassess the mulch every season; sometimes, thicker layers or substituting with materials like leaves can optimize frost protection.
Consider using mulch that varies seasonally, as some materials offer better insulation than others. In the fall, switch to an organic mulch that can decompose and enhance soil quality while still providing a buffer against cold. Furthermore, avoid allowing mulch to directly touch the stems of the plant to prevent moisture retention at the base, which could cause rot; this simple adjustment can save your hibiscus from future frost stress. In areas with severe winters, also consider adding a protective layer of burlap around the base of the plant to offer additional temperature stability, removing it only once the threat of frost has passed.
Step 5 – Check Hibiscus for New Browning After Treatment
Start by checking your hibiscus plants for signs of stress in the early morning after a cold night. Look for browning tips or edges on the leaves and observe if they feel crisp or brittle to the touch. Recheck the following morning after a warm day to see if there’s any improvement or further browning. Good signs include vibrant, healthy leaves unfurling from the stem, while continued dullness should signal the need for further action.
A fully recovered hibiscus plant will display vibrant green leaves that are firm and supple, with no signs of browning. In contrast, early signs of the problem returning include a dull coloration and spots that emerge again, leading to texture changes where leaves may appear slack and discolored. If the leaves begin to droop again, check for cold exposure and adjust their positioning accordingly, such as moving them to a more sheltered part of the garden. If browning still persists, immediate reevaluation of the watering schedule and environmental factors may be necessary.
If browning persists despite your efforts, consider relocating the plant to a more sheltered area or wrapping it with horticultural fleece during nights forecast to be cold. If these measures do not yield improvements after a week, escalate to inspecting the roots for rot or disease, as these can complicate recovery. A soil check for waterlogged conditions can help, as a soggy substrate is a common underlying issue in chronic browning. Signs of root rot often present as a foul scent coming from the soil or blackened roots during inspection.
A fully recovered hibiscus will display firm, vivacious leaves, and you will notice new growth at the tips within a week or two. If the browning issues persist, focus on both environmental factors such as drastic temperature changes and your plant care routine, including watering and feeding schedules. As you monitor the plant, note any signs of pests, as weakened plants could lead to additional problems; for example, aphids thrive on stressed hibiscus and can compound the existing issue.
If the browning issues persist despite following the recovery steps, reassess your plant’s environment and care. This could signal an underlying issue such as poor soil quality or pest infestations. Be vigilant; check for webs or tiny insects on the undersides of leaves, seeking out your local extension office for assistance. Early intervention can mean the difference between full recovery and irreversible damage—especially central is the health of the roots, as they are essential for the ongoing vitality of the plant.
FAQ
How long does it take for hibiscus to recover from cold stress?
Recovery from cold stress can take anywhere from a few days to several weeks, depending on the severity of the damage and environmental conditions. You should start to see improvements in leaf firmness and new growth within one to two weeks if the hibiscus is properly cared for. However, if adverse conditions persist, recovery could take longer and necessitate ongoing adjustments to care. Patience is key, as the hibiscus may take longer during colder months when growth naturally slows.
Can browning leaves spread to other plants?
Browning leaves on hibiscus generally do not spread to other plants, as this issue is tied more to environmental stress than to pests or disease. However, if the underlying conditions causing cold stress aren’t addressed, nearby plants may suffer from similar effects if they are in the same environment. Monitoring air circulation and ensuring adequate spacing between plants can help mitigate risks across multiple plants. Investing in overall plant care techniques helps create a more resilient landscape.
Should I remove all the affected leaves after treatment?
It’s best to wait until the plant starts to show signs of recovery before removing all the affected leaves. Removing too many leaves too soon can hinder the plant’s ability to photosynthesize, further delaying recovery. Instead, focus on the most severely damaged leaves first, allowing the plant a chance to regain strength before further trimming. Monitor new growth closely; as the plant recovers, be prepared to reassess your pruning strategy to encourage a balanced and healthy structure. This gradual approach allows the plant to utilize the remaining foliage while healing.