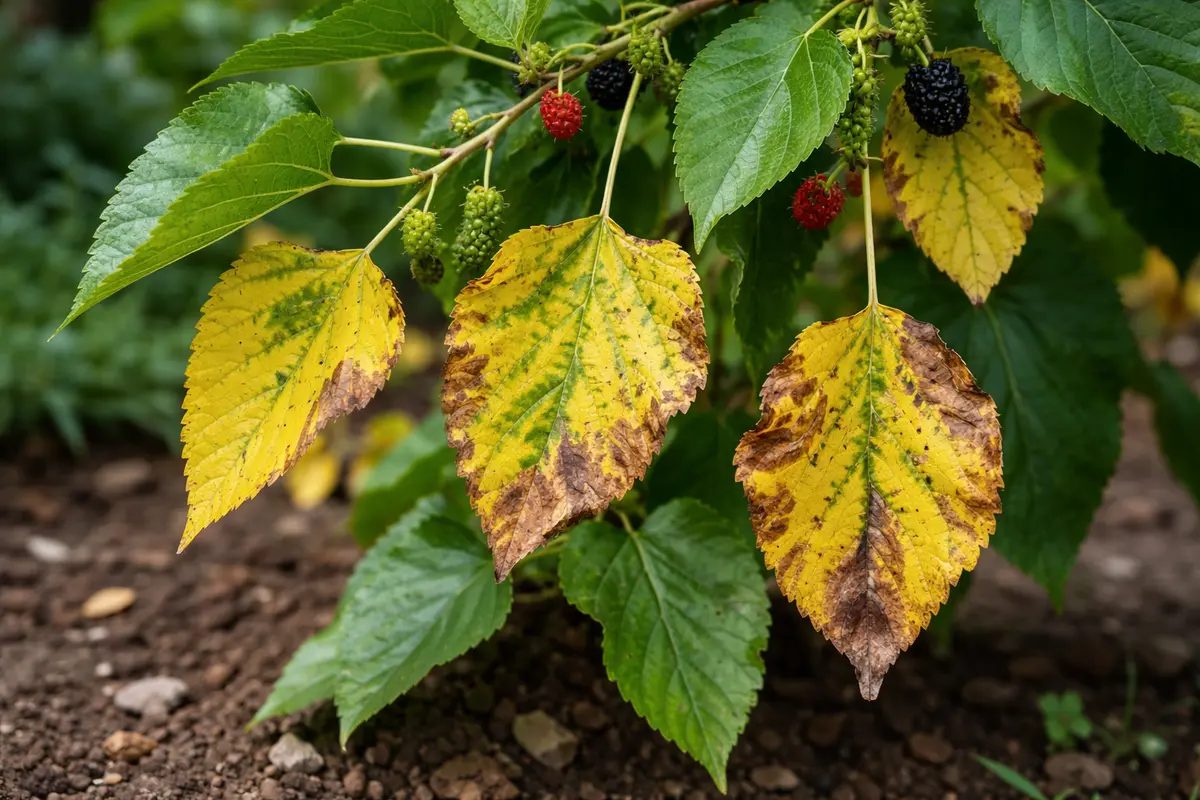
You may notice in summer that your mulberry leaves are turning yellow, which is why you need to know why are my mulberry leaves turning yellow in summer. This yellowing typically occurs due to nutrient deficiencies or stress from environmental factors, indicating potential damage to the plant. If left unresolved, the issue can spread and weaken the plant’s overall health, making it harder to fix later on. Fortunately, you can improve the situation now by checking the soil conditions and adjusting your watering practices.
Step 1 – Trim Yellowing Mulberry Leaves Immediately

Remove any yellowing leaves from your mulberry tree right away. You will notice a reduction in stress on the plant as it begins to redirect energy to healthy foliage within a few days. Proper timing in this step is crucial; delaying removal can increase the risk of spreading potential disease or stress throughout the tree, endangering its vitality.
Prompt removal of yellow leaves not only aids the plant in recovery but also prevents the energy drain that occurs from maintaining unhealthy foliage. Yellow leaves lose their photosynthetic ability, which detracts resources from the rest of the tree. By taking swift action, you allow the plant to concentrate its energy on producing new, healthier leaves that can contribute positively to its growth. Keep in mind that when leaves start to yellow, their potential for recovery diminishes rapidly, so addressing the issue expeditiously is essential. If you see that the yellowing is mostly affecting the lower leaves, this often means that the issue may be systemic, affecting the entire plant.
A common mistake is waiting too long to take action. This indecision may result in entire branches suffering decline as the tree struggles to maintain unhealthy foliage that no longer benefits it. To stay vigilant, inspect the tree regularly—especially after heatwaves, strong winds, or heavy rains—to catch signs of distress early. If you find multiple yellowing leaves in one area, it indicates immediate removal is needed to prevent further harm. As you prune, remember to use clean, sharp shears to avoid introducing pathogens that could cause additional stress. If the tree exhibits significant yellowing across multiple limbs, assess whether environmental factors or nutrient levels might be at play as well, factoring that into your next steps.
Step 2 – Diagnose Nutrient Deficiencies in Mulberry
Check the soil nutrient levels using a soil testing kit. Within a week, you should see clearer signs of nutrient deficiency or excess nutrients, informing your next steps. Timely testing can considerably enhance the effectiveness of your intervention strategies, preventing more serious issues down the line. If the test indicates an issue, you’ll know to amend the soil before further stress manifests in your tree.
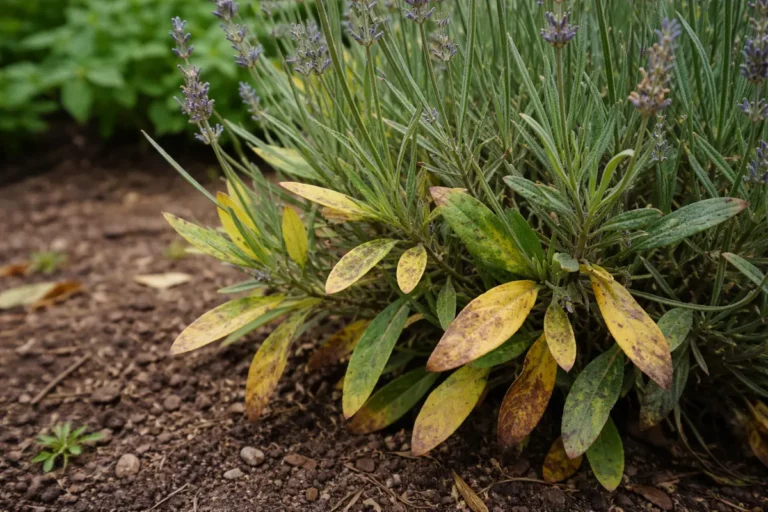
Nutrient deficiencies often manifest as yellowing leaves, especially in the middle or older leaves, which points to a lack of essential elements like nitrogen, iron, or magnesium. These nutrients are critical for photosynthesis and the tree’s overall vitality. When these nutrients are absent, the mulberry’s leaves can discolor, inhibit proper growth, and affect fruit yield. Testing the soil provides definitive data regarding nutrient levels, enabling you to create a tailored, effective plan to restore balance. If you suspect a deficiency but the soil test returns normal results, consider if environmental factors, like soil compaction or root damage, might be inhibiting nutrient uptake.
If tests reveal imbalanced nutrients, such as high phosphorus combined with low nitrogen, adjust your fertilization strategy accordingly. Applying a balanced fertilizer may be necessary to address the deficiency or using targeted fertilizers to correct specific imbalances. In contrast, if you discover that the soil emits a sour smell, this often points to poor drainage, leading to root rot—an extremely severe condition requiring immediate adjustment to your watering practices. It’s crucial to understand these variables; if immediate corrective actions aren’t taken, ongoing yellowing may become persistent or worsen over time, complicating recovery efforts. An ongoing failure to address nutrient imbalances can lead to poor leaf growth and ultimately affect fruit production, so keeping a close eye on soil health is key.
Step 3 – Water Mulberry to Recover from Stress
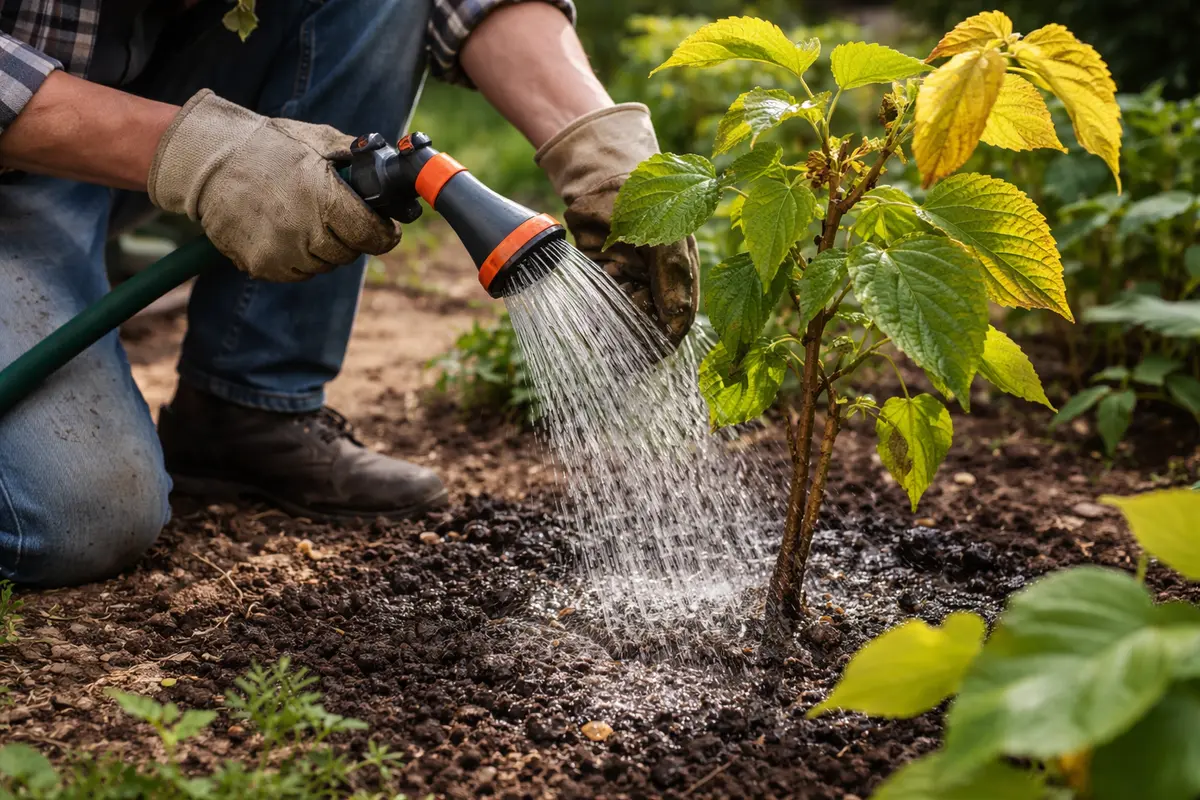
Start by reducing water stress on your mulberry tree by watering it deeply and consistently but avoiding waterlogging. Within a few days, you should notice an improvement in leaf color, with yellowing leaves starting to green up and new leaves forming as signs of recovery.
In a healthy recovery, expect to see green leaves emerging after about two to three weeks, particularly when the weather is warm and the soil is well-drained. If leaves remain yellow or drop off, check for root rot or other moisture-related issues, as those can indicate persistent overwatering. Conversely, if leaves develop a rich green, your mulberry is responding well and regaining vigor.
Avoid the mistake of over-fertilizing during this recovery period, as excess nutrients can scorch roots and cause further stress. Instead, focus on maintaining balanced conditions; if you notice stunted growth and yellowing persists, check soil pH before applying fertilizer to ensure it is optimal for mulberries.
Give your mulberry time to recover; typically, you can expect to see noticeable regrowth within 2 to 4 weeks after adequate care. Healthy regrowth appears vibrant and green, contrasting with the tired yellowing leaves before recovery. Conditions such as ample sunlight and proper drainage speed recovery, while too much shade or compacted soil can slow it down significantly. If you notice no improvement after this time frame, check for possible pest infestations, as they can contribute to ongoing stress. If the leaves show improvement, you’ll likely see a shift in overall plant vigor.
Avoid overwatering or over-fertilizing your mulberry during this recovery phase, as too much water can lead to root rot and fertilizer burn can exacerbate leaf yellowing. Instead, stick to a balanced schedule that supports natural regrowth without overwhelming the plant. If you’re tempted to add more nutrients, check the soil’s nutrient level first to prevent further issues. Effective watering will often lead to an increase in healthy root growth, which in turn supports better leaf health. If the leaves continue to show signs of yellowing, investigate further to ensure that the drainage of the soil is adequate, as poor drainage can hinder recovery efforts significantly.
Proper watering is essential for recovery since it facilitates nutrient uptake and helps the roots access oxygen. Mulberry trees thrive in well-drained soil with consistent moisture, but they can suffer significantly from dry conditions, especially during intense summer heat. Lack of adequate water may lead the tree to exhibit wilting and yellowing foliage. Therefore, establishing a regular deep watering schedule is critical to rebuilding its health and promoting robust growth. Monitor the soil moisture by checking 2-3 inches below the surface; if it feels dry, it’s time to water again, keeping in mind that inadequate moisture will lead to evidenced stress, while too much moisture can lead to root issues.
However, be cautious not to overwater, as this can lead to root rot and exacerbate yellowing. Apply water in a slow and steady manner, allowing it to seep gradually into the soil, avoiding runoff or standing water. After watering, if you do not observe new growth or improved leaf turgidity within a week, it’s time to re-evaluate your watering frequency and amounts. If issues persist, consider testing the soil drainage or checking for root health; soggy soils may suggest an urgent need for better drainage strategies. Conversely, if you find signs of wilting or dry foliage returning, it will indicate that your watering approach needs reassessment, possibly calling for more frequent water application.
Step 4 – Protect Mulberry from Summer Sunburn
Start by ensuring your mulberry tree receives full sunlight for at least six hours a day; this will promote vibrant green foliage and prevent yellowing. Regularly check for competing plants or structures that may cast shade over your tree, as this can directly impact leaf coloration. If competing plants emerge or grow taller, pruning them back may be necessary to provide your mulberry with adequate sunlight.
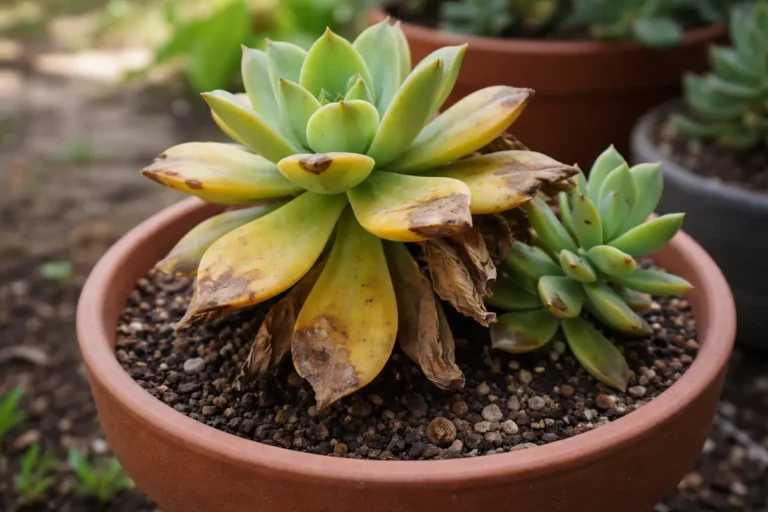
Mulberry leaves tend to turn yellow due to insufficient sunlight or moisture stress during the hot summer months. By providing adequate sunlight and managing watering routines, you not only address yellowing leaves but also encourage healthy leaf expansion, contrasting with situations where neglect leads to browning and loss. If leaves still yellow despite sunlight exposure, check the soil moisture levels for overwatering or underwatering. Overexposure can lead to burnout on leaves, jeopardizing their health.
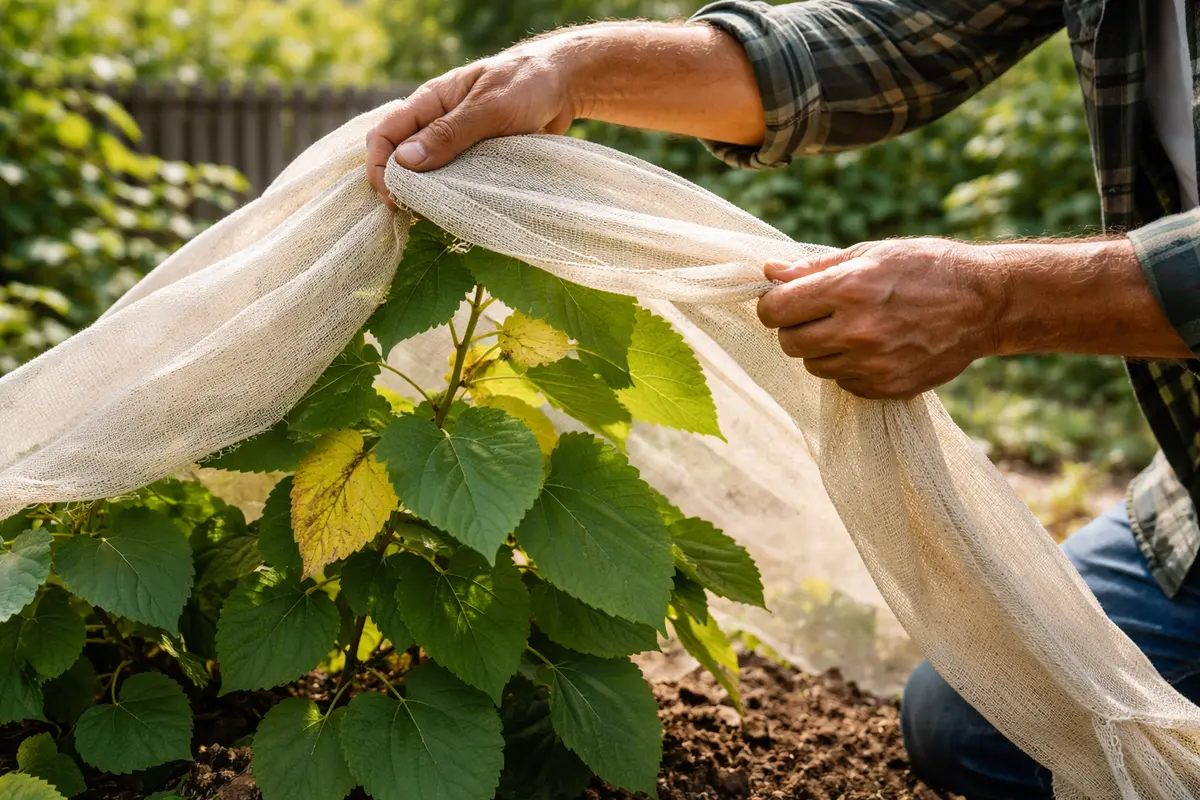
During periods of high heat, increase your watering frequency to sustain soil moisture, ensuring the roots absorb enough water. If a drought occurs, mulberries may benefit from a temporary mulch layer that retains soil moisture, which is a secondary precaution to take alongside direct watering. This change helps further prevent yellowing during peak summer temperatures. If mulch is not an option, you might consider using a shade cloth during heat waves to reflect sunlight.
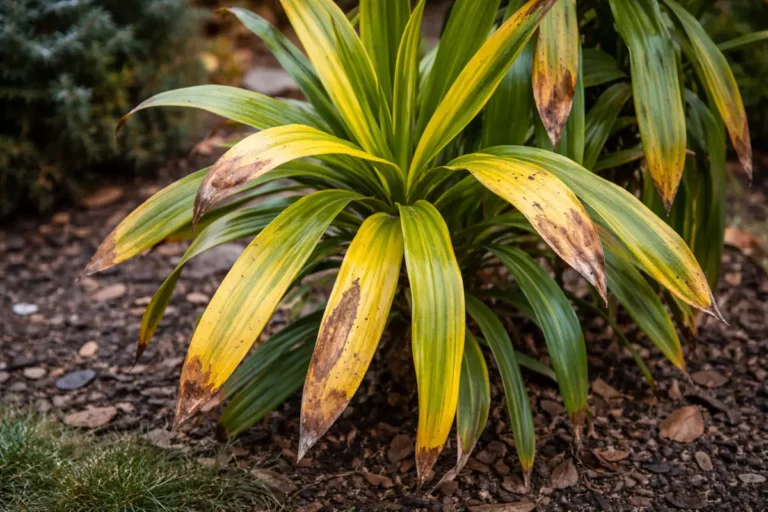
Summer sun can be particularly harsh on mulberry trees, especially if exposed to direct sunlight for extended periods. Prolonged exposure may lead to sunburn, dehydration, and further yellowing, manifesting as browning at the edges of leaves as they struggle with the intense heat. Implementing a shade cloth effectively mitigates these effects, aiding the tree’s acclimatization to fluctuating temperatures without incurring significant stress. Regularly adjust the shade cloth according to daily temperatures to ensure maximum coverage during peak sun hours for best protection. If you implement shade cloth, be sure to gradually introduce the tree back to full sunlight to avoid shock.
In addition to shade provisions, consider applying a mulch layer around the base of the tree to retain soil moisture and moderate root temperatures. This strategy not only keeps the base cool but also buffers against the rapid evaporation of soil moisture during hot spells. Depending on the season and weather conditions, adjust the amount of shade accordingly; provide stronger coverage during heatwaves and gradually lessen it when temperatures stabilize to moderate levels. After implementing shaded cover, regularly observe the foliage for signs of recovery; less drying and improved vibrancy should confirm the protective measures are effective. If despite efforts the leaves continue to yellow or brown, be on alert for potential underlying issues, such as pest activity or further stress factors.
Step 5 – Inspect Mulberry Foliage for Continued Yellowing
Recheck the leaves every week for signs of yellowing or other anomalies. Within this timeframe, you should look for either new growth or signs of yellowing returning, guiding your next course of action. This constant vigilance is key to preventing any regressive issues that could jeopardize your hard work and the tree’s overall health.
A thriving mulberry tree should showcase firm, vibrant green leaves without new yellowing signs, indicating that your recovery efforts are effectively taking hold. Conversely, if the yellowing issue persists or worsens, this commonly signals underlying problems such as ongoing nutritional deficiencies or a hidden pest infestation demand further investigation. Conducting recurrent checks enables you to catch potential setbacks before they escalate, allowing for timely intervention. If a sustained yellowing arises, dive deeper into both cultural practices and the overall soil composition to ensure nothing has changed since your last review.
If yellowing or wilting returns despite your efforts, consider re-evaluating your care routine. An important check is for root rot; if digging about 2-3 inches down reveals mushy roots, immediate corrective measures—like adjusting watering habits or enhancing drainage methods—are crucial. Monitoring broader environmental conditions and symptoms is vital; a significant drop in vigor could warrant consulting with a local horticulturist or arborist if improvements are not observed within a few weeks. The situation becomes especially pressing if multiple areas of the tree begin to decline in health. A systematic pull back for two weeks on watering activity may allow the roots to stabilize, minimizing further yellowing and decay.
FAQ
How long does it take for mulberry leaves to recover from yellowing?
Recovery can take about 1-2 weeks once you implement changes in care, such as improved watering and fertilization. You should begin to see new healthy leaves as the plant starts to rebound from the initial stress. Keep an eye on broader environmental factors that may also be affecting this process, as they can play a significant role in overall recovery. Rapid leaf restoration is often a good sign of effective intervention; however, use caution to ensure external factors remain stable during this period.
Can yellowing leaves spread to healthy leaves on my mulberry tree?
Yes, yellowing leaves often signal stress that could impact the health of nearby healthy leaves. If not addressed promptly, the underlying issues may escalate, impacting the overall condition of the tree and risking the vitality of green foliage. Implementing proactive measures is essential, as delayed action can result in widespread impact throughout the foliage. Close observation after interventions is critical; if you see signs of yellowing migrating to previously healthy leaves, consider revisiting nutrient levels or addressing potential pests immediately.
Should I remove all yellow leaves from my mulberry tree?
Yes, removing all yellowing leaves is beneficial as it helps the tree conserve energy. However, if the tree has only just begun to show signs of yellowing, it’s prudent to evaluate the cause before stripping too many leaves away, ensuring the remaining ones are still viable. Assess the potential factors related to the yellowing to determine the best course of action; premature removal may risk losing more healthy leaves that could bounce back with proper care. Ensuring that no more than 30% of foliage is removed at once helps maintain balance in energy production and nutrient uptake.