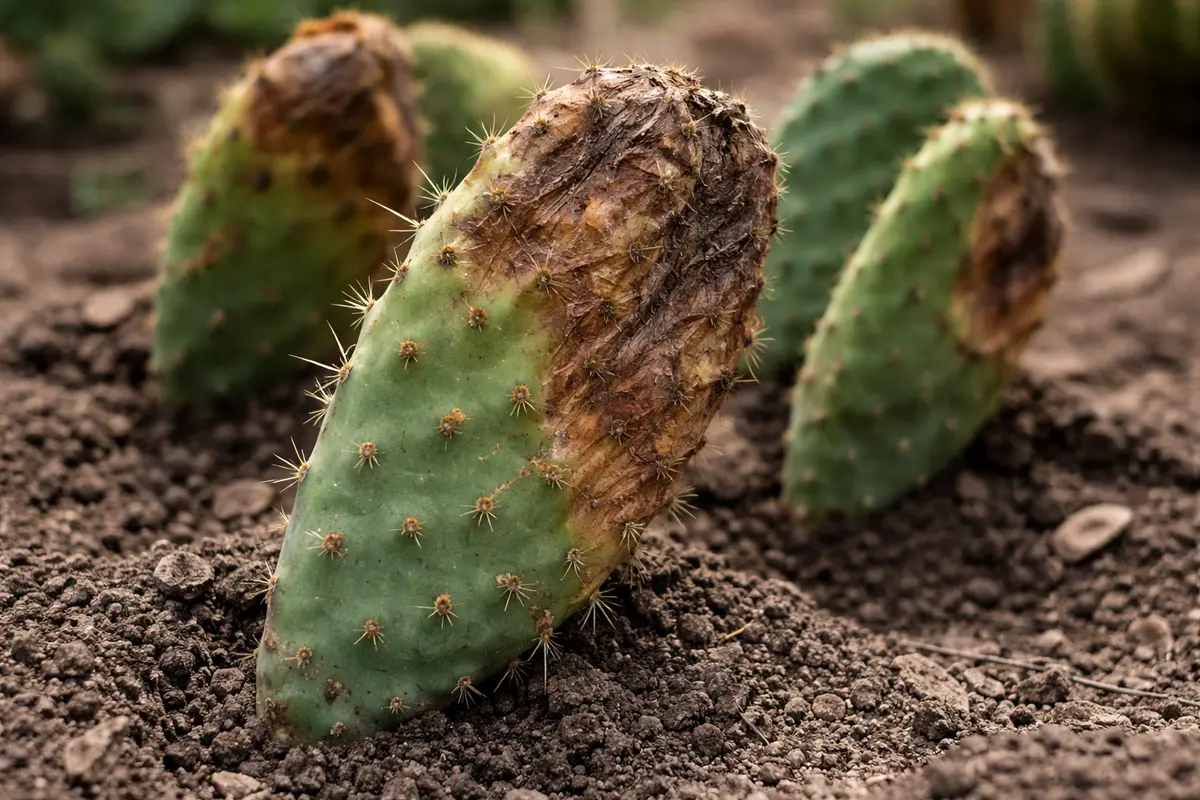
You may notice your cactus plants showing signs of distress, particularly why are my cactus plants turning brown after transplanting, which can occur during the initial adjustment to their new environment. This browning often indicates problems like wilting or damage due to shock from the transplanting process. If left unaddressed, the issue can worsen, leading to more damage, but you can improve the situation by adjusting light exposure and monitoring soil moisture levels.
Step 1 – Inspect Cactus for Immediate Damage
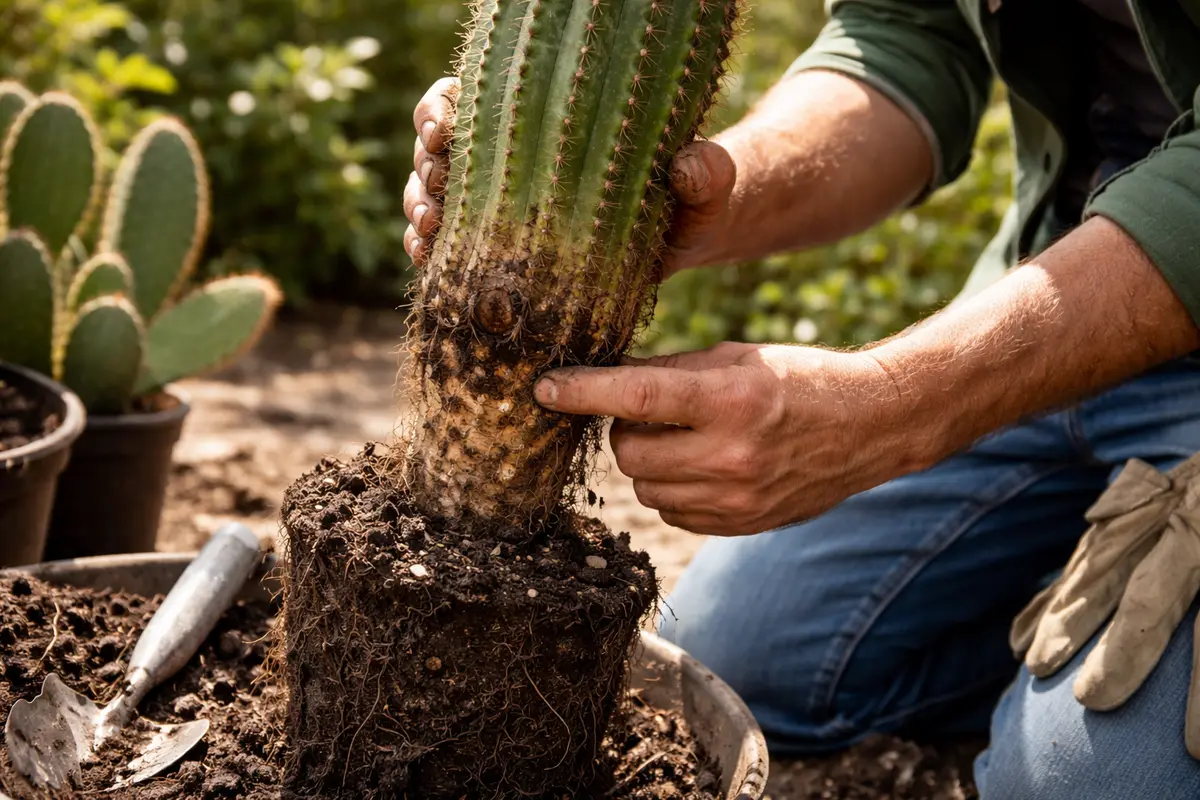
Start by gently removing the cactus from its pot, ensuring minimal disturbance to the roots. You will notice if the roots are congested or damaged, which can indicate the cause of browning. Additionally, examine the root system closely for any signs of rot or decay; healthy roots should be firm and white, while rotting roots are often mushy and darkened.
Immediately repot the cactus into a container filled with well-draining soil to stabilize it. This action will prevent the cactus from sitting in moisture, which is crucial, as overwatering and root rot can quickly lead to browning and decline. Observe the soil around the roots; it should settle without pooling, indicating good drainage.
If you find any rotten roots during inspection, trim them off cleanly with sterilized scissors. This immediate action will help save the healthier parts of the plant by preventing spread of rot from affected areas. For example, a plant left with rotten roots will continue to deteriorate; however, removing the damaged roots can allow the plant to regain stability.
After replanting, monitor the cactus closely for any signs of wilting or further browning over the next few days. If you observe continued browning or softening of the plant structure, check the moisture level of the soil again. If the soil feels overly wet, this may indicate that drainage is insufficient or the plant is still retaining too much moisture.
If browning continues despite proper repotting, investigate the soil’s dryness more thoroughly. Inspect for any signs of mold or a foul smell, as these can indicate deeper rot issues that need addressing. If you notice heavy, soggy soil, repotting in a different, drier potting mix designed for cacti can provide a fresh start.
In cases where browning occurs gradually, watch how quickly the discoloration spreads. If only the tips of the cactus are turning brown while the base remains firm, it may require a lighter touch with watering. Conversely, if the entire top section is turning brown and mushy, this may mean the plant is in a critical state and needs immediate repotting. Quick actions can limit the extent of damage to the cactus and promote recovery.
To summarize, acting quickly helps prevent further decline, as cacti quickly respond to changes in their environment. If symptoms persist even after transplanting, assess whether the potting medium retains excess water and adjust accordingly. Your immediate actions can make a significant difference in preserving the health of your cactus and preventing irreversible damage.
Step 2 – Diagnose Cause of Brown Cactus Leaves
Check the soil moisture levels and drainage quality immediately after your inspection. If the soil feels soggy and emits a rancid smell, the roots may be struggling due to excess moisture. Start by replacing the affected soil with a well-draining mix, such as one enhanced with perlite or sand to improve aeration. This adjustment helps excess water flow out, promoting better root health and halting browning.
The cause is often excess moisture blocking nutrient uptake, particularly if brown leaves appear after transplanting. Root issues, such as damage or poor soil quality, can lead to this condition. If the soil feels dry to the touch at least an inch down, this could indicate underwatering as the possible cause, which also leads to browning. To identify the issue, insert a moisture meter to accurately assess the water levels in your soil.
If moisture levels seem acceptable, examine the lighting conditions. If your cactus was moved to a noticeably darker spot, insufficient light could be the reason for browning leaves. Adjust its placement gradually towards a brighter area, as cacti typically require at least 6 hours of bright, indirect sunlight daily. For instance, a cactus transitioning from a sunny window to a shaded spot may start showing distress within a week. Recognizing and correcting this shift promptly can significantly improve your cactus’s health.
Step 3 – Water Cactus to Aid Recovery After Transplant
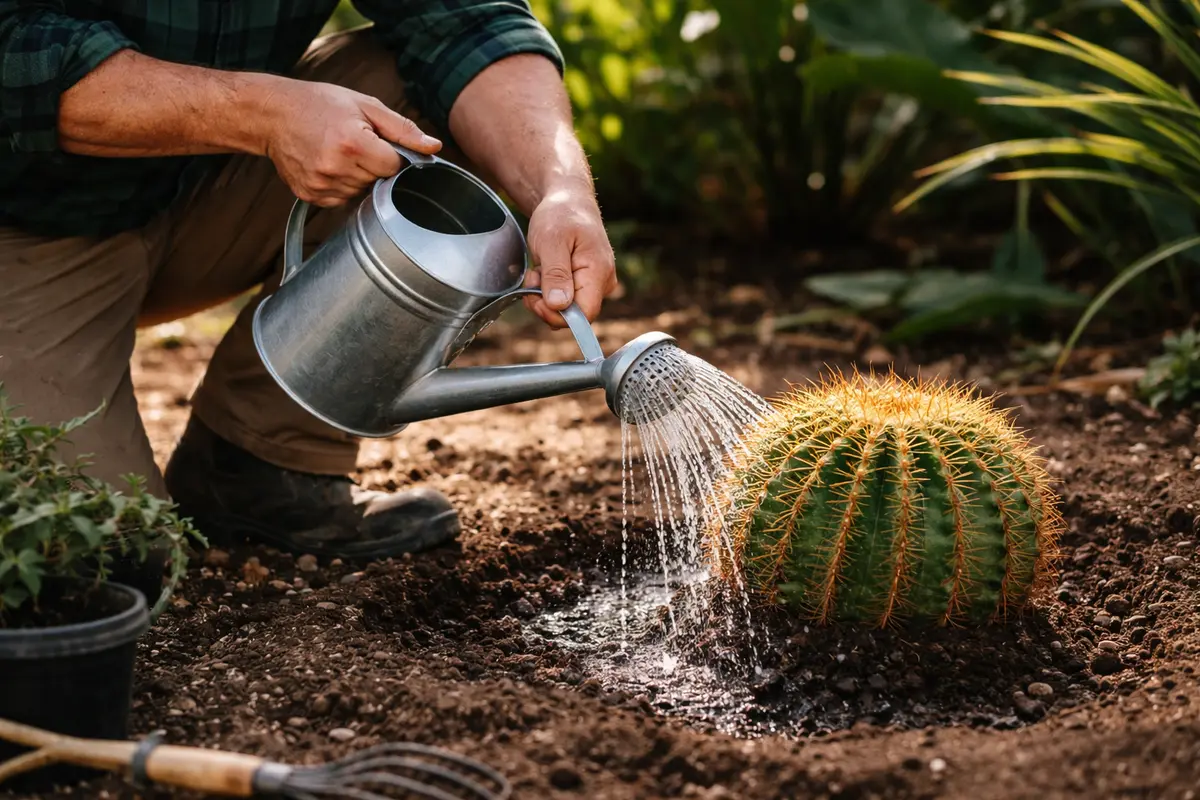
Begin by watering your cactus moderately while allowing the soil to dry out completely between waterings. You should see a difference as the cactus stabilizes, with dull browning softening and new growth beginning to appear.
Recovery begins when you see new green shoots forming at the tips within 4 to 6 weeks, indicating that your cactus is responding positively. Be aware that healthy regrowth will present as vibrant, fresh growth, while persistent dark browning or wilting signals continued stress. Keep the cactus in high humidity and bright, indirect light to promote faster recovery; too much direct sunlight could hinder its progress. If browning continues despite providing these balanced conditions, check the soil moisture level to ensure it isn’t excessively dry.
During this recovery phase, it’s crucial to avoid overwatering, as many gardeners mistakenly believe that increased water will expedite the cactus’s return to health. Concentrate on ensuring adequate drainage and allowing the soil to dry thoroughly to avoid root rot. If you consider adding fertilizer, wait at least a month post-transplant to prevent root burn, which might impede recovery further.
The right watering routine at this stage will help replenish moisture and energize the cactus to cope with transplant shock. Ensure each watering penetrates the root zone adequately, as healthy roots need moisture to absorb nutrients while still thriving in dry conditions. Aim for soil dryness to the touch between waterings to prevent humidity fluctuations. Watch for signs of overwatering, such as a softening cactus or new browning spots, indicating a potential issue.
If persistent browning remains an issue after initial watering, evaluate the drainage capability of your soil mix. This could mean relocating your cactus to a brighter area or switching soil types, as some retain too much moisture and could lead to root rot. Monitor closely, and if the cactus firms up within a few days, you are likely on the right track to recovery. If not, further adjustments may be needed to support its healing process.
Step 4 – Adjust Watering for Future Cactus Health
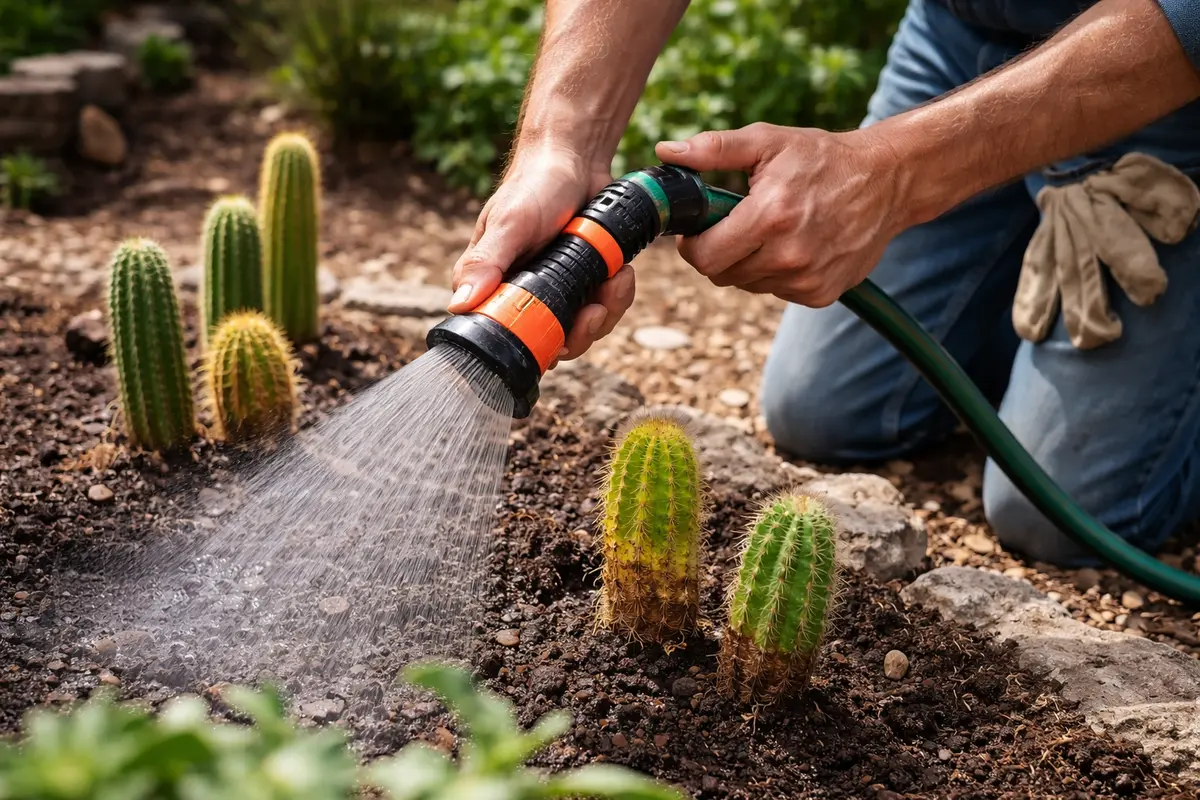
Start by setting a consistent watering schedule tailored to your cactus’s specific needs. This routine will stabilize moisture levels, preventing browning from both overwatering and underwatering. Check soil moisture weekly, and water only when the top inch of soil feels dry.
From here on, monitor environmental conditions closely—if temperatures rise, increase intervals between watering to prevent excess moisture. For example, during warmer months, instead of the usual every two weeks, transition to every three weeks to account for higher evaporation rates. Conversely, during winter, reduce watering frequency to once a month—if you notice brown spots, check for damp soil to confirm overwatering.
Establish clear triggers for adjustments: if your cactus shows signs of wilting, reassess your watering habits; conversely, if the soil appears too dry and the plant is drooping, it’s time to water sooner. Recognizing these visual cues ensures you’re adjusting to the plant’s health needs effectively.
Next, enhance airflow around your cactus by placing it in a location where it receives indirect sunlight and sufficient air circulation. A windless zone can lead to stagnant air around the plant, increasing humidity. Enhance airflow by repositioning the plant or using a small fan if indoors. If your cactus develops brown patches with sufficient air, evaluate its watering schedule instead.
Finally, keep a close watch on humidity levels in your environment. In high humidity areas, especially during rainy seasons, modify your watering frequency to avoid root rot. If your cactus continues to struggle despite these adjustments, check the drainage situation—adding holes or a layer of gravel at the bottom of the pot can encourage better drainage.
Step 5 – Check Cactus for New Brown Areas Weekly
Check your cactus weekly for new brown areas or other signs of distress. You should observe any changes in color and firmness, indicating recovery progress. For the next month, monitor your cactus closely, looking for vibrant color and firm leaves as positive signs. If brown areas return, reassess your care routine and environmental conditions immediately.
Watch for weak growth or new brown patches, which may indicate issues with soil or sunlight exposure. Healthy cacti will show noticeable growth and firmness; if new browning appears, check if the cactus is receiving too much direct sunlight or too little filtered light. If the cactus starts to show stress after thriving for a period, this contrast can signal a need for environmental adjustments.
If new brown areas reappear after your recent care adjustments, revise your watering frequency and inspect for pests that could be affecting your plant’s health. Signs of pests, like mealybugs or spider mites, may manifest as browning or wilting. If browning continues despite your monitoring and adjustments, prune away any affected sections promptly. Consider consulting a gardening professional if you’re uncertain about specific care techniques. Establishing a vigilant checking routine will help ensure your cactus remains healthy and well-established in its new environment.
FAQ
How long will it take for my cactus to recover from transplanting?
Recovery can take anywhere from a few days to a few weeks depending on the plant’s initial health and the conditions it is in after transplanting. Regular watering and monitoring conditions will encourage new growth. If no signs of improvement appear after a fortnight, it’s best to reassess the watering habits and soil conditions; this could include varying your approach based on the time of year or the specific needs of your cactus species.
Should I remove the brown parts of my cactus?
Yes, you should remove any brown or mushy sections promptly to prevent diseases from spreading to healthy areas. Use clean scissors to make a cut above the affected area, ensuring that these cuts do not inflict further harm. If this is done correctly and at the right stage, it can help maintain the cactus’s overall health by allowing the healthy parts to thrive unimpeded.
Will my cactus grow back full after being damaged?
With proper care, your cactus can indeed grow back healthy after being damaged. Ensure you provide the right amount of light, water, and soil conditions to support its revival. While some species may take time to regain their former fullness, the health of your cactus largely hinges on consistent care and proper environmental conditions tailored specifically to its needs.