You may notice your potted orchids looking less vibrant and healthy during the humid days after heavy rain, which is why you need to know how to prevent root rot in potted orchids after heavy rain. This waterlogged condition often leads to mushy roots and yellowing leaves, putting your cherished plants at risk. If not addressed promptly, the situation gets worse, weakening the plant and stalling growth, but you can still fix it by checking the roots and adjusting your watering routine.
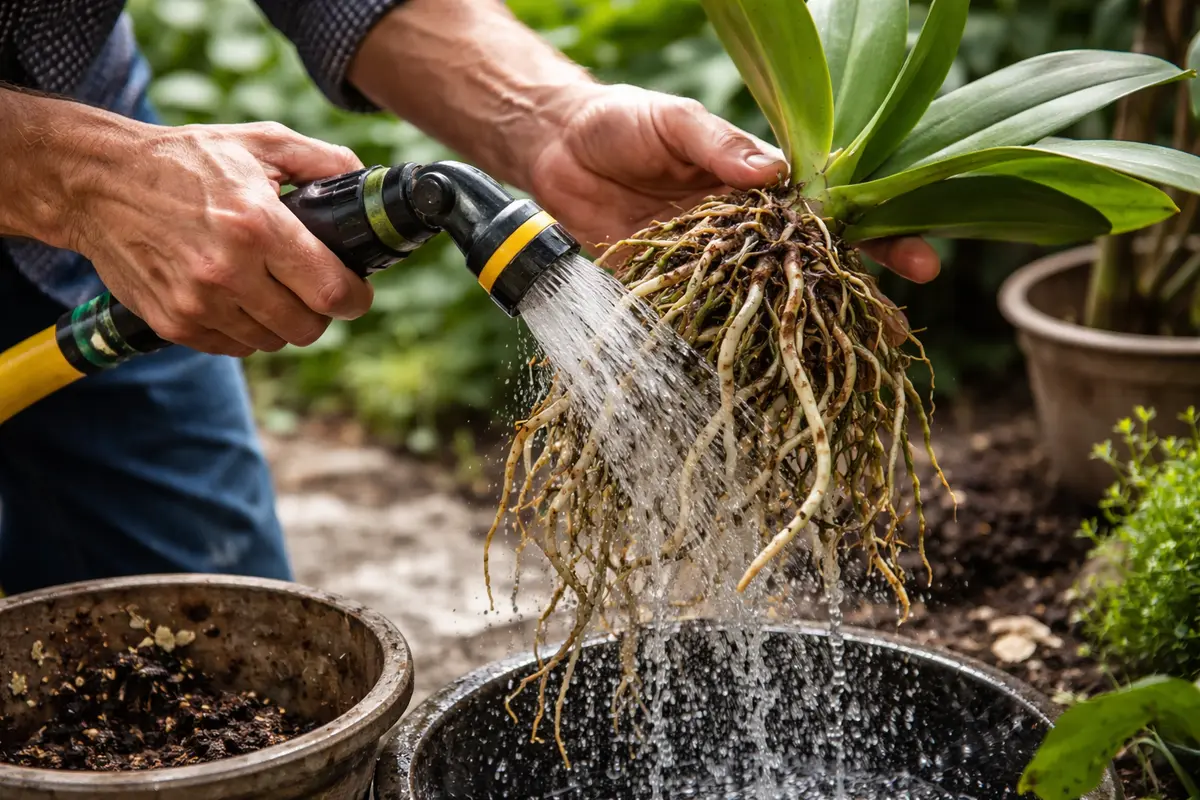
Step 1 – Rescue Orchid Roots from Excess Water
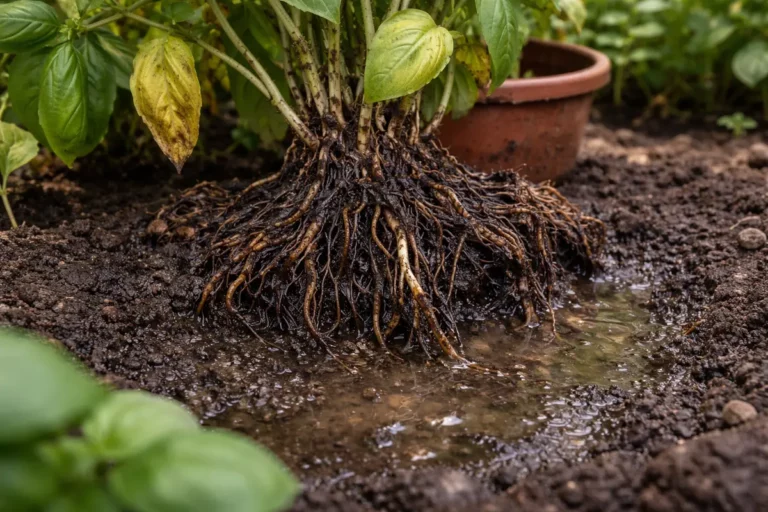
Remove the orchids from their pots and inspect the roots immediately. You will see any excess water draining from the media within moments. Ensure you have a container ready to catch the runoff. If the water doesn’t drain quickly, keep the roots suspended above the water to help expedite the process.
Removing the orchids from their pots allows the excess water to escape, providing immediate relief to the roots that may be submerged in waterlogged soil. Orchids require well-draining substrates to promote air circulation around their roots; prolonged exposure to water will lead to root suffocation and decay. Manipulating the roots gently while they are still wet can help you observe how they respond. Roots should feel firm and fleshy, not mushy or overly soft. This method minimizes damage caused by excess moisture and helps prevent root rot from developing further. If you notice that the roots have a dark color or sliminess, that indicates rot has already set in; immediate action will be required.
Timing is critical here. Many gardeners tend to delay this action, mistakenly believing the plant will recover on its own. Ideal intervention occurs within 48 hours of exposure to saturated conditions; otherwise, signs of root distress will begin to manifest. A common mistake is assuming that a well-draining pot will never become waterlogged, leading to neglect of checking the moisture level in the pot. If the bottom of the pot is consistently moist while the top appears dry, it signals a drainage issue that needs addressing. Remember, after heavy rainfall, immediate removal of the orchids is paramount; you might even need to air out the roots for several hours to guarantee they’re not retaining moisture.
Step 2 – Diagnose Soil Saturation Issues in Orchids
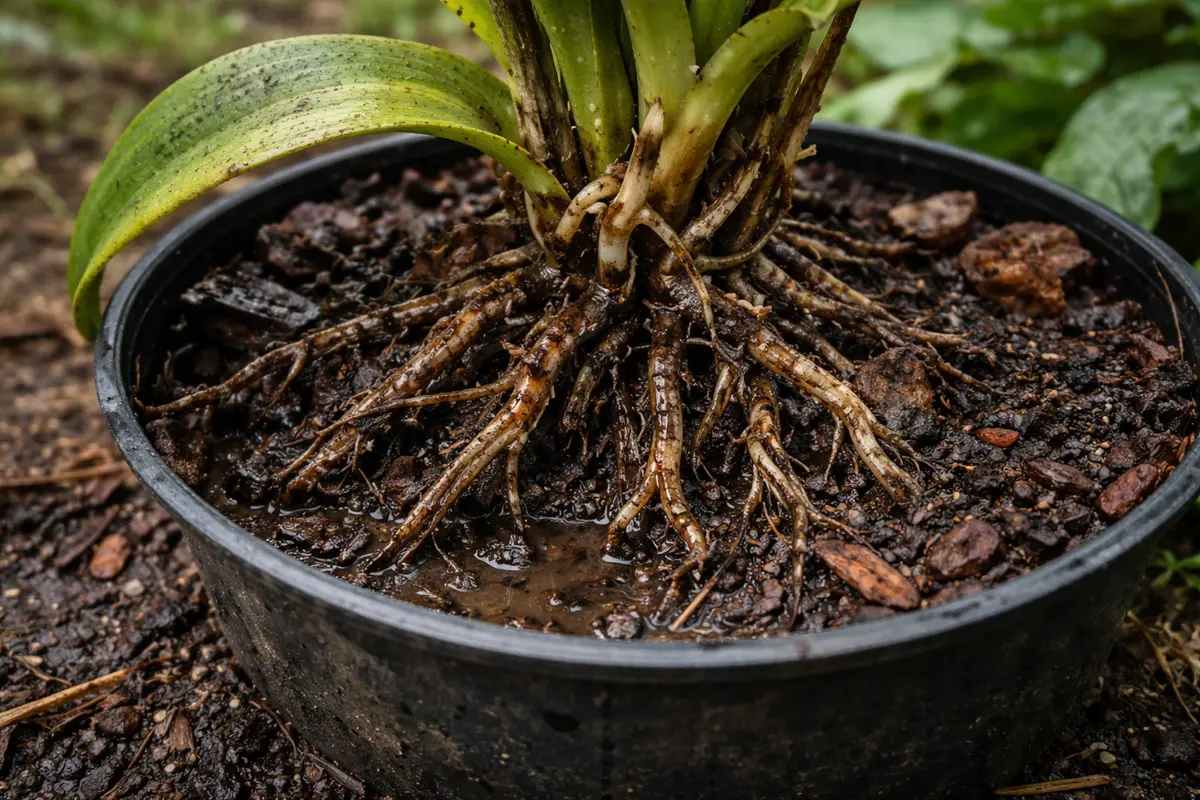
Examine the potting media for water saturation right after removing the orchids. You should observe a muddy consistency at the base of the pot if the media is too saturated. Inspect also for any pooling water, which is a strong indicator of drainage failure; this will often appear as water collecting in depressions on the surface of the substrate.
Identifying waterlogged soil is crucial, as poor drainage can lead to anaerobic conditions, which contribute to root rot. Saturated media restrict airflow to the roots, preventing oxygen uptake, thus stunting growth. Fungal pathogens thrive in such environments, making it necessary to dry out the substrate to save the orchids. Noticing an unusually heavy weight to the pot—especially when compared to lightweight, dry conditions—can indicate significant moisture retention. A spongy texture in the potting mix should trigger an immediate reassessment of the growing medium, as it indicates that the mix is saturated and may contribute to ongoing health issues. Poor drainage episodes often surface as root rot in gardenias from poor.
If you find that the soil blend is inappropriate for orchids, like traditional potting soil, consider switching to a specialized orchid mix. Some gardeners mistakenly use regular potting soil, believing any mix will suffice, but using a dense material results in water retention. If the roots exude a sour smell, or if they feel mushy, this indicates that rot has already begun. Following detection, refrain from attempting to remedy the issue by simply adding dry media; instead, immediate corrective actions, such as repotting with fresh, dry media, should be your next step. Keep in mind that failing to address this promptly can lead to less-than-ideal root systems that stunt overall growth and vitality.
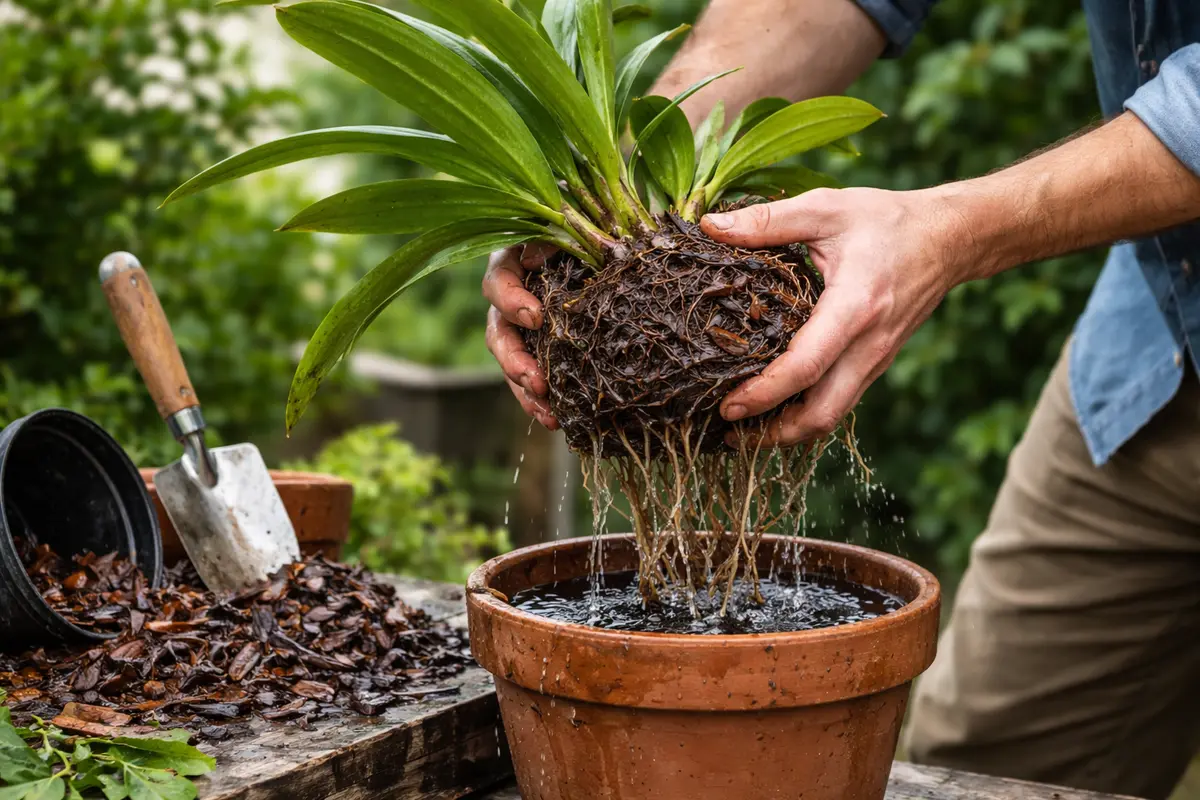
Step 3 – Hydrate Orchid Roots to Aid Recovery
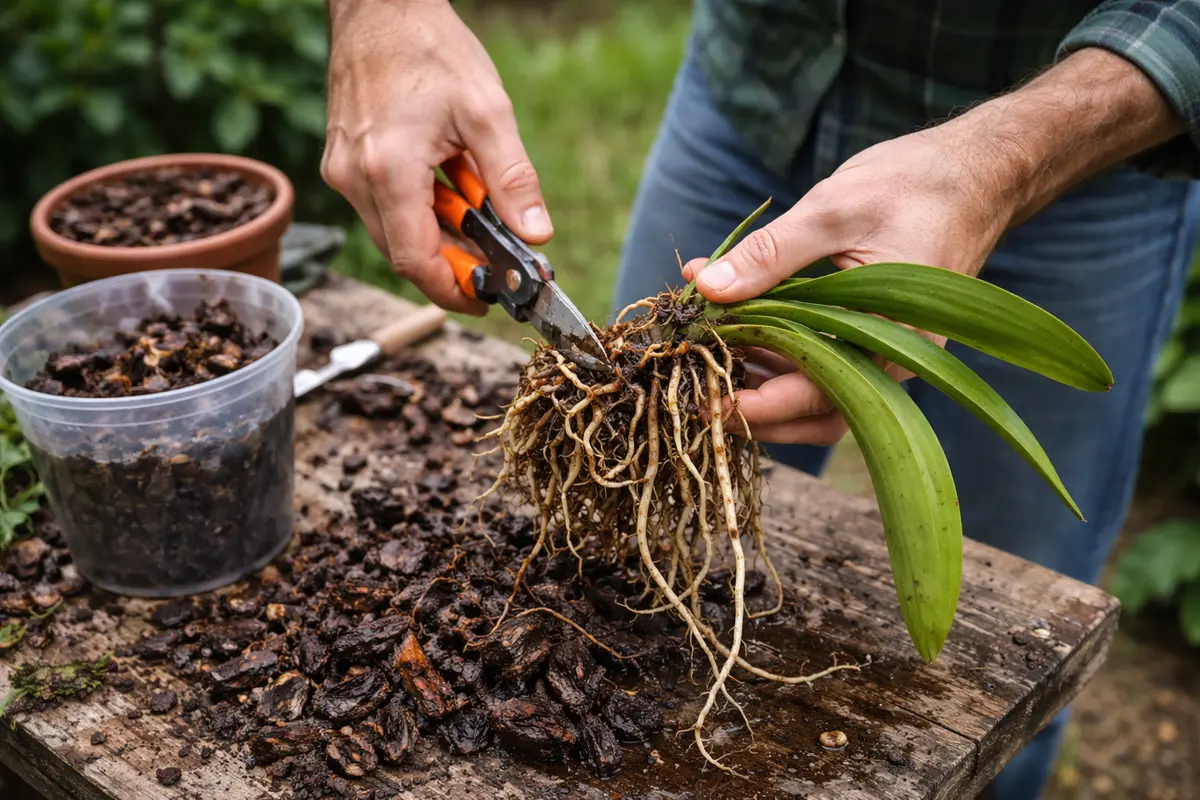
Start by removing the potting medium from around the orchid roots, ensuring that any mushy or darkened roots are trimmed away. After a few days, you should observe the remaining roots beginning to firm up and take on a lighter color, indicating a recovery from the initial shock and a return to healthy tissue. During this process, adjust care to focus on providing stable moisture levels without oversaturating the plant.
Recovery can take several weeks, depending on the initial extent of root damage; healthy regrowth typically includes the emergence of new roots and leaf growth returning to a vibrant green. Conditions such as increased airflow and warmth can expedite this process, while ongoing waterlogging will slow it down significantly. If you notice yellowing leaves, check the root status, as it might indicate ongoing issues.
Avoid overcompensating with excessive watering or fertilizer during recovery, as this can exacerbate root rot. Specifically, too much fertilizer can lead to salt buildup, which negatively affects root function. If the plant’s leaves droop despite regular watering, check for root blockage or decay instead of automatically increasing water volume.
This technique helps rehydrate the roots without over-saturating the media again. Roots that have dehydrated can easily become woody, resulting in failure to absorb nutrients and water efficiently. By hydrating the roots directly, recovery will begin as they take in moisture faster than if they were sitting in wet soil. The visual cue to look for here is a brightening of color in the roots as they rehydrate, typically resulting in healthier and fatter roots over time. Avoid soaking the roots for excessive periods, as this could lead to another cycle of over-saturation instead. Once the roots regain a plump appearance, the soaking can stop—usually after a brief 1-2 hours.
During recovery, avoid over-fertilizing; some gardeners mistakenly believe that increased nutrients will hasten growth in damaged plants. In reality, over-fertilization can exacerbate stress on recovering roots and lead to further complications, particularly as the roots may struggle to process excess salts. Look for new growth within a week or two; if no growth appears, investigate further to ensure that the media is not still overly saturated or that other underlying problems—such as root infection or pest issues—need to be addressed. Remember, excessive watering after rehydration can lead to a recurrence of previous problems, mirroring symptoms like yellowing leaves or dwindling health indicators.
Step 4 – Avoid Overwatering After Heavy Rains
Reduce your watering schedule for orchids in the following weeks. A visual indicator that you have locked in a better routine will be firm soil that retains enough moisture without staying wet. Adjust your approach based on the orchid’s response during this period. Consider testing the moisture level by sticking your finger about an inch into the soil; if it feels damp, hold off on watering.
Consolidating your care routine is vital to avoid recurring waterlogged conditions. Factors such as increased humidity levels resultant from rain can saturate the mix easily. To prevent future occurrences, orchids require a potting medium that allows for quick drying between watering sessions. Engage in frequent monitoring; if humidity levels rise or the forecast predicts rain, be prepared to adapt your watering habits accordingly—this may include increasing the intervals between watering or reducing the amount applied. Frequent checks will ensure you maintain healthy moisture levels, avoiding the ‘set it and forget it’ mentality that often leads to further problems.
For instance, if you anticipate a rainy season, proactively position pots in a sheltered spot or upgrade drainage by layering gravel at the base of the pot. This adjustment enhances drainage capabilities and promotes healthy root development. It’s often advantageous to place pots in ways that allow free airflow around each one, preventing moisture from becoming trapped. Many times, even slight changes—such as using finer medium or adding perlite for aeration—can significantly impact your orchid’s health. Understanding how environmental shifts affect watering needs is paramount; be vigilant in observing both ambient weather patterns and your plant’s responses.
Step 5 – Check for Signs of Root Rot Post-Treatment
Inspect the pots every few days for signs of root rot. You should observe changes in leaf color and texture; leaves will gradually regain their firmness and pigmentation, indicating that the plant is on the mend. Look out for new growth emerging at the base of the plant, which signals a positive recovery. Documenting this progress can reveal patterns that indicate the effectiveness of your interventions.
A fully recovered orchid will possess vibrant green leaves, signaling active growth and rehabilitation. Healthy roots should appear firm and white or green; these indicators reflect successful recovery from prior stress. It’s crucial to maintain vigilance for signs of fresh damage, like yellowing leaves or wilting, which would indicate that existing problems are re-emerging and warranting immediate attention. Tracking changes over time also builds your understanding of the regular growth patterns for your specific orchids; this insight will help you identify problems more quickly in the future.
If symptoms persist post-treatment, reassess environmental conditions—humidity may still be too high, or the potting medium could remain unsuitable for orchid roots. Recurrent symptoms may necessitate engaging a professional assessment, as this could indicate the presence of more serious diseases that require treatment beyond standard horticultural practices. Remember, having an action plan is key; having a rotation of strategies to recover thriving orchids could be the difference between lush foliage and further loss in the future. Observing any consistent pattern of distress signals post-treatment is essential; it should alert you to assess the suitability of your tropical orchid environment promptly when negative trends emerge.
FAQ
How long does it take for orchids to recover from root rot?
Recovery from root rot can take several weeks, typically between 4-8 weeks. During this time, you should see signs of new growth, indicating the plant is regaining strength. If improvements aren’t seen within this timeframe, consider further adjustments to care routines.
Can root rot spread to other plants?
Yes, root rot can spread if conditions are favorable for pathogens in the growing area. It’s essential to keep isolated any affected orchids until recovery is evident to prevent cross-contamination. Regular monitoring and immediate removal of any decaying material from the vicinity can help mitigate this risk. Proactively checking surrounding plants for signs of distress can help you maintain an overall healthier gardening environment.
Should I remove the affected roots before planting again?
Absolutely; any mushy or discolored roots must be pruned off before repotting to ensure the plant’s health. Healthy roots encourage regrowth and overall plant vigor during recovery. Be meticulous in this process, as missed rot can lead to reoccurring issues and stunted regrowth. It’s best practice to sterilize scissors or pruning shears before use to prevent cross-contamination from previous plants.