You’ve probably seen your caladium plants looking less than their best after heavy rainfall, which is why you need to know why are my caladium leaves curling after heavy rainfall. This curling is often a sign of excess moisture causing damage, leading to wilting or drooping leaves. If left unaddressed, the problem gets worse and can spread, weakening the plant and stalling growth; however, fixing it is possible now by checking the soil drainage and adjusting your watering practices.
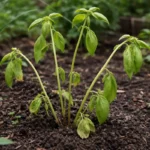
Step 1 – Inspect Caladium Leaves for Immediate Damage
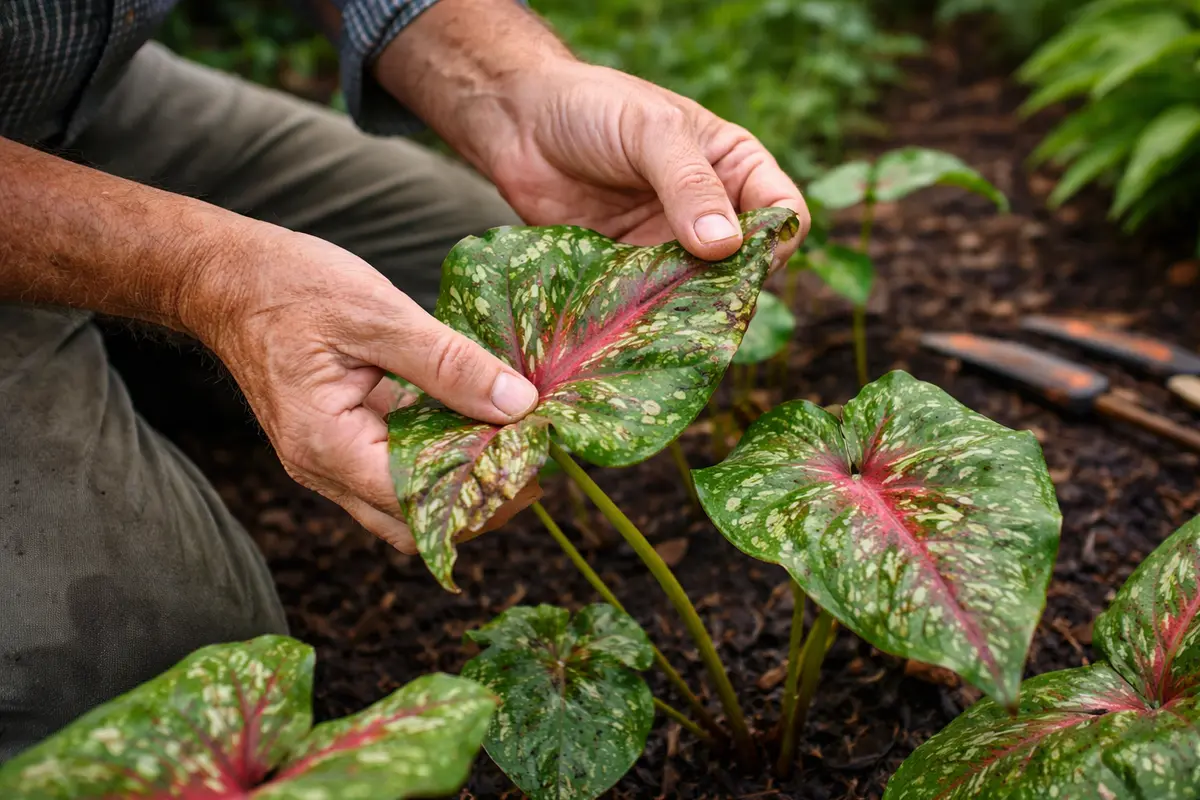
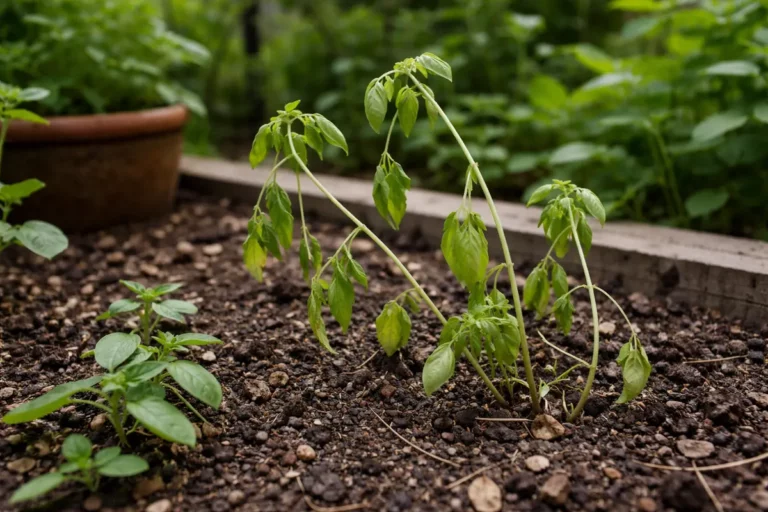
Start by carefully checking the leaves for signs of curling and discoloration. You will notice changes in the leaf structure, such as a wrinkled appearance and possibly browning edges within a few hours after the rain. To properly assess for damage, look closely at the tips of the leaves and the vein structures, as these areas can be the first affected. If you observe a shiny or droopy look in addition to the curling, those symptoms signal further distress.
Inspecting your caladiums right away is crucial. Failing to act may allow the stress from excess water to escalate, compromising the plant’s overall health. Curling leaves generally indicate restricted water uptake due to root stress often exacerbated by heavy rainfall in poorly draining soils. This can lead to yellowing or even black spots, signaling that your caladium may be suffering from root rot. A rotten root system will hinder the plant from absorbing any nutrients, and it may necessitate complete replanting in severe cases.
A common mistake gardeners make at this stage is overlooking the need for moisture checks. For instance, if the soil still feels extremely wet yet the plant shows signs of distress, you should prioritize drainage adjustments instead of merely watering more. In this context, too much water can smother the roots, making it essential to observe for signs of waterlogging or a musty smell. Addressing these aspects early can help avert severe implications for your plants; for example, allowing the leaves to become more severely damaged could lead to bolting or premature death.
Step 2 – Diagnose Curling from Excessive Rainfall
First, inspect the soil around your caladium for excessive moisture and poor drainage. If you find water pooling or the soil feels soggy, take immediate action by amending it with organic matter to improve drainage. A noticeable change will occur as the excess water seeps away, helping the leaves to gradually uncurl.
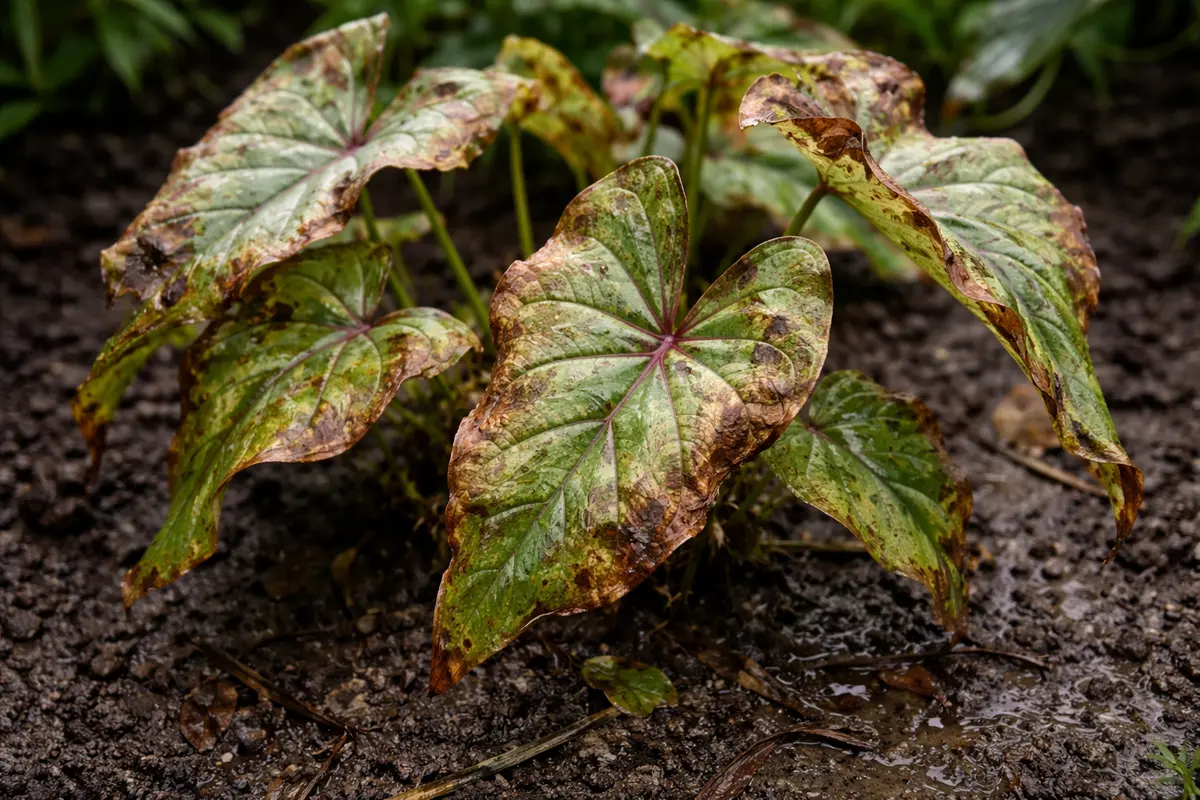
When heavy rainfall saturates the soil, it can lead to root rot, triggering a lack of oxygen in the root zone. As the roots suffocate, the plant’s ability to take up water and nutrients diminishes, causing the leaves to curl as a stress response. In a contrasting situation, if the soil remains well-draining and only the outer leaves are curling while the inner leaves remain healthy, it could indicate environmental stress rather than root issues.
If the soil smells sour, drainage may be significantly compromised; in this case, remove the affected plants, amend the soil with sand or perlite, and replant them in a well-draining mix. Conversely, if the curling is paired with discolored leaves but the soil drains well, check for pest infestations, as these can signal different care needs.
Heavy rainfall can lead to waterlogged soil, preventing roots from accessing necessary oxygen. If you detect that the soil is soggy, it indicates root rot might be developing. In contrast, if the soil remains relatively dry but the leaves are still curling, this may signify a different underlying issue requiring another approach, such as underwatering or nutrient deficiency. Understanding these distinctions is essential as it allows for targeted care that addresses the specific issue affecting your caladium. It’s critical to check soil moisture levels regularly, especially following substantial rainfall events.
Should you find that the soil smells sour, indicating anaerobic conditions, consider introducing perlite or sand to enhance drainage. This adjustment will improve airflow around the roots. If the soil is spongy and overly damp, it might be beneficial to create drainage channels by loosening the top layers of soil, facilitating quicker evaporation. Alternatively, if it feels gritty and dry, you may need to increase your watering regimen gradually, ensuring that the moisture penetrates to the roots instead of pooling at the surface. Monitoring the moisture levels over the next couple of days allows you to assess the effectiveness of the amendments; if there’s no change in drainage or soil condition, further steps may be necessary.
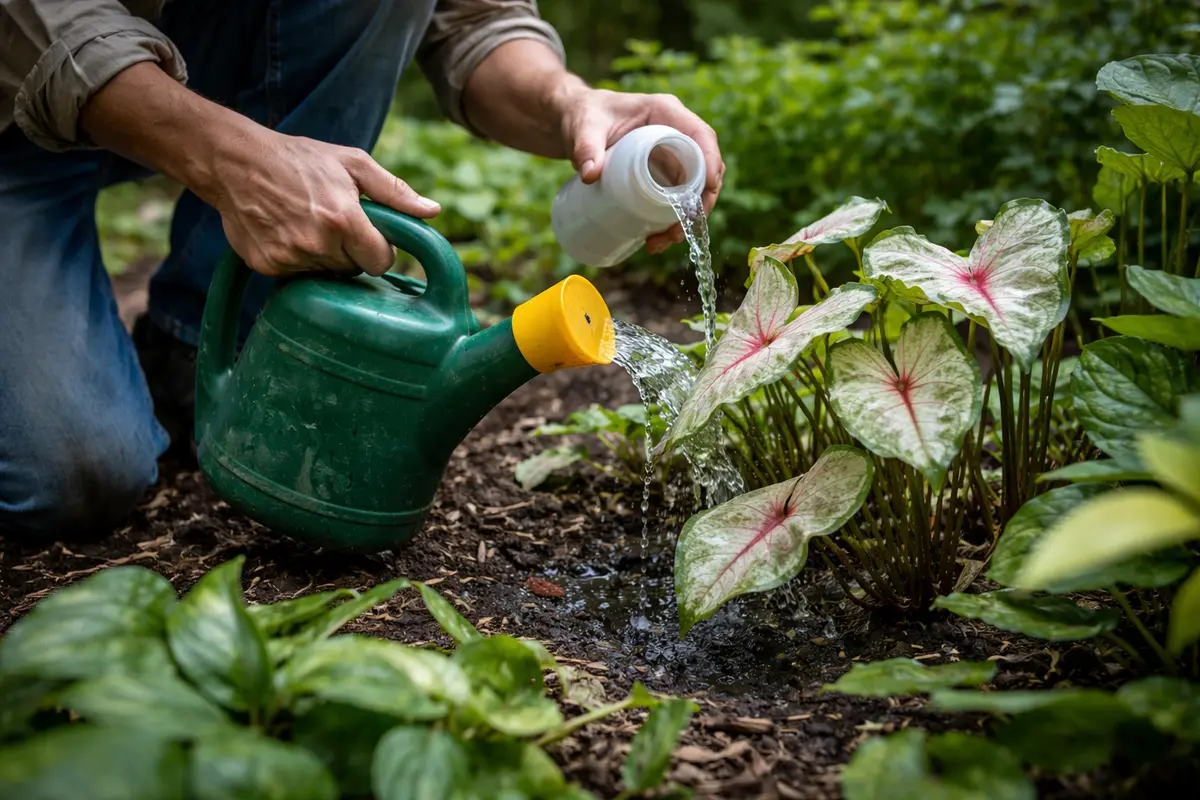
Step 3 – Rehydrate Caladium with Balanced Fertilizer
Start by gently increasing airflow around your caladiums by pruning away any overlapping or damaged foliage caused by the heavy rainfall. Within a few days, you should observe the curled leaves starting to unfurl and show signs of improvement as they adapt to the increased light and airflow.
In the natural context of recovery, expect to see regrowth within one to two weeks if the conditions are right, such as maintaining consistent moisture without saturation. Healthy new leaves will emerge with vibrant coloration, contrasting the previous curled and discolored foliage that resulted from excessive rainfall. If the leaves remain droopy and desiccated, check for residual water pooling in the soil, which can slow recovery.
Avoid overcompensating with fertilizer during this recovery period, as excess nutrients can exacerbate stress. Instead, focus on soil drainage and ensure your caladiums are receiving adequate sunlight but not direct intense rays that can further strain the recovering leaves. If the leaves do not recover within the expected timeline, check for root rot or persistent waterlogged conditions in the soil.
Using a balanced fertilizer provides essential nutrients that help your plant recover its vigor after moisture stress. Healthy nutrient absorption facilitates new cell growth, leading to greener and more robust foliage. Long-term recovery can typically be observed through perked-up leaves and more vivid colors as the plant replenishes itself. However, monitor the progress closely; if you notice that the new growth appears weak or discolored, it might indicate that the roots need further care or that the fertilizer isn’t suitable for your specific soil conditions, which would require adjustment.
Beware of the temptation to over-fertilize during recovery; doing so can lead to additional stress on the plant. If your caladium continues to exhibit curling, it might mean that recovery requires a reduction in fertilizer and focusing on improving the overall drainage and aeration of the soil instead. Signs such as persistent curling or browning could mean the roots are damaged; thus, performing a soil test to ascertain nutrient levels may be beneficial before introducing nutrients again. Continuous monitoring of the plant’s response to treatment will be key in providing the best outcomes for your caladium’s health and growth.
Step 4 – Shield Caladium from Future Heavy Rain
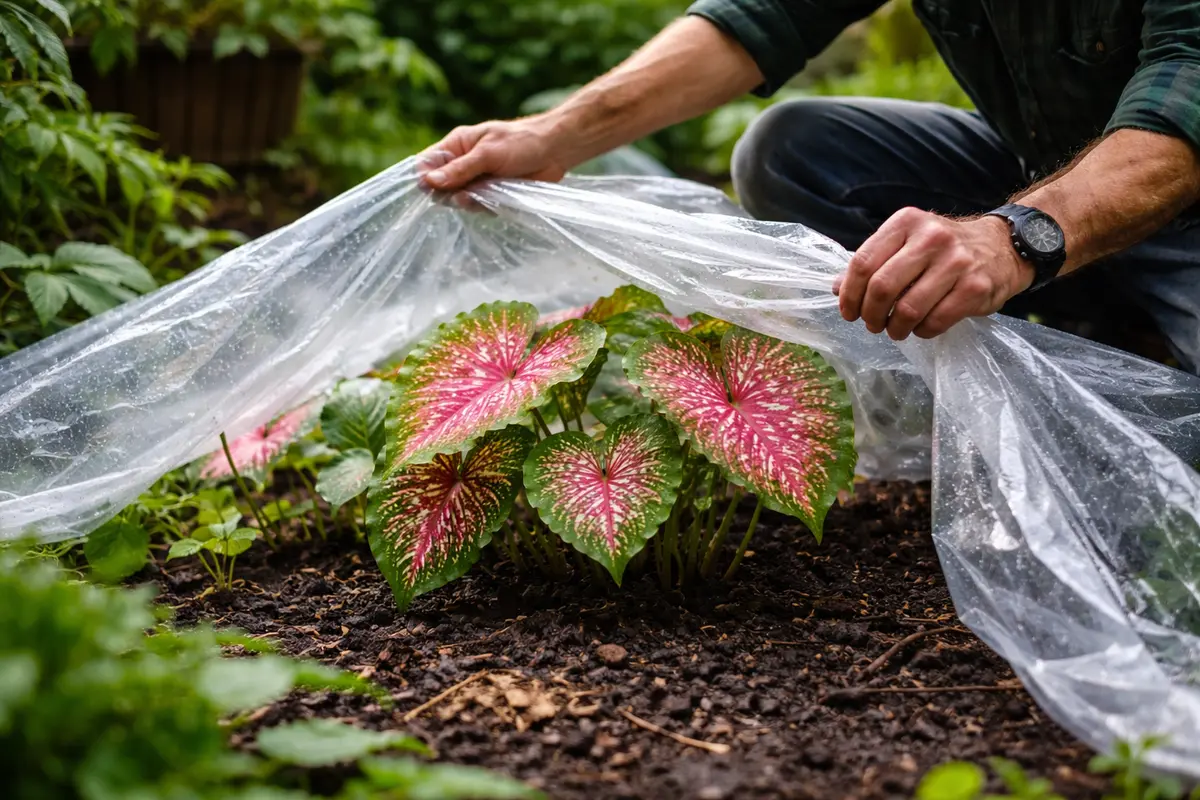
Start by adjusting the water drainage around your caladium plants by elevating planting beds or adding mulch to create a barrier. This action reduces excess moisture accumulation and stabilizes leaf texture, leading to healthier, firm leaves instead of curling post-rainfall.
Excessive water in the soil can cause the roots to suffocate, leading to curling leaves as the plant attempts to conserve moisture. When soil remains overly saturated, bacteria thrive, further harming roots. The prevention routine of improving drainage directly addresses the root cause, ensuring your caladiums can access oxygen and nutrients effectively.
In rainy seasons, increasing the frequently checked drainage can enhance results, especially if heavy downpours are expected frequently. If the soil remains soggy for prolonged periods, consider adding sand to provide further aeration and improve drainage across varied weather conditions.
Preventing future curling involves understanding environmental triggers like heavy rain or prolonged dampness. Setup adjustments, such as amending the soil with organic matter, will aid in the absorption and retention of moisture without leading to waterlogging. When creating these amendments, aim for a mixture of compost and coarse sand to create well-aerated soil. This integration encourages healthy root growth while maintaining adequate moisture levels. Proactive steps in the garden layout and design can create a sustainable environment for your plants.
Consider seasonal weather patterns when planning your garden layout to mitigate potential rain damage. For example, during heavy rains, moving pots to a sheltered location can help prevent excess water from reaching the soil and thereby mitigating the curling issue. This preparation reduces the chances of recurring issues with curling leaves. Pay attention to upcoming weather forecasts; reassessing your care plan after heavy precipitation forecasted can ensure your caladiums receive immediate and appropriate shelter from rain-related stress.
Step 5 – Check Caladium Foliage for Signs of Stress
Monitor your caladium leaves every few days to observe any signs of stress, such as renewed curling or discoloration. You should expect to see fresh, vibrant new growth, indicating that your plant is on the mend. If leaves begin to curl again after a week of treatment, it may be worth revisiting your watering practices or layouts, particularly focusing on ensuring adequate drainage and aeration of the soil.
Healthy leaves should appear firm, lush, and vibrant, while signs of distress may involve curling returning or leaves becoming limp. This ongoing evaluation is vital, as it will allow you to continuously adapt your care strategies to whatever conditions arise. If you note any stunted growth, wilting, or roots emerging from the pot, these could be further indicators that adjustments in pot size or soil composition are necessary, revealing that the plant’s health is still compromised.
If you notice a return of curling after implementing these changes, consider reassessing your watering schedule or soil composition once again. Sometimes, despite initial recovery, the plant may still struggle against environmental stressors like excessive water retention shortly after precipitation; thus, keeping an eye on moisture levels will guide your future actions. Regularly schedule inspections to keep a close watch on your plant’s needs, adjusting your strategies accordingly after each season to ensure sustained growth and health of your caladium plants.
FAQ
How long will my caladium take to recover from curling?
Recovery can take anywhere from one to four weeks, depending on soil conditions and overall plant health. Factors such as previous damage severity, current weather, and ongoing care efforts significantly impact recovery time. Consistent care and monitoring will aid its resilience during this period, helping you to gauge how well your interventions are working.
Can caladium leaves curling spread to other plants?
Curling leaves can indicate diseases or pests that might affect nearby plants. Fungal infections or pests thrive in overly moist conditions and can cause leaf curl and yellowing. If left unchecked, it can lead to broader damage, so acting promptly is essential to safeguard all your plants; for instance, promptly isolating affected plants can help protect others from potential infestations.
Should I remove the affected leaves immediately?
Yes, prune any significantly damaged or diseased leaves to promote healthy growth. Doing so allows the plant to focus its energy on new foliage, which should appear within weeks. Be sure to use clean, sharp pruning shears to minimize the risk of disease transmission during this process and prevent unnecessary harm to the remaining healthy foliage.