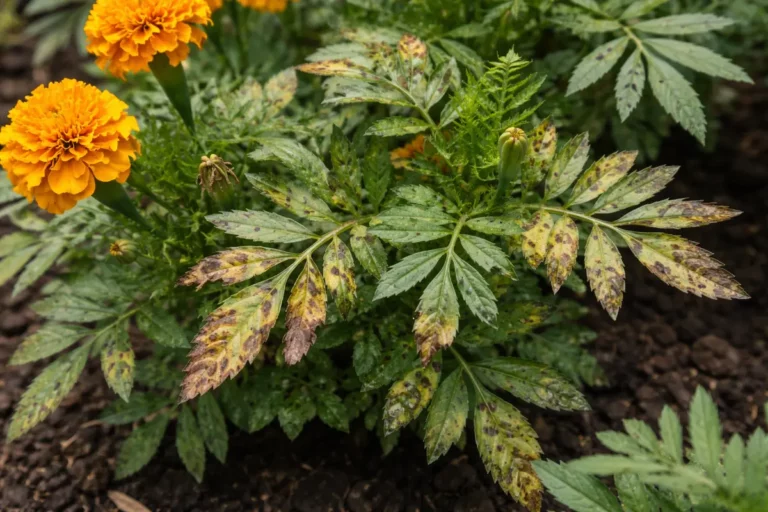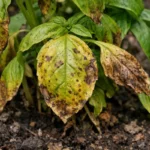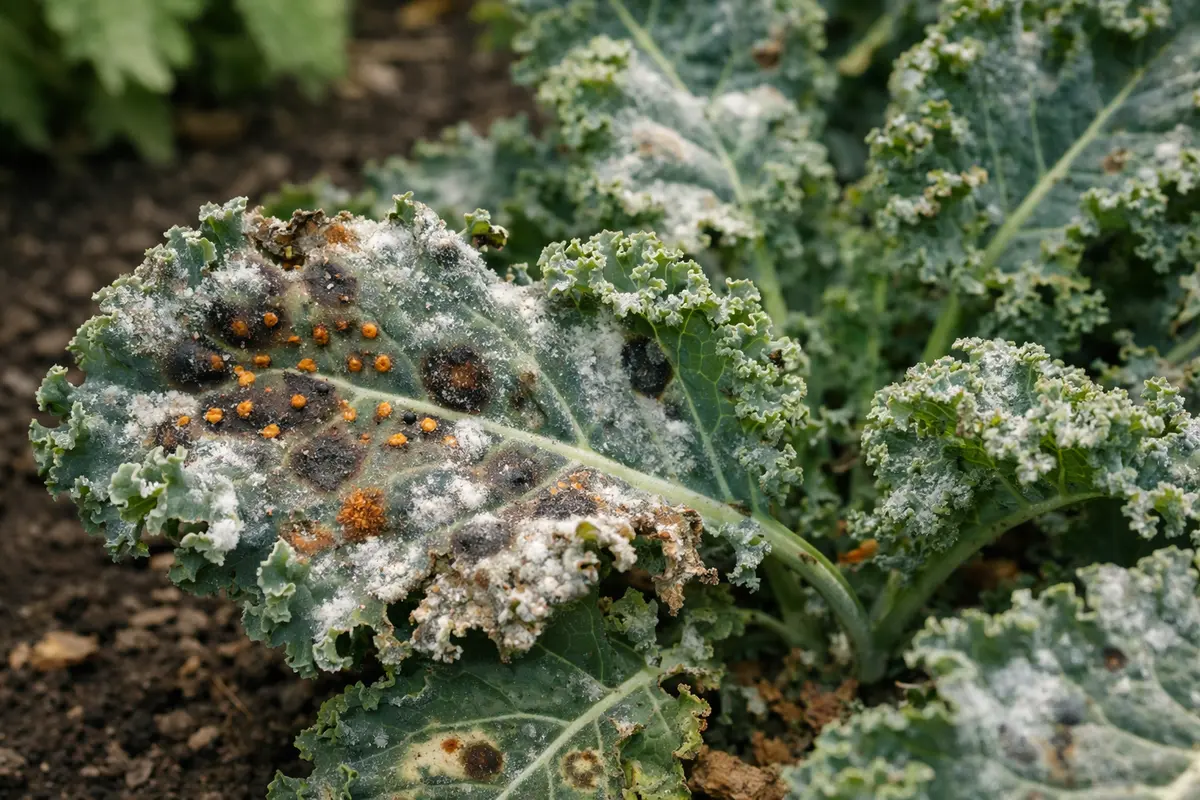
You may notice unsightly brown spots on your kale leaves when humidity levels rise, which is why you need to know How to treat fungal spots on kale in humid air. These spots often develop due to the excess moisture creating an ideal environment for fungal infections, leading to significant leaf damage. If left unaddressed, this problem gets worse and can spread to healthy parts of the plant, weakening it overall. Fortunately, fixing it is possible now; you can remove affected leaves and adjust watering practices to improve air circulation around your kale.
Step 1 – Spray Infected Kale Leaves with Fungicide
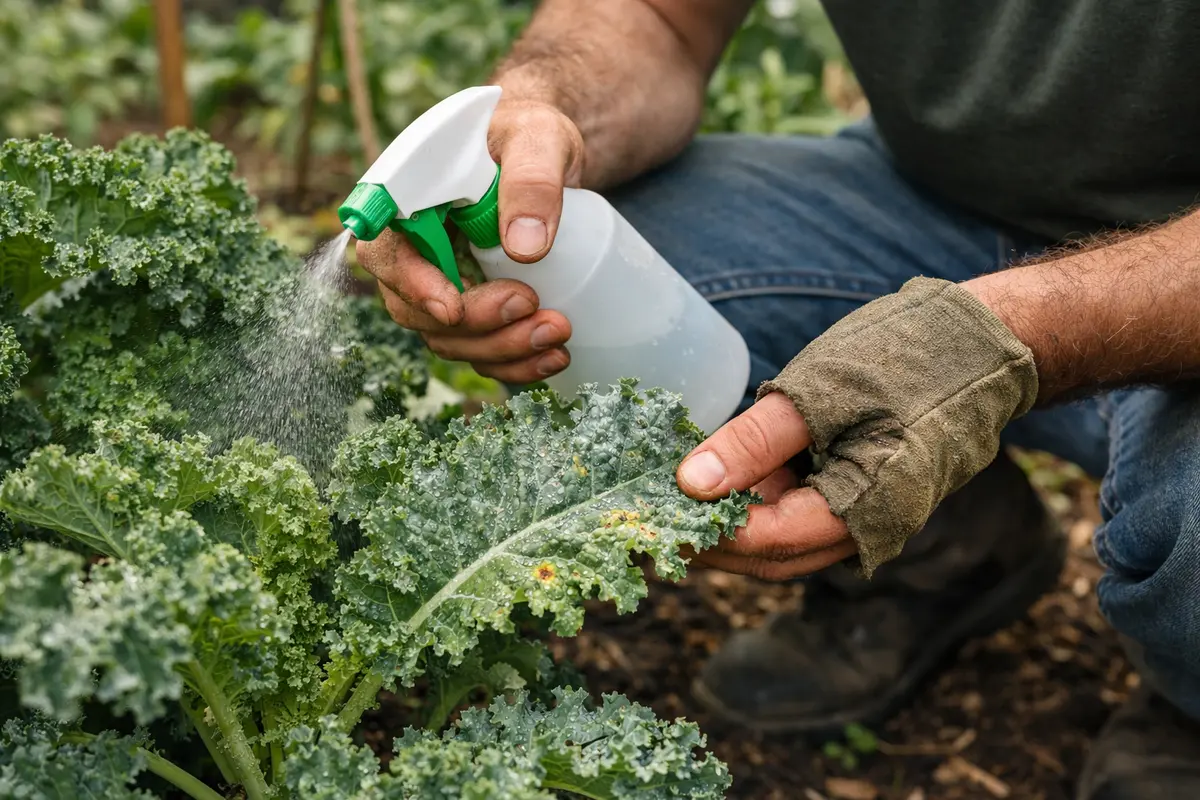
Start by spraying the affected kale leaves with a commercial fungicide specifically designed for vegetable crops. You will notice that the visible fungal spots start to darken and fade within a few days, indicating that the treatment is taking effect. Ensure you follow the manufacturer’s instructions for dilution rates to maximize the fungicide’s effectiveness. A common ratio is typically around 1-2 tablespoons per gallon of water, but it’s vital to check the specifications on the label for your particular product.
Treating the leaves with fungicide is critical because it halts the spread of fungal spores that thrive in humid conditions, thereby protecting the rest of the plant. Fungal pathogens can rapidly proliferate within a few days, leading to severe leaf damage and impacting overall plant health. Addressing the infection promptly can significantly improve your yield. If a good amount of time passes, around 5 to 7 days, without noticeable improvement, you may need to escalate your treatment plan by considering a different active ingredient that targets a broader spectrum of fungi.
A common mistake at this stage is to apply too little fungicide, thinking that it will suffice. This often leads to incomplete treatment and persistent issues. Ensure that you cover all affected areas thoroughly; otherwise, the fungal spots can spread from the untreated sections back to healthy leaves. For instance, a person might only spray the tops of the leaves, neglecting the undersides where moisture can accumulate and spores may thrive. In extreme cases, if you notice that the fungal spots are accompanied by wilting or yellowing of the leaves, consider switching to a stronger fungicidal formulation. If a week goes by and you still see fungal growth, reapply the fungicide, following the manufacturer’s instructions but perhaps with an increased concentration or frequency of application.
Step 2 – Diagnose Humidity Issues Affecting Kale Growth
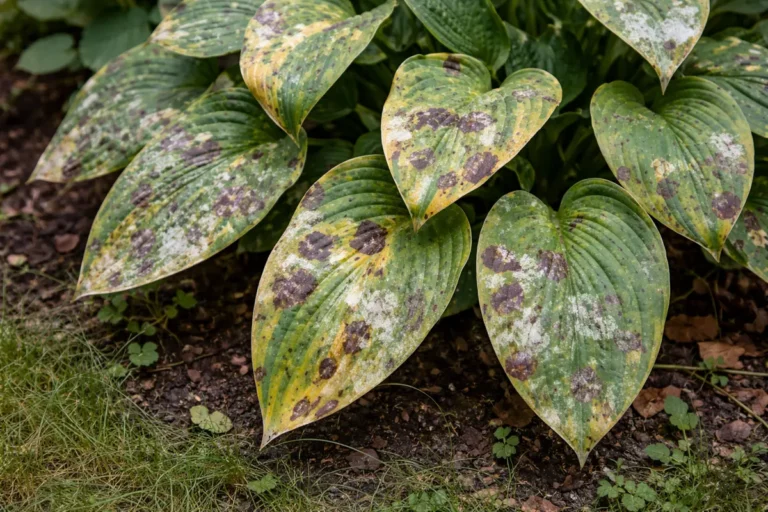
Start by examining your kale to identify if the fungal spots are accompanied by a powdery or fuzzy appearance. If so, immediately remove the affected leaves and ensure good air circulation around the plants. You should notice reduced spread of the fungus as the remaining leaves dry out and breathe more easily.
Fungal spots on kale are often a result of high humidity and poor air circulation, leading to excess moisture that fosters fungal growth. Healthy kale should have firm and green leaves, but when fungal pathogens invade, they can cause soft, discolored areas. This moisture imbalance creates an ideal breeding ground for fungi to thrive, ultimately damaging the plant tissue and hindering nutrient uptake.
If you notice excessive moisture or a sour smell from the soil, shift to an environment with better drainage or reduce watering frequency. Similarly, if the symptoms resemble fungal spots but there are also yellowing leaves and stunted growth, check for aphid infestations instead, as they may require a different treatment approach.
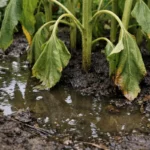
High humidity contributes significantly to the recurrence of fungal diseases because it limits the evaporation of moisture from the leaves and soil. When kale plants remain wet for prolonged periods, it creates the perfect breeding ground for mildew and other fungal diseases to thrive. Thus, regulating the humidity will assist in preventing the reemergence of these symptoms. For instance, if you find that your area has high overnight humidity, it would be prudent to water earlier in the day to allow sufficient drying time.
If your area is prone to persistent humidity, consider offering more air circulation. This can be achieved by adjusting your planting layout; for instance, if the kale is crowded, thin out other nearby plants to create better airflow. Ensure adequate spacing of at least 12 to 18 inches between plants, as this can significantly assist in this prevention. Crowded plants hinder air movement, increasing moisture retention in dense foliage. If this adjustment does not lead to a noticeable improvement in the coming weeks, assess your watering practices. Watering too frequently and using overly dense mulch that retains moisture for too long can exacerbate the issue, leading to chronic humidity problems.
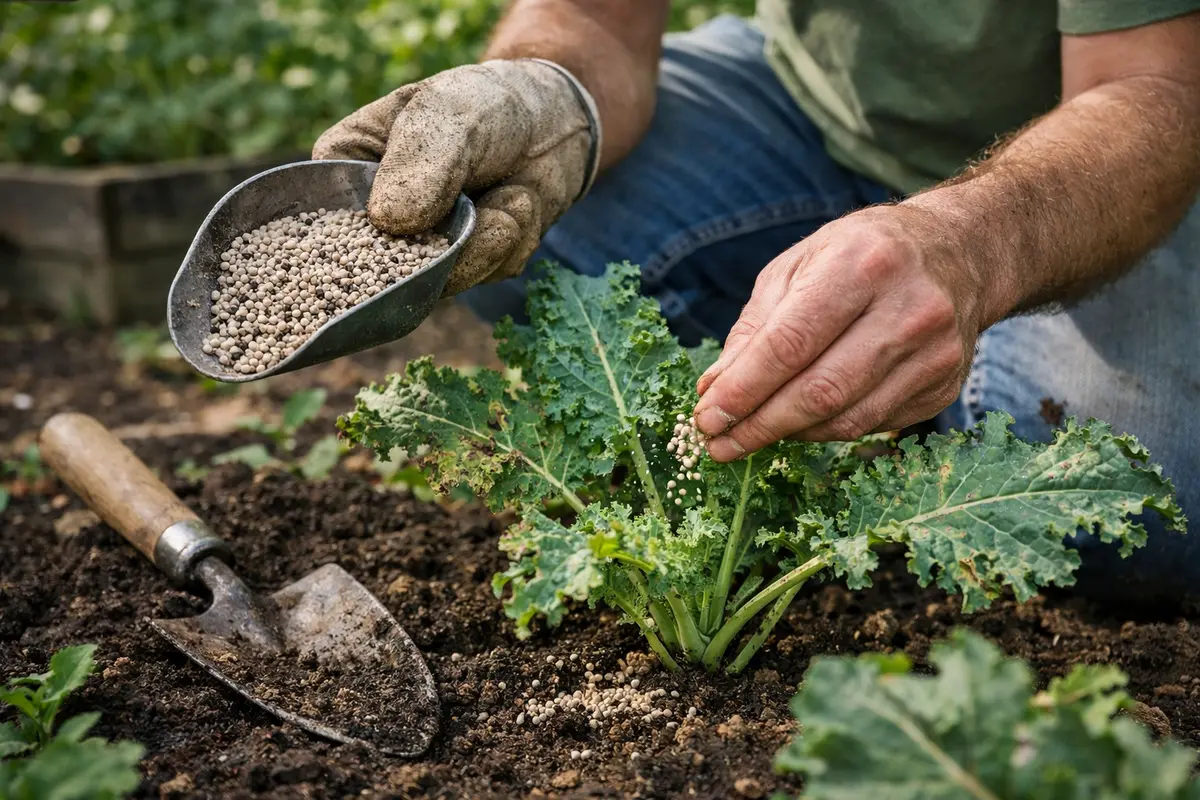
Step 3 – Apply Nutrients to Support Kale Recovery
Water your kale plants with a balanced solution of neem oil and water to remove existing fungal spores and prevent further spread. In the week following this treatment, watch for the disappearance of dark brown spots and an increase in fresh green leaves as evidence of recovery.
Recovery from fungal infections in humid conditions typically takes one to two weeks. During this time, healthy regrowth will appear as new, vibrant leaves sprouting from the center of the plant. Warm, breezy days can expedite recovery, while prolonged damp and cloudy weather may slow it down considerably. If you notice continued discoloration despite these conditions, check for excessive moisture retention in the soil.
Avoid the mistake of overwatering during this recovery phase, as too much moisture can create an environment ripe for further fungal issues. Kale prefers consistent but moderate moisture; excessively wet conditions can lead roots to rot, which hinders recovery. If leaves begin to wilt despite proper watering practices, check the soil drainage and adjust accordingly.
Providing additional nutrients will boost the plant’s immune system, allowing it to recover more quickly from the fungal infection. During this period, plants like kale benefit from higher levels of potassium and phosphorus, which are essential for vigorous growth. Nutritional deficiencies can make plants more susceptible to diseases; therefore, carefully monitoring nutrient levels is vital for the ongoing health of your kale. For example, if leaf tips appear brown or the overall color is pale, these symptoms may point to nutrient deficiency that inhibits overall recovery.
A common mistake is over-fertilizing; too much can lead to stress on the roots or promote rapid growth, making plants fragile again. Instead, apply nutrients in moderation, approximately half the recommended dose on the package. Always water thoroughly before applying fertilizers to avoid root burn. Observe the plant’s response and if leaves remain lush and green without discoloration, you are on the right track. If the foliage begins to yellow or develop further discoloration, it may indicate that too much fertilizer has been applied, necessitating a pause in feeding until symptoms stabilize.
Step 4 – Manage Humidity Levels to Prevent Fungal Spots
Start by ensuring your kale plants have adequate spacing and good air circulation. This will inhibit the growth of fungal spores and prevent infection, resulting in cleaner leaves and a healthier crop.
High humidity and crowded plants create a perfect environment for fungal growth; air stagnation retains moisture on the leaves, leading to more prevalent spots. By spreading your plants apart, you promote airflow and dry conditions, addressing the root cause of the fungal issue while keeping your kale vigorous.
During rainy seasons, increase plant spacing more significantly and consider adding a layer of mulch to reduce soil splash that can introduce spores. If you notice persistent dampness in the foliage, try implementing a fan or windbreak to enhance airflow further, preventing moisture buildup.
One strategy to prevent fungal spots is to ensure good drainage and air circulation around your kale plants. This minimizes moisture retention and is crucial since ideal humidity levels for kale are between 60% and 70%. Regularly turning the soil after heavy rainfall and maintaining distances of at least 2 feet apart between mature plants can dramatically reduce the likelihood of fungal outbreaks. Additionally, examine whether your mulch retains too much moisture; switching to lighter, airy materials like straw can promote better moisture regulation.
In more humid seasons, you can use mulch sparingly to prevent the soil from retaining too much moisture. Monitor rainfall closely; when heavy rains are forecast, consider utilizing raised beds or trenches to enhance drainage. Pay attention to pooling water around the base of plants; implementing a gentle slope around those areas can help facilitate proper runoff during heavy rain, significantly influencing the long-term resilience of your plants against diseases.
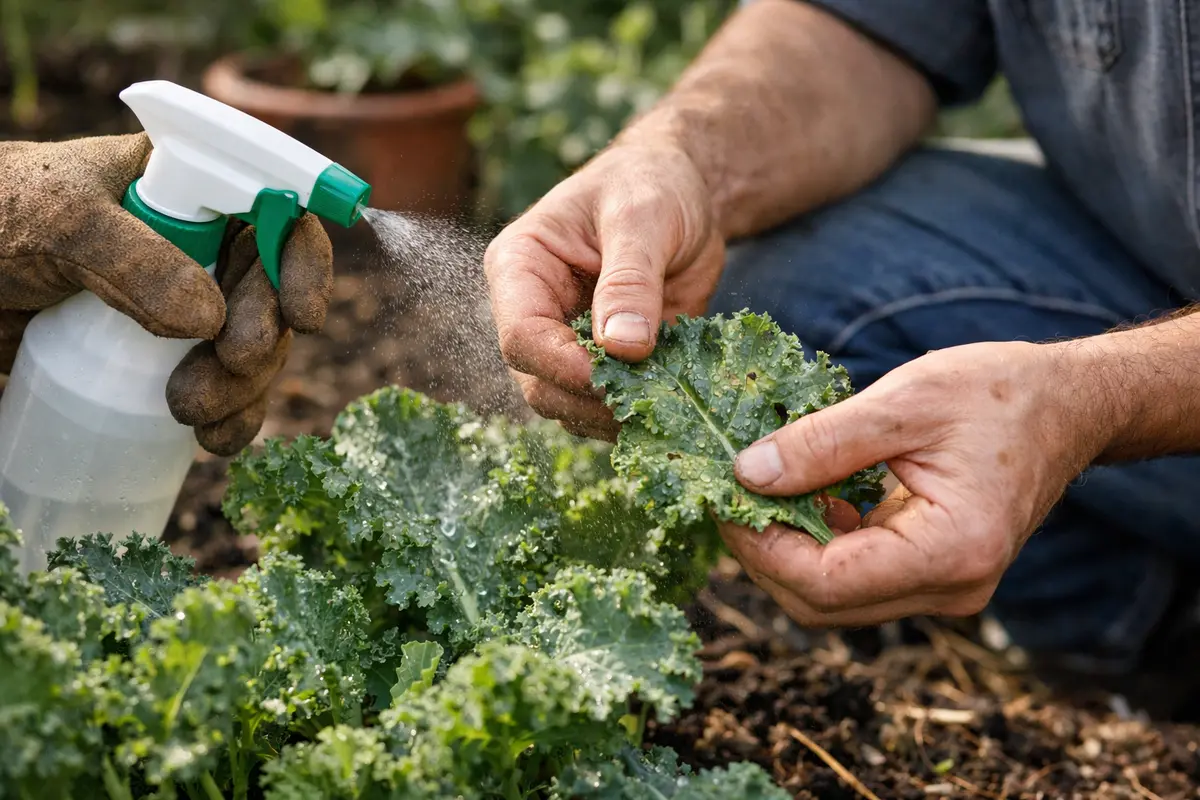
Step 5 – Inspect Kale for Signs of Fungal Return Weekly
Inspect your kale plants weekly for any signs of returning fungal spots, focusing on the undersides of leaves where moisture tends to linger. You’ll want to monitor for new spots or stress indicators like wilting or discoloration of leaves. Establishing a consistent inspection routine makes monitoring seamless; for instance, examining your plants each Saturday morning can create a pattern that becomes second nature.
A healthy plant should appear vibrant and perky, devoid of discoloration on the leaves. If you notice new spots appearing within a week or two, it’s time to reassess your previous treatment, as persistent symptoms indicate a failure to completely eradicate the infection. Prompt attention at this stage is critical; note the area of recurrence and your previous treatments to help pinpoint weaknesses in your strategy. Keeping a journal of noticeable changes will help identify if consistent patterns — such as humidity spikes following rain events — are affecting your plants.
If you see fungal symptoms returning despite your efforts thus far, do not hesitate to apply your fungicide again and closely monitor soil moisture levels. In some cases, newly developed spots may originate from neighboring infected plants; therefore, isolation and treatment of symptomatic plants are paramount. Adjust any care routines that may be promoting excess moisture to better combat the environment; also inspect root health if growth patterns slow down, as poor root systems can exacerbate surface infections. This ongoing vigilance is key to successfully preventing future outbreaks.
FAQ
How long does it take for fungal spots to disappear on kale?
Generally, fungal spots start to fade within 3 to 7 days after applying fungicide, provided the underlying humidity issues are also addressed. Ensuring consistent air circulation along with proper watering practices will speed up the recovery process, leading to healthier foliage over time. However, results may vary based on the severity of the initial infection and ongoing environmental conditions.
Can fungal spots on kale spread to other plants?
Yes, fungal infections can spread quickly from kale to other plants, especially in humid conditions. It’s essential to isolate affected plants and treat them immediately to mitigate the risk of spreading the disease throughout your garden. If you notice your other plants expressing similar symptoms, reassess not just the kale but the entire garden’s humidity and air flow to identify any systemic issues.
Should I remove the affected kale leaves before treating them?
Yes, you should remove any severely affected leaves to reduce the fungal load and prevent it from spreading to healthier areas of the plant. Doing so not only helps in managing the current infection but also promotes better air circulation around the remaining foliage. After removal, ensure that you clean up any fallen debris promptly, as this can harbor spores and exacerbate the problem; a thorough cleanup can be the difference in preventing future outbreaks.