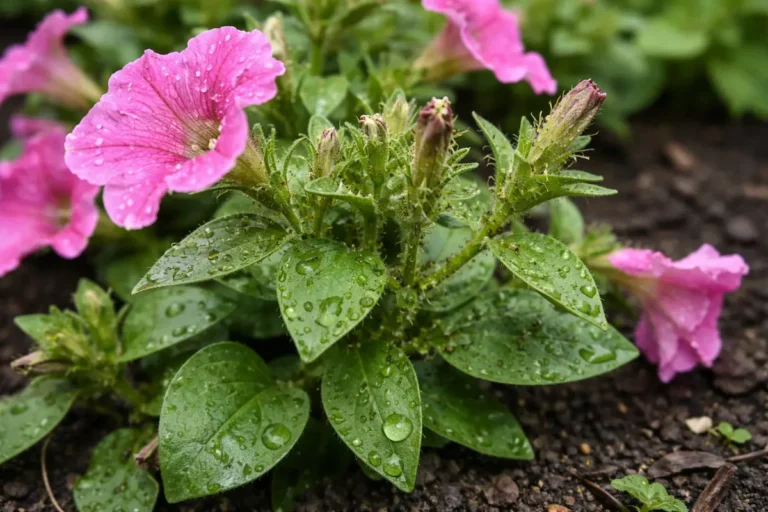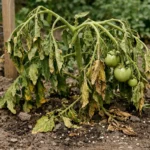
You may notice that your lavender has become a haven for tiny pests during spring growth, which is why you need to know how to treat aphids on lavender during spring growth. These insects suck the sap from the plant, causing yellowing leaves and wilting blooms. If left unchecked, the infestation can spread rapidly and weaken the plant, but fixing it is possible now if you inspect the foliage closely and remove any affected parts. Failing to address the issue promptly can lead to significant damage and even plant death, making it all the more crucial to take immediate action.
Step 1 – Spray Infected Lavender with Neem Oil
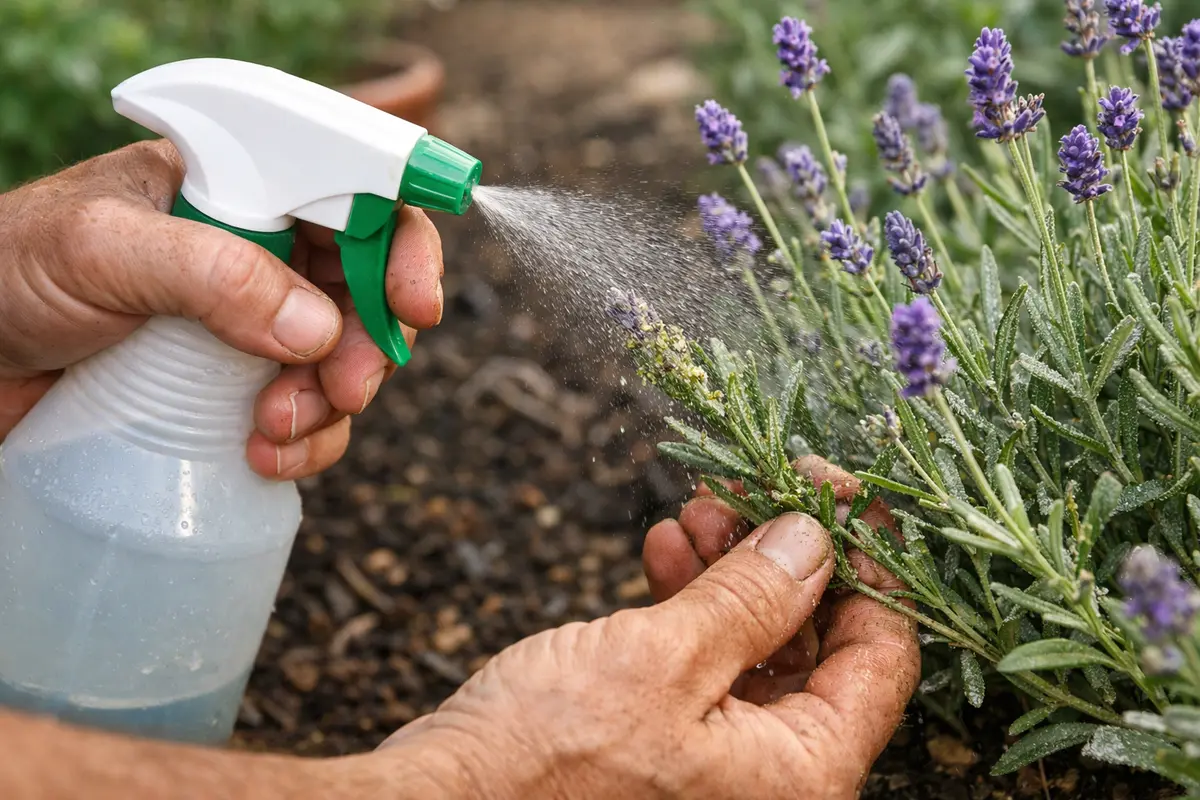
Start by spraying neem oil on the affected lavender plants to target aphids immediately. You will notice a reduction in the sticky residue on the leaves within a day or two as the oil disrupts the aphids’ feeding habits. This swift action is vital for controlling the aphid population before it becomes unmanageable, ensuring that the infestation does not spread to other areas of your garden.
Neem oil is effective because it interferes with the growth and reproduction of aphids, reducing their population over time. The active compounds in neem disrupt the hormonal systems of insects, preventing them from maturing and laying eggs. By smothering the aphids when sprayed directly, it forms a barrier on the plant’s surface, making it difficult for the insects to thrive. It’s essential to remember that even a few days of neglect can result in exponential increases in the aphid population, as a single aphid can produce dozens of offspring in just a week.
Common mistakes include applying neem oil during peak sunlight hours. Doing so can cause leaf burn and reduce the effectiveness of the treatment. It’s best to apply the spray in the early morning or late evening when temperatures are cooler, allowing the oil to dry without immediate sunlight exposure. Additionally, ensure you thoroughly cover the undersides of the leaves, as this is where aphids often hide. Over-spraying may lead to excessive oil buildup, which can suffocate beneficial insects, so make sure to use only enough to coat the affected areas without saturating the plant. If you observe that the oil hasn’t dried after several hours, this may be a sign of humidity hindering the drying process, and you may need to adjust your application strategy.
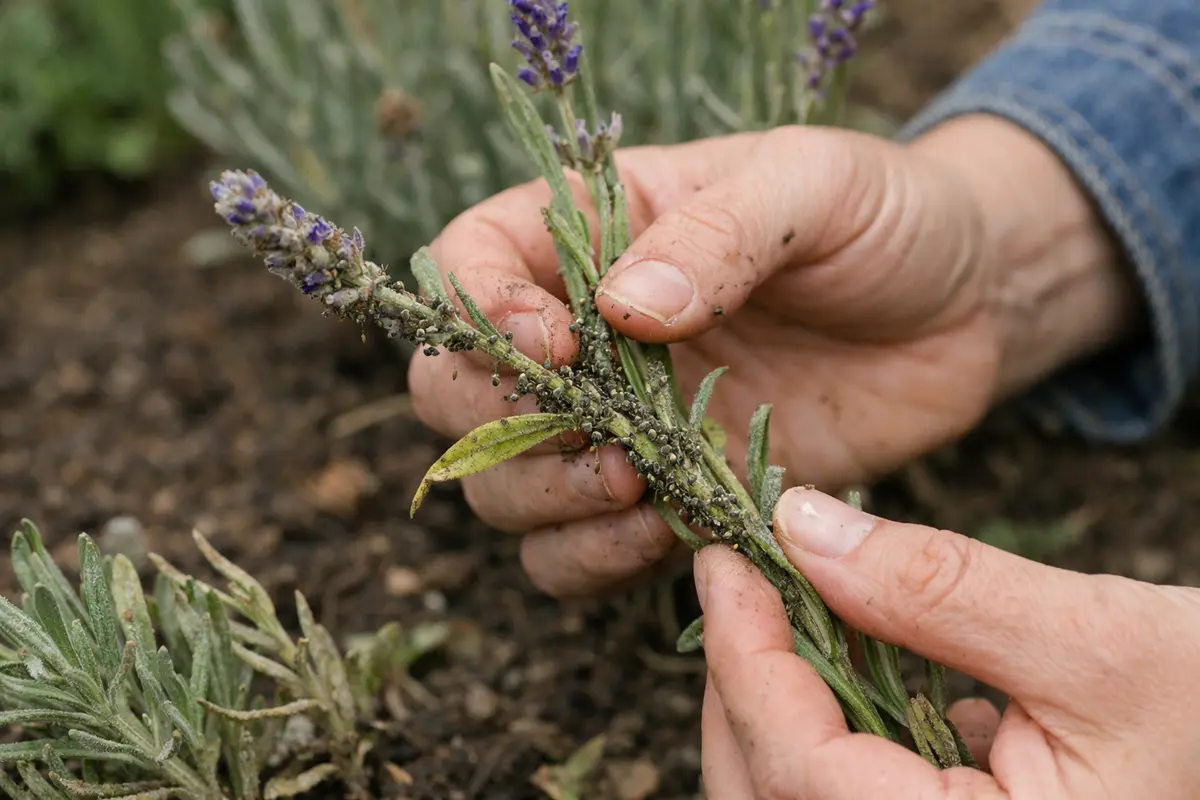
Step 2 – Check for Aphid Infestation Levels on Lavender
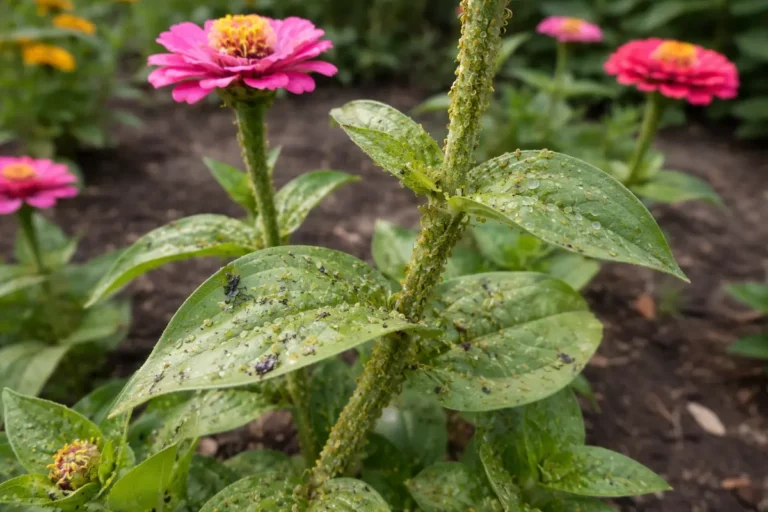
Inspect your lavender plants closely to confirm the level of aphid infestation before proceeding with further treatments. You will see small clusters of aphids on the new shoots and under the leaves, indicating the severity of the problem. A thorough assessment is crucial, as it will guide you in selecting the right treatment intensity. A light scattering may require minimal intervention, while large infestations will necessitate more aggressive tactics, including repeat treatments.
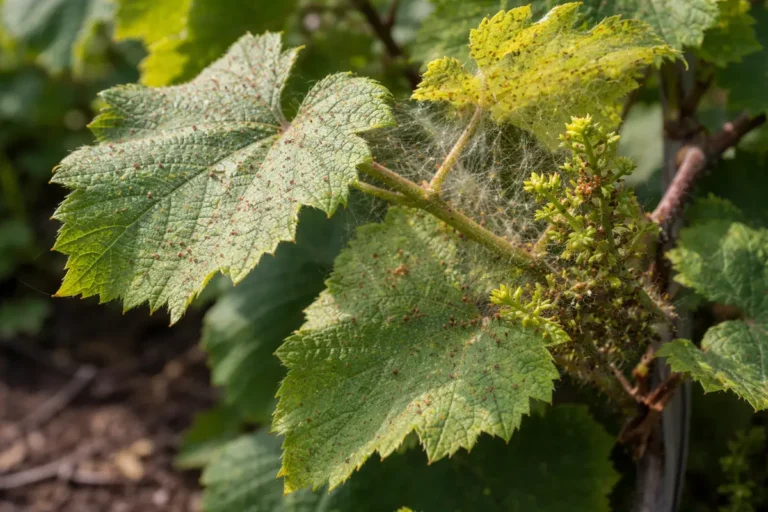
Aphids cause damage by feeding on the sap of the plant, leading to yellowing leaves and stunted growth. The droppings left by aphids, known as honeydew, can attract sooty mold, further complicating the damage. Monitoring for their presence is critical, as larger infestations can lead to a significant decline in your lavender’s health, positioning them as a breeding ground for other pests. If you notice clusters of ten or more aphids, take immediate action alongside the neem oil treatment. If the infestation is just beginning, clusters may be small and near the tips of the shoot, while severe cases can spread throughout the plant.
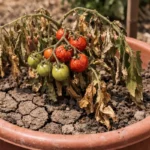
If your soil feels overly compacted or retains too much moisture, it could attract these pests. Aphids thrive in environments where plant stress is evident. Therefore, make sure to improve drainage and avoid over-watering your lavender plants, as healthy soil conditions are vital for preventing further infestations. Stress factors like poor soil nutrients or inadequate sunlight can exacerbate their appeal, so be vigilant. If your lavender plants are exhibiting signs of stress, such as wilting or yellow leaves, assess their watering pattern and light exposure immediately. Consider conducting a soil test to identify any nutrient deficiencies that could be addressed to bolster plant health.
Step 3 – Water Lavender to Encourage New Growth
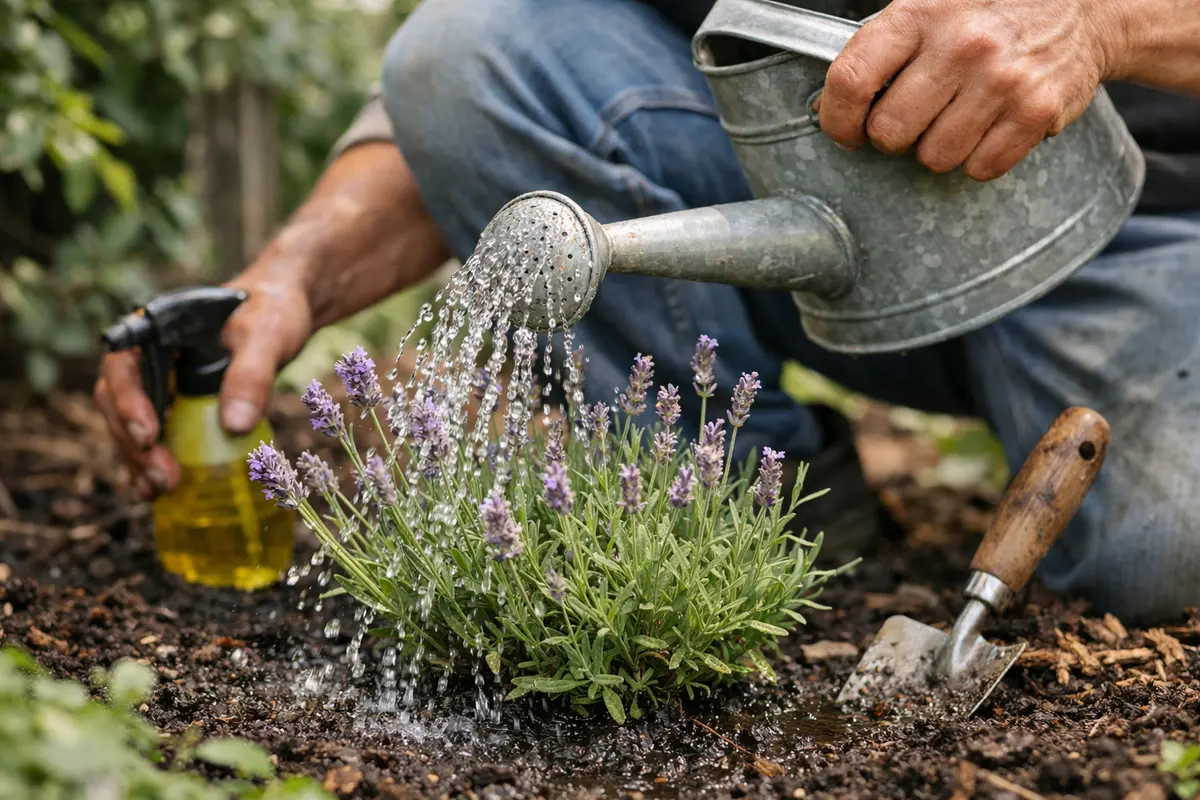
Begin watering your lavender deeply to support new growth and recovery. You will see the soil begin to darken and the plants start standing upright within a couple of days, indicating that your response is having a positive effect. Healthy hydration will spur new growth, allowing the plants to recover from prior stress while supporting defenses against further infestations. Cutting off the stressors through adequate hydration is crucial, as stronger plants can better withstand pest pressures.
Deep watering encourages the roots to become established, leading to robust growth. This, combined with previous treatments like neem oil, helps the plants recover more effectively from the stress caused by aphid feeding. Adequate moisture also allows the plants to absorb necessary nutrients, fortifying their stature. Be sure to soak the soil at least 6 inches down, as this will promote deeper root systems better equipped to draw up nutrients. Watching for the soil to dry slightly between watering sessions can ensure you’re promoting growth while avoiding waterlogged conditions.
A common mistake during this recovery phase is over-watering, which can lead to root rot. Poor drainage can cause water to pool around the roots, suffocating them and promoting fungal diseases. It’s essential to ensure your soil is well-drained and only water when the top inch feels dry; typically, this should be every 1-2 weeks depending on the weather. Overcompensation can deter growth instead of promoting it. Additionally, using mulch can help retain moisture without saturating the soil, but take care to ensure it does not touch the plant’s stems, as this can cause rot. Should water pooling occur, consider adjusting your drainage conditions, perhaps by incorporating sand or perlite into your soil mix.
Step 4 – Establish Beneficial Insects in Your Garden
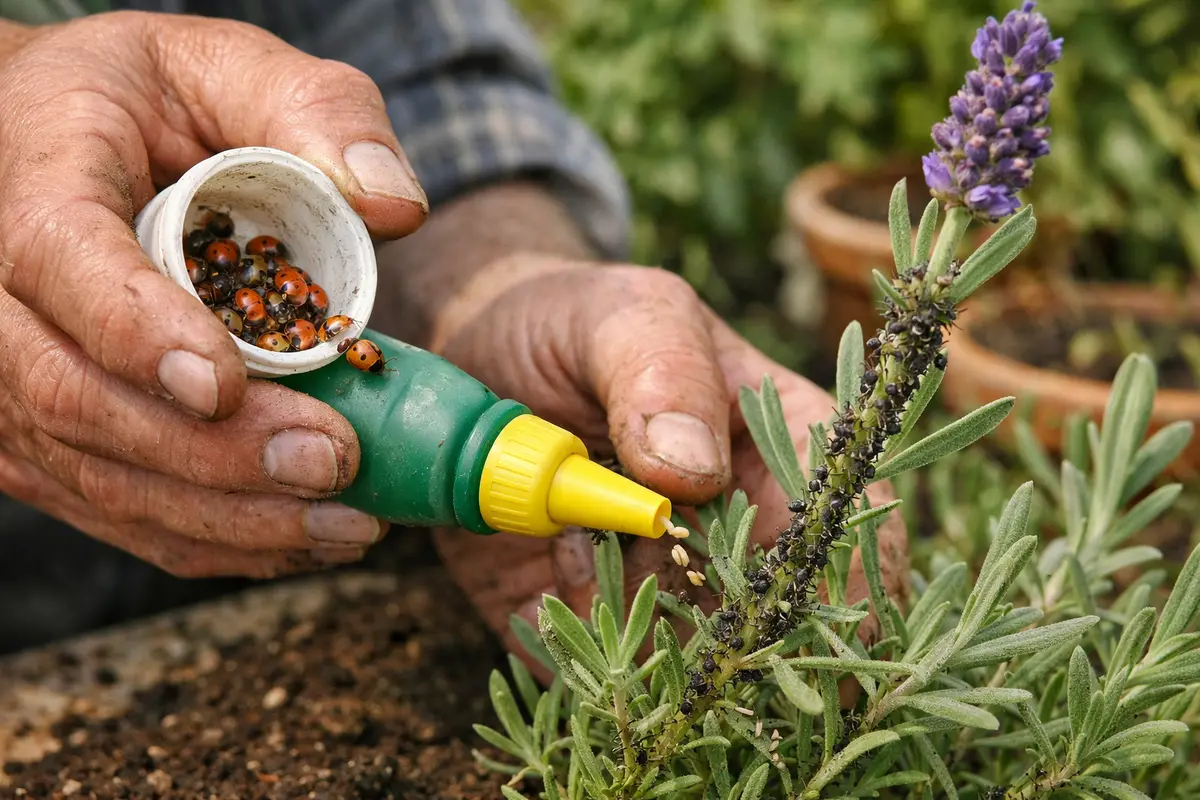
Start by regularly inspecting your lavender plants for early signs of aphids, especially under the leaves, and promptly remove any infested foliage. By establishing this routine, you will significantly reduce the likelihood of an infestation taking hold, as this proactive measure deters aphids from proliferating. Establishing an ecosystem in your garden that fosters beneficial insects can create a natural balance that combats common pests.
Aphids thrive in warm, dry conditions and are more likely to invade when plants are stressed by drought. Consistent monitoring and timely removal of infested plant parts effectively disrupt the aphid life cycle, minimizing their opportunity to establish colonies. If you notice stunted growth on some lavender while others flourish, check for poor soil drainage or inadequate watering routines that can stress the plants. Regular checks can aid in re-establishing vigor through consistent growth and reducing aphid susceptibility.
During unusually warm springs, consider increasing the frequency of inspections as aphid populations can rise rapidly due to ideal conditions. Additionally, introducing natural predators like ladybugs can help keep aphid numbers in check. This encourages a balanced ecosystem where beneficial organisms help control pest populations naturally. Timing for introducing these insects may depend on your local climate, but late spring is typically ideal when aphids begin to emerge. Consider planting a mix of flowering plants that provide food for these beneficial insects, promoting their presence in your garden. Keeping areas around your lavender clear of debris and not using broad-spectrum insecticides will further support their populations. Regularly revisiting these orga can keep your garden healthy and thriving.
Step 5 – Inspect Lavender for Residual Aphids Weekly
Start by checking your lavender plants every few days during the active spring growth period for signs of aphids, especially on the new shoots and the underside of leaves. Observe for small green or black insects clustered on tender foliage and monitor for honeydew, a sticky substance they produce. Should you spot aphids, treat promptly and recheck your plants two to three days later to gauge the effectiveness of your treatment, as ongoing monitoring is essential for successful pest management.
A fully recovered lavender plant will exhibit robust green foliage, firm and unwrinkled leaves, and new growth shooting up, devoid of any sticky residue. In contrast, if you notice yellowing leaves, curling, or black sooty mold forming, these are key indicators that aphids may be returning. If the leaves are not firm, it’s time to re-check for clusters of aphids and their honeydew, refining your treatment accordingly. Look also for signs like wilting or stunted growth; any resurgence warrants immediate action to prevent further damage.
If aphids persist despite your treatment, escalate the approach by introducing beneficial insects such as ladybugs or lacewings; these natural predators can effectively control aphid populations without the need for chemical treatments. Alternatively, consider applying a more potent insecticidal soap or neem oil if the problem continues to escalate, ensuring to follow the product instructions carefully. A healthy lavender plant that consistently displays leaves free of aphid damage will not only thrive but can resist future pest attacks much more easily.
If you notice returning infestations despite your efforts, be prepared to reapply neem oil or introduce additional beneficial insects. Keep track of your treatments, noting what methods work best for your lavender, and be ready to switch tactics if results are not improving. Additionally, consulting with a local gardening center can provide tailored advice to address persistent issues or provide insights into controlling pests in your specific climate. This ongoing diligence will help safeguard your lavender’s health and ensure its aversion to future aphid invasions.
FAQ
How long does it take for neem oil to work on aphids?
Neem oil typically begins to affect aphids within a few hours of application, but it may take 3 to 5 days to see a significant reduction in their population. It disrupts their feeding and reduces their ability to reproduce, which helps control the infestation over time. Be patient and re-evaluate after a week to determine if reapplication is necessary. If you continue to see aphids after this period, consider intensifying treatments or inspecting for potential underlying issues in your plants.
Can aphids spread to other plants in my garden?
Yes, aphids can easily spread to other plants if not managed promptly. They can travel by wind or through contact, potentially affecting sensitive plants nearby, so it’s crucial to monitor all vegetation closely. Watch for any signs of stress or sticky residues on other plants; acting quickly can prevent further spread. If you find aphids on multiple plants, consider isolating affected plants until the infestation is controlled.
Should I remove affected lavender parts before treatment?
Yes, it’s advisable to remove heavily infested parts of the lavender before treatment to reduce the overall aphid population. Trimming these sections helps contain the spread and minimizes additional stress on the plant. Dispose of the cuttings carefully; do not compost them, as doing so can spread the infestation. Proper disposal methods should include sealing the clippings in a plastic bag and discarding them to prevent the spread of aphids to healthy areas. Following up with neem oil or insecticidal soap after removal can significantly boost the lingering effects, ensuring that the remaining plant is safe from further attacks.