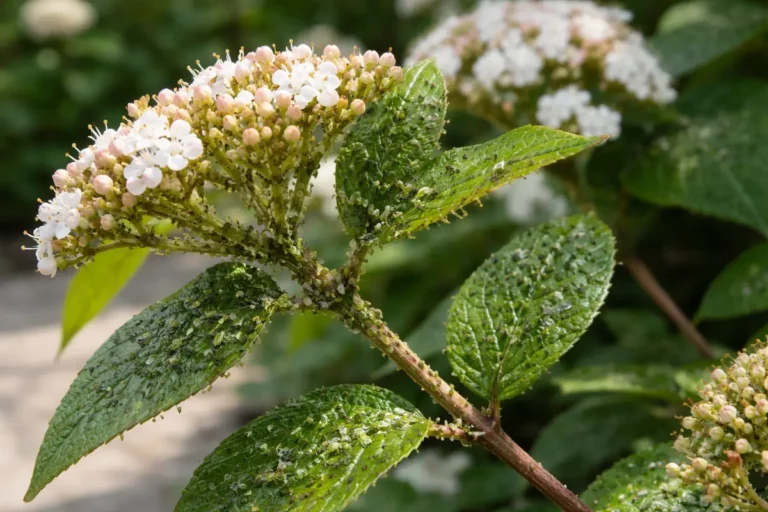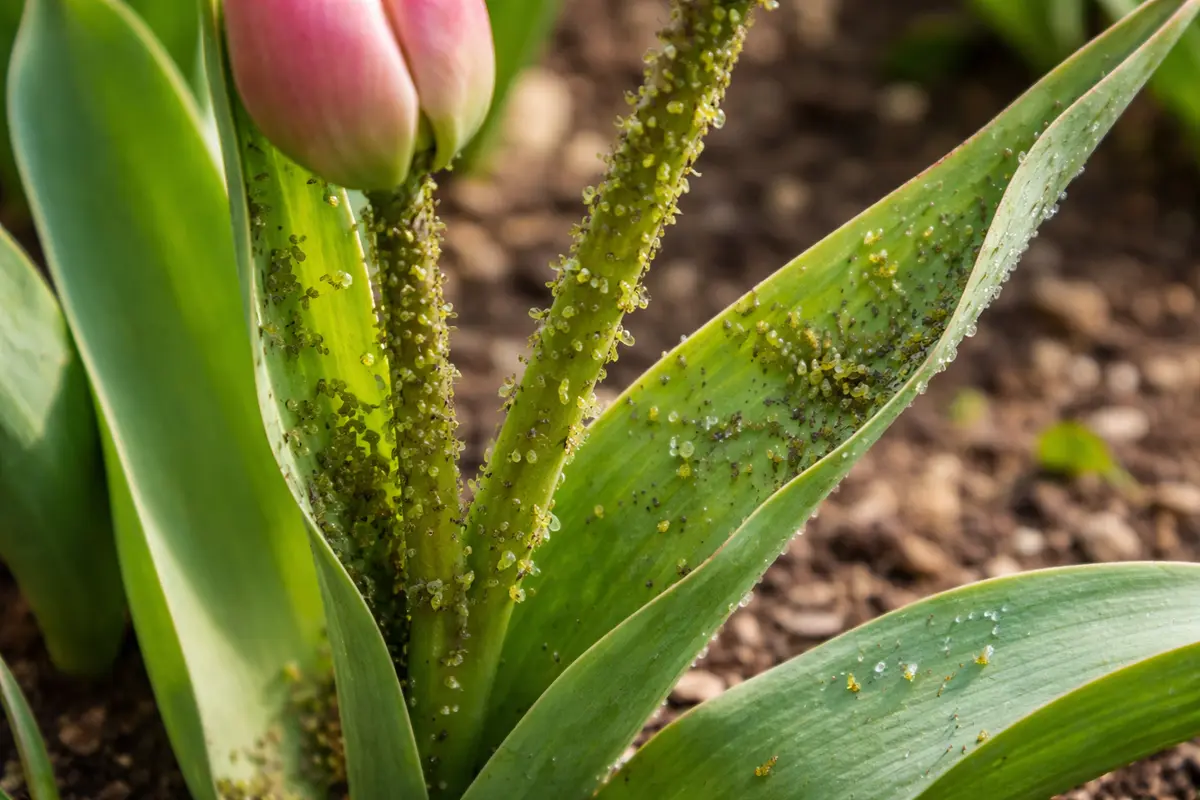
You may notice small clusters of tiny green insects on your tulips during the growing season, a clear sign that you need to know how to stop aphids on tulips during the growing season. These pests feed on the sap of the plant, leading to yellowing leaves and stunted growth. If left unchecked, the infestation gets worse and can spread to other plants, making it crucial to inspect and treat your tulips promptly while monitoring their health.
Step 1 – Spray Insecticidal Soap on Tulips
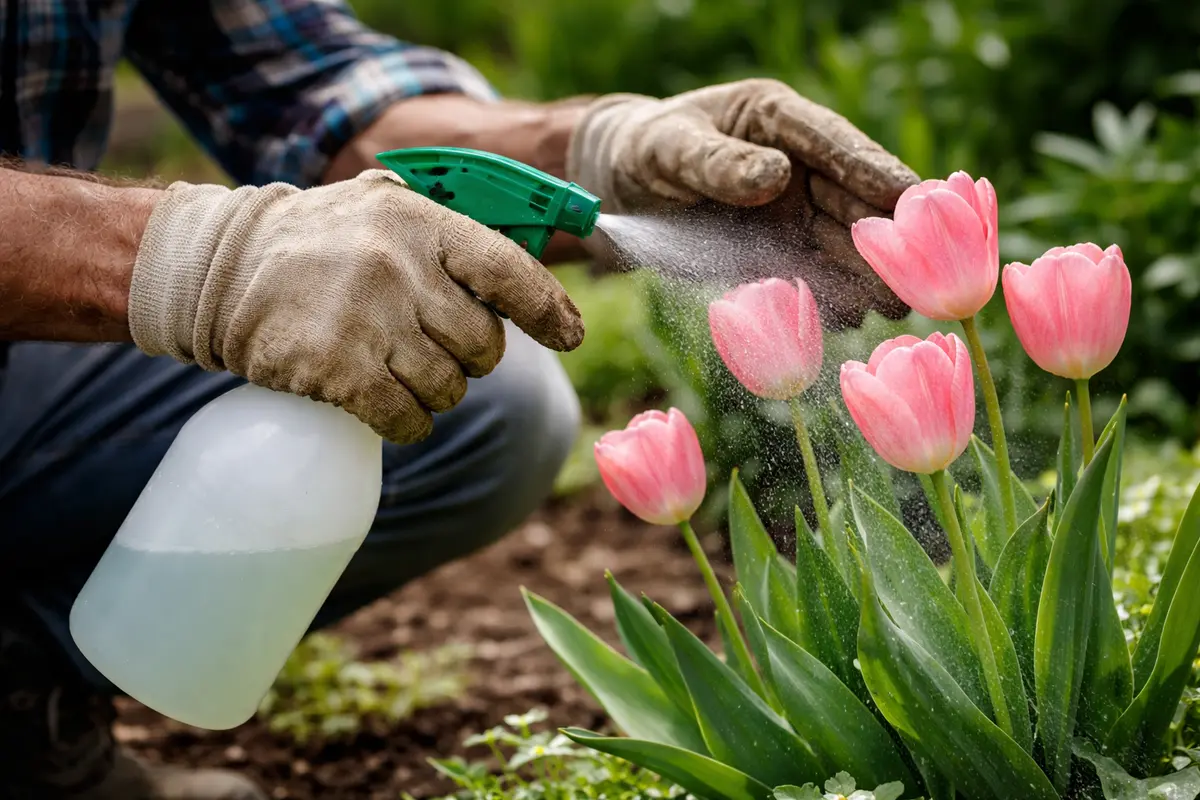
Spray insecticidal soap directly onto the affected areas of your tulips, focusing particularly on the undersides of the leaves where aphids often congregate. You will see the aphids start to disappear within a day or two as the soap suffocates them, resulting in a notable reduction of sticky residue and a healthier appearance of the leaves. This immediate action helps reduce the population quickly and limits further damage to the plant.
The insecticidal soap works by breaking down the outer protective layer of the aphids, effectively suffocating them. This approach is particularly effective in warm temperatures between 20°C and 25°C, which is typical for the growing season. Timing is crucial; catching the infestation early significantly increases the chances of recovery and minimizes stress on the tulips. Additionally, ensure that the soap thoroughly coats the aphids; if you’re only spraying the tips of the leaves, you might miss significant populations hiding beneath. If you don’t see immediate results or if the infestation rebounds, consider applying a diluted solution in intervals of 4-5 days to maintain pressure on the aphid population.
A common mistake is applying the insecticidal soap in the heat of the day, which can cause the soap to evaporate quickly and reduce its efficacy. Instead, opt for early morning or late afternoon applications when temperatures are cooler. If you notice a resurgence of aphids despite application, increasing the frequency to every 4–5 days can help eliminate any remaining population. Furthermore, always test the soap on a small area of the leaf first to ensure there’s no adverse reaction, as some tulip varieties may be sensitive. The goal is to ensure that the soap is effective without harming your plants in the process.
Step 2 – Inspect for Common Aphid Infestations
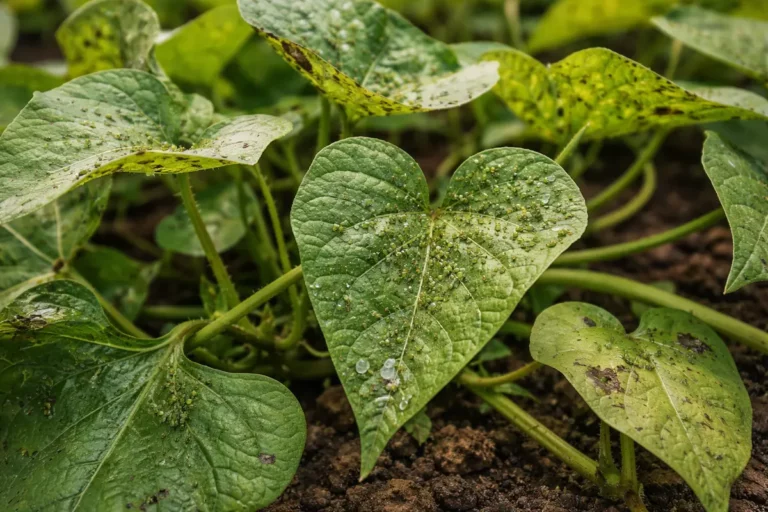
Start by inspecting the undersides of tulip leaves for clusters of small, green or black aphids. If found, spray the affected areas with a strong stream of water to dislodge them and reduce their numbers, resulting in less visible damage on the foliage. You should notice an immediate reduction in aphid activity within a few days.
The presence of aphids indicates a nutrient imbalance often linked to over-fertilization. Over-fertilized plants may exude excess sap, attracting aphids, which feed on this sugary substance and weaken your tulips. In contrast, tulips with balanced nutrient availability will show no signs of aphid infestation, stemming the issue before it escalates. If not this, check your watering routine, as poor drainage can stress plants and create an inviting environment for pests.
If you notice a sticky residue on the leaves, it may be honeydew, a byproduct of aphid feeding. In this case, applying a mixture of water and insecticidal soap can help manage both the aphids and the honeydew buildup. Conversely, if you don’t find any signs of aphids, but the leaves appear distorted, be on the lookout for thrips, which require a different treatment approach.
Aphids thrive on the sap of tulip plants, extracting essential nutrients and leading to stunted growth or yellowing leaves. When they feed, they also excrete a sticky substance called honeydew, which can attract ants and lead to the growth of sooty mold. By eliminating the aphids, you not only remove the insects but also prevent these secondary issues and encourage healthier foliage.
If any leaves continue to yellow despite aphid removal, check the soil for drainage problems. Poor drainage can cause root rot, which may mimic the same symptoms as aphid infestation. Ensuring your tulips have adequate drainage will support their overall recovery from potential damage caused by overwatering or infection.
Aphids thrive in warm, dry conditions and can rapidly reproduce, which is why it’s essential to know what to look for. Signs include curling leaves, sticky residue known as honeydew, and sooty mold on the leaves. The presence of ants may also indicate aphid activity, as they farm and protect these pests in exchange for honeydew. Monitoring should include checking nearby plants, as aphids can quickly migrate from one to another. If you observe robust blooms but still see sticky spots on the leaves, revisiting your inspection routine is critical; it indicates that aphid populations could still be hiding.
If the leaves have dried out between inspections, this might be a sign of an aphid infestation combined with insufficient watering. Monitor the moisture level of the soil—if it’s dry and the leaves are curling, it could be a dual issue that needs your attention. Consequently, you might need to adjust your watering habits in conjunction with continuous aphid checks. If your foliage is visibly drooping and you haven’t had any rainfall, increasing your watering regimen will address plant hydration while checking for aphids. If you notice aphids but the leaves are still relatively firm, focus on addressing both the pest problem and the watering schedule to support overall plant health.
Step 3 – Fertilize Tulips to Encourage Growth
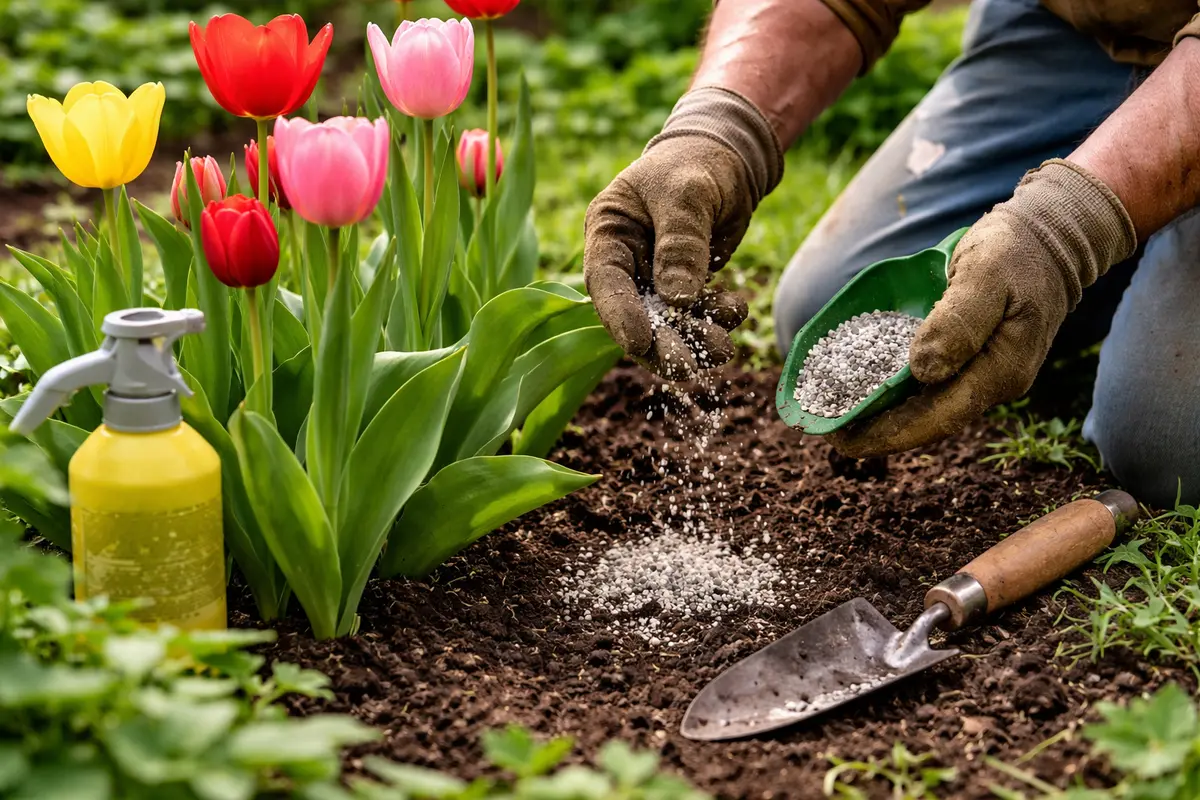
Apply a balanced fertilizer around your tulips to encourage new growth, elaborating on soil health while integrating essential nutrients back into the plant. You will begin to see fresh shoots emerging within a week, reflecting the plant’s increased resilience after the aphid attack. Fertilizing not only aids in recovery by providing essential nutrients that may have been depleted during the infestation but also encourages robust foliage that can better resist pests.
Fertilizers help reinforce the health of the tulips, promoting vigorous growth that makes them less susceptible to pests. Choose a slow-release fertilizer to allow a steady nutrient supply in the soil. It will create a better environment for robust recovery, especially when combined with adequate watering to keep the soil moist but not soggy. If you encounter nutrient deficiencies, conducting a soil test can guide your fertilization approach, as various soil compositions demand tailored treatments. During applications, ensure that the fertilizer does not come into direct contact with the tulip bulbs, as this can lead to burn and damage.
A mistake often made during recovery is over-fertilizing. Applying too much fertilizer can lead to salt build-up in the soil, which could stress the plants further. If seeking rapid growth, it is better to follow a lighter feeding schedule—every 4–6 weeks is often sufficient. Additionally, if you observe new leaf curl or burning despite your fertilization efforts, reduce the amount used to avoid additional stress. Another crucial point is to monitor for competing weeds; they can quickly deplete the nutrients and water your tulips are trying to absorb, ultimately exacerbating the stress on your tulips.
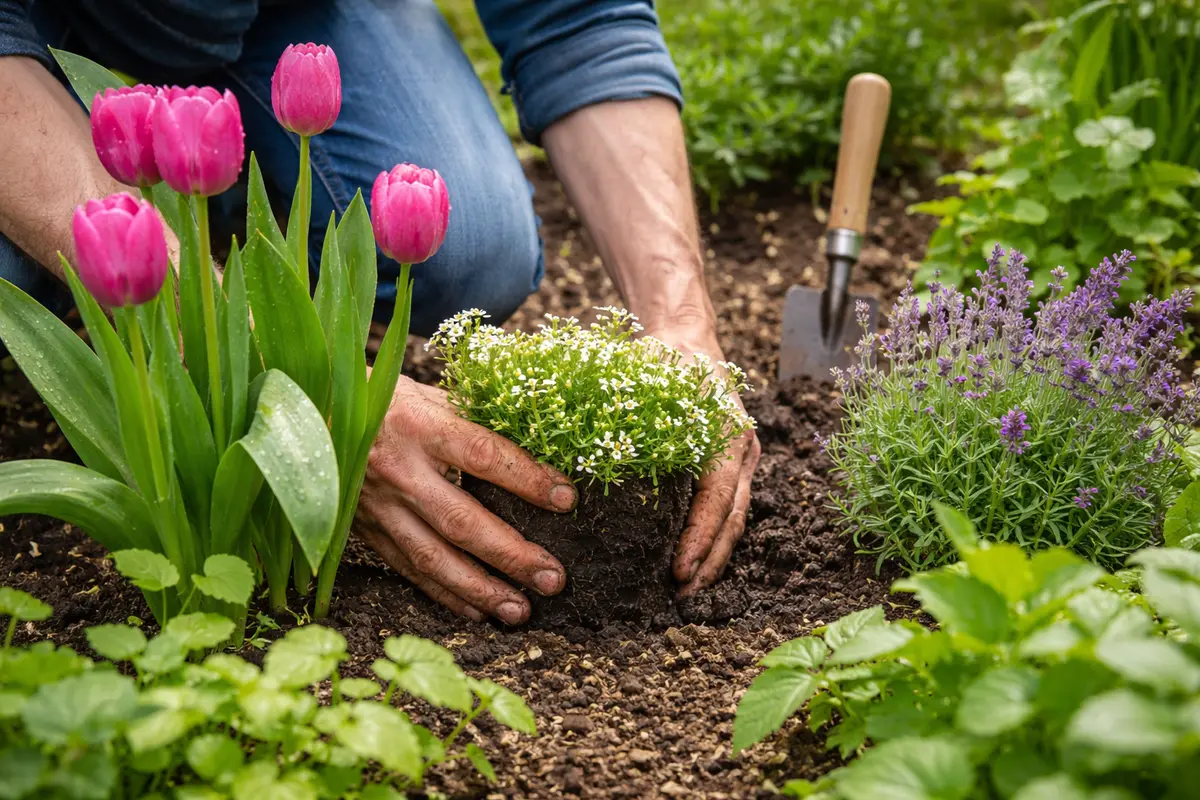
Step 4 – Shield Tulips with Companion Plants
Start by applying a natural insecticidal soap to your tulips every two weeks during the growing season. You will notice a significant reduction in aphid populations, as the soap suffocates them by blocking their breathing pores, making it harder for them to reinfest your plants.
Aphids thrive in warm, dry conditions and can rapidly reproduce if not controlled. By regularly applying insecticidal soap, you disrupt their breeding cycle and create an unfavorable environment that deters their return. In contrast, tulips left untreated may exhibit stunted growth and leaf curl due to aphid damage, which directly impacts blooming potential. If not managing this insect, check for signs of excess moisture or nutrient imbalance in the soil.
During dry spells, increase your application frequency to once a week to maintain effectiveness. Additionally, incorporating companion planting with marigolds can create a natural barrier that repels aphids and further enhances your prevention strategy during peak aphid activity months.
Certain flowers release natural repellents that can keep aphids away from the tulips, and the presence of these companions helps ensure that helpful insects like ladybugs and lacewings thrive in your garden. These beneficial insects feed on aphids and significantly decrease their populations. Through encouraging these beneficial insects, you take proactive steps not only for your tulips but also for overall biodiversity, paving the way for a more resilient garden. Take note, however, that if your companion plants are withering, they can lose their effectiveness as deterrents.
Weather patterns can influence the effectiveness of companion planting. For example, heavy rain can wash away the aromas plants release to deter aphids, making them less effective. During particularly wet seasons, you should monitor the health of both your tulips and companion plants, ensuring they are thriving and not attracting unwanted pests. To enhance success in pest deterrent strategies, consider rotating your companion plants each season to help maintain their attractant qualities and keep your garden dynamic.
Step 5 – Look for New Aphids on Tulip Buds
Check the tulip buds and leaves every few days for any signs of new aphids after treatment. You should notice clear, healthy new growth if the treatments are working, and the buds will remain undamaged and develop vibrant colors. Immediate monitoring allows you to respond quickly to any signs of a new infestation before it gets out of hand. Forming a consistent checking routine can play a vital role in averting another pest cycle.
If healthy, the tulip buds will maintain their vibrant color and robust shape as they mature into blooms, while leaves will be firm and free from curling. Regular inspection should also include checking for signs like honeydew or a sticky residue on the leaves, which can often indicate lingering aphid activity. These observations are crucial for catching any potential resurgence early. Additionally, consider documenting your findings in a journal, as tracking aphid populations over time can highlight patterns and assist in future prevention strategies. This consistency can prove vital in determining effective methods for different seasons.
If you observe new aphids or other signs of re-infestation, consider adjusting the timing and frequency of your insecticidal soap treatments to reapply more frequently. Alternatively, you might need to switch to a more powerful organic pesticide specifically designed for aphids if home remedies fail to deliver results. Ensuring that your monitoring is consistent will facilitate effective recovery before the issue escalates. Additionally, evaluate any environmental factors that may have changed recently; shifts in local insect populations or your tulips’ health can greatly influence the likelihood of pest resurgence.
FAQ
How long does it take to see results after applying insecticidal soap?
You can expect to see a reduction in aphid populations within a couple of days after application. For more severe infestations, reapplication may be necessary every few days for optimal results. It’s important to keep in mind that aphids reproduce quickly; therefore, persistent monitoring for new generations is crucial after you treat.
Can aphids spread to other plants in my garden?
Yes, aphids can easily spread to nearby plants, especially during windy conditions. Therefore, checking all plants, not just the affected ones, is crucial to prevent a wider infestation. Quick pruning of any nearby infested plants serves as a critical tactic to disrupt their movement and mitigate spread.
Should I remove aphid-infested leaves or flowers from my tulips?
It is advisable to remove heavily infested leaves to stop the aphids from spreading while preventing potential disease transmission to healthy foliage. However, if the infestation is mild, treating the plant with insecticidal soap is often sufficient, when combined with regular inspections to keep them in check. Always dispose of the infested parts far from the garden, as aphids can survive on detached plant matter, potentially leading to a resurgence in a different area.