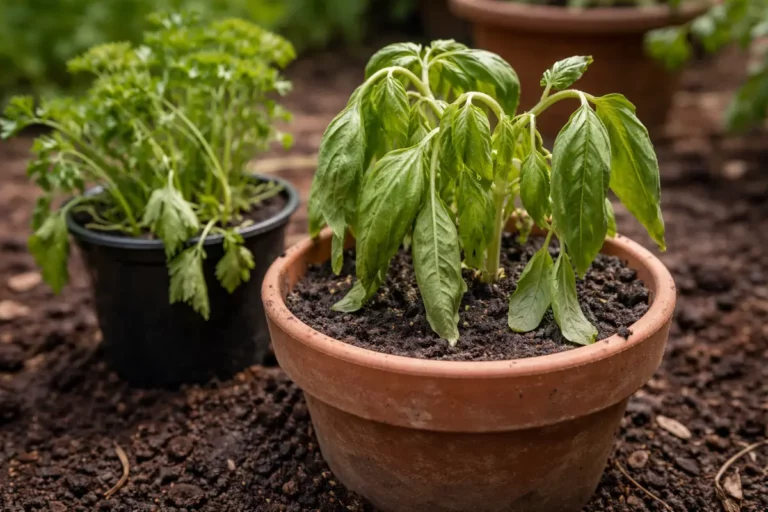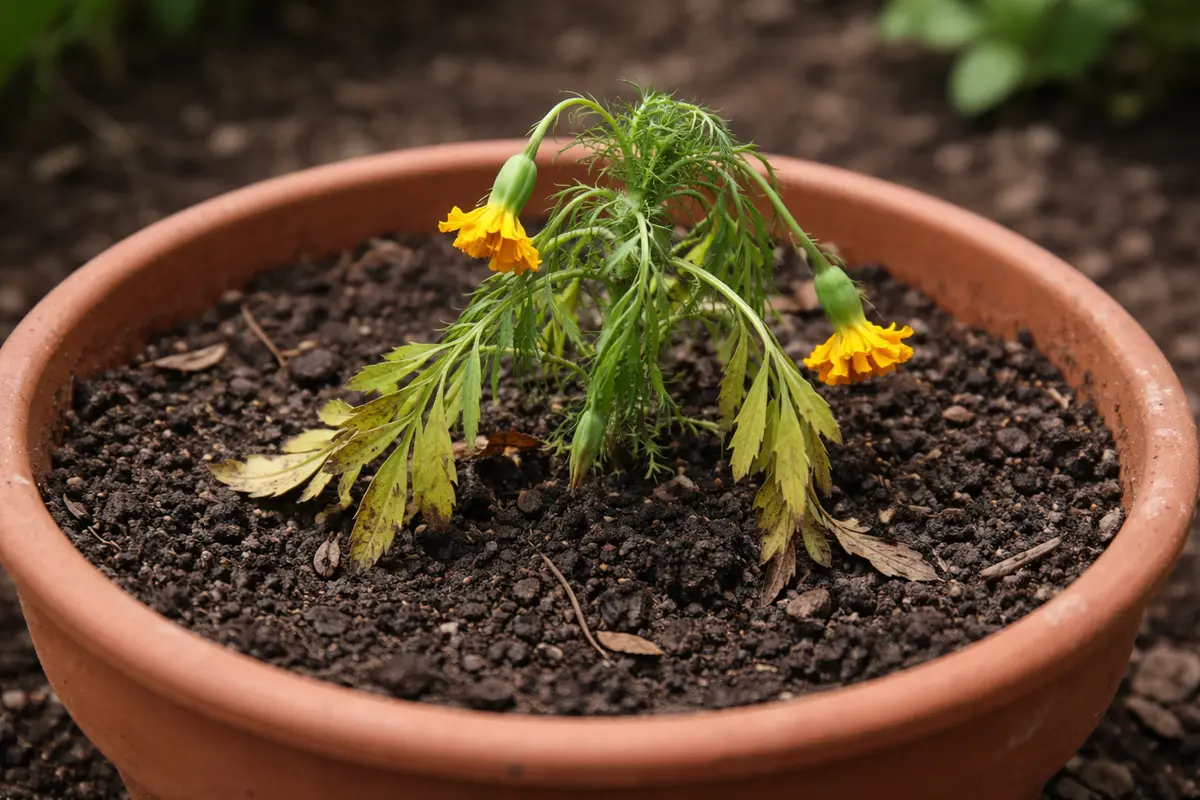
You may notice your marigolds looking droopy and pale during the hot summer days, which is why you need to know how to recover marigolds from transplant shock in pots. This stress often causes yellowing leaves and wilting as the plants struggle to adjust to their new environment. If left unaddressed, the situation gets worse and leads to more damage, but fixing it is possible now; simply monitor the soil moisture and adjust your watering routine accordingly.
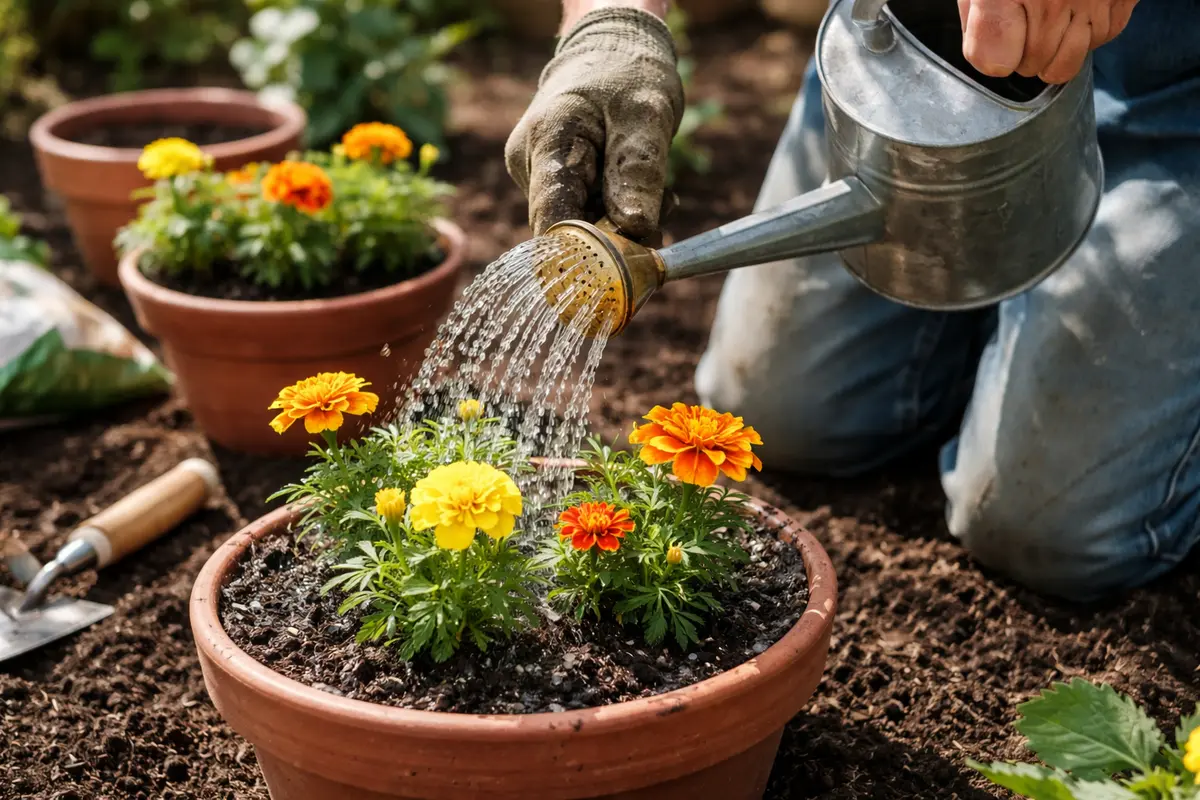
Step 1 – Water Marigolds Immediately After Transplanting
Start by placing your marigolds in a stable, well-ventilated area away from direct sunlight, and if they’re crowded by other plants, gently thin nearby foliage to enhance airflow. You should see immediate changes such as less wilting and improved leaf response as the plants begin to stabilize.
Acting quickly is crucial for marigolds because they are sensitive to environmental stressors. Transplant shock can lead to root damage if the plants remain in unfavorable conditions for extended periods, causing yellowing leaves and stunted growth. If you notice rapid wilting, this means the roots are struggling, and action to change their environment is necessary to encourage healthy recovery.
A common mistake gardeners make at this stage is neglecting the immediate fallout after transplanting. For instance, one gardener delayed moving their marigolds despite noticing wilting, which led to irreversible root damage and plant loss. If you see marigolds drooping but your pot seems fine, check that they’re not too crowded or in too much shade, as this can hinder recovery.
Immediate watering is crucial for rehydrating the marigolds and facilitating good soil contact with the roots. During transplanting, the roots may have been disturbed or damaged, leading to air pockets in the soil; watering fills these gaps and replenishes lost moisture. This quick action minimizes stress, allowing marigolds to cope better with environmental changes and establish themselves in their new pot. Furthermore, use tepid water—cold water can shock the roots, while warm water aids in easing the plant through stress recovery. Aim to moisten the soil to a depth of about 3–4 inches to ensure that moisture reaches the root zone, as dry pockets can hinder recovery. If the soil is less than adequately wet or the pots are too dry, plants are more likely to experience prolonged wilting.
A prevalent mistake among gardeners is to delay watering after transplanting, assuming it can wait. Failure to provide immediate water can lead to the soil drying out too soon, resulting in potential permanent wilting. If the leaves continue to droop or browning develops further after watering, it could indicate ongoing shock, requiring re-watering or alterations in care. It’s essential to ensure that the pot has adequate drainage to avoid waterlogging, which could exacerbate stress. If the center of the pot feels damp while the edges remain dry, it suggests localized dry spots that need to be addressed with further careful watering. To confirm saturation, stick your finger into the soil; if the soil feels dry more than one inch down, it’s imperative to apply more water.
Step 2 – Diagnose Soil Compaction in Marigold Pots
Examine the soil for signs of compaction or poor drainage, which can hinder recovery. You’ll be able to tell if the soil is compacted if it feels overly dense and water pools on the surface rather than soaking in; this inhibits roots from accessing moisture and nutrients. Lightly pressing the soil can reveal whether it’s rock-hard, indicating a compaction issue. Healthy potting soil should crumble easily when pressed, allowing water to permeate it without obstruction. Assess the soil texture visually; for instance, if it appears more like a clay sludge than crumbly or fluffy, it’s likely too compacted.
Soil compaction can significantly block air and moisture from reaching the roots, leading to oxygen deprivation. Consequently, marigolds may exhibit drooping or yellowing leaves as the roots struggle to absorb essential nutrients. When faced with tightly packed soil, a quick and effective solution is to aerate it by carefully loosening it with a garden fork or skewer. This process encourages better drainage and promotes root growth. Ideally, creating small holes every few inches around the edges of the pot allows air to circulate more freely, enabling the roots to expand without restriction. Be cautious to avoid damaging the roots during aeration, as this could result in further stress. If, after aerating, the soil still shows signs of compaction, it may need a more drastic intervention.
In cases where the soil holds a sour smell, it indicates conditions that favor root rot, usually due to excessive moisture trapped in dense soil. If you perceive this unpleasant odor, you should promptly remove the existing potting mix and replace it with fresh, well-aerated soil. Ensure the new mix contains well-draining materials such as peat or coco coir alongside perlite or vermiculite. Once you’ve added the fresh soil, monitor conditions diligently and refrain from watering too soon to allow the roots to stabilize and dry out sufficiently. Frequent soil compaction issues suggest that you should consider integrating a layer of organic mulch on top after planting, which can help maintain moisture without leading to further compaction. Additionally, using a moisture meter can give you an accurate gauge of soil moisture levels, helping you avoid overcompensation with watering. If you revisit the aeration after a week and the soil appears still dense, you may need to re-evaluate the mix or add further amendments.
Step 3 – Feed Marigolds with Nutrient-Rich Fertilizer
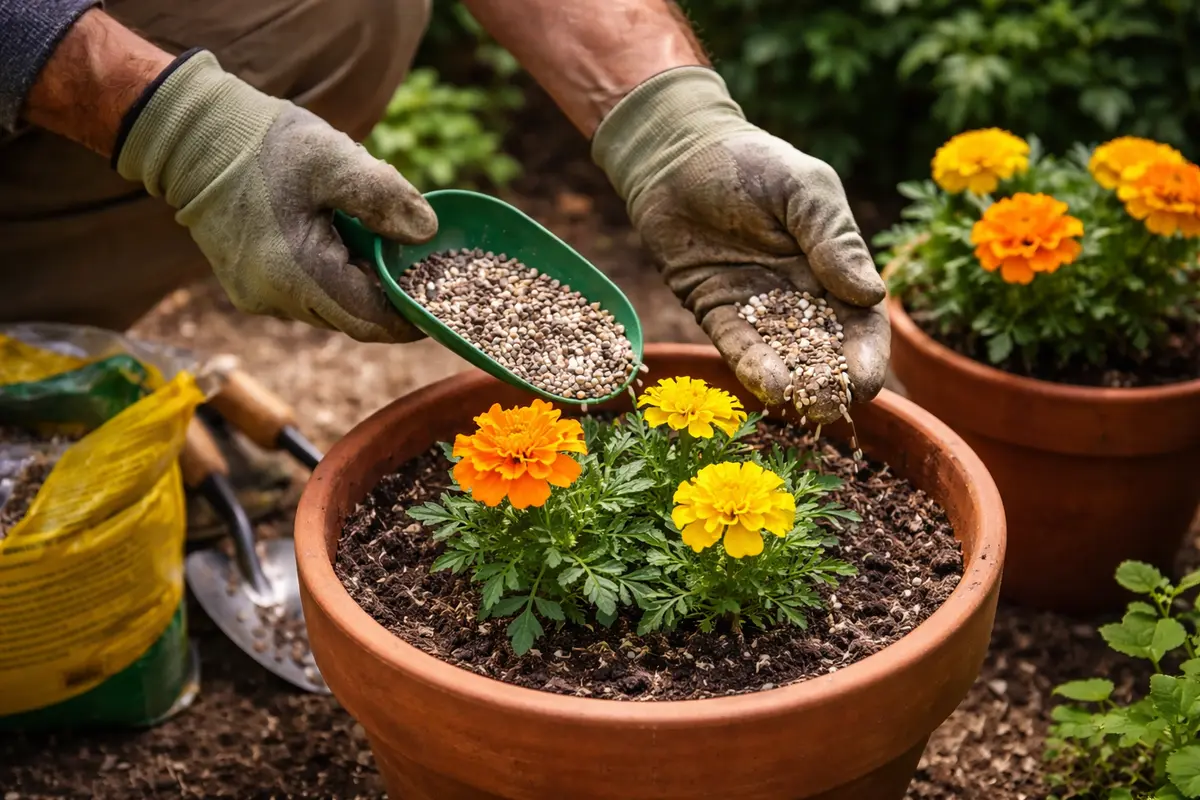
Apply a diluted liquid fertilizer suitable for flowering plants every two weeks during the growing season. After a few applications, you should begin to notice new growth and greener leaves developing within this timeframe, signaling that the marigolds are receiving the necessary nutrients to recover from shock. However, be cautious not to overdo it; excessive fertilizer can result in more harm than good. Therefore, when fertilizing, start with half the recommended strength to observe how the plants respond before gradually increasing it if they show signs of thriving. You should also monitor for signs of leaf distress after fertilization, as these can indicate stress from excess nutrients.
This nutrient boost is indispensable after transplanting since marigolds require additional energy to bounce back from shock and solidify their roots in the new potting environment. Fertilizer ensures that essential nutrients vital for healthy foliage and blooms are available, helping them regain vigor while supporting robust root systems. For best outcomes, select a balanced fertilizer with a complete nutrient profile inclusive of nitrogen, phosphorus, and potassium, typically in a ratio close to 10-10-10, to provide even nutrient distribution across the soil.
A typical miscalculation at this juncture is the temptation to over-fertilize, which can lead to nutrient burn, resulting in further stress for the plants. Signs of this include crispy leaf edges or brown spots forming on the foliage. To avoid such issues, always follow the product’s instructions closely and consider diluting fertilizers further if needed. Additionally, observe soil moisture before fertilizing; overly dry soil can amplify the risk of burn. Instead of applying fertilizer during intense sunlight, aim for cooler periods, like early morning or late afternoon, to lessen additional stress from heat exposure. Regularly inspecting the appearance of the leaves post-fertilization can also yield insights; rapid yellowing may suggest the need to scale back on feeding. In some instances, lateral roots may also be damaged during transplant; therefore, applying fertilizers that are too high in salt content after these events should be avoided until the roots show readiness through consistent hydration levels.
Step 4 – Watch Marigold Leaves for Wilting Signs
Inspect leaves regularly for signs of wilting or discoloration, checking at least once a week. Focus on gradually observing improvements in leaf color and firmness; ideally, marigolds should regain their characteristic vibrancy as they recover. A favorable sign amid recovery is the emergence of new leaves from the plant’s core, serving as an indicator of positive adjustment. Conversely, if you notice leaf curling or darkened edges, this may suggest ongoing issues with their care that needs addressing. Documenting weekly observations can help determine if there’s consistent improvement or a recurrence of issues.
A fully recovered marigold displays vibrant green leaves, robust stems, and fresh growth appearing swiftly. On the flip side, early signs of re-emerging problems could include limp leaves or persistent yellowing, signaling that stress might be returning. Regular monitoring empowers you to intervene promptly, possibly adjusting cultural practices like watering frequency or light exposure. When comparing the marigolds to healthier neighboring plants, you can gauge their overall health. If no improvement is evident after a week despite proper care, it might be time to reassess environmental factors—this includes both light and humidity levels. Incorrect lighting can lead to excessive leaf burn or strain on young plants that are more susceptible during recovery.
Should wilting symptoms appear again despite your attentive efforts, consider reevaluating watering practices and soil conditions. It’s essential to ensure consistent moisture and nutrient availability for optimal growth. Compare your marigolds with adjacent plants; if they seem healthy while yours are deteriorating, it points toward localized root or soil health issues. Light exposure must be properly managed; marigolds are susceptible to heat stress under direct sunlight during peak hours—temporarily relocating pots to shaded areas or using shade cloth can provide necessary relief. Additionally, remain vigilant against overwatering as it can mimic drought symptoms; always check soil moisture before attributing wilting to insufficient water. This approach ensures root systems are neither submerged nor excessively dry. If conditions worsen, consulting a local gardening expert may also provide insights specific to your environment or setup.
FAQ
How long does it take for marigolds to recover from transplant shock?
Marigolds typically require about 1-2 weeks to show noticeable recovery signs after addressing transplant shock. During this period, keep an eye on the leaves’ color and firmness. Proper hydration and nutrient support can significantly influence recovery rates. If care practices are maintained consistently, you should start observing improvements in leaf color and resilience, indicating that the marigolds are progressing towards full recovery. The quicker you respond to the signs of shock, the more rapidly recovery can occur; therefore, prompt action is crucial, as delays may prolong healing times considerably.
Can transplant shock spread to other plants in the same area?
Transplant shock is not contagious; however, if environmental conditions are deficient—such as inadequate light or overwatering—it may similarly affect nearby plants. To maintain the wellbeing of the entire garden area, ensure all plants receive appropriate care, including suitable sunlight, regular maintenance like pruning, and thoughtful watering habits. Introducing beneficial insects, like ladybugs, can mitigate pest issues that might arise in a weakened garden environment. Assessing drainage and soil conditions for all potted plants can also help prevent common stress factors from compromising overall health. Maintaining uniform care routines can boost overall plant health and resilience within your garden.
Should I remove any leaves that have wilted or yellowed?
Gradually remove severely wilted or yellow leaves once the marigolds show signs of recovery. This practice will help redirect energy toward healthier growth. It’s imperative to strike a balance when trimming—removing too many leaves might further stress an already vulnerable plant. As the marigolds regain strength, remain vigilant in monitoring their ongoing health to determine the optimal timing for trimming excess foliage, facilitating the plants’ ability to concentrate their resources on rejuvenation. Employ clean, sharp scissors to prevent introducing disease during the trimming process, and ensure that such removal does not coincide with any critical recovery phases to avoid jeopardizing further growth.