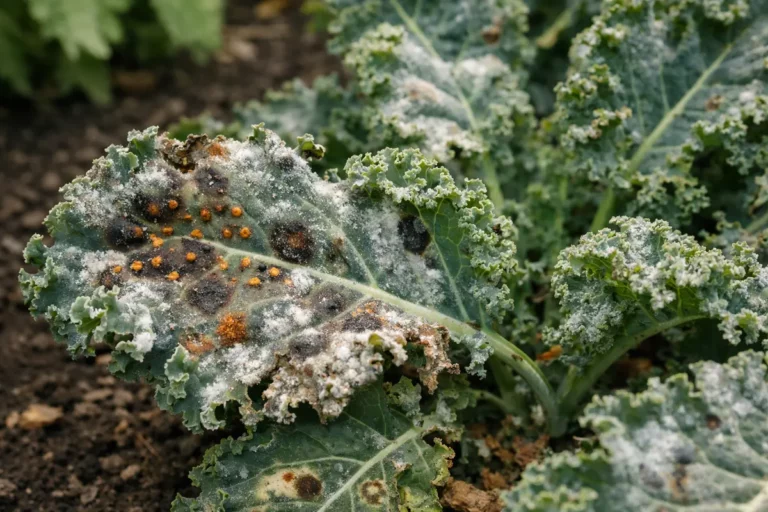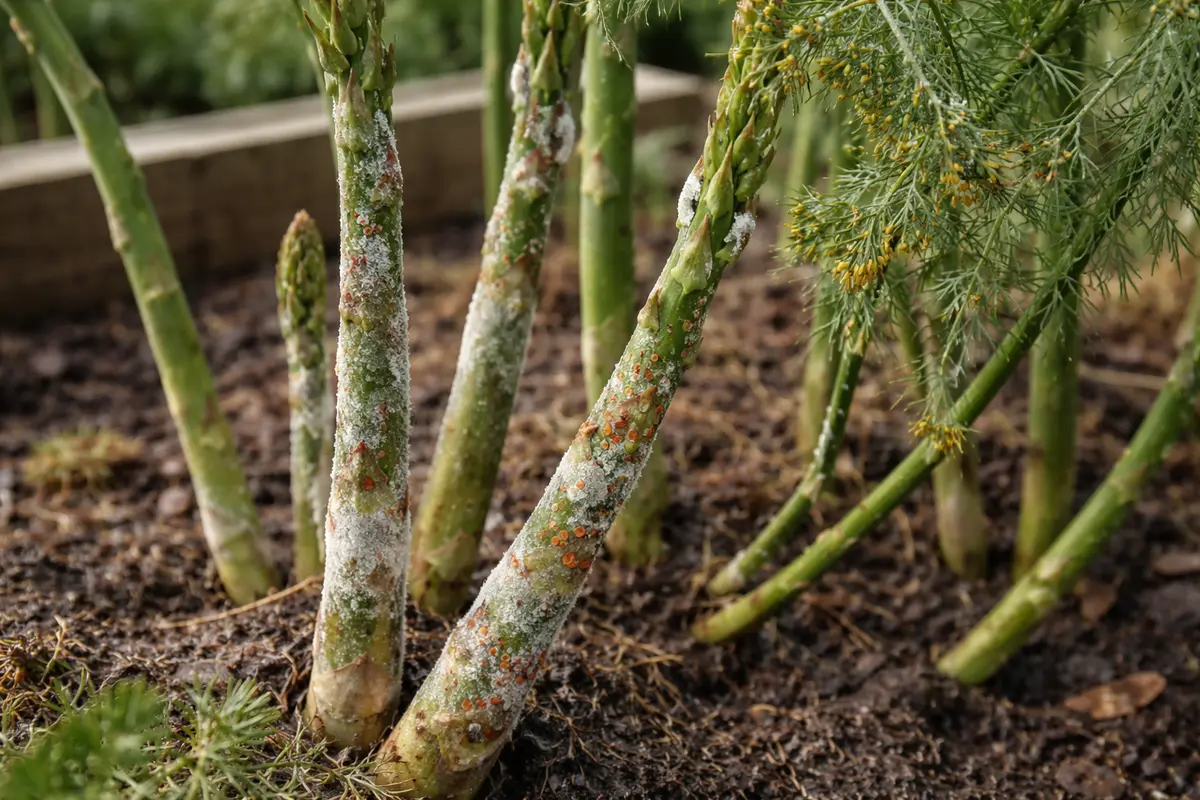
You may notice small brown patches forming on your asparagus during humidity, a clear sign that you need to know how to prevent fungal spots on asparagus during humidity. This fungal issue arises when moisture lingers on the leaves, causing spots that can lead to further damage and decline. If left unchecked, the problem gets worse, leading to more damage and potentially weakening the plant, but you can improve the situation now by inspecting for affected areas and reducing moisture around the plants.
Step 1 – Cut Off Affected Asparagus Shoots Promptly
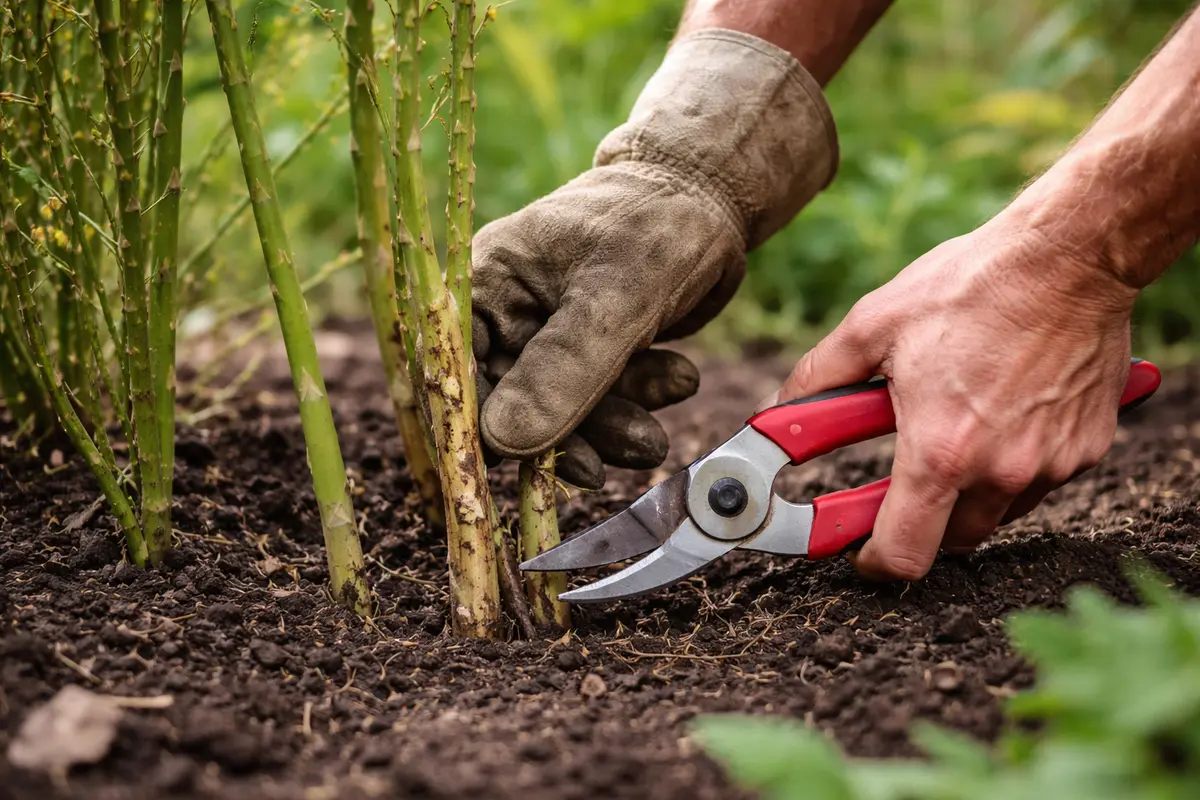
Remove the infected asparagus shoots immediately. You will notice that the overall appearance of the plant improves, with less visible disease spreading within a couple of days. Aim to cut off shoots at least six inches below the lesions to ensure you’re eliminating the entire infected area. It’s critical to sharp scissors or pruners to prevent further injury and ensure a clean cut, as ragged edges can complicate the healing process.
Quickly cutting off the affected parts significantly limits the spread of fungal spores. Fungal diseases spread rapidly, especially in warm, humid conditions, as the spores can easily travel to another plant or area if not controlled. This action helps stop the infection from gaining strength while allowing healthier tissues to thrive unobstructed, creating an environment for potential regrowth. This is a particularly crucial intervention; if the infection goes unnoticed for too long, it can choke out entire areas of the plant, leading to further reductions in yield.
Many gardeners delay acting upon visible fungal spots, thinking that the plant will recover on its own. Unfortunately, this often leads to a larger infection, making it harder to remove infected areas and save other shoots. Always pay attention to wet conditions, as they foster rapid spread; if not curtailed swiftly, neighboring healthy plants may soon show similar symptoms, spreading through the root system or through air currents carrying spores. Gardeners frequently misjudge the infection’s seriousness, believing that minor discoloration does not merit action; however, a proactive approach can make a significant difference in long-term plant health.
Step 2 – Diagnose Humidity Impact on Asparagus Growth
Examine the immediate environment for excessive moisture around your asparagus plants. Following this action, you will see a clearer picture of the potential causes of fungal growth and identify poorly draining spots. Look for pooled water around the base or examine soil moisture with a simple finger test; if it feels soggy an inch below the surface, adjustments are necessary. This hands-on examination provides necessary insight into root health, as soggy soil often indicates root rot is a risk.
Humidity can saturate the soil, limiting oxygen availability and creating a haven for fungal spores that affect asparagus. When soil remains consistently damp, root systems struggle to function properly, making the plant vulnerable to disease. Analyzing both the soil’s moisture content and the plant’s exposure can clarify why symptoms appeared and how they relate to the surrounding conditions. If you detect consistently high moisture levels that lead to compaction or even pooling, it may be time to consider amending your soil or even relocating the plants to a more suitable area.
If soil drainage is poor or compacted, consider loosening the area around the roots or enriching the soil with organic matter like compost to improve aeration. However, if the garden location doesn’t receive adequate sunlight, such as being shaded by larger plants or structures, it may also contribute to excess moisture retention. Early intervention in diagnosing these environmental factors is crucial to mitigate the infection’s spread and improve your overall gardening conditions. For example, adjusting shading can improve airflow and help reduce humidity levels around the base of the plants, thus enhancing overall health.
Step 3 – Fertilize Asparagus for Recovery from Fungal Issues
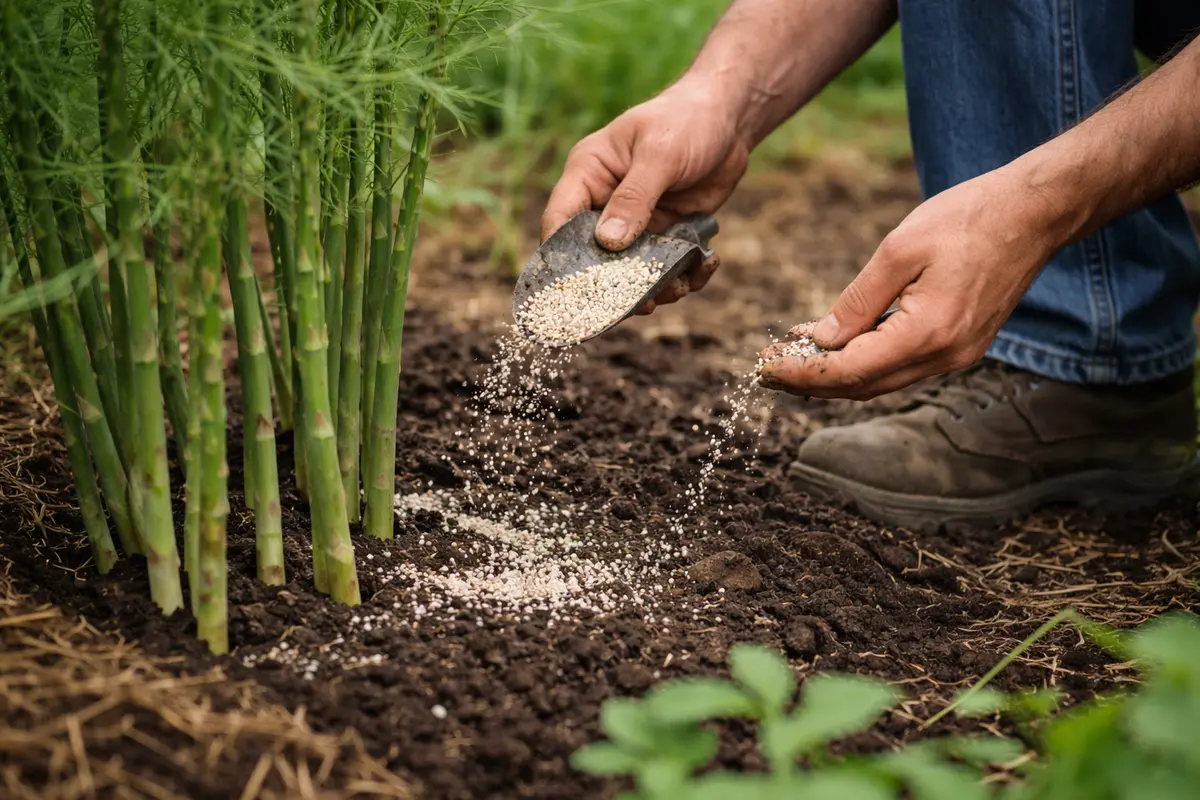
Apply a balanced, nitrogen-rich fertilizer to your asparagus plants to support recovery. As a result, you should begin to see new, healthy growth starting within a week. For best results, apply the fertilizer according to package directions, usually around 1 to 2 tablespoons per plant, making sure not to overapply the fertilizer, which can harm the roots. This is ideally done early in the day when plants are actively taking up nutrients, leading to efficient absorption and minimal waste.
Providing additional nutrients improves the vigor of your asparagus plants, enabling them to fend off diseases more effectively. Stronger plants have better resilience against stress factors, including fungal infections, especially after an outbreak. Healthy new growth indicates not just recovery, but also the plant’s readiness to tackle future challenges, showing that your intervention is effective. However, be vigilant about the nitrogen levels; excessive nitrogen might encourage lush foliage, making plants more attractive to pests and diseases.
While fertilizing, avoid overdoing it. Too much nitrogen can lead to lush foliage that is more susceptible to fungal threats. For example, if the plant seemingly bounces back but soon droops under humidity, it may be due to over-fertilization. It often manifests as an unexpected dullness or a change in color in the foliage, which indicates that the plant is struggling. It’s critical to maintain balanced nutrient levels without excessive inputs that can cause rapid growth, ultimately resulting in a higher risk of fungal disease if humidity levels rise again. Observing the leaves closely after fertilization helps gauge whether your intervention is hitting the mark or needs adjustment.
Step 4 – Apply Mulch to Regulate Soil Humidity Around Asparagus
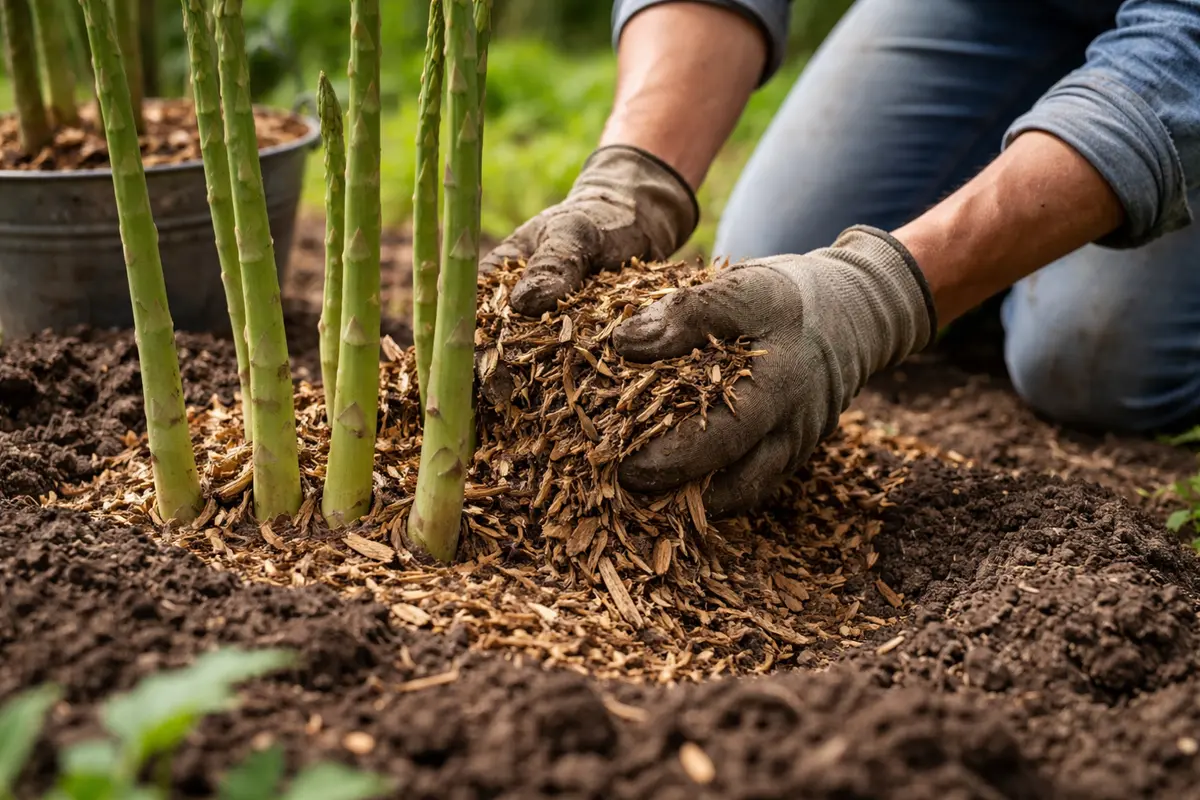
Spread a layer of organic mulch around your asparagus plants to help regulate soil moisture levels. This practice will lead to improved soil temperature consistency and reduced moisture evaporation, typically by 20% in particularly humid conditions. Aim for a 2 to 4-inch layer of mulch, but avoid direct contact with the stalks to prevent rot. Ensure that the mulch is evenly distributed; while a thicker layer may be helpful, too much can trap moisture and lead to root problems.
Mulch acts as a barrier against rapid moisture loss and helps to prevent weeds that can harbor fungal spores. A consistent layer of mulch maintains better soil conditions by allowing water to evaporate slowly, which is crucial for managing humidity levels that promote fungal diseases. The organic matter also breaks down over time, adding beneficial nutrients back into the soil, enhancing microbial activity, and fostering a healthier ecosystem. A well-maintained mulch layer can drastically change the moisture dynamics in your garden.
During rainy seasons or when temperatures rise, adjusting the thickness of your mulch can help manage water retention levels. In contrast, if the mulch is too thick, it can trap humidity beneath it, leading to rot and further fungal spread. Observing the condition of your mulch, particularly after periods of heavy rain or hot sun, is important to ensure that it is working effectively in your plant’s favor. Regularly replenishing mulch and checking for signs of decomposition are beneficial practices; also watch for any signs of fungal growth on the mulch itself, as this can be an early indicator of potential issues near your asparagus plants.
Step 5 – Inspect Asparagus Leaves for New Fungal Spots Weekly
Start by monitoring your asparagus plants closely, especially during periods of high humidity. Check the leaves and stems daily for any signs of fungal spots, which appear as small, dark lesions. If you observe any changes, recheck every two to three days to ensure prompt action against potential fungal outbreaks.
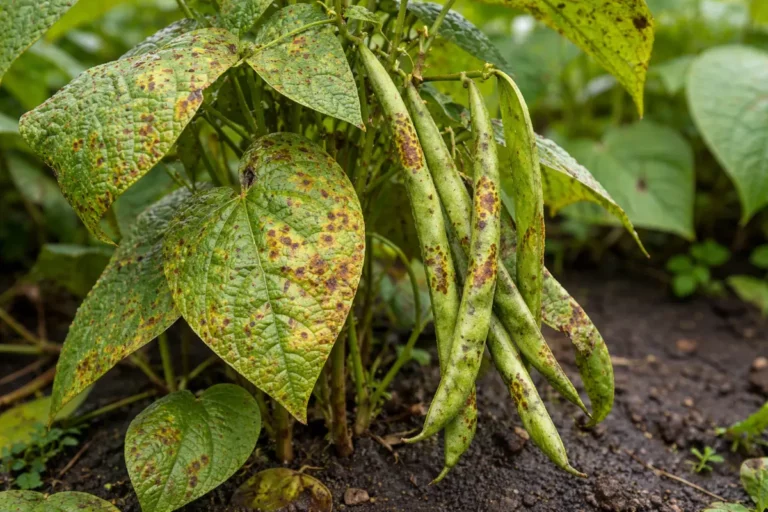
A fully recovered asparagus plant has vibrant green leaves with no discolored patches, while early signs of returning problems include new dark spots gradually spreading across the foliage. A healthy plant’s stems feel firm and smooth, whereas infected areas may feel slightly soft or slimy to the touch. If the color shifts from deep green to a dull or yellowish hue, it’s time to take additional measures.
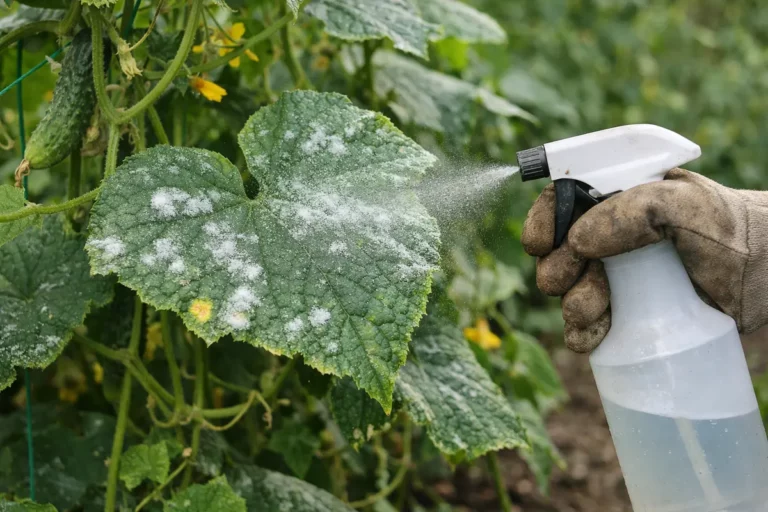
If fungal spots reappear despite your monitoring efforts, escalate by applying an approved fungicide specifically designed for asparagus and ensure proper air circulation around the plants. Remove any heavily infested plant debris immediately to prevent spores from propagating. If not treated promptly, consider altering your watering habits to avoid excess moisture on the foliage.
Regular monitoring allows for early detection of potential issues, which is vital for avoiding re-infection. When plants are maturing, they might develop fresh tissues that initially appear healthy; however, re-checking can reveal if earlier problems have recurred. Healthy asparagus should start sprouting well-formed shoots without further lesions, while any signs of resurgence warrant immediate action. Common mistakes at this stage include overlooking subtle color variations, which could indicate early fungal activity; many gardeners wait too long to verify their suspicions, allowing conditions to worsen unnecessarily.
If you notice signs of new fungal spots returning, increase your vigilance on humidity levels and consider adjusting your watering routine or aeration practices. For example, switching to a drip irrigation system can minimize moisture on leaf surfaces, reducing fungal risks. If soft spots recur despite best efforts, consider alternative fungicidal treatments or integrating integrated pest management approaches. Keeping systems in place to evaluate moisture and plant health helps guard against recurring infections, such as monitoring soil moisture with a hygrometer for precise adjustments based on ongoing weather conditions.
FAQ
How long does it take for asparagus plants to recover from fungal spots?
Asparagus plants usually start showing signs of recovery within one to two weeks after you take corrective action, such as pruning infected shoots and applying fertilizer. New healthy growth typically indicates successful rehabilitation; however, watch for any signs of re-infection as conditions can quickly revert if moisture is not managed properly. Frequent inspections during the recovery period can yield signs of stress that may need addressing.
Can fungal spots on asparagus spread to other plants in the garden?
Yes, fungal spots can easily spread to neighboring plants, especially in humid conditions. Proper sanitation and immediate removal of affected shoots are crucial to preventing cross-contamination. Consider whether your watering method might inadvertently splash spores onto nearby plants after a rain. Continuous monitoring and immediate treatment are essential to stop outbreaks before they escalate across diverse plant zones.
Should I remove the infected parts of my asparagus plants?
Yes, promptly removing the infected foliage is essential to managing the spread of fungal diseases. Cutting back the infected parts not only stops the spores from traveling to healthier parts of the plant and other nearby crops, but also encourages better airflow around your plants, nurturing a less hospitable environment for fungal growth. Failing to undertake this action can jeopardize not only the current crop but potentially future seasons as well, given the lingering nature of fungal spores.