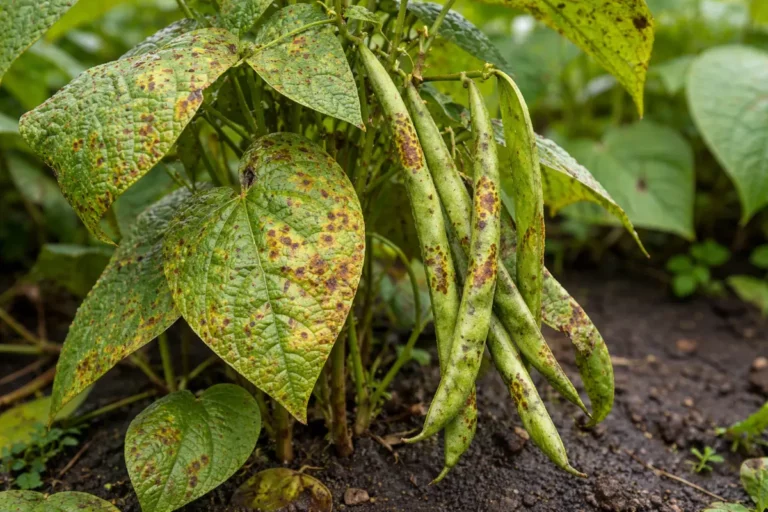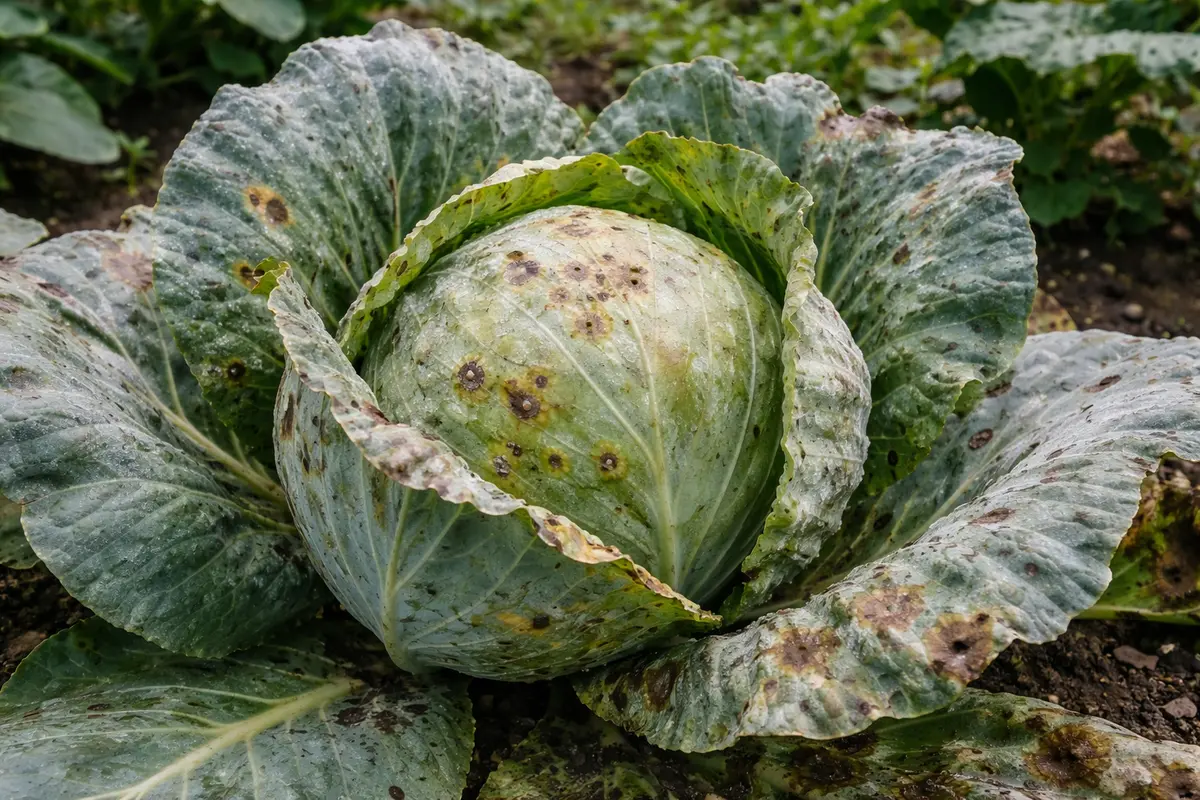
You may notice dark, unsightly patches forming on your cabbage leaves during muggy weather, which is why you need to know how to prevent fungal spots on cabbage during muggy weather. This damage occurs when fungal spores thrive in warm, humid conditions, causing leaf spots that can eventually lead to severe decline. If left untreated, the infection can spread rapidly, weakening the plant and making it harder to fix, but you can still act now by inspecting your plants and adjusting your care routine.
Step 1 – Spray Cabbage with Fungicide Immediately
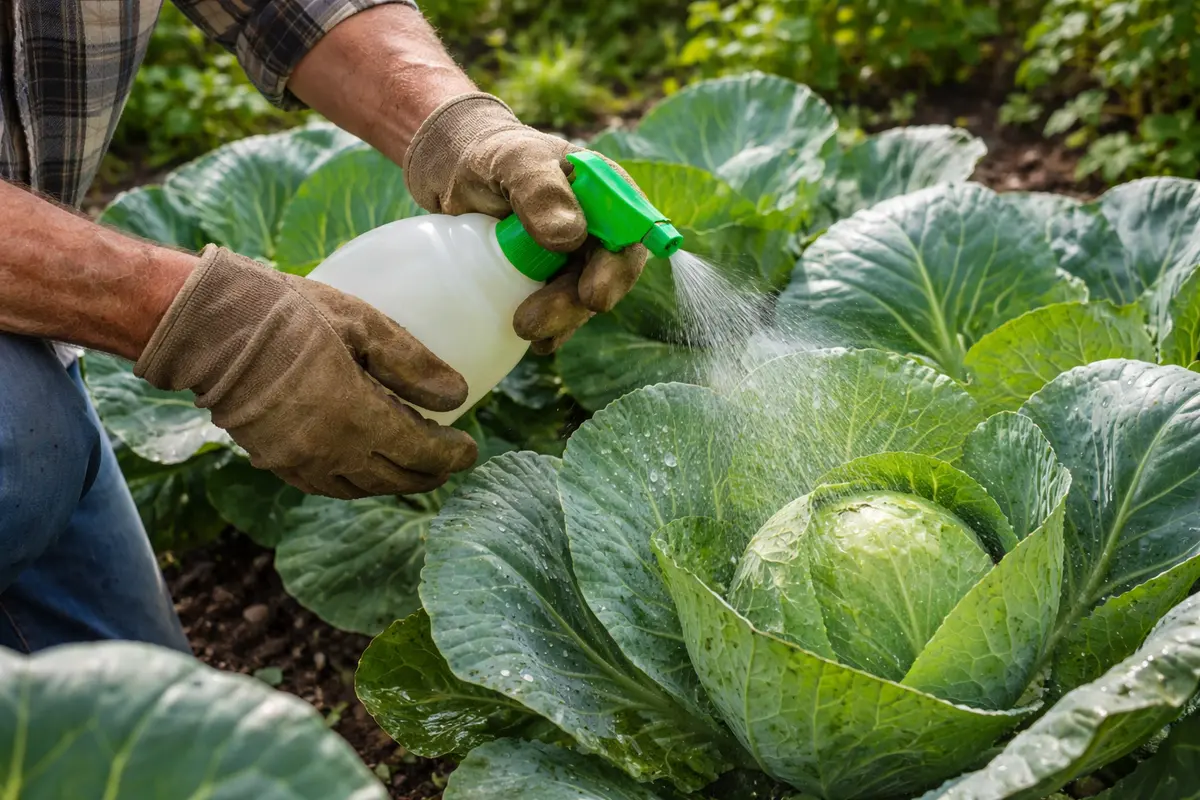
Apply a fungicide specifically designed for cabbage directly to the affected areas. You will see the fungal spots begin to fade within a couple of days if this is done early. This immediate action helps reduce the spread of the fungal infection and provides a protective barrier against further outbreaks. Make sure to cover both the upper and lower leaf surfaces to ensure full coverage, as some fungal spores can reside on the underside of leaves, which receive less treatment.
Fungal infections thrive in warm, humid conditions, causing rapid damage to plant tissues. When sprayed early, fungicides disrupt the reproductive cycle of the fungus, diminishing its ability to colonize the cabbage. The temperature at which the spraying is performed can significantly affect effectiveness; it’s advisable to apply fungicide during cooler parts of the day, ideally in the morning when temperatures are lower. Ignoring these early signs gives the fungus time to multiply, severely impacting your cabbage crop. By treating as soon as spots appear, the plants can recover more effectively, allowing for renewed growth in the following weeks.
Many gardeners mistakenly wait too long before spraying, thinking that the problem will resolve itself or mistakenly attributing the spots to something else. This delay often allows the infection to take root deeply, resulting in larger areas of decay on the leaves, which are harder to combat. Often, those who apply fungicide too late notice ongoing leaf deterioration and reduced overall vitality in their cabbage plants, which can take weeks or even months to recover fully. For example, if a gardener notices the spots but hesitates to treat, they may return a week later to find the entire leaf yellowing and wilting, indicating a much more significant issue that is harder to resolve. Prompt action can prevent this and keep your cabbage healthy.
Step 2 – Investigate Humidity Levels Affecting Cabbage
Start by improving air circulation around your cabbage plants by spacing them at least 18 inches apart. This change will reduce humidity around the foliage, leading to a noticeable decrease in the development of fungal spots within days. When plants are tightly packed, moisture remains trapped, creating an ideal environment for fungal spores to germinate.
The underlying issue with fungal spots on cabbage during muggy weather is often linked to excess moisture lingering on the leaves. When humidity levels rise, water evaporates slowly, creating a perfect environment for fungal spores to thrive and infect the plant tissue, ultimately leading to leaf discoloration and decay. Healthy soil with good drainage allows excess moisture to dissipate more freely, preventing fungal growth, while heavy, compacted soil retains too much water. Conducting a simple soil drainage test to see how quickly water soaks in can provide insight; if water pools at the surface, the soil may need amending with materials like sand or perlite.
If your soil feels excessively moist and smells sour, consider improving drainage with organic matter like compost or vermiculite. Alternatively, if you notice yellowing leaves with similar fungal spots but also see stunted growth, inspect for root rot, which requires a different treatment approach involving the careful removal of affected roots and soil amendment. A common error involves just adding more water or fertilizer without addressing the underlying drainage issue; this approach leads to chronic moisture issues that exacerbate fungal outbreaks.
High humidity can create a moist environment where fungal spores germinate and infect plants rapidly. By decreasing humidity through proper air circulation and spacing between plants, you can hinder the spread of the fungus and promote healthier plant growth. For instance, if your garden is surrounded by tall plants, it might restrict airflow and trap excess moisture. If you find that humidity remains high, consider thinning out crowded areas to promote better air circulation around the cabbage. This might involve removing some nearby plantings or even rearranging your cabbage beds. Implementing these changes can significantly reduce the likelihood of future outbreaks and help sustain a healthier crop over time.
Step 3 – Boost Cabbage Growth with Nutrient-Rich Fertilizer

Start by removing any infected cabbage leaves and spraying the plants with a neem oil solution. Within a few days, you should notice a reduction in fungal spots and new healthy growth emerging at the leaf tips. Assess any factors that may be limiting growth; healthy, well-nourished plants are far better at repelling pests and diseases.
Recovery from fungal issues can take one to three weeks, depending on moisture levels and air circulation. In optimal conditions, healthy regrowth will appear brighter green with fewer blemishes, while excessive humidity can delay progress, leading to further fungal spread. If the foliage remains dull and impacted, check for excessive moisture at the soil level. Plants that show signs of recovering will have smaller, vibrant leaves pop up amid the older, damaged foliage. Maintain observation because a lack of recovery might signal continuing issues hidden beneath the surface.
Avoid overcompensating with water or fertilizer during recovery, as this can worsen fungal issues by creating overly wet conditions. Cabbage prefers consistent moisture, but too much at once can lead to root rot and additional fungal spots appearing if not carefully managed. A common mistake is to think that if a little fertilization helps, then more must be better; however, this approach often leads to nutrient burn and weakened plants. Monitor your fertilization closely; if you notice yellowing remaining post-application, this may indicate too much nitrogen or salt buildup. Follow the recommended application rates on the fertilizer package closely to ensure that you don’t exceed the suggested amounts. If the plant appears lush but its leaves are drooping, or if you begin to notice brown tips on foliage, this could indicate that it has been over-fertilized and immediate adjustments are necessary.
Step 4 – Water Cabbage Only at Base During Humid Days
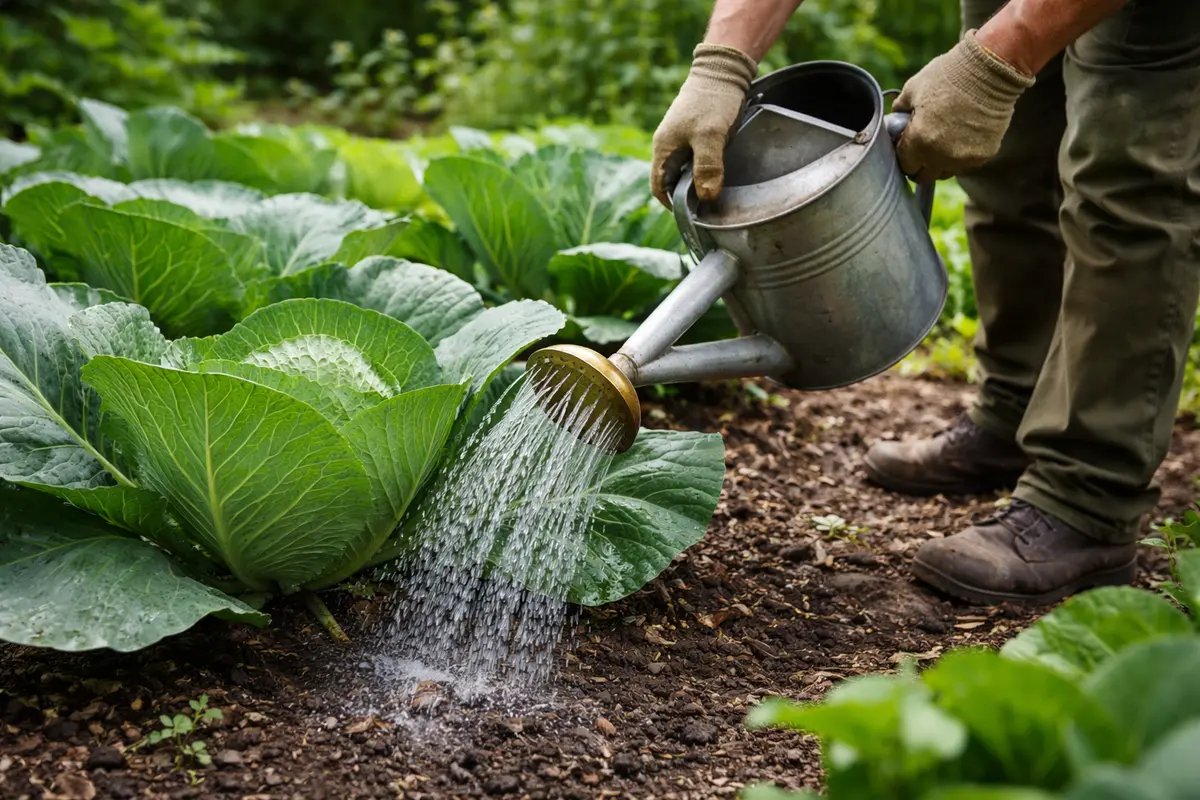
Water your cabbage plants only at their base, avoiding overhead watering on humid days. This practice helps prevent excess moisture on the leaves, reducing the risk of fungal outbreaks. Establishing this habit ensures that you significantly limit moisture retention on the leaf surfaces, which is essential during high-humidity periods. Using a soaker hose or drip irrigation can be beneficial in providing moisture directly to the root zone without wetting the foliage. If a hose is absolutely necessary, water early in the morning while the atmosphere is still relatively cool to limit evaporation and maximize absorption.
Reducing overhead watering decreases moisture on the leaves, directly disrupting the conditions that allow fungal spores to thrive. Remember that wet leaves can lead to increased humidity around the plant, creating an ideal environment for fungus. By consistently watering at the base, you not only protect the foliage but also ensure healthy and efficient uptake of water through the root system. This method also limits the overall water stress on the plant during hot, humid days. For example, if you have been watering from above consistently and notice yellowing at the leaf edges accompanied by the return of spots, it indicates a need to reevaluate your watering method.
Consider adjusting your watering schedule based on weather forecasts. If you know a humid week is looming, reinforce this practice and water less frequently to further minimize moisture accumulation on the leaves. However, if you notice signs of leaf wilting or dehydration on particularly dry days, you may increase watering but ensure it is strictly at the base of the plant. This simple adjustment is crucial in maintaining balance during humid periods and promotes a healthier growth environment. An additional strategy is to mulching around plants, which can help retain moisture at the roots while further reducing the chances of fungal spores settling on moist leaf surfaces.
Step 5 – Inspect Cabbage Leaves for Fungal Spots Weekly
Inspect your cabbage leaves for any new fungal spots each week. You should observe that new growth looks healthy and free from any fungal markings. Regular inspections help detect any early issues so they can be addressed promptly, preventing a minor problem from escalating. Use a magnifying glass during inspections if needed, as some early-stage fungal issues can be hard to see with the naked eye. Ideally, perform these inspections in good lighting so you can notice even the smallest signs of trouble.
A fully recovered cabbage plant will display robust green leaves without any signs of spotting or decay and will maintain its firmness and integrity. Pay attention to the texture of the leaves; healthy cabbage leaves are usually crisp and firm, while infected leaves may feel limp or mushy. Conversely, if you notice the appearance of new fungal spots during your checks, it indicates that further treatment is required. If the spots are progressing in size or quantity, immediate action is necessary. For example, if you notice a new set of spots forming after a few days of treatment, it indicates that the current methods are insufficient and require reevaluation.
If you find recurring spots despite following the care guidelines, consider reevaluating your watering practices and ventilation strategies. You might need to increase the frequency of fungicide applications or switch products if the initial treatment does not appear effective. Establishing healthier conditions, such as reducing humidity and improving airflow, and seeking stronger treatment options may be necessary. Should the issue persist, consulting with a local gardening expert or agricultural extension service could provide valuable insights specific to your region’s climate and conditions. This professional advice can save significant effort and produce more efficient solutions tailored to your unique environment.
FAQ
How long does it take for cabbage to recover from fungal spots?
Recovery duration can vary, but you may start to see improvements within a week of applying a fungicide and fertilizing. Generally, healthy growth should become noticeable within two to three weeks, depending on environmental conditions and care. If the conditions are favorable, you can expect visibly healthier leaves without spots by the end of the third week. However, monitor closely for any returning symptoms to ensure that further treatment is not needed.
Can fungal spots spread to other plants?
Yes, fungal spores can easily spread to nearby plants, especially in humid conditions. It’s crucial to monitor all plants in the vicinity and take preventative measures such as improving airflow and using fungicides during outbreaks. Checking neighboring plants regularly after identifying an issue in your cabbage increases the likelihood of catching any infections early. If your cabbage was severely infected, inspect neighboring crops to ensure that the fungal spores haven’t breached those plants, as catch-up treatments will be necessary to avert widespread infection.
Should I remove leaves with fungal spots?
Yes, remove heavily infected leaves to prevent further spread of the fungus. This action should be done immediately to reduce the fungal load on the plant and improve air circulation among remaining healthy foliage. Make sure to dispose of the infected leaves properly, either by incorporating them into compost (if the fungus is properly treated) or throwing them away to prevent the spores from returning. Leaving these infected leaves can lead not only to further spread but also to longer recovery times for your crop.