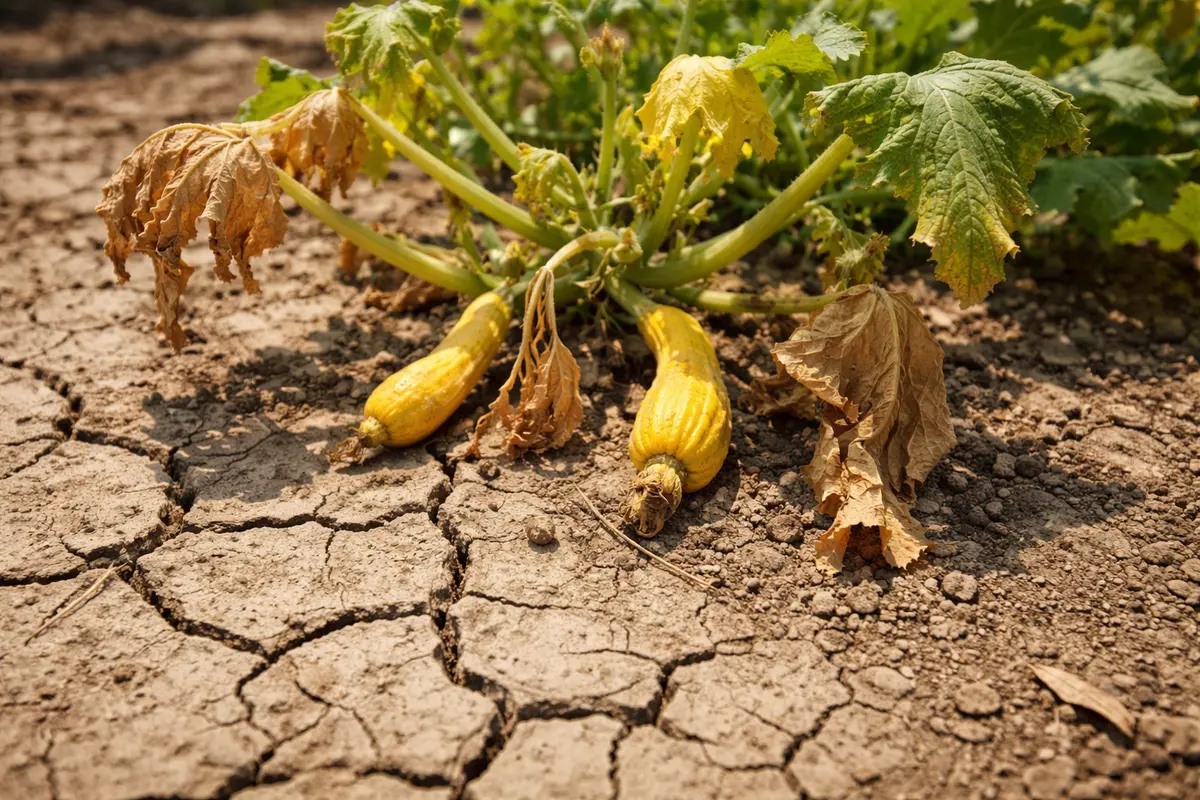
You may notice your yellow squash appearing shriveled and lifeless during the intense heat of summer, which is why you need to know why are my yellow squash shriveling during drought. This wilting occurs as the plant struggles to retain moisture, leading to yellowing and drooping leaves as it becomes unable to sustain its growth. Ignoring these signs can set the plant back significantly, making it harder to fix, but you can still improve the situation by watering thoroughly and adjusting the soil’s moisture levels.
Step 1 – Water Yellow Squash Immediately to Revive
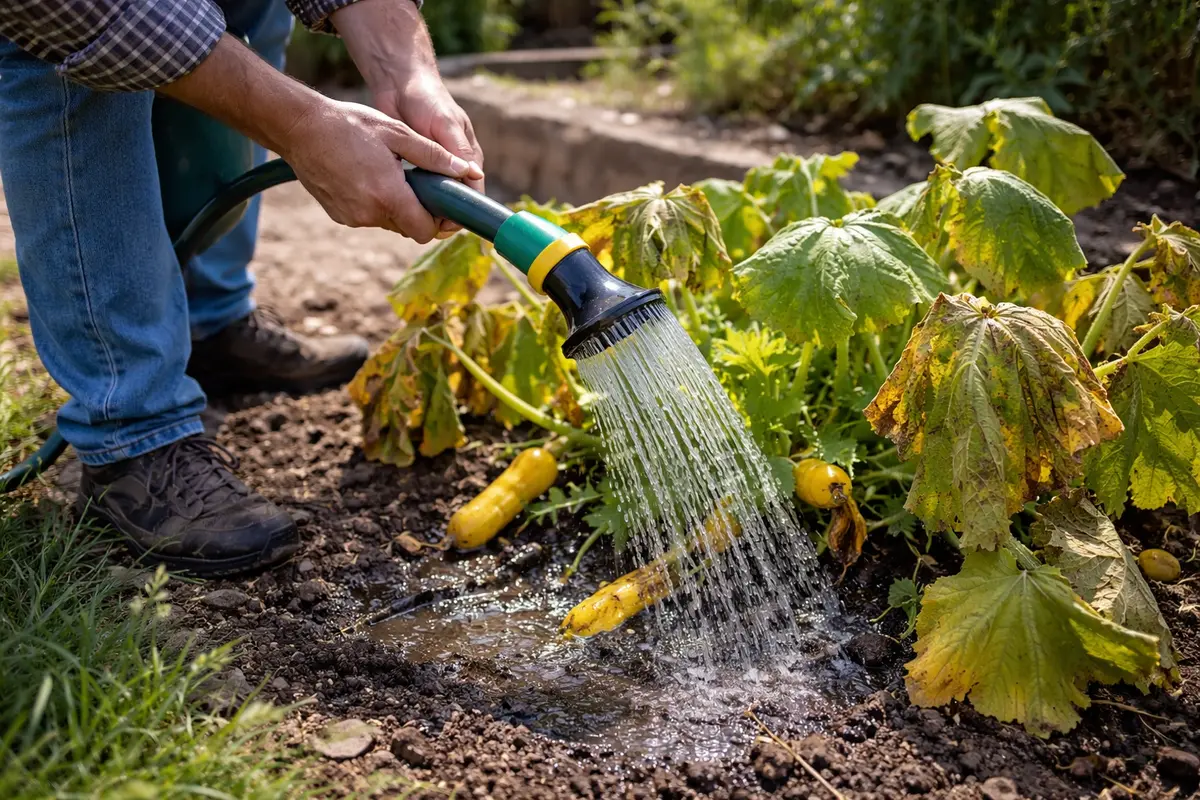
Start by deeply watering your yellow squash plants, ensuring the water penetrates at least 6-8 inches into the root zone. Check the soil moisture using your finger or a moisture meter; it should feel moist but not waterlogged. Within a day or two, you should notice the squash leaves perking up and the stems regaining firmness as they rehydrate.
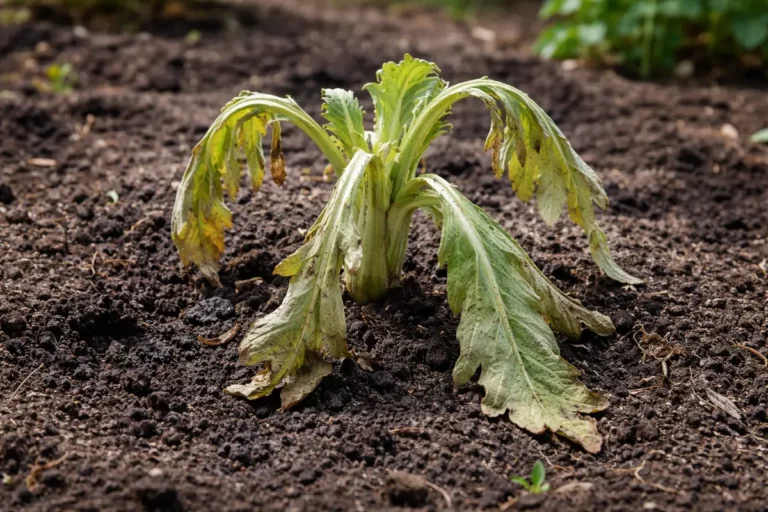
Acting fast is crucial for yellow squash because the plant’s vascular system may begin to malfunction under stress, leading to decreased nutrient and water transport. If you delay providing water, you’ll observe wilting beyond recovery as cells lose turgor pressure, causing irreversible damage to the squash. A comparison shows that a well-watered plant will stand upright while a neglected one wilts and shrivels severely if left too long.
For example, a gardener who quickly adjusted their irrigation system during a heatwave successfully revived their squash, leading to a bountiful harvest. In contrast, another gardener delayed watering and lost nearly half their crop due to poor timing. If you see wilting during this period but the soil remains relatively dry, adjust your watering strategy immediately to avoid further damage.
Step 2 – Diagnose Shriveling Caused by Drought Stress
First, check the soil moisture levels around your yellow squash plants. Use your finger to dig about an inch into the soil; if it feels dry, water the plants deeply to ensure the roots absorb sufficient moisture. Within a day or two, you should see the squash stop shriveling and the leaves become more turgid as they begin to take up water again.
The shriveling of your yellow squash during drought is often linked to the plant’s inability to absorb moisture from the soil, which can be caused by compacted soil or a lack of organic matter. When the soil dries out, the roots may not be able to efficiently take up water, leading to dehydration of the plant tissues, which you’ll notice as wilting or shriveling fruits. If the soil feels crumbly and dry, check that it is not overly compacted; otherwise, your plants will struggle more, even with occasional watering.
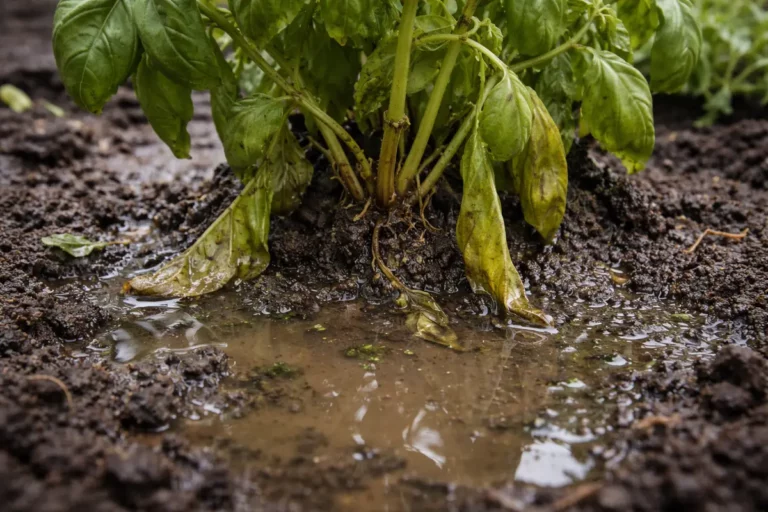
If the soil smells sour, it may indicate poor drainage and root rot instead of dehydration. In such cases, you should improve soil aeration by adding organic matter or relocating the plants to a better-draining area. Look for brown, mushy roots to confirm root rot; this symptom will require different attention than just hydration.
Drought conditions lead to decreased moisture availability in the soil, causing the squash’s vascular system to struggle in transporting water and nutrients. As a result, the fruit and foliage may shrivel as the plant conserves what little water it has. If the soil feels dry to the touch yet your squash is still shriveling, it might indicate that the roots are damaged and unable to uptake moisture effectively.
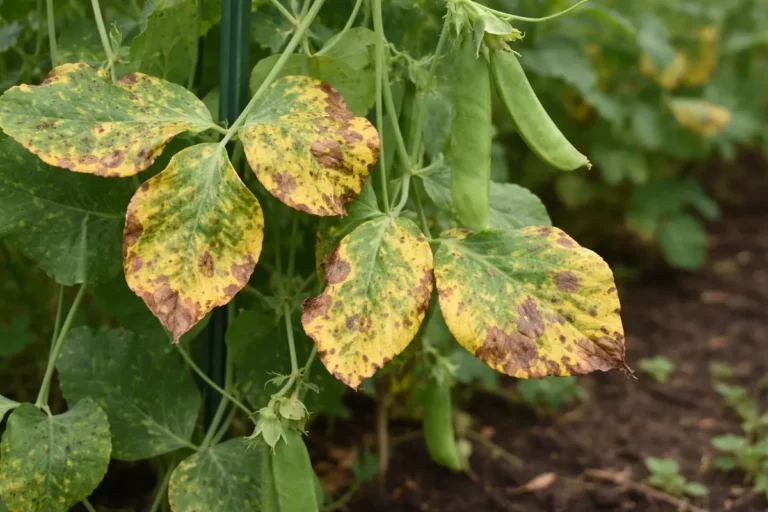
If you notice that the leaves are yellowing along with the shriveling, check for root rot, which can occur if the plant has been overwatered previously. In contrast, healthy root systems present firm, white roots and sufficient green foliage. If not this, check for pest infestations that could also cause similar symptoms by stressing the plant.
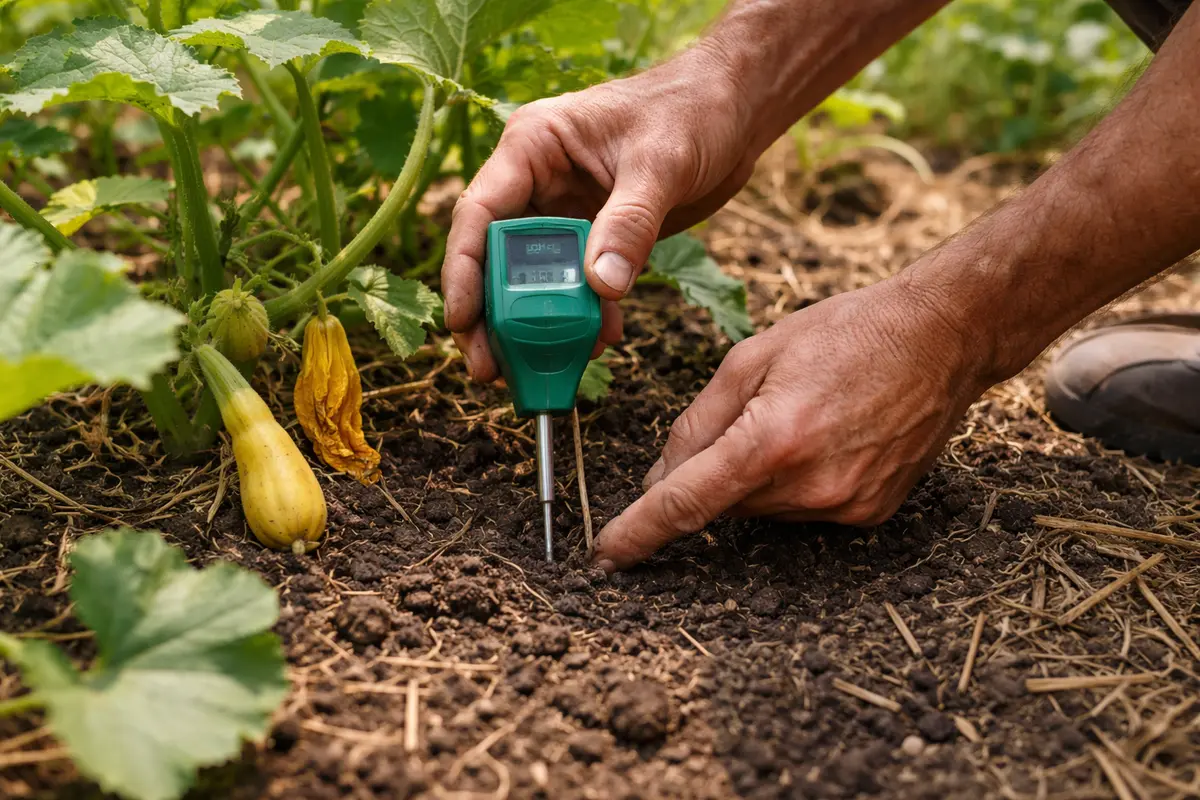
Step 3 – Test Soil Moisture for Yellow Squash Care
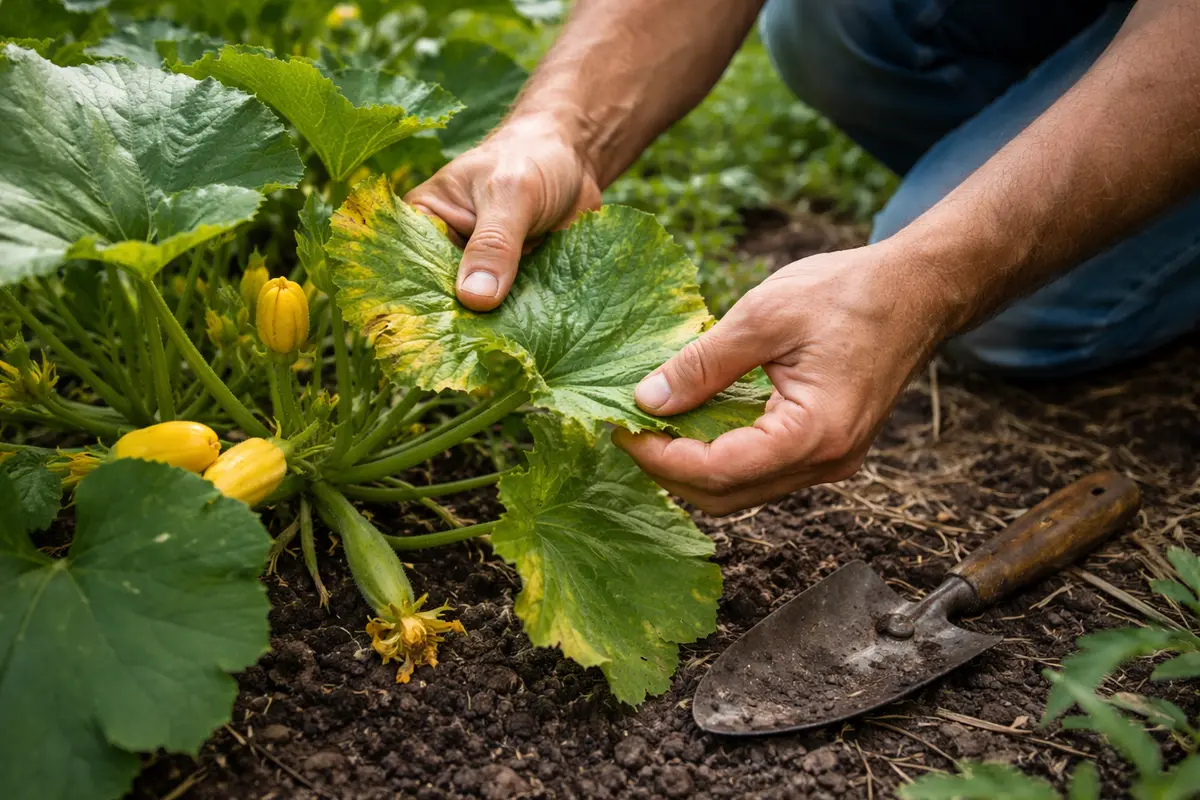
Next, inspect your yellow squash plants closely for signs of shriveling, particularly focusing on the condition of the leaves and fruit. Look for leaves that are wilting or curling, and check for fruit that appears shriveled or dehydrated. These symptoms indicate that the plants are enduring significant drought stress, and prompt watering should help reverse these issues.
Be aware that other problems might cause similar shriveling, such as blossom end rot or root rot. Blossom end rot typically results in dark, sunken spots on the bottom of the fruit, while root rot causes a general wilting and yellowing of the entire plant. If your squash looks distinctly dry and shriveled without dark spots, then drought stress is the likely culprit; if not this, check for soft, mushy roots to rule out root rot.
If you are unsure whether the issue stems from drought stress or another condition, observe the plants over the next day or two after watering. Notice any changes in texture or color, and if symptoms persist, consider examining the root system for signs of disease. This additional observation period will help confirm the diagnosis before you proceed with recovery strategies.
Other problems that can mimic shriveling include pest damage and fungal infections. Pest damage often results in holes or chewed edges on leaves, while fungal infections may show as powdery mildew or black spots, which can feel fuzzy to the touch. If the squash is shriveling but the plant appears otherwise healthy, it’s likely a water issue; if you see clear signs of either pests or fungi, then treat those issues accordingly.
If your diagnosis remains uncertain after inspection, follow up with a brief observation period of a few days to monitor any changes in the plant’s condition. During this time, consider adjusting your watering schedule—water deeply to encourage root growth if drought symptoms persist. If you do not see improvement, assess for other conditions, such as soil compaction or nutrient deficiency, which may also require your attention.
When you test the soil, soil that is too dry may cause roots to be stressed and lead to poor nutrient uptake. Visual cues like drooping leaves signal that the plant is starved for water. Dry soil means the moisture isn’t penetrating deep enough to support the roots, which can severely affect growth. Conversely, overly wet soil can suffocate the roots, leading to decay and diminished plant health.
If the leaves still appear wilted after watering and the soil remains dry, it likely indicates that the roots are compromised or the plant is not able to draw in moisture properly. In this case, consider loosening the soil around the roots to enhance moisture absorption and oxygen flow while ensuring you do not damage them. Be gentle, as overly aggressive handling can shock the plants further.
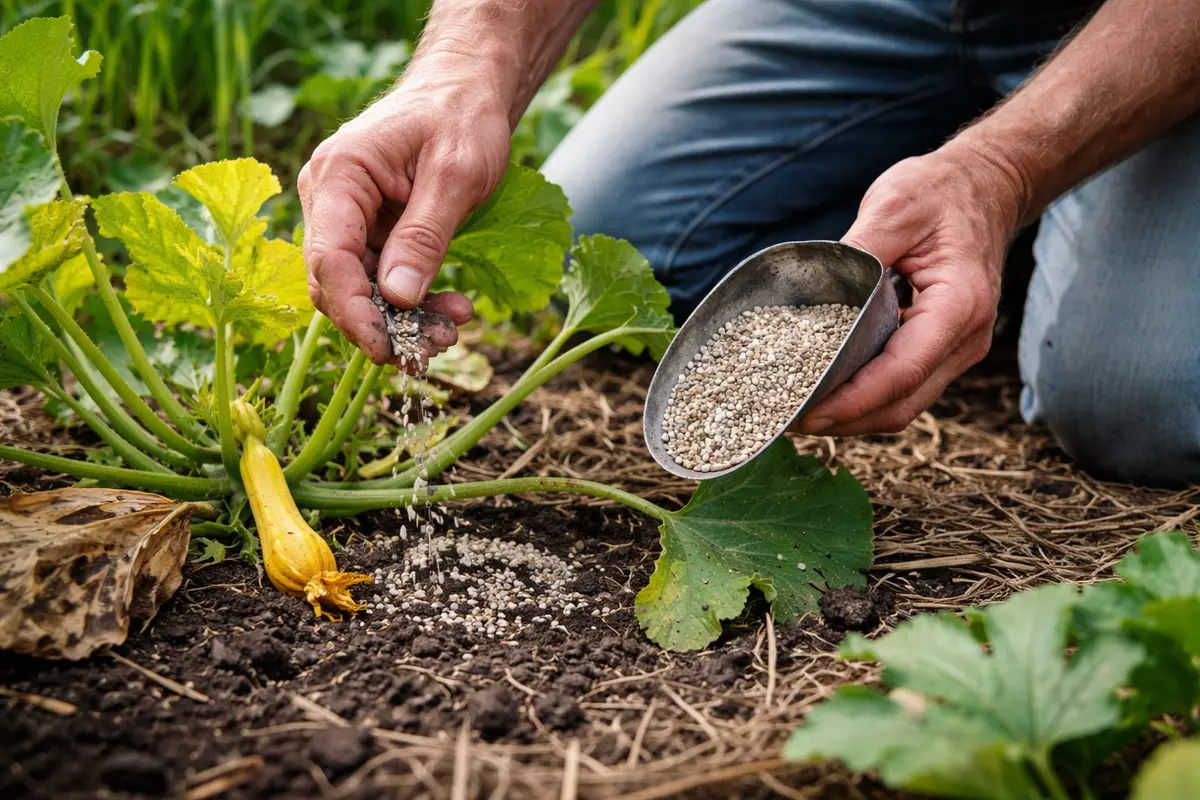
Step 4 – Feed Squash Plants to Support Recovery
Start by providing consistent moisture to your yellow squash, ensuring the soil is evenly moist but not waterlogged. As you do this, look for the wilting leaves to perk up and new blooms to develop within a week, signaling a shift towards recovery.
Understanding that recovery from drought stress may take approximately two to three weeks is crucial. Healthy regrowth often features vibrant green leaves and a revitalized appearance, while those unable to recover might show yellowed, browning foliage. Weather conditions, such as cooler temperatures and regular rainfall, can significantly speed or hinder this recovery timeline, so monitor your local climate closely.
Avoid the mistake of overwatering your yellow squash, as excess water can lead to root rot and further stress the plant. Timing is essential; ensure watering is done early in the morning to prevent disease from lingering moisture during the cooler night temperatures. If you notice your squash still struggling, check for adequate drainage in the soil, as poorly draining soil can exacerbate water-logging issues.
Feeding the squash with nutrients replenishes the lost energy, and adequate fertilization can significantly speed up recovery after drought stress. When the leaves begin to green again and stand upright, it is a promising sign that the recovery process is underway. Ensuring balanced nutrients will help support healthy leaf growth and flower production. Overly high nitrogen levels can unintentionally lead to leggy growth, making the plant prone to other stresses.
However, be cautious not to over-fertilize. Many gardeners think that more nutrients will speed up recovery, but this can lead to further stress. Instead, gradually add fertilizer to avoid shocking the plant; a little goes a long way in recovery. Conversely, if using organic options like compost, ensure you do this thoughtfully as too much can lead to nutrient burn.
Step 5 – Water Regularly to Prevent Shriveling Again
Start by installing a drip irrigation system to provide consistent moisture to your yellow squash. This method delivers water directly to the root zone, reducing stress on the plants and preventing them from shriveling due to drought.
Drought conditions can cause soil moisture levels to drop rapidly, leading yellow squash to shrivel and drop fruit. By implementing drip irrigation, you address this issue directly, supplying the necessary water even during prolonged dry spells. In contrast, plants reliant on inconsistent watering methods often struggle, showing signs of stress such as wilting or yellowing leaves.
In hotter months, increase the frequency of your irrigation schedule to accommodate rising temperatures and evaporation rates. Additionally, consider adding mulch around the base of the plants to retain soil moisture and regulate temperature, which acts as a secondary prevention measure against drought-related shriveling.
Drought conditions cause the soil to dry out, leading to inadequate water uptake by the plants. Without proper hydration, fruits may shrivel, reducing yield and quality. Implementing a regular watering routine addresses the root cause by ensuring that your squash roots have the necessary moisture they need to thrive, contrasting sharply with unwatered plants that display undue stress.
In hotter summers, consider increasing your watering frequency, possibly providing deep watering twice a week if temperatures regularly exceed 90°F. Alternatively, applying a layer of mulch around the base of your yellow squash can help retain soil moisture, shielding roots from extreme temperatures. If you notice wilting despite regular watering, check if the soil drains too quickly or if roots are potentially damaged.
Regular watering is crucial, especially in hot weather. Aim to provide approximately 1-2 inches of water weekly, depending on rain levels and soil conditions. This consistent routine will lock in healthy growth, preventing future occurrences of shriveling. A lack of regular moisture will make your squash plants vulnerable to stress during dry spells. Plants may struggle annually if this routine isn’t established, especially in drier climates or during heat waves.
During periods of extreme heat, consider watering in the early morning or late evening to minimize evaporation. Additionally, mulching around the base can help retain moisture, but avoid covering the stems directly to prevent rot. Monitoring the soil conditions will inform you whether to adjust your watering schedule, particularly in response to season changes or unexpected rainfall.
Step 6 – Inspect Squash Leaves for Signs of Improvement
Check the leaves of your yellow squash plants every few days to monitor recovery progress. Witnessing new leaf growth or old leaves becoming firmer indicates that your interventions are effective. Look specifically for rejuvenated color and firmness; a slight sheen on the leaves is also a good sign of health.
Look for blossoming new shoots and a return of vibrant color to the existing leaves. If these signs emerge within a couple of weeks, the plants are on their way to full recovery. However, remain observant for any signs of wilting or browning edges that can signal a recurrence of stress or potential disease. Consistent checks will help you catch any potential issues early, allowing for rapid response.
If you notice scraggly growth or deterioration after your corrective actions, reassess soil composition and drainage. If the issue persists despite your efforts, consult local gardening resources or experts to diagnose potential underlying issues further, such as pests or root problems. Implementing preventative measures during recovery can significantly enhance the plant’s future resilience.
FAQ
How long does it take for yellow squash to recover from drought stress?
Recovery from drought stress can take 1-2 weeks, depending on the severity of the condition and how promptly actions are taken. Consistent watering and proper feeding speed up the process, and visible signs of improvement will become apparent sooner. The length of recovery can vary significantly between plants tailored to their environmental conditions.
Can drought stress cause yellow squash to have poor fruit development?
Yes, drought stress can severely impact fruit development, resulting in smaller and poor-quality fruits. Inconsistent moisture levels lead to inadequate nutrient uptake, which affects the fruit’s growth and overall yield. Also, stress during critical flowering and fruit development stages can lead to blossom drop or misshapen fruit, compounding yield losses.
Should I remove damaged leaves from my yellow squash?
Yes, removing severely damaged leaves will help redirect energy towards healthier parts of the plant and promote better overall growth. This action can improve air circulation and minimize pests’ habitat areas. Be sure to prune only those leaves that are beyond repair to avoid further stressing the plant. Always use clean, sharp pruning tools to make clean cuts and reduce the risk of infection.