You’ve probably seen small webs and speckled leaves on your houseplants during dry air, which is why you need to know how to stop spider mites on houseplants during dry air. These pests suck the sap from leaves, causing yellowing and unsightly spots that can lead to serious damage. If left untreated, the problem gets worse and can spread quickly, weakening the plant and making recovery harder, but with prompt action, you can inspect, adjust humidity levels, and monitor your plants to get them back on track.
Step 1 – Spray Under Leaves to Combat Mites
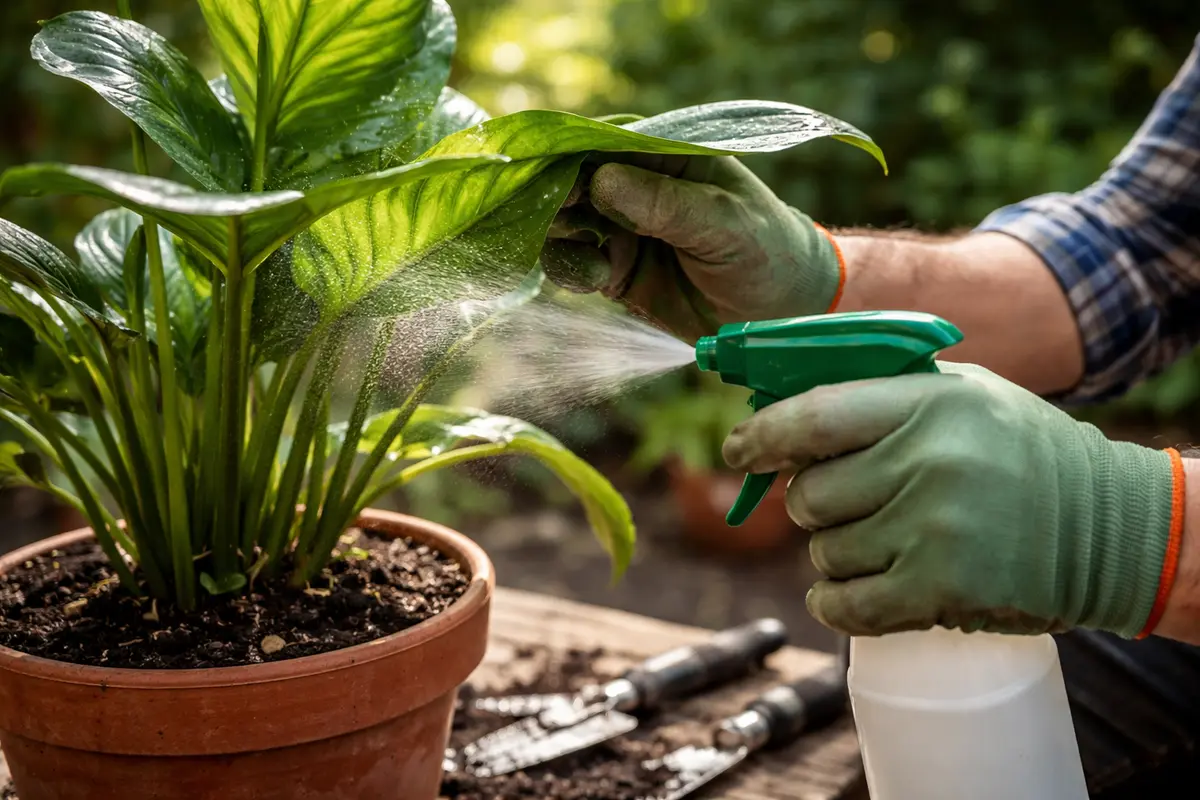
Start by spraying the undersides of the affected leaves with water or an insecticidal soap solution. You should see the spider mites being dislodged from their webs and the leaves appearing cleaner immediately after application. This is the first line of defense against the infestation. It’s crucial to ensure that the solution reaches the entire surface of the leaves, as spider mites often hide in sheltered spaces. A thorough misting allows for more effective coverage of the leaves.
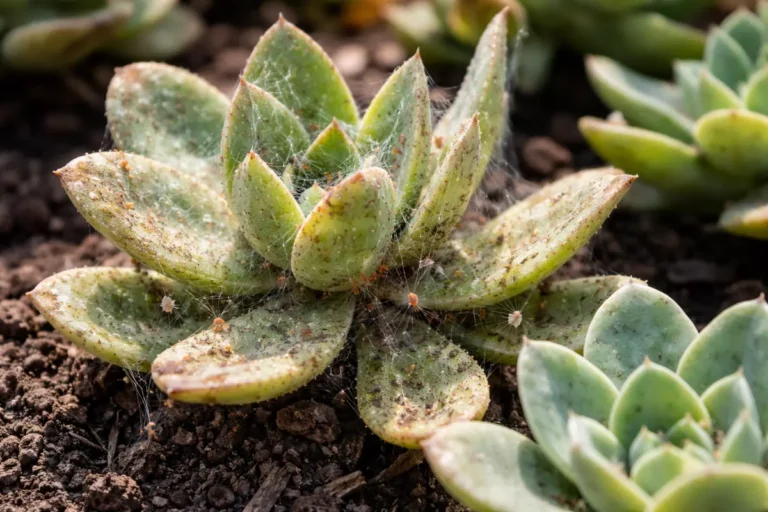
Spider mites thrive in dry environments, where they can reproduce quickly and create webs under the leaves of plants. Not addressing the issue right away allows them to multiply, leading to a more serious infestation. By thoroughly spraying the leaves, you disrupt their habitat and remove a significant number of these pests. If consistent spraying is maintained, a noticeable reduction in webbing and visible mites should occur within a few days; however, complete eradication may take more time, highlighting the need for persistent monitoring. This step not only targets existing pests but also creates a less hospitable environment for future infestations.
A common mistake during this initial treatment is only to spray the tops of leaves, neglecting the undersides where the mites often reside. This error results in many mites going undetected, allowing them to return quickly. Make sure to spray the underleaf surfaces thoroughly, as failing to do so can result in a rapid resurgence of spider mites. Most people overlook this area, leading to a false sense of security after treatment. Without comprehensive coverage, you risk a protracted battle against an initially manageable issue. If you notice persistent webs or specks after treatment, it’s a sign that the solution did not reach all infested areas and requires reapplication or increased scrutiny on the undersides.
Step 2 – Test Humidity Levels in Your Home
Check the humidity levels in your home using a hygrometer or simple houseplant moisture meter. You should see readings indicating a relative humidity below the preferred range of 40-60%, highlighting a dry environment that encourages spider mite activity. This is a critical step in understanding the conditions contributing to insect proliferation and ensuring your plants can thrive. If the environment is consistently dry, spider mite populations can rapidly escalate.
Spider mites are attracted to low humidity because it creates an ideal environment for their survival. When humidity levels drop, plants lose moisture rapidly, making them more susceptible to infestations. Identifying and correcting humidity levels can significantly decrease the chances of a spider mite outbreak. If humidity remains low, your plants won’t just struggle with pests; they may also face stress and decline overall vitality. To maintain optimal humidity, regularly measuring it can help you anticipate and manage potential spider mite risks before they escalate.
If the humidity in your home is consistently low, consider placing a humidifier in the same room as your houseplants. This is particularly effective during winter months where dry heat is prevalent. Introducing a humidifier can offer immediate relief; however, monitor the levels to avoid excessive moisture, which can lead to mold and mildew. In addition to a humidifier, grouping plants together can create a microclimate with increased humidity; the collective transpiration from the leaves increases moisture in the air. A small plant stand or shelf can facilitate this, allowing several plants to benefit from the increased humidity. Nonetheless, if your home tends to have high humidity, ensure ventilation remains optimal. Check for signs of mold regularly and adjust your strategies accordingly, as too much humidity can promote fungal diseases that weaken plant health.
Step 3 – Water Houseplants to Encourage Recovery
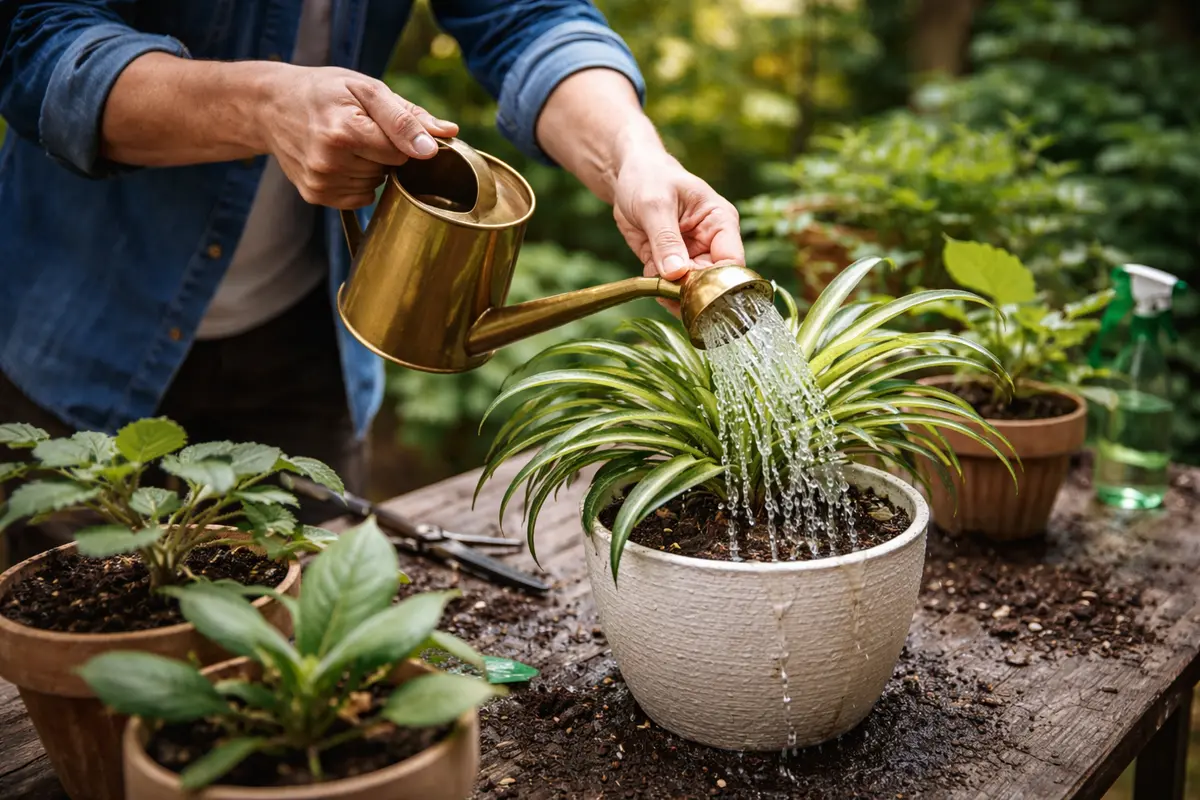
Water the affected houseplants deeply, ensuring the top layer of soil is moist but not soggy. Within a few hours, you should observe the plants beginning to perk up, and the leaves may start regaining their turgidity as stress reduces. A thorough soaking helps improve the plants’ resilience against further mite invasions. After watering, check the soil moisture to ensure it is evenly distributed and that no areas dry out quickly. This step is vital in encouraging plant recovery while simultaneously creating a less inviting habitat for spider mites.
Proper watering is essential in the recovery process. This practice rejuvenates the plants and creates a less favorable environment for spider mites, who prefer dry conditions. If your plant thrives with adequate moisture levels, it can bolster its defenses against pests naturally. Establishing a well-structured watering schedule—typically allowing the top inch of soil to dry out between watering—will also help in maintaining sustained health. Remember that overwatering can lead to root issues, making it more challenging to combat mites effectively. If the leaves start turning yellow or become mushy, it’s a clear indication of overwatering, which could mean revamping your approach is necessary.
A common pitfall during this recovery phase is overcompensating with water, which can lead to overwatering and root rot. Monitor your soil moisture regularly after watering; if after a few days your soil remains soggy or waterlogged, it’s crucial to adjust your watering schedule to ensure proper drainage and aeration. Particular attention should be paid to pots with dense soil that retains moisture longer. The importance of checking the drainage holes in the pots cannot be overstated; if they’re blocked, excess water can build up and suffocate the roots. Keeping track of your plant’s response to your watering approach will offer insights into effective management. If you find yourself consistently overwatering, consider using self-watering pots or ceramic pots that allow for better moisture regulation.
Step 4 – Use Neem Oil to Deter Spider Mites
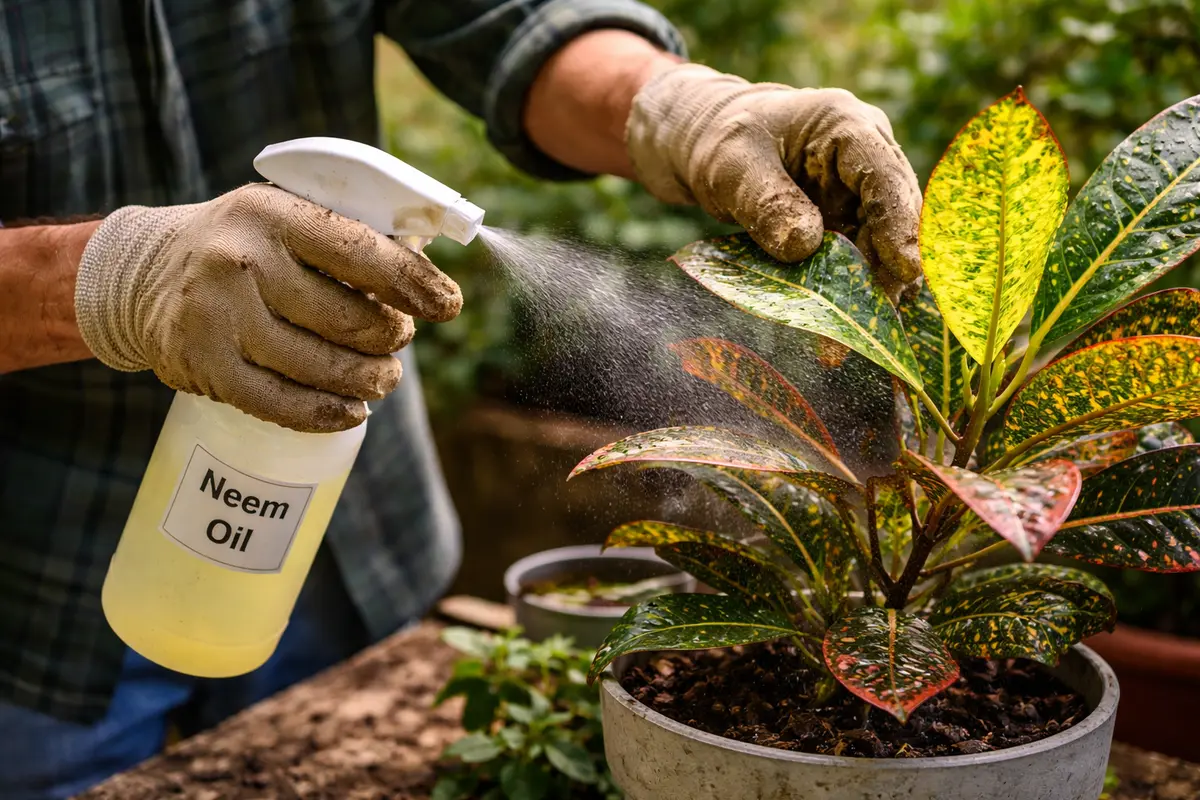
Apply a neem oil solution to your houseplants every week as a preventive measure against spider mites. You should start noticing a decrease in mite presence and damage within a few weeks, allowing your plants to thrive. This natural solution is particularly effective because it hampers the capability of spider mites to reproduce. Consistent application ensures their life cycle is interrupted, preventing new generations from establishing. Make sure to thoroughly coat all surfaces of the plant, including the undersides of leaves, for maximum effectiveness.
Neem oil works effectively to deter spider mites because it disrupts their hormone systems, preventing them from growing and reproducing. This natural pesticide acts as a barrier, keeping future spider mites at bay while also aiding in the recovery of the affected plants. Regular application overcomes the spider mites’ natural defense mechanism of spinning webs that protect them, allowing the neem oil to coat all plant surfaces. In practice, this means spraying not just for visible pests, but preemptively to stop others from settling in. Applying neem oil more frequently during peak infestation seasons can yield better results.
If applying neem oil, adhere to the following guidelines: be mindful of doing so during cooler hours, ideally in the evening. Applying in the heat of the day can cause the oil to heat up excessively, diminishing its effectiveness and potentially leading to leaf burn. Additionally, check for any plant sensitivities; some species may react adversely to oils, leading to leaf burn, discoloration, or overall decline in vigor. Conducting a patch test on a small section of the plant can reveal any adverse reactions before full application. If after application you notice a decrease in leaf vigor or new growth browning, discontinue use immediately and consider alternative pest control methods, such as introducing beneficial insects like ladybugs or using insecticidal soap as a backup option.
Step 5 – Check Spider Mite Activity Weekly
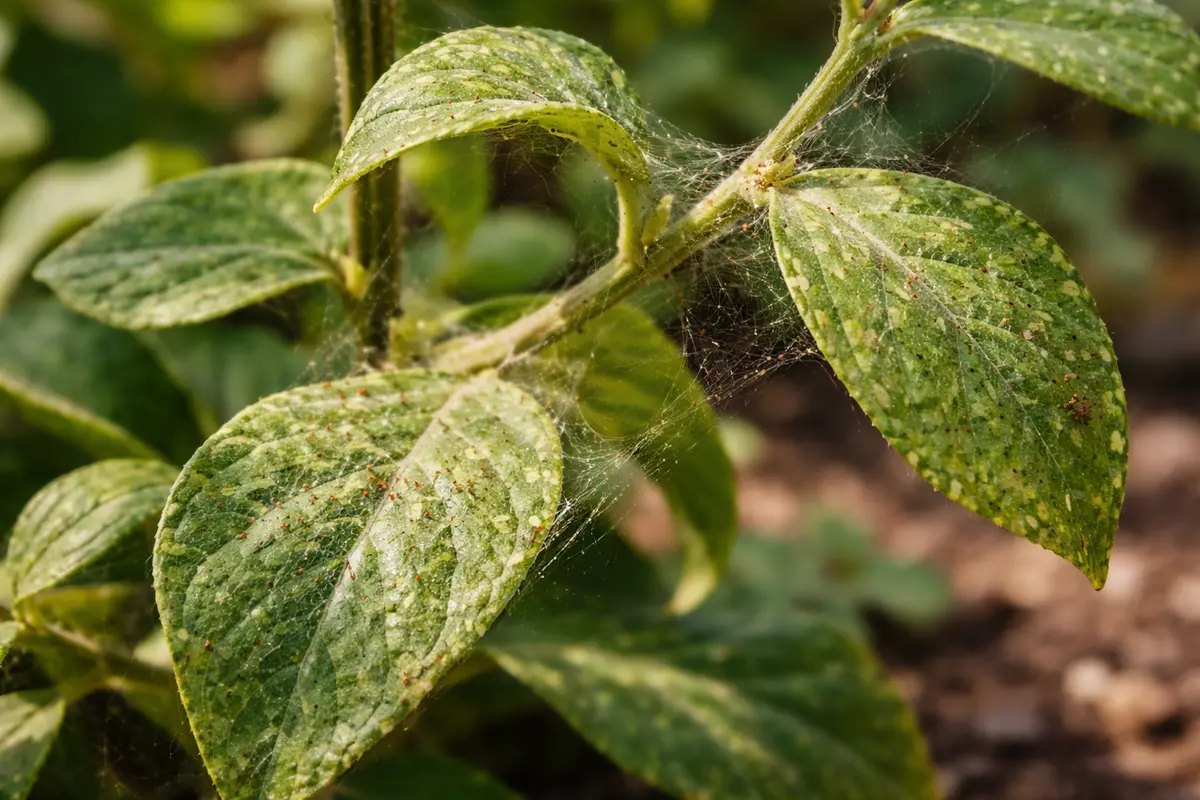
Start by closely examining your houseplants for any tiny, discolored specks on the leaves, which indicate spider mites. Look for the presence of fine webbing, especially on the undersides of the leaves, and check at least once a week. Regular monitoring allows for early intervention and increased chances of recovery. Keep a journal of your observations; this can help track pest activity and the effectiveness of your treatments over time.
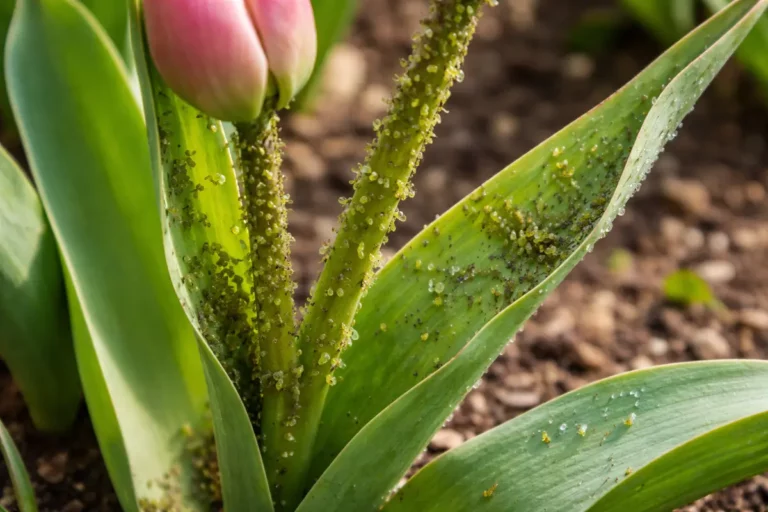
A fully recovered plant showcases vibrant green foliage, with smooth, unblemished surfaces free from any webbing or pest activity. In contrast, early signs of returning spider mites can be seen as yellowing spots on leaves and a rough texture, indicating potential stress. If you notice any sticky residue along with these symptoms, it’s essential to act quickly. This stickiness is often a sign of honeydew from feeding pests, further attracting other insects that could aggravate your plant’s situation.
If the spider mite problem resurfaces despite your previous efforts, initiate a stronger intervention such as applying insecticidal soap or neem oil. If symptoms persist after 1-2 weeks of treatment, it may signal that your current method is insufficient, and you may need to escalate to more potent chemicals or trap methods that target mites more directly. Furthermore, consider relocating your plant to a more humid environment or consulting a gardening expert for advanced solutions if repeated treatments fail. Regular monitoring is crucial to ensuring that your plants are on a path to recovery; the earlier you identify lingering infestations, the easier they are to manage.
Should spider mites still be present despite following these prescribed steps, it may be necessary to escalate your treatment method. If you find that your plants are still showing signs of mite activity, consider using a horticultural oil or a professional-grade miticide, which can be purchased at gardening supply stores. Additionally, quarantining affected plants will prevent the spread of pests to other healthy plants in your home. Knowing when to escalate treatment is essential in preserving the health of your houseplant collection; monitor not only for visible mites but also for signs of other pests that may take advantage of the weakened plants. Record any changes in mite levels or plant health in your journal, which can improve your approach over time.
FAQ
How long does it take for spider mites to cause damage?
Spider mites can start causing visible damage within a few days of infestation, particularly if environmental conditions are favorable, such as low humidity. In just a week, you may start noticing leaves with a yellowish discoloration, curling edges, and silken webbing, indicating a rapid decline in plant health if not addressed promptly. The visible signs often lead to a drastic change in plant appearance, making it imperative to act quickly at the first signs of infestation. Immediate attention can prevent permanent damage and ensure that your plant has the best chance for recovery.
Can spider mites spread to other plants?
Yes, spider mites can easily spread to other plants, especially if they are kept close together. It’s crucial to isolate infected plants as soon as you notice an infestation to prevent it from multiplying and affecting surrounding plants. If left unchecked, spider mites can quickly travel through air movement or even on gardeners’ hands and clothing. As they reproduce rapidly, it’s wise to check plants in close proximity regularly for any signs of spider mite activity. Cultivating a keen eye during the growing season is vital for early detection and eradication.
Should I remove affected leaves from my plants?
Removing heavily infested leaves can be beneficial in preventing further damage and allowing the plant’s resources to focus on healthier parts. This approach reduces the overall mite population and provides the plant a better chance to rejuvenate. However, ensure to do this cautiously, as excessive pruning can lead to stress and shock in the plant. Only remove leaves that are beyond saving; healthy leaves provide crucial photosynthesis for recovery, and maintaining as much foliage as possible can help the plant bounce back quicker. Ensure that any tools used are sanitized to avoid the potential transfer of pests or disease between plants.