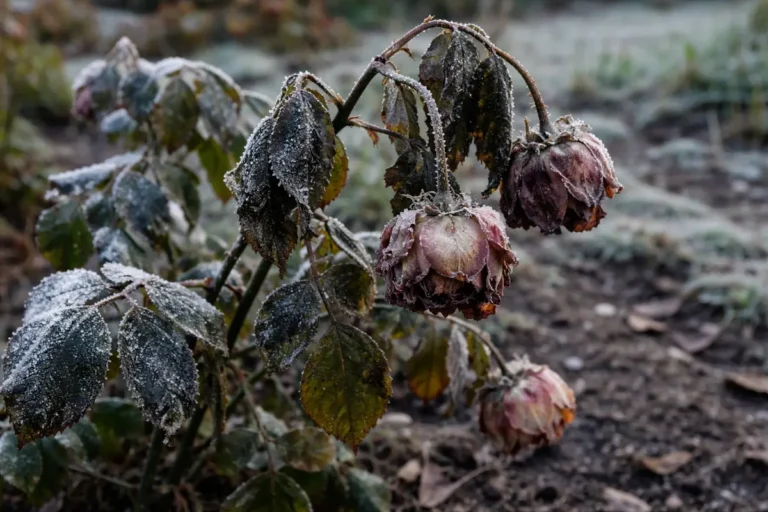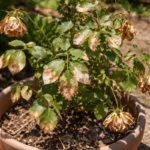
You may notice your calla lilies drooping dramatically after particularly cold nights, which is why you need to know How to revive drooping calla lilies after cold nights. This wilting occurs because the cold temperatures affect the plant’s water uptake, leading to stress and drooping leaves. If left unaddressed, the situation gets worse, weakening the plant and potentially causing lasting damage; however, fixing it is possible now by inspecting the soil, adjusting watering routines, and providing the necessary care to help them recover. Understanding and addressing this issue promptly can save your plants from further distress and enhance their chances of recovery.
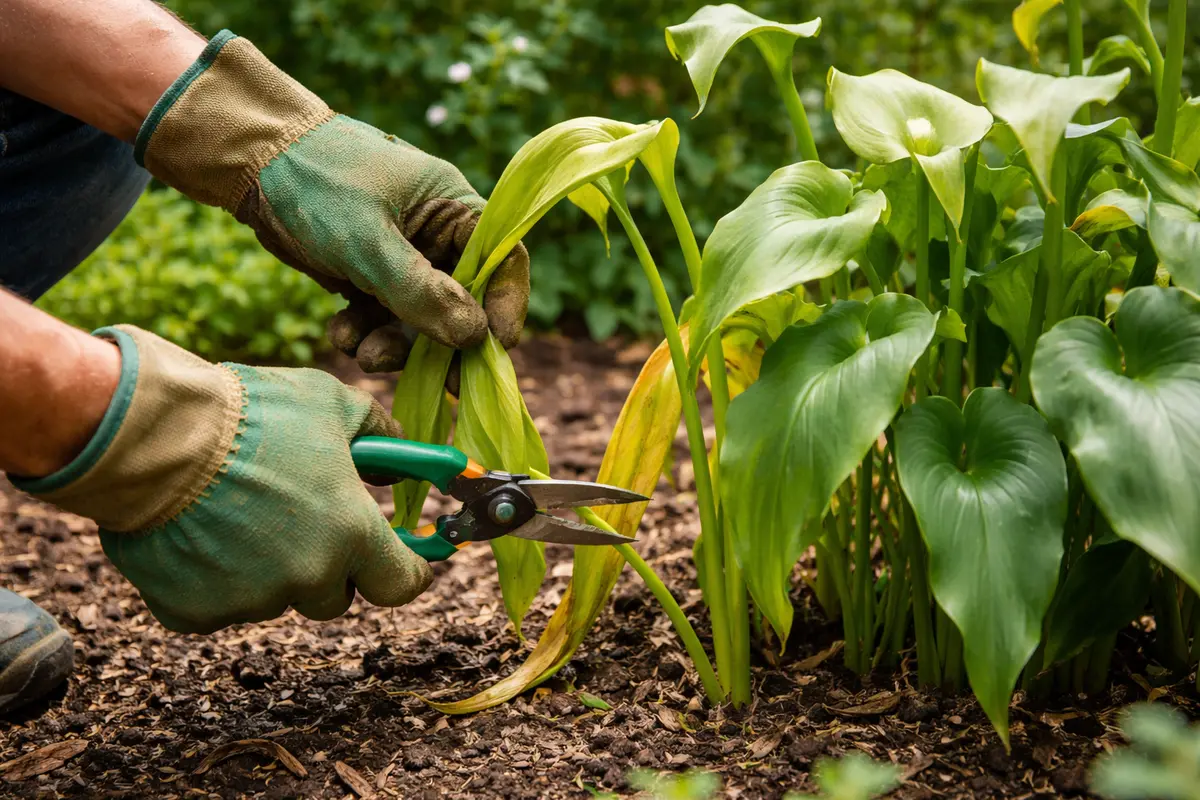
Step 1 – Trim Drooping Calla Lily Leaves Now
Start by bringing your drooping calla lilies indoors or covering them with row covers if they’re planted in the ground. This immediate action helps to shield the plants from further cold exposure, and you should notice the foliage slowly begin to perk up within a few hours as they receive some warmth. Additionally, check the moisture level in the soil; if it’s dry, give them a light watering to support recovery.
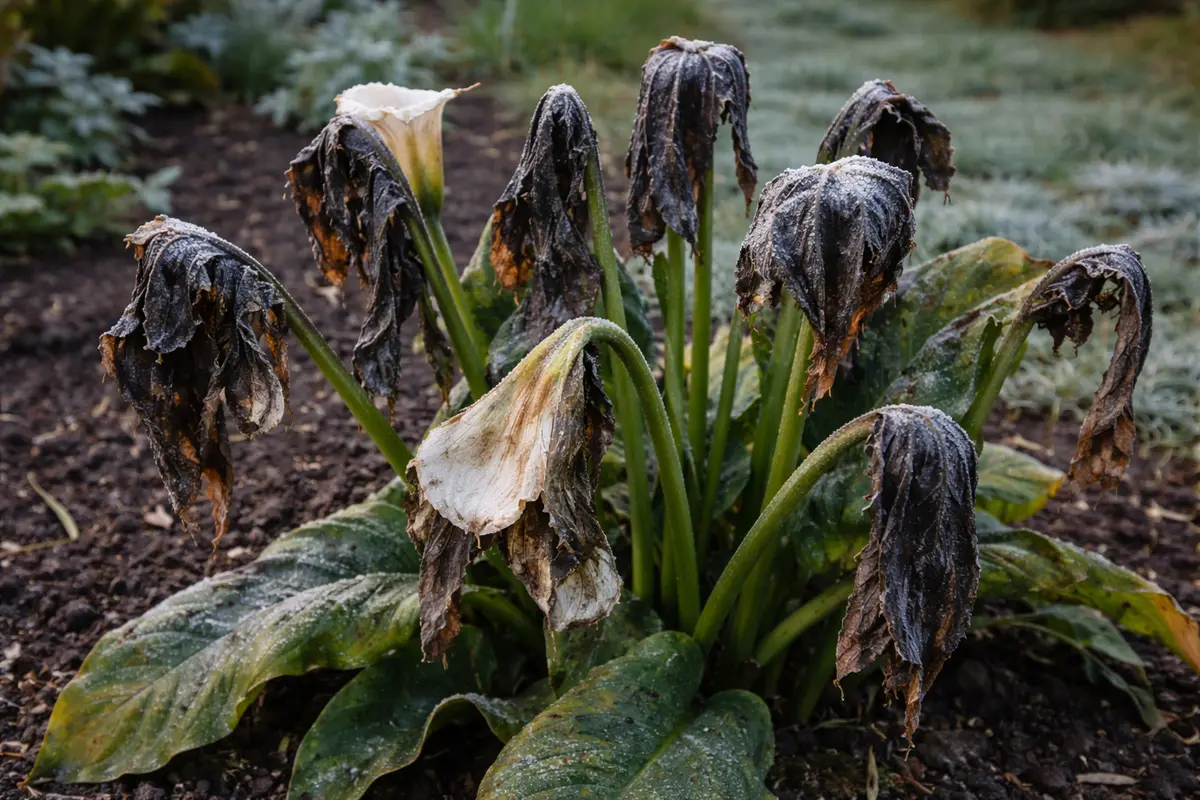
Acting fast matters for calla lilies because their cellular structure can be compromised by low temperatures, leading to cellular dehydration and necrosis if left exposed. This can cause the leaves to wilt and darken, which means the plant may not recover if action is delayed; you could see a stark difference in vitality between wilting plants and those that were brought inside promptly. If you notice wilting but act quickly, the plant can stabilize before further damage sets in.
In a real-world scenario, a gardener waited too long to bring their calla lilies inside after a cold snap, resulting in significant leaf browning that required more extensive intervention later. Contrarily, another gardener who acted swiftly saw their plants rebound within days, avoiding the hassle of cutting back dead foliage. If a calla lily shows drooping followed by brown tips, check for cold damage exposure immediately rather than waiting to see if it recovers on its own.
Acting quickly to remove damaged leaves is crucial for calla lilies because prolonged exposure to cold stress can lead to cellular breakdown and root rot. Without timely intervention, the plant’s ability to absorb water and nutrients diminishes, resulting in further wilting or even death. If you notice deep brown spots developing, that’s a clear signal of advanced damage; if not, check that the roots are still firm and healthy.
In one case, a gardener waited too long to act on drooping calla lilies after a night of frost, leading to irreversible root damage and a failed recovery. Conversely, a proactive approach resulted in successfully reviving a plant within days, showcasing the importance of prompt action. A common oversight is removing only the visibly damaged leaves while neglecting to check for root issues; if you see drooping persists, inspect your watering environment as well.
Acting quickly is essential because calla lilies are sensitive to temperature fluctuations. If the cold temperatures linger, the plant’s cells can become damaged, leading to wilting and delayed recovery. A prompt response helps to restore cellular function and prevent irreversible harm, ensuring that revived blooms remain vibrant.
For instance, a gardener who immediately brought their calla lilies indoors saw a significant difference; their plants returned to normal within days, while another who delayed action ended up with brown, wilted petals that never fully recovered. Don’t overlook the root zone—if the soil feels soggy and cool, consider repotting to allow for drainage and warmth.
Acting quickly is crucial for drooping calla lilies because prolonged exposure to cold temperatures can cause cellular damage, leading to brown spots and wilting that may not recover. If you delay action, the plant’s tissues could begin to break down, resulting in irreversible decline characterized by blackened leaves that indicate cellular death. Keeping them warm and hydrated enhances their ability to revive, as warm conditions promote more effective water uptake and photosynthesis.
A gardener once delayed moving their calla lilies after an unexpected frost, resulting in permanent damage to the plants, which turned brown days later. This scenario highlights the importance of swift action, as some may mistakenly wait to see if the plants will recover naturally, only to face severe deterioration of the foliage. If the leaves appear mushy or blackened, quickly assess the warmth provided to prevent further damage. A common pitfall stems from underestimating the speed at which cold stress can affect plants, especially if nighttime temperatures fluctuate significantly.
This initial pruning is critical because it alleviates the burden on the remainder of the plant. Drooping leaves, unable to effectively photosynthesize, divert energy away from thriving portions. As you trim, observe that photosynthesis resumes more efficiently with less competition for resources. Consequently, you can expect to see positive signs of rejuvenation, like fresher, upright growth within a week, assuming other conditions are favorable. Keep an eye out for new growth tips emerging from the base, which indicates that your efforts are beginning to take effect, giving you hope that these plants will return to health.
A common mistake gardeners make at this stage is procrastination, believing the plant will naturally recover. Holding off on necessary pruning often results in worsening conditions as the drooping leaves can develop diseases or further degrade, adding to the plant’s stress. If you notice leaves remaining limp for more than a few days or if colors fade further, it’s time to act immediately. Delaying this step could compound the damage and hinder the overall recovery process; waiting longer than a week can lead to irreversible tissue damage and increased potential for pests. Timely intervention significantly improves your calla lilies’ chances of bouncing back; thus, do not hesitate to act when the signs first appear.
Step 2 – Assess Cold Damage on Calla Roots
Start by checking the soil moisture level around your calla lilies. If the soil feels too dry, immediately water the plants thoroughly to rehydrate them. You should see an improvement within a few hours as the leaves begin to perk up and regain their original posture. Consider applying a diluted liquid fertilizer after their initial watering to provide an extra nutrient boost for recovery.
When calla lilies droop after cold nights, it often indicates stress from dry soil or insufficient hydration. The roots require adequate water to support the plant’s natural transpiration process, which helps maintain turgor pressure in the leaves. Without enough moisture, the plant tissue loses rigidity and collapses under its weight, leading to drooping. Conversely, if the soil remains soggy and waterlogged, this creates conditions fast-tracking disease and root rot, which manifests as a different type of wilting that signals potential systemic issues.
If the soil smells sour, it indicates potential root rot, necessitating immediate action. In this case, gently remove the plant from its pot and examine the roots for blackened or mushy sections. Not only should you trim these away, but also soak the healthy parts in a fungicidal solution before replanting in fresh soil, ensuring that pathogens do not resurface. On the other hand, if the soil is dry instead, check for any compacted areas that might restrict water absorption; loosen it to allow water to penetrate more effectively.
Understanding the roots’ condition is vital, as cold temperatures can cause irreversible damage, significantly impairing the plant’s nutrient absorption capabilities. Calla lilies thrive in well-drained soils, and prolonged exposure to chilled and consistently damp soil can lead to debilitating root rot or damage. Recognizing and correcting this issue becomes a high priority to ensure the plant can resume its growth pattern efficiently. If you observe any blackened or soft tissue after lifting the plant, this is a clear sign of further intervention needed. Healthy roots feel firm and often have a clean, earthy smell, contrasting glaringly with damaged roots.
If you find that the roots appear somewhat compromised but display signs of just waterlogging, take corrective action by carefully removing as much saturated soil as possible. Supplement it with fresh, dry potting mix specifically designed for drainage improvement; mixes containing perlite or sand will encourage airflow and assist in moisture management. Alternatively, should you discover blackened or slimy roots indicating fungal damage, trimming away these rotten portions is essential to prevent further decay and potential disease spread. This practical observation will directly influence recovery; healthy roots contrast starkly with damaged roots when re-establishing a plant’s vitality.
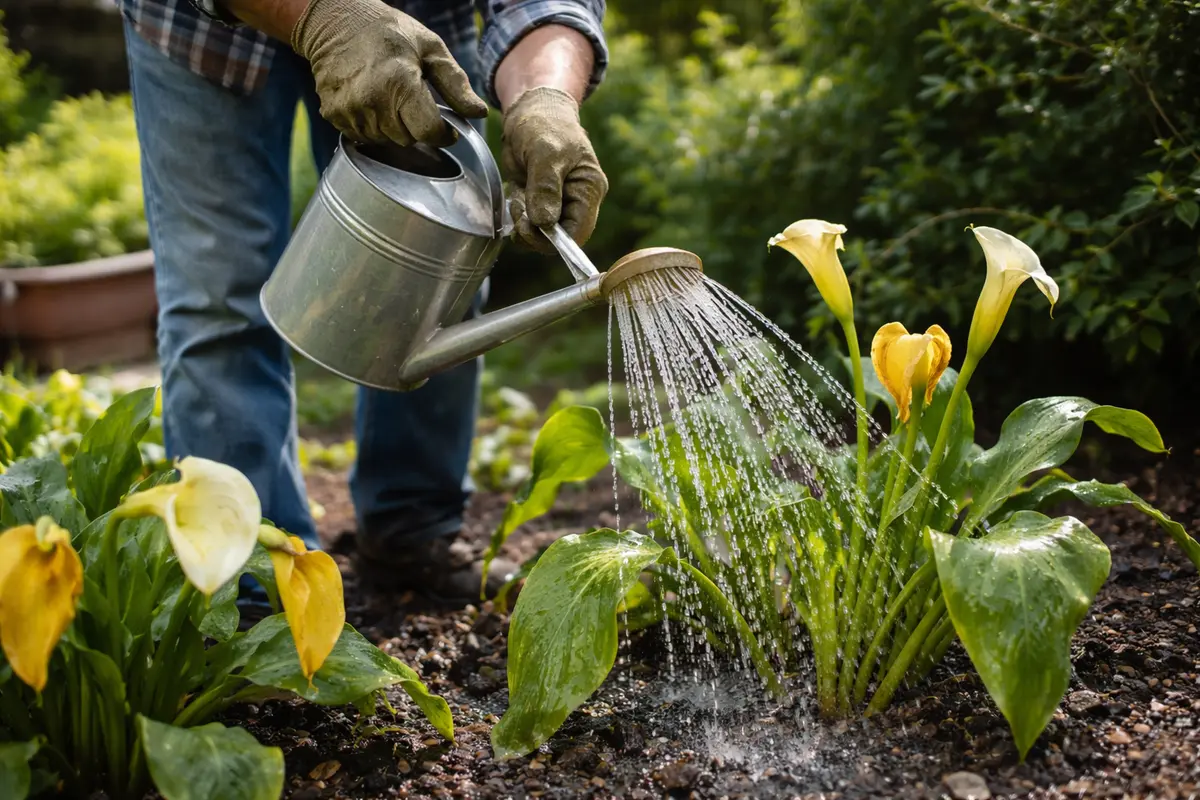
Step 3 – Water Calla Lilies to Promote Recovery
Start by gently lifting the drooping calla lilies from the ground and checking their roots for any signs of rot or damage. If they appear mushy, trim the affected areas and repot in fresh, well-draining soil. Water them cautiously, ensuring they receive adequate light, and within a few days, you should see the leaves regain their rigidity and brightness. To prevent future drooping, implement a routine of watering and checking temperatures, especially as night temperatures begin to drop during the fall months.
The revival timeline typically spans from a few days to a week, depending on the severity of cold exposure. If the calla lilies remain limp after repotting, this often indicates excessive cold shock or continued exposure to low temperatures at night. Check that the plant is not situated near cold drafts or frost-prone areas; otherwise, move it to a more sheltered location during chilly nights.
A common mistake during this recovery phase is overwatering while the plant is still adjusting to its new environment. If you notice the leaves turning yellow even after following recovery steps, check the drainage to ensure that excess water is not suffocating the roots. For severe cases, allow the soil to dry out completely before watering, as soggy conditions can exacerbate the drooping issue.
Calla lilies typically show signs of recovery within 24 to 48 hours when the nighttime temperatures are above their tolerance level. If they consistently droop after cold nights, the fluctuation between these temperatures might be too severe, indicating a need for more protective measures during unexpected cold spells. If these conditions persist, check the plant’s location for wind exposure and adjust accordingly.
A common mistake when transitioning from recovery to prevention is immediately resuming regular watering despite changes in temperature. If the leaves are still limp after temperature stabilization, evaluate soil moisture before watering again. If not dry, a light misting can provide some humidity without over-saturating the soil, mitigating further risk of drooping.
The recovery timeline for drooping calla lilies typically spans 3 to 7 days, depending on the extent of the cold exposure and the overall health of the plant. This duration is crucial; recurrent drooping can occur if the roots remain in temperatures below 45°F for several hours, leading them to suffer damage which can further hinder recovery. If you don’t see any signs of improvement after a week, check the soil moisture immediately to ensure it hasn’t become too waterlogged, as this can prevent any root recovery.
A common mistake during the recovery phase is overwatering the calla lilies while they are still in shock, which can lead to detrimental root rot. Adjust your watering based on the condition of the plant; if the leaves remain droopy despite proper hydration, consider that the roots may need drier conditions to recover adequately. If not this, check the drainage of the pot to ensure it allows excess water to escape without hindrance.
Deep watering saturates the root zone, enabling it to absorb essential moisture and nutrients necessary for recovery from cold stress. This routine not only fosters strong root development but also instills resilience critical for the plant’s overall vitality. Regularly observing the moisture conditions should become second nature; when you notice that the top inch of soil feels dry, that’s your signal to water again. Be cautious, though, as over-saturation from excessive watering can quickly lead to root rot once more, reversing any recovery progress made. Monitor your lilies closely during this phase and compare leaf turgor at intervals to gauge recovery. A near-instantaneous drop after watering typically indicates chronic stress requiring immediate attention.
During this recovery phase, many gardeners mistakenly believe that more frequent watering expedites healing, inadvertently drowning the roots in the process. This often leads to further damage, as excess moisture defeats the purpose of allowing the soil to dry adequately between waterings. Always check for moisture consistency before adding more water; well-calibrated watering practices encourage vital new growth without overwhelming the plants’ root system. If actions displace water retention, then adjust your frequency to maintain moisture balance according to real-time observations of plant behavior. Should leaves still droop despite your best watering efforts, check for soil quality—it might be too compact to allow proper drainage, warranting a complete change to a more suitable soil mix that enhances aeration.
Step 4 – Check Calla Lilies for Signs of Stress
Monitor the calla lilies every few days for signs of recovery and regrowth. Look for improved turgor in the leaves along with fresh growth; these indicate that your efforts to assist them have yielded positive results. Healthy calla lilies should display crisp, erect leaves rather than remaining droopy. Involving a keen observation habit will help you determine if recovery is progressing as anticipated. A sharp contrast may be seen in newly forming leaves, where increased brightness and rigidity symbolize effective recovery, directly reflecting on the care provided during stressful conditions.
Over the following week, expect the rejuvenated plant to showcase vibrant colors and exhibit a sturdy structure, symbolizing resilience after the distress caused by the cold nights. However, if any signs of drooping reappear or the leaves remain discolored, further intervention may be necessary. It’s essential to continuously observe moisture levels in the soil and adjust your watering schedule as needed, avoiding both over and under-watering. Daily assessments will provide insights into necessary adjustments, allowing for quick corrective actions that cater to the plant’s needs.
If recovery stalls or the drooping resumes, consider the possibility that the soil could be excessively dense or poorly draining; hence, upgrading to fresh, well-draining soil mixes during repotting may dramatically benefit the overall health of your calla lilies. A common mistake during this stage is to overlook the impact of light; too much direct sunlight during recovery can compound stress exacerbated by cold damage. In such cases, providing some shade can significantly help avoid burning or additional wilting. Staying proactive during this monitoring phase ensures your calla lilies are given the necessary support to thrive! Additionally, consider rotating the pots periodically to allow all sides to receive adequate light exposure without scorching one side or creating uneven growth patterns.
FAQ
How long does it take for calla lilies to recover after cold nights?
Recovery time for calla lilies can vary greatly depending on the severity of cold exposure; typically, you may see signs of improvement within a week. However, full recovery can extend for several weeks to months, especially if root systems were significantly compromised or if environmental temperatures drop again. In cases of severe cold damage, you may not see substantial recovery for an entire growing season, so it’s relevant to monitor changes continuously during this period.
Will drooping calla lilies spread the problem if left alone?
Yes, if drooping calla lilies are not addressed promptly, symptoms can worsen, potentially affecting nearby plants. Increased moisture from decay can encourage diseases like bacterial soft rot, making it vital to take timely action to prevent the spread of problems. Keeping your garden area clean and monitoring surrounding plants closely can help catch any early signs of distress, especially if environmental conditions remain critical.
Should I remove all drooping leaves from the calla lilies?
Remove only the visibly damaged leaves; retaining some healthy foliage remains important for photosynthesis and supporting overall recovery efforts. Cutting all foliage at once can impose additional stress on the plant and hinder its ability to regain its former vigor. If a significant amount of foliage is lost, consider adjusting your care routine to support the remaining healthy parts more effectively, focusing on providing adequate light and moisture to those areas.