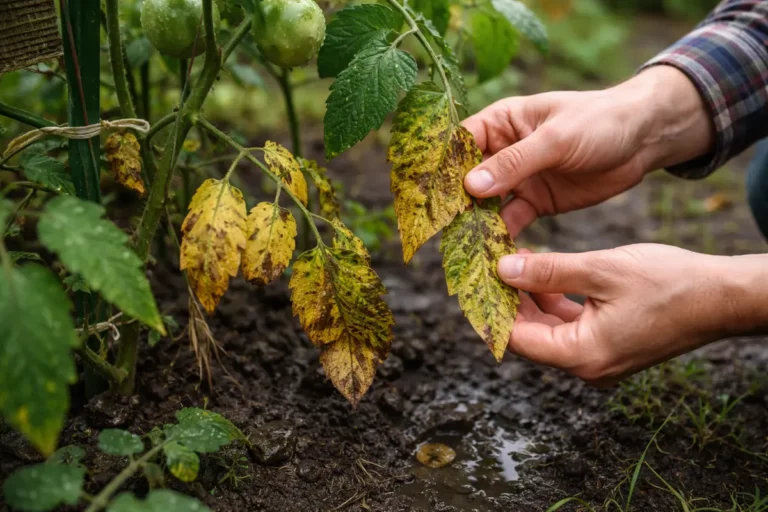
You may notice your orchids wilting and showing signs of distress when you’ve overwatered them, which is why you need to know how to fix wilting orchids after overwatering. This happens because excessive moisture can lead to root rot, causing the leaves to droop and develop yellowing spots. If left unaddressed, the problem can worsen, leading to more damage and weakening the plant’s health, but you can still salvage it by inspecting the roots and adjusting your watering routine.
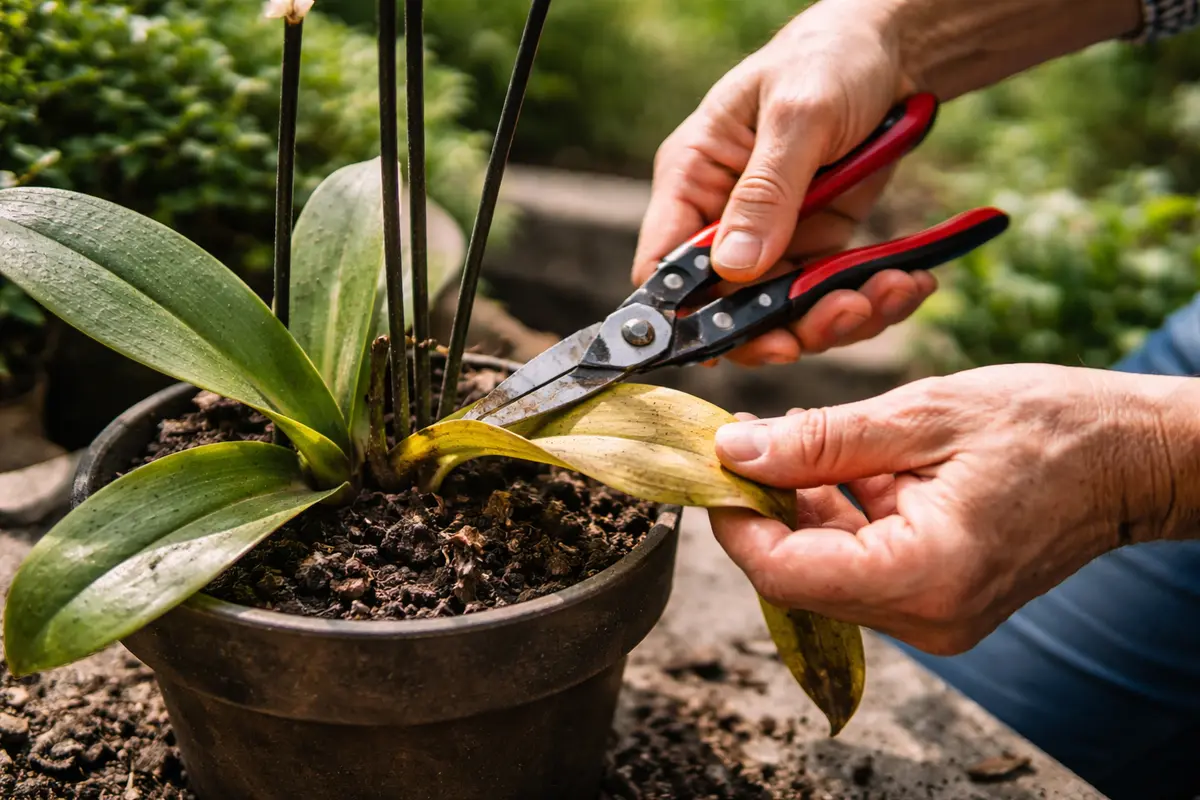
Step 1 – Trim Wilting Orchid Leaves Immediately
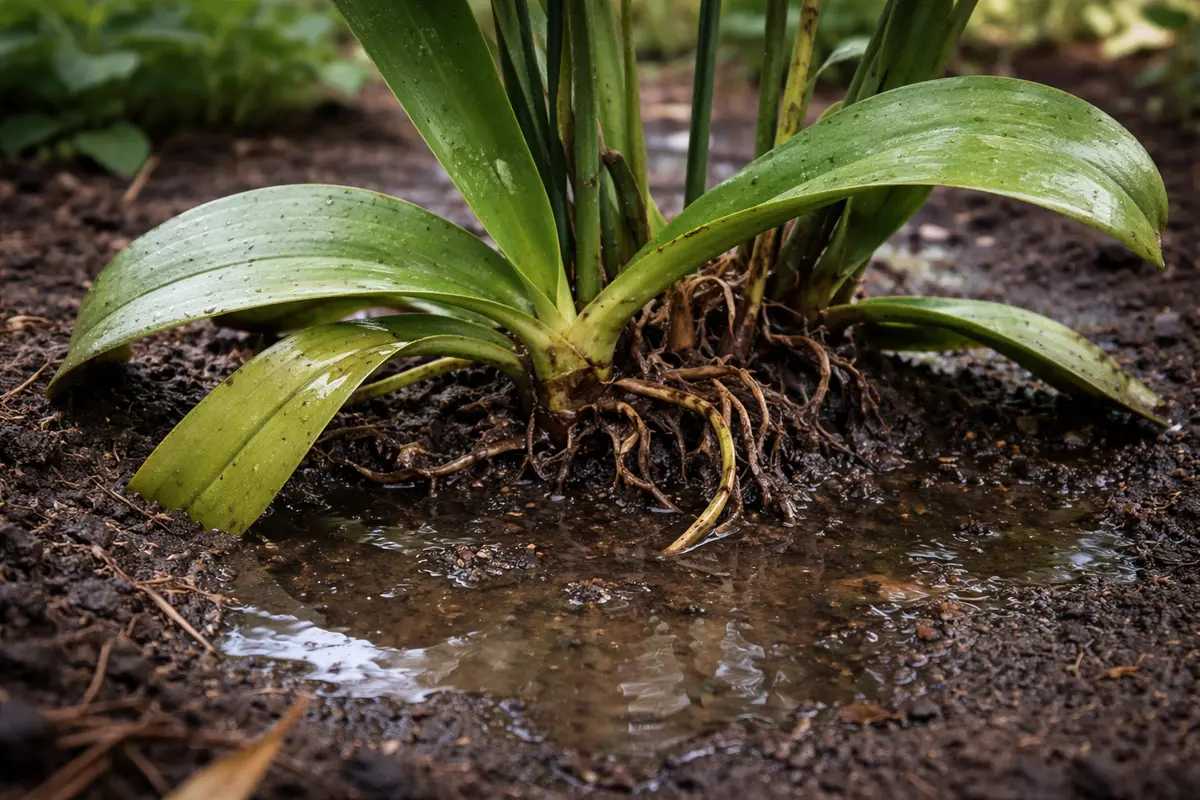
Start by carefully removing the orchid from its pot, gently shaking off excess water from the roots and inspecting them for signs of rot. If the roots appear brown or mushy, trim away the damaged sections with sterilized scissors. Within a short period after this action, you should notice that the leaves become less droopy and regain some firmness as you provide appropriate care following this step.
Acting fast is critical when dealing with overwatered orchids because their roots are susceptible to rot, which can spread quickly if not attended to. When waterlogged, the roots suffocate and fail to absorb oxygen, leading to cellular breakdown. If you delay, the plant may reach a point of no return, where recovery becomes much more difficult.
For instance, a gardener once delayed re-potting a wilting orchid, thinking that simply allowing it to dry would suffice. In contrast, immediately addressing overwatering by repotting saved another orchid from losing all its roots. If the leaves start to lose color along with wilting, check for root damage rather than waiting for further signs of distress.
Taking swift action is vital to halt the spread of damage, as wilting leaves can harbor rot and fuel further deterioration. Keeping the cuts clean helps reduce exposure to potential pathogens that can thrive in moist conditions. When the leaves are removed, the plant can focus its energy on healthier parts, enhancing its chances of recovery. Additionally, trimming the foliage allows for better air circulation, which is essential for orchids that thrive in humidity, preventing fungal infections that often exacerbate wilting. For effective trimming, utilize sterile cutting tools like scissors or pruning shears to minimize contamination of the remaining plant.
Many gardeners make the mistake of waiting too long to trim wilting leaves, leading to stress accumulation in the plant. If left unchecked, wilting can spread beyond the affected leaves, causing stress to stems and roots. A common pitfall is not checking for hidden damage or prolonged wilting; it’s crucial to look for subtle signs like discoloration on inner leaves before they become fully wilted. These early signs often reflect a loss of vitality due to overwatering, which can lead to further complications if not addressed. Immediate action not only helps mitigate the impact of overwatering but also boosts the plant’s morale, giving it a fresh start for recovery. Regularly inspect the orchid for any new signs of stress so you can act promptly if needed, creating a habit that promotes ongoing plant health.
Step 2 – Diagnose Overwatering Issues in Orchid Roots
Start by removing your orchid from its pot and inspecting the roots for any signs of rot. Trim away any brown or mushy roots with sterilized scissors, then repot the orchid in fresh, well-draining potting mix. You should see the plant perk up within a few days as it begins to establish healthier roots.
Overwatering leads to a lack of oxygen in the soil, causing roots to suffocate and decay, which in turn results in wilting leaves. When roots are healthy, they take up water efficiently, supporting the plant’s structure and turgor. However, if the roots are damaged, the plant cannot hydrate properly, leading to noticeable drooping and sometimes yellowing of leaves, contrasting with the upright condition of properly hydrated orchids.
If the soil smells sour, it indicates anaerobic conditions and severe root rot, necessitating a more drastic approach. In this case, remove the plant entirely and thoroughly clean the roots under running water to eradicate any diseased tissue, then repot in a sterile environment. Alternatively, if wilting occurs alongside brown leaf tips, check moisture levels as this may signify underwatering, necessitating a different watering schedule.
If you notice that roots are turning dark brown or black and feel mushy to the touch, these are clear signs of rot. To combat this issue, gently remove the orchid from its pot and examine the root system, cutting away any damaged roots with sterilized scissors. Focus on trimming at the healthy tissue, as this minimizes the chance of further damage. Be cautious and avoid cutting into any healthy roots, as losing these can significantly impede recovery. Always make sure you have a trusted orchid potting mix on hand before performing this step to prevent future issues; a suitable mix allows for better aeration and drainage, crucial in preventing recurrences of overwatering.
Should you find that the roots are healthy and firm, this indicates that overwatering effects may be limited to the surface. In this case, adjust your watering frequency and allow the surface soil to dry out before the next watering; this could take several days. Ensure that the pot has adequate drainage to allow excess moisture to escape, which is crucial for maintaining a healthy root system. However, if you often see signs of wilting despite firm roots, it can indicate that the orchid is still struggling with previous damage, often requiring time to fully recover. A typical sign of healthy roots is a firm, white appearance, whereas any black coloration is a warning that corrective measures must be taken. If you determine that drainage is poor, repotting may become necessary to ensure longevity. Additionally, consider how the potting medium breaks down over time; old media can retain water more, exacerbating these issues.
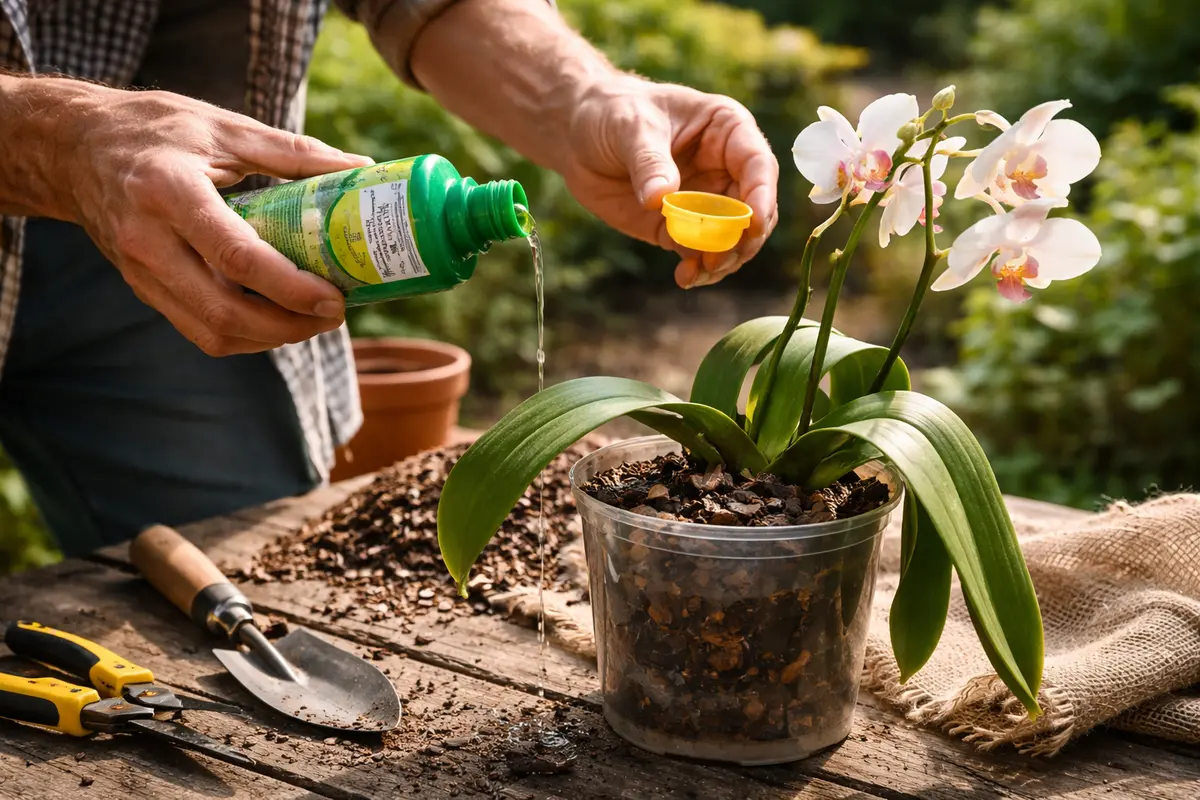
Step 3 – Provide Orchid Recovery Nutrients for Growth
Start by removing the orchid from its pot and gently rinsing the roots under lukewarm water to eliminate excess soil and moisture. Trim away any blackened or mushy roots to prevent further decay. After re-potting with fresh, dry orchid mix, look for signs of improvement like fresh green root tips or upright leaves within a few weeks, which indicate recovery. Establish a routine where you check the moisture level weekly and water only when the top inch of the medium feels dry.
Recovery typically takes 2 to 4 weeks, depending on the severity of overwatering and the orchid species. Monitor the conditions closely; for instance, an orchid in a bright, indirect light setting recovers faster than one in a dark room, which may lead to ongoing issues. If the leaves start drooping again despite proper care, check for overly compacted potting medium that can hold too much moisture.
A common mistake during the transition to recovery is instinctively watering again too soon after changing the medium. Delaying watering for a longer period enables roots to heal and adapt. If the orchid continues to show signs of wilting despite adequate moisture checks, adjust your watering schedule to accommodate its environment, reducing frequency in more humid conditions and increasing it in drier air.
The recovery timeline for orchids is usually a few weeks, with noticeable signs like the leaves regaining firmness and color returning. Overwatering often leads to root rot, which can recur if you water too frequently despite the visible wilting. If your leaves still droop after adjusting your watering, check the root condition; if they appear soggy, you may need to reduce the frequency even further.
A common mistake during the transition from recovery to prevention is immediately resuming a previous watering routine, which may lead to repeating the cycle of overwatering. Adjust your timing based on the potting medium—more moisture-retentive mixes may require less frequent watering compared to bark-based mixes. If your orchids continue to struggle despite following these guidelines, check for proper drainage and ensure your pots have sufficient holes.
Using a balanced, diluted fertilizer encourages roots to rebuild and recover, aiding the process of nutrient absorption. Orchids thrive with a careful balance of nutrients, particularly nitrogen, phosphorus, and potassium, so be mindful to choose a fertilizer that provides these elements. If there’s a noticeable lack of new growth, it may indicate that roots are still in distress or that nutrient levels remain insufficient. Providing these nutrients at the correct intervals can lead to successful regrowth, especially after the stress of overwatering. As fertilizer can build up in the soil over time, it’s recommended to flush the pot with water every few months to remove build-up.
Be cautious not to oversaturate the soil while offering recovery nutrients, as applying fertilizer to wet soil can lead to root burn. Many gardeners inadvertently apply fertilizers too frequently or in excessive concentrations, which can harm the plant further. Establish a consistent feeding schedule, such as every 4-6 weeks during the growing season, to ensure your orchids receive the nourishment they need without the risk of overapplication. Moreover, observe your plant: if you notice yellowing or leaf tip burn, these are key indicators that feeding should be adjusted, as over-fertilization is often mistaken for normal leaf stress.
Step 4 – Inspect Orchid Soil Moisture Regularly After Recovery
Start by checking the soil moisture level immediately. Use your finger to probe about an inch into the soil; if it feels soggy, hold off on watering for another week. Observe the leaf texture and color closely; they should begin to regain firmness and vibrancy within a few days of adjusting your watering schedule.
A fully recovered orchid will display plump, green leaves that feel firm to the touch and vibrant colors without any signs of browning or shriveling. In contrast, early signs of the problem returning include leaves that begin to yellow or lose stiffness, signaling potential overwatering once again. If only a few lower leaves appear limp but the upper ones remain healthy, inspect the roots for signs of rot.
If the wilting returns despite following these steps, consider repotting the orchid in fresh, well-draining medium to prevent further root damage. If symptoms persist, escalate by referring to specialized resources or consult with an orchid care expert to zero in on potential root issues that may not be immediately visible.
Healthy orchids will display signs of resilience, such as firm stems and plump leaves, suggesting that the plant is bouncing back from its ordeal. Conversely, should you notice signs of wilting or discoloration returning, this indicates that the plant may be experiencing moisture-related stress again. To better understand how moisture levels affect plant health, try adjusting the frequency of watering based on environmental conditions; factors such as humidity, light exposure, and pot size can all influence how quickly the soil dries out. Setting a consistent watering schedule based on these needs is key to preventing future episodes.
If you find moisture consistently building up due to poor drainage, consider repotting into a more suitable mix that allows for greater airflow. This is a common oversight among gardeners who may be reusing old soil or pots without drainage holes. Excess moisture can lead to root rot, while soil that holds too much water can foster fungal growth, compromising the health of your orchids. Regular irrigation checks need to focus on the texture and drainage behavior of the potting mix. Further, using pots made from materials like clay, which allow moisture to evaporate more effectively, can lead to better control over watering schedules. Establishing these routines will create a proactive habit, allowing you to identify issues early and ensure the health of your orchids long-term.
FAQ
How long does it take for my orchid to recover from overwatering?
The recovery timeline for an orchid after overwatering can vary based on the extent of root damage, but noticeable improvements may begin within 2-4 weeks post-treatment. Factors like the type of orchid, environmental conditions, and care following the incident all influence the rate of recovery. If the orchid has experienced severe root rot, recovery efforts may take longer, possibly several months, but careful monitoring can significantly help with timely interventions.
Can overwatering spread to other plants in my collection?
Yes, overwatering can indeed lead to fungal issues that may spread to nearby plants, especially if they share the same growing environment or water. If any neighbors exhibit symptoms like root rot, wilting or darkening leaves might be signals of underlying moisture problems affecting multiple plants. It is critical to monitor surrounding plants for any signs of distress following an overwatering incident; employing frequent checks can prevent broader impact within your collection.
Should I remove all affected roots when repotting my orchid?
You should only remove the severely damaged roots when repotting your orchid; healthy roots need to remain intact to support recovery. Aim for clean, white roots that are firm, while cutting away any dark or mushy sections to prevent further rot. If you’re unsure about the health of a root, it often helps to make a clean cut to reduce the risk of introducing more bacteria or mold. Remember to observe closely after repotting, as new root growth will progressively emerge, indicating the orchid’s return to a healthier state.