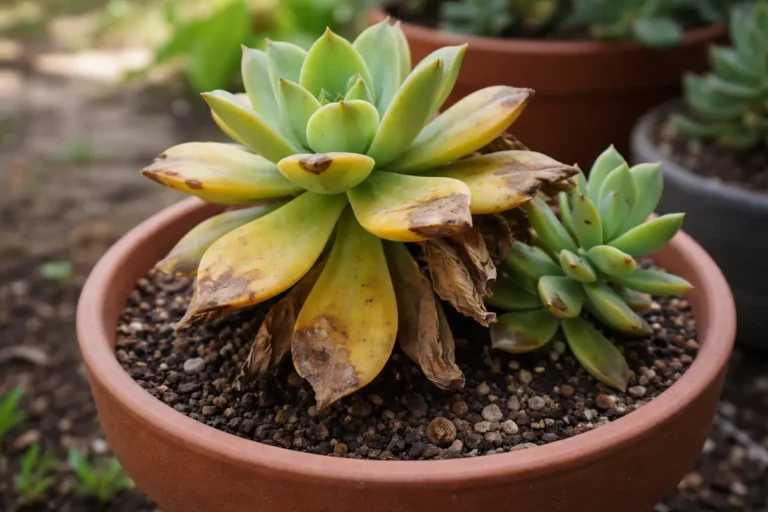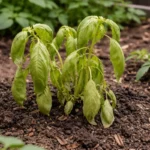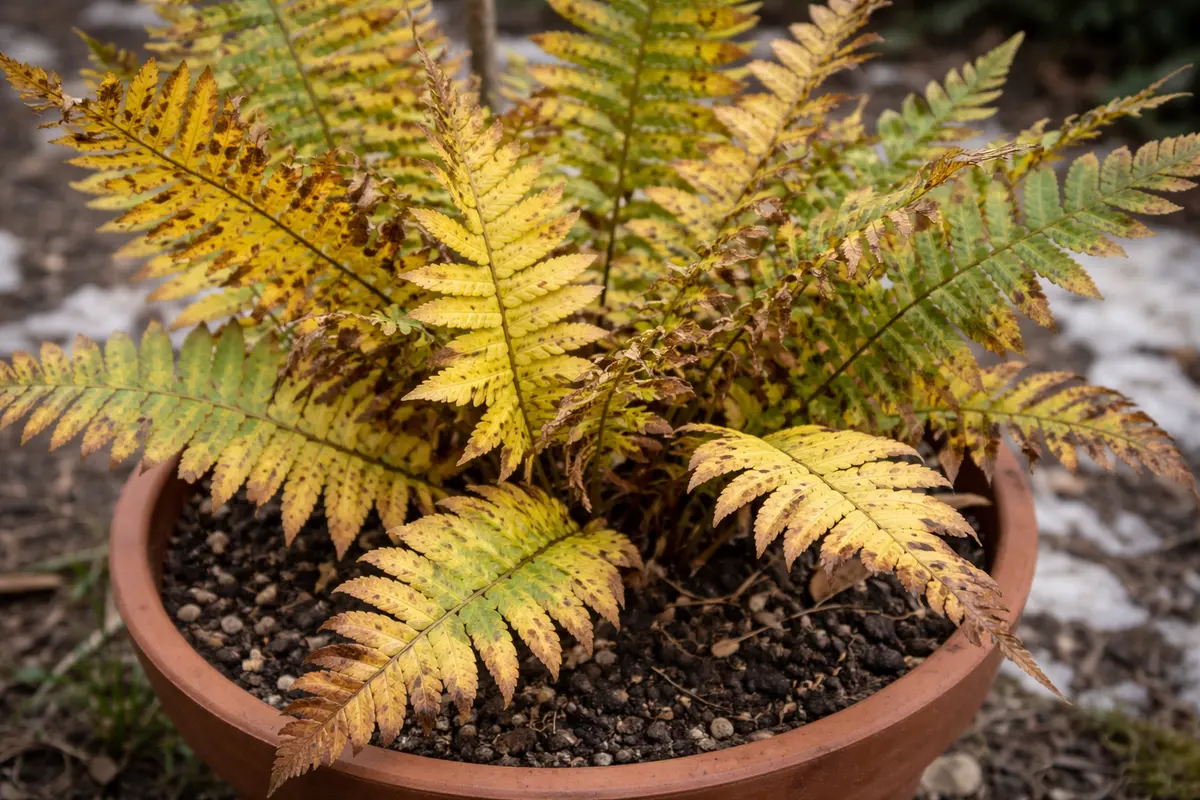
You may notice your ferns showing signs of distress, such as yellowing leaves, particularly during winter, which is why you need to know why are my potted ferns turning yellow during winter. This yellowing often indicates an underlying issue, such as insufficient light or overwatering, leading to problems like wilting and drooping. If left unaddressed, the situation can worsen, weakening the plant and making it harder to restore its health, but fixing it is possible now—just adjust the light conditions and monitor your watering schedule.
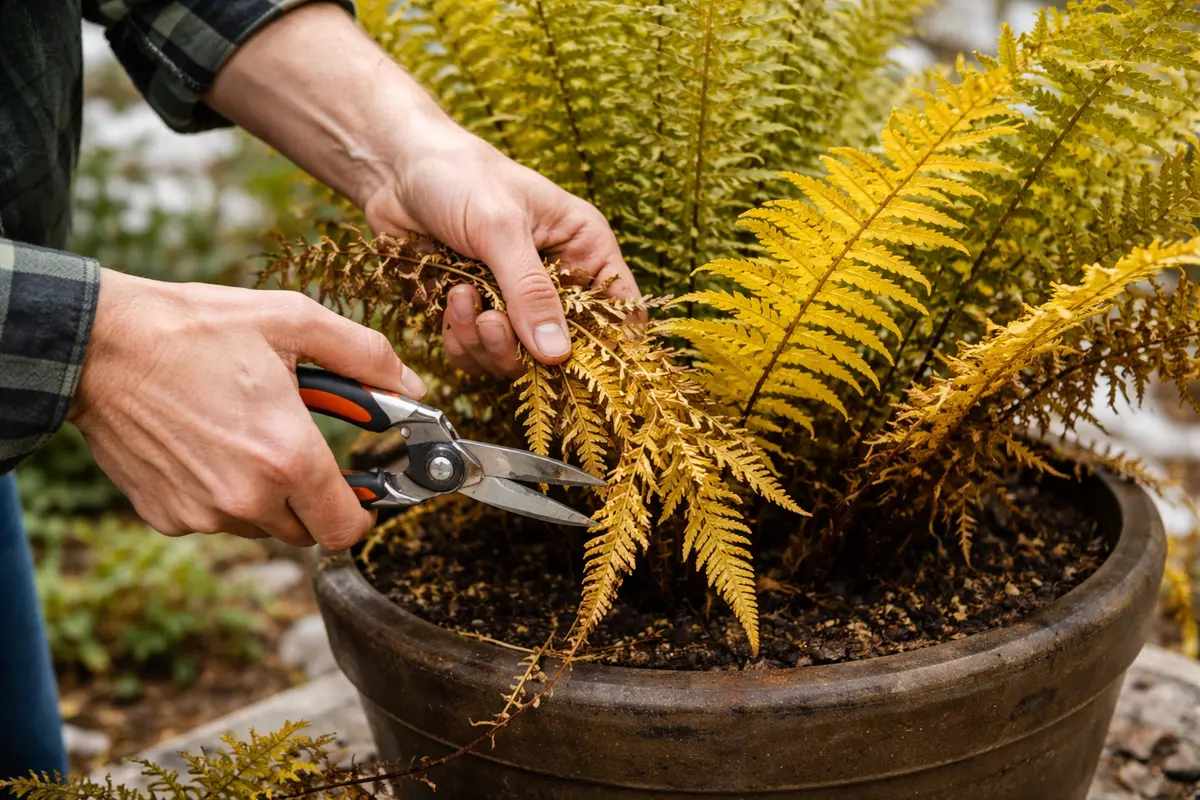
Step 1 – Trim Yellowed Fern Leaves Immediately
First, move your potted ferns to a location where they receive indirect light but are sheltered from drafts and cold temperatures. Check the soil moisture; if it’s dry, water the plant thoroughly, ensuring that excess water drains out. Within days, you should notice the yellowing leaves stabilizing, with some signs of new, healthy growth beginning to emerge.
Acting quickly is crucial because ferns are sensitive to changes in their environment, especially temperature and moisture levels. If the yellowing progresses without intervention, the roots may begin to rot due to overwatering or drying out, leading to irreversible damage. If you see consistent yellowing but the soil is wet, check the root condition; healthy roots should appear firm and white, while rotting roots will be mushy and black.
For instance, a gardener I know noticed her ferns turning yellow as soon as winter arrived, but she delayed adjusting their environment. When she finally moved them indoors, most of the roots had already rotted, leading to a loss of her plants. This illustrates the importance of prompt action; if you see early yellowing in the leaves but the light conditions seem adequate, check for changes in watering routine as well.
Trimming yellowed leaves is crucial as it helps the fern allocate nutrients more effectively, minimizing resource waste on dying parts. Ferns, especially during winter, are more susceptible to root rot and disease when they display yellow leaves. This often indicates erratic watering or nutrient deficiencies. Removing these stressed leaves promptly not only improves the plant’s appearance but also mitigates the risk of further complications, such as attracting pests. The fungus can thrive on decaying leaves, making the situation more severe if you allow them to linger.
A common mistake gardeners make at this stage is being overly cautious, hesitating to cut off yellow leaves. Delaying this action can exacerbate the problem, as the foliage can become a breeding ground for pests or fungi. If yellow leaves are left on the plant for more than a week, you increase the risk of those leaves decaying on the soil’s surface, further attracting undesirable insects. If you notice a significant number of yellow leaves, prioritize removing the most affected ones first, as this can help maintain plant vitality, allowing for a better recovery overall.
Step 2 – Inspect for Improper Lighting Issues
Check your ferns for signs of insufficient light immediately, adjusting their position if necessary. After relocating them to a brighter spot, you’ll likely notice that the remaining green leaves appear perkier within a few days as they start to respond positively to the increased light levels. Ferns thrive in bright, indirect light and can become stressed if deprived of adequate illumination, leading to yellowing leaves.
Insufficient light is often the culprit behind yellowing leaves; when ferns do not receive enough sunlight, they cannot photosynthesize efficiently, stunting their growth. This deficiency results in weakened leaf structure, ultimately leading to discoloration and leaf drop. By providing the right amount of light—typically around 10-14 hours of indirect sunlight—you help restore their natural vigor and promote healthier growth patterns that can combat yellowing. If you find that your ferns are leaning towards the light source, this is another sign they are not getting enough light, which can indicate the need for a move.
If relocating the ferns does not yield improvement, inspect for other influencing factors such as temperature extremes or too much direct sunlight, which can also cause stress and contribute to color changes. Ferns can exhibit yellowing if they are exposed to direct sunlight for prolonged periods, which can scorch their delicate leaves. If the ferns are positioned near heat sources like radiators, the drying effect can exacerbate this issue. Keeping a thermometer nearby to monitor temperatures around your ferns can help ensure they are in an environment conducive to their health, avoiding frozen or highly hot air. Always take note of the humidity surrounding your ferns; an environment that mimics their natural habitat can do wonders for their recovery.
Step 3 – Utilize Fertilizer for Fern Recovery
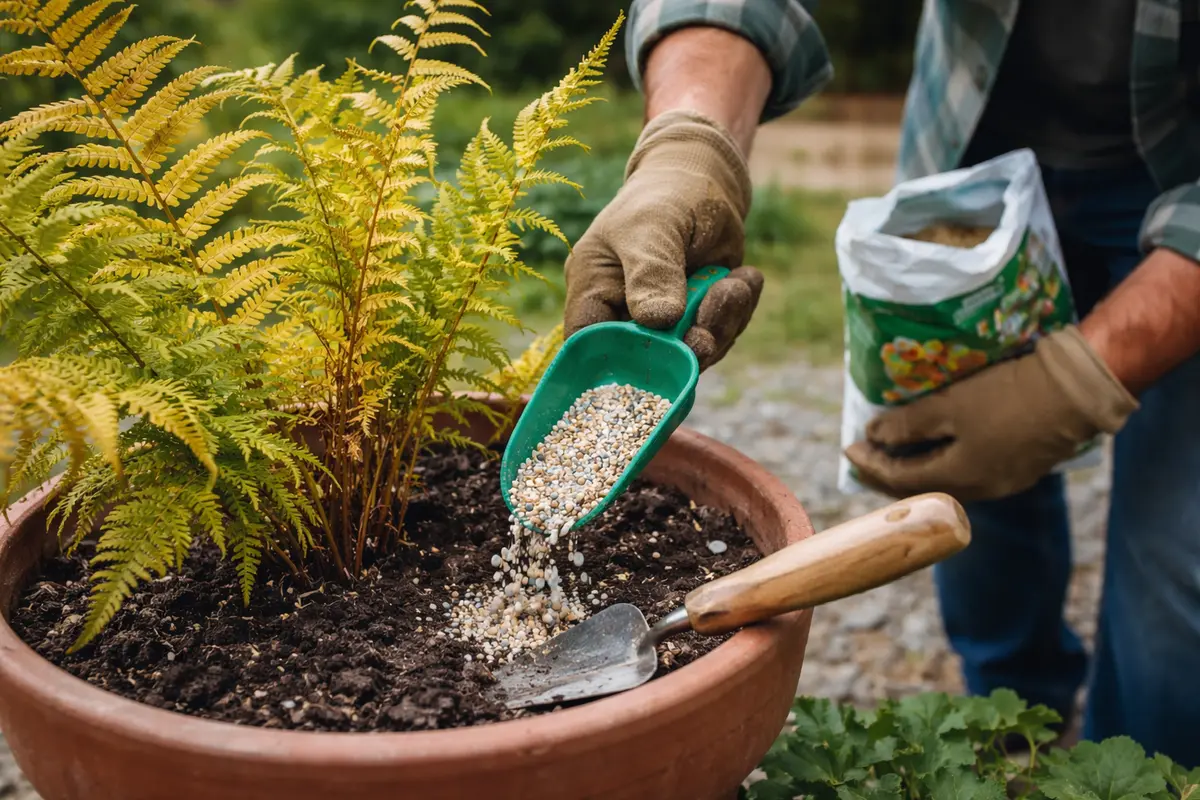
Apply a balanced, water-soluble fertilizer to your ferns to bolster their nutrient intake. After a week, healthy signs of recovery such as new green growth and the rich emerald color returning should become evident. Fertilizing ferns enhances the overall health of the plant, allowing it to recover from the various winter stressors that contribute to yellowing leaves. Fertilizers should ideally contain equal parts nitrogen, phosphorus, and potassium (N-P-K) to maintain balance.
Utilizing fertilizer helps replenish any essential nutrients the ferns may be lacking, especially potassium and nitrogen, which are crucial for foliage health. During winter, ferns often experience slower growth, resulting in a heightened need for nutrient supplementation when you notice deficiencies expressed through yellow leaves. A boost from fertilizer can significantly accelerate the recovery process and restore vibrancy to your plants, but make sure to dilute it to at least half-strength to avoid overwhelming the fern.
A mistake many gardeners make during recovery is over-fertilizing, which can lead to nutrient burn, wilting, or even yellowing leaves returning. To avoid this, always follow the manufacturer’s recommended dosage, generally around half-strength for sensitive plants. Allow the ferns time to respond before reapplying; typically, waiting 4–6 weeks provides a clear timeline to evaluate their condition. Monitor your ferns closely for any signs of stress that could indicate that the fertilizer isn’t working as intended—such as curling or browning leaf edges—and adjust your feeding schedule accordingly. If after several weeks you do not see any positive changes, consider switching to a different formula that might offer a better nutrient profile for your specific type of fern.
Step 4 – Adjust Watering Habits During Winter
Start by relocating your potted ferns to a spot where they receive bright, indirect light during winter. This shift will help maintain their green foliage and prevent further yellowing, as the plants will be better equipped to photosynthesize. It’s critical to monitor both light conditions and watering carefully, as erratic moisture levels can lead to yellow leaves.
Potted ferns often turn yellow when exposed to low light conditions, which can lead to stress and inadequate growth. By ensuring they receive ample indirect light, the roots can absorb the necessary nutrients effectively, contrasting with plants left in a dark corner that risk fading or dying. If the ferns still show signs of yellowing after adjusting light conditions, check for overwatering, as soggy soil can also cause stress. Regularly checking the top inch of soil for dryness can help ensure you only water when necessary; this is usually a good indicator that moisture levels are adequate for the plant’s needs.
In colder months, you might also consider using a humidity tray under your ferns, filled with water and pebbles, to boost moisture levels. This additional humidity compensates for dry indoor air, which can exacerbate yellowing if the environment is overly dry. If you notice persistent yellow leaves despite adjusting light and humidity, check for signs of pests or disease affecting the leaves. Furthermore, if you are overwatering, it may cause the roots to appear mushy or even develop a foul smell, indicating root rot—a serious condition that requires immediate attention and potential repotting.
During winter, as fern growth slows down, they require significantly less water, with their uptake diminishing considerably. Overwatering can lead to root suffocation and a decline in the plant’s overall health. To achieve optimal moisture levels, use a quick-draining potting mix specifically designed for ferns that enhances drainage without sacrificing moisture retention. Monitoring moisture levels closely allows you to provide what they need without encouraging the conditions that could lead to yellow leaves next winter. Many gardeners mistakenly assume that ferns need as much water in winter as they do in spring and summer. This can often lead to problems, particularly if your ferns consistently sit in a waterlogged pot. If you find root rot setting in, immediately stop watering; if the roots are soft, trim back the rotted portions and allow the remaining healthy roots to dry out before repotting them in fresh soil.
Step 5 – Look for New Growth After Adjustments
Check for new growth every few weeks, as it indicates the adjustments made are producing positive results. Within 4-6 weeks after implementing the actions discussed, you should see fresh green fronds emerging from the center of the fern. This development demonstrates the plant’s responsiveness to the care and adjustments made, reinforcing the path toward recovery. Signs of vigor in the new fronds indicate that the plant is adapting well to its adjusted environment.
A fully recovered fern will display vibrant green growth and firm stems, which are crucial indicators that your plant is revitalizing and regaining its strength. Conversely, if you observe that old fronds continue to yellow despite improved conditions, it may suggest a failed recovery. Regular monitoring during winter allows you to catch issues early, preventing them from escalating to more severe problems that could threaten the overall health of your plants. If new sprouts emerge discolored, this might indicate that while conditions are thoughtful, they still fall short for some reason, necessitating a reevaluation of the light, water, or nutrients provided.
If old growth continues to worsen despite your adjustments, consider consulting a professional to evaluate any pest infestations or diseases that may not respond to casual home care. Being proactive with your monitoring makes it easier to tackle problems at their root before they escalate, ensuring that your health and vigor remains intact. When viewing your ferns, look for signs of alertness—such as the turgidity of leaf shape and any potential budding, which signify that your interventions are having the desired effect. If you don’t see any new growth after a month, consider looking into plant diseases or even potential pot incompatibilities that could be causing root suffocation.
FAQ
How long does it take for my ferns to recover after adjustments?
Recovery time for ferns can vary based on the specific conditions and the extent of the issues they faced. Typically, you can expect to see noticeable improvements within 4 to 6 weeks following adjustments to light, watering, and fertilization. Keep in mind that some ferns may take longer to bounce back based on their original health and the severity of the stress they experienced; patience is key during this recovery stage.
Can yellowing spread to other leaves if not treated?
Yes, if yellowing leaves are not trimmed, the stress can indeed spread to healthier parts of the plant. Promptly removing affected leaves limits the risk of further damage while also allowing the accepted care practices to work more effectively. Over time, neglected yellow leaves may lead to a systemic decline of the fern, leading to significant challenges in maintaining overall plant health. Always stay vigilant and work towards creating an environment that channels their recovery.
Should I remove all yellow leaves immediately?
While it is essential to remove visibly yellow leaves, avoid stripping the plant entirely in one go. Instead, focus on trimming the most visibly damaged ones first, allowing the fern to adjust without placing too much stress on it during recovery. This selective approach not only promotes better health but also gives the plant the best chance of regaining its strength by preserving its energy and resources for recovery, drawing from the healthy parts of the plant to encourage regrowth in the remaining foliage.