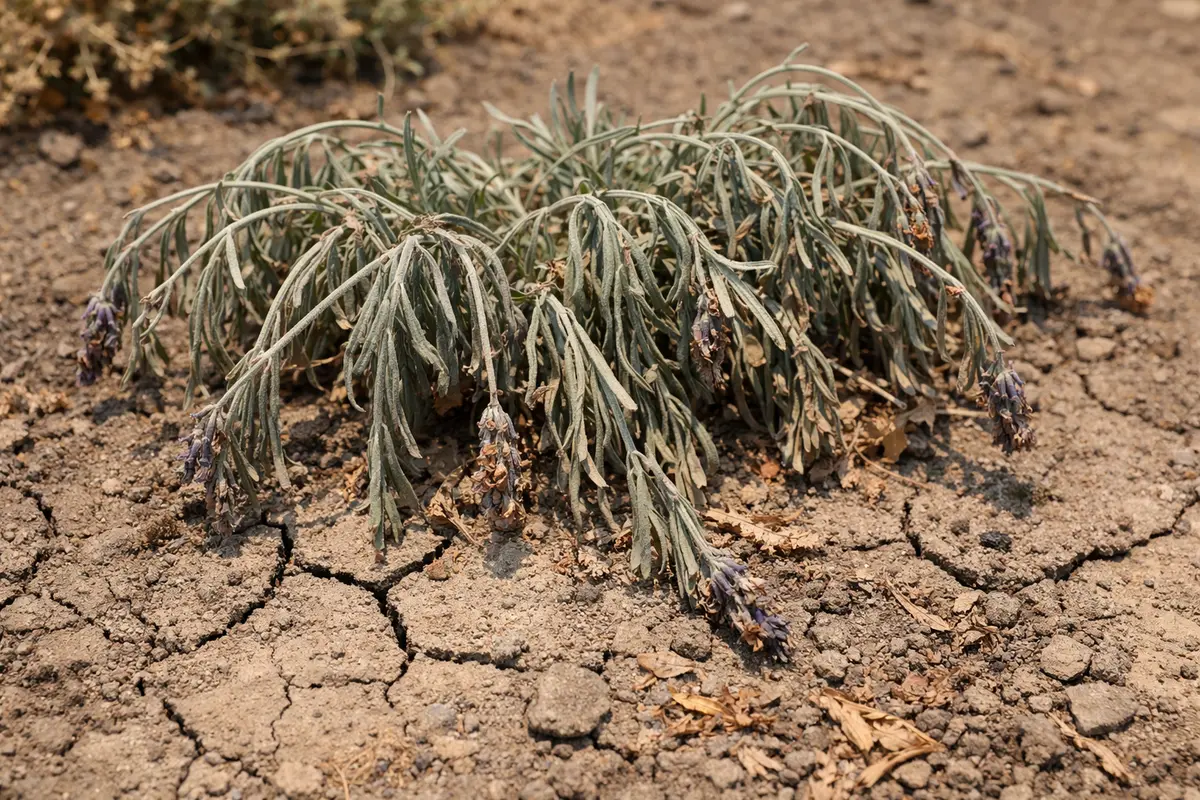
You may notice your lavender plants looking particularly saggy during the intense heatwaves, which is why you need to know what to do if lavender plants droop during heatwaves. This drooping often occurs because the plants are struggling to retain moisture in the extreme conditions, leading to wilting and a loss of vigor. If left unaddressed, this issue can worsen, ultimately weakening the plant and setting it back in growth, but don’t worry—fixing it is possible now by adjusting your watering routine and providing some shade. Check the soil moisture and monitor the plants closely to ensure they bounce back to health.
Step 1 – Water Lavender Plants Immediately
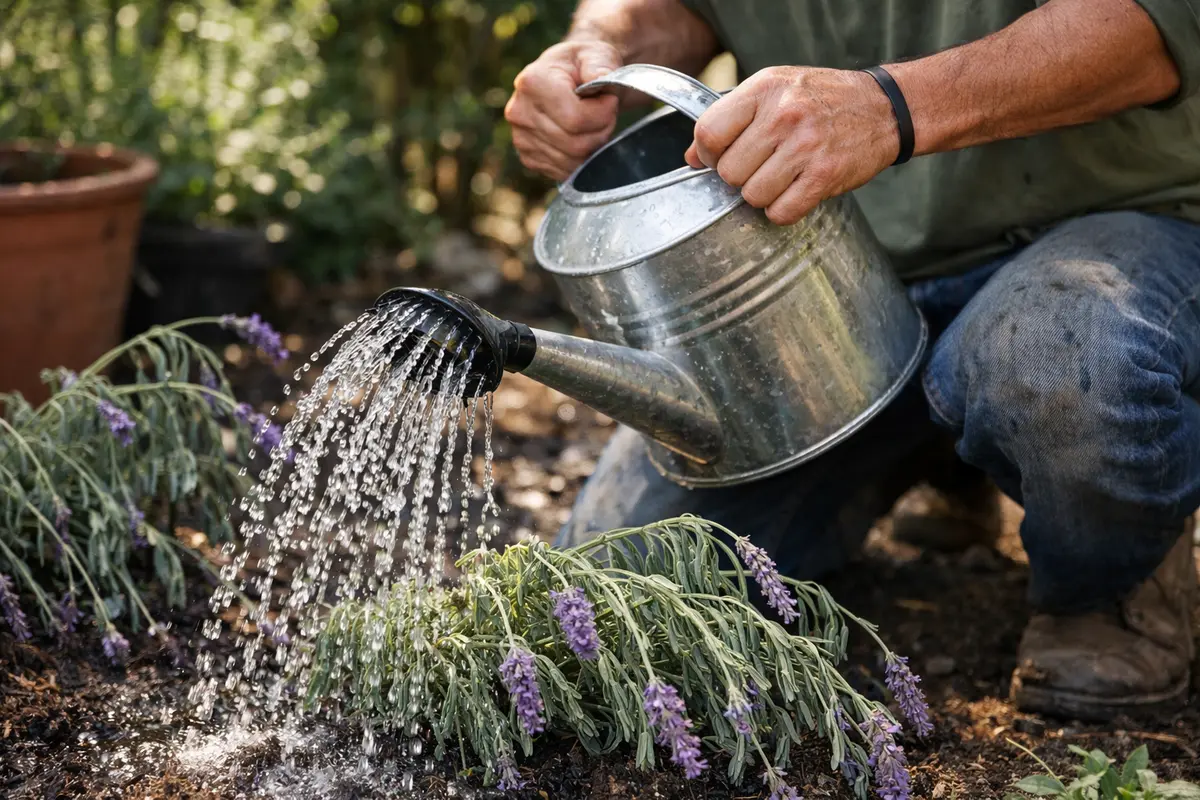
Water your lavender plants deeply and thoroughly. You should see the soil become moist, with some water pooling at the base of the plants shortly after watering. Aim for approximately one inch of water per week, increasing slightly during heatwaves to reflect the increased evaporation rates. If it has been particularly hot, consider watering twice in one day, early in the morning or later in the evening when temperatures are lower.
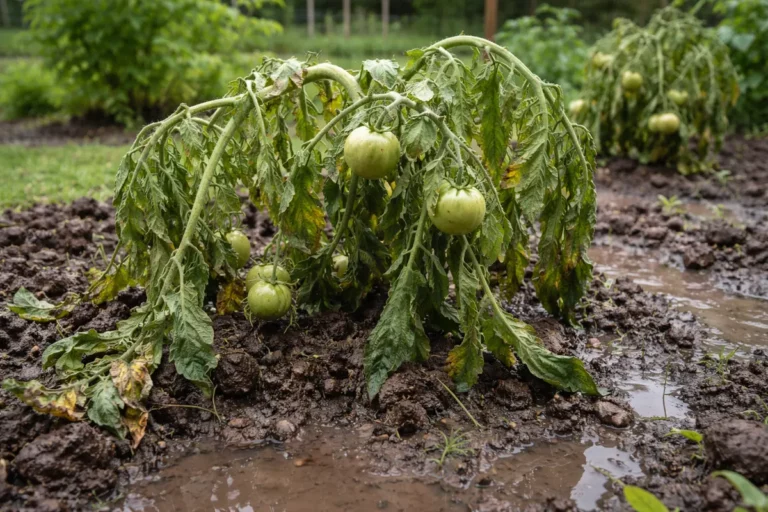
Watering immediately helps restore moisture lost during the heat and can perk up drooping plants within a few hours. Lavender prefers well-draining soil, but during heatwaves, it may easily dry out, leading to drooping leaves as they struggle to retain hydration. If you notice that your lavender has taken on a grayish hue, this is a sign that it is not receiving adequate moisture. Alternatively, if the soil feels excessively wet an hour after watering, you may need to adjust your watering schedule to prevent waterlogging. Under prolonged heat, the same plants may show are ferns wilting during heatwave.
A common mistake at this stage is to water too shallowly, which only saturates the top layer of soil but does not reach the roots. If you notice that the drooping returns shortly after watering, it may be an indication that the roots are not getting adequate moisture. Ensure you are watering deeply enough to allow moisture to penetrate at least six inches into the soil; you can verify this by digging slightly with your finger or a small garden trowel. If the soil feels dry past that depth, you are not watering sufficiently. Additionally, if you see signs of algae forming on the soil surface, this may suggest over-watering rather than healthy drainage.
Step 2 – Check for Root Rot in Lavender
Inspect the base of your lavender plants for signs of root rot. If the roots appear brown or mushy while the foliage is wilting, this can lead to weak stems and drooping. It’s critical to check the drainage to ensure excessive moisture isn’t the underlying issue. If you notice that the soil feels overly saturated and smells unpleasant, this can be an indicator of anaerobic conditions that contribute to root rot.
Root rot occurs when excess moisture sits around the roots for too long, suffocating them and causing them to decay. Conditions such as compacted soil or improper pot drainage can exacerbate this issue. If you observe any black or mushy roots during your inspection, the plant cannot absorb water and nutrients, further exacerbating wilting during hot weather. If you are uncertain about root health, gently tug on the plant; a lack of resistance may indicate that the roots are compromised. In poor drainage conditions, plants may also develop wilting tulips after prolonged rain.
If you notice sour or foul-smelling soil during your inspection, it’s crucial to take immediate action. In such cases, remove the plant from the pot or garden bed, trim away any rotten roots, and allow the healthy roots to dry out for a couple of hours before repotting in well-draining soil. Make sure to choose a pot with drainage holes if potted; otherwise, consider amending your garden bed’s soil composition. Timing is essential—waiting too long will increase the risk of losing the entire plant. If root rot is found, also consider applying a fungicide to the remaining roots to prevent further decay. If root rot has advanced too severely, replanting might be necessary, and in particularly dire cases, you may need to start fresh with new plants.
Step 3 – Trim Back Wilted Lavender Stems
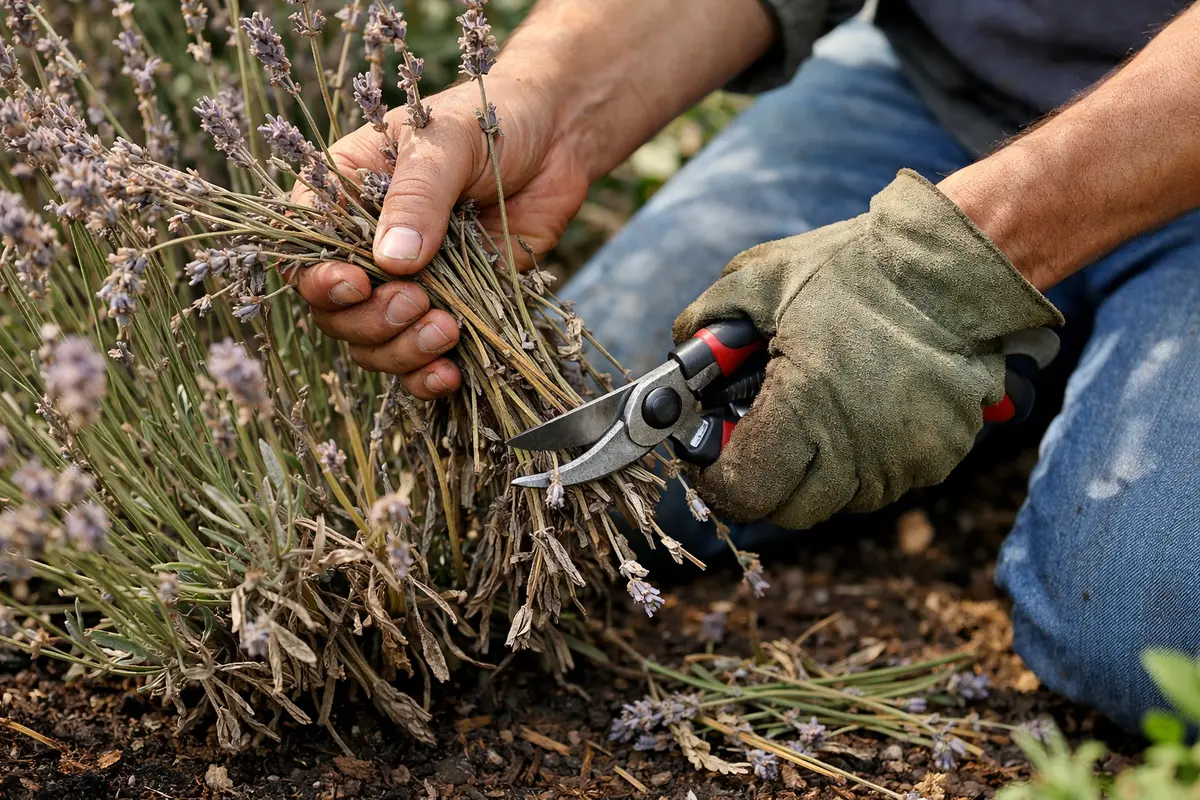
Cut back any wilted or dead stems to encourage new growth. Within a week, you should begin to see fresh, healthy shoots emerging from the remaining foliage. If your plants are particularly stressed due to heat, taking this action can prevent stagnation and encourage rejuvenation sooner rather than later. Under prolonged heat, the same plants may show is leeks wilting during high temperatures.
Trimming helps the plant allocate its energy toward healthier parts, especially after experiencing heat stress. By removing the wilted portions, you create a more favorable environment for remaining growth to flourish. If left uncut, dead stems can harbor pests or diseases that further hinder recovery. You might notice that trimming results in a visible increase in light penetration around the base of the plant, which can stimulate growth.
However, avoid over-pruning your lavender all at once, as doing so can stress the plant further. Instead, aim to remove only a third of the damaged stems at one time. If you are noticing slow recovery despite the cuts, double-check your soil’s water retention and ensure it is appropriate for lavender, which prefers slightly drier conditions. Additionally, if you find that the plant’s growth continues to decline, consider evaluating factors such as nearby plants that could be causing excess shade or competition for resources. If nearby plants are too close and stealing moisture or nutrients, consider relocating them to provide your lavender with space to recover.
Step 4 – Mulch Around Lavender for Heat Protection
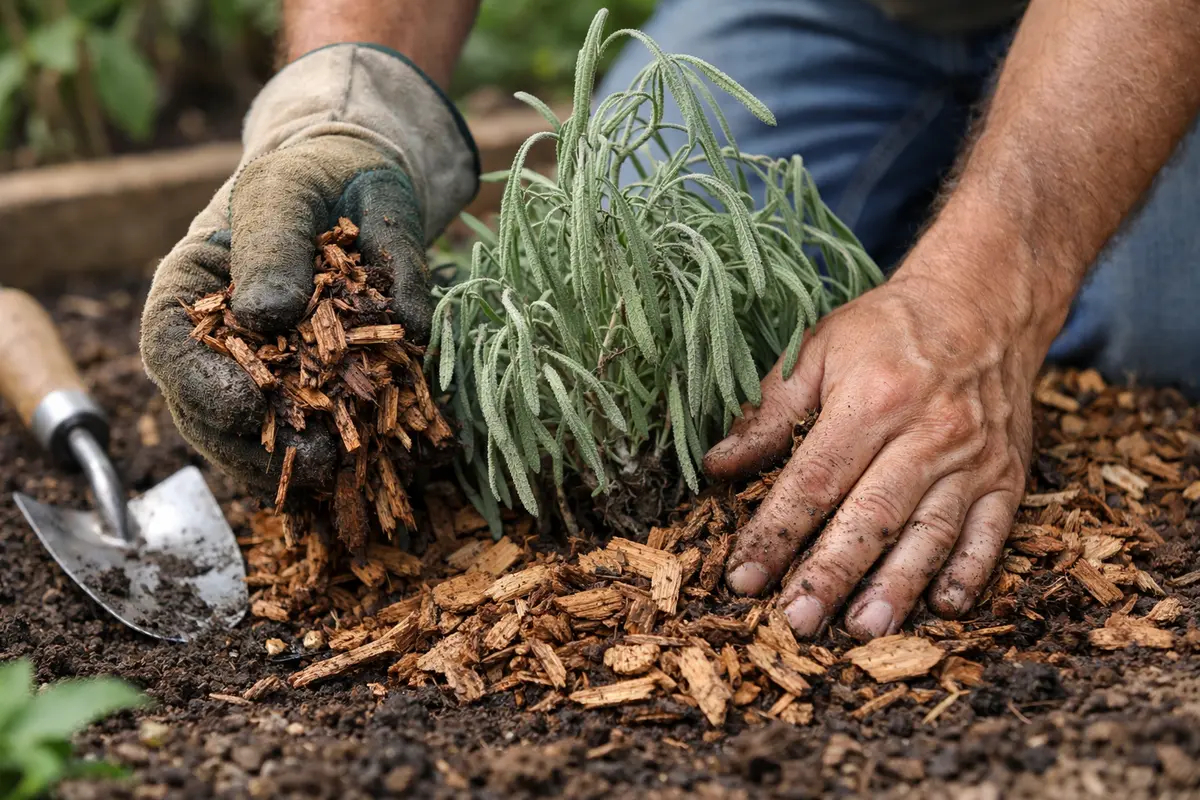
Apply a layer of mulch around your lavender plants to maintain soil moisture and regulate temperature. You will notice the soil staying cooler and moisture levels remaining stable for a longer duration, specifically under intense sunlight. Aim for a three-inch layer of organic mulch, such as straw or wood chips, as these materials not only provide cooling benefits but decompose slowly to enrich the soil. If you struggle with weeds, using mulch can also significantly reduce competition for moisture and nutrients.
Mulching mitigates heat stress by acting as an insulator, protecting the roots from extreme temperature fluctuations and preventing evaporation in high heat. The right mulch can help maintain a consistent temperature at the root level—cooler during hot spells and warmer during cooler nights. Also, organic mulches creatively feed beneficial microbes, further supporting plant adaptability. You can also benefit from incorporating cottonseed meal or compost into the mulch layer, as it provides additional nutrients for the plants.
To maximize the mulch’s effectiveness, consider refreshing your layer before the summer heat peaks in your area, applying it to a depth of about three inches. During prolonged hot spells, check the mulch’s integrity; heavy rains can displace mulch, warranting upkeep to ensure your lavender remains protected. If soil erosion or weed growth appears, replace or top off your mulch layer to maintain its protective qualities for the plants underneath. If you notice any signs of mold forming amidst the mulch, it may be advisable to reduce moisture levels in that area, as mold can indicate too much humidity trapped close to the plant base.
Step 5 – Inspect Lavender for Signs of Stress
Start by checking your lavender plants’ soil moisture levels during the heatwave. Use your finger to probe about an inch into the soil; if it’s dry, water deeply at the base of the plant. Observe the leaves for any signs of stress, such as drooping or browning, and recheck soil moisture every day to monitor any changes in texture or moisture levels. Under prolonged heat, the same plants may show cucumber plants wilting heatwave.
A fully recovered lavender plant shows vibrant green leaves that stand upright and release a pleasant aroma when touched. In contrast, early signs of the problem returning can include leaf tip browning or a limp texture, where leaves appear soft and lose their rigidity. If the foliage begins to yellow while showing signs of droop again, it indicates underlying issues that need urgent attention.
If the lavender plants continue to droop despite adequate watering and care, assess their location for excessive heat exposure or strong winds that may exacerbate stress. As a fallback, create some shade by using shade cloth or relocate your plants to a less harsh environment. If drooping persists even in these conditions, consider checking for root rot by examining the root system for signs of decay.
A fully recovered lavender plant showcases vibrant, upright leaves with a lush green color, whereas early signs of drooping might reveal a faded or crispy texture, accompanied by a slight bend in the stems. If the plant remains droopy but begins to show new growth at the base, it indicates that it’s recovering; however, if the leaves remain discolored and crisp, that points to ongoing stress.
If the drooping persists despite your efforts, focus on improving drainage by amending the soil or consider relocating the plant to a more shaded area during peak heat. Additionally, evaluate the watering schedule: if the plant appears waterlogged yet still droops, it may require less frequent watering to prevent root rot. In poor drainage conditions, plants may also develop root rot in potted cacti.
Recovery is marked by signs of fresh growth and firm leaves. Healthy lavender should have plump, vibrant green foliage and upright stems; keep an eye out for any new sprouts emerging from previously leafed stems. If you do not observe any changes within a week after taking the initial steps, you may need to reassess your watering and soil conditions, particularly in maintaining a proper balance of moisture and aeration. Incorporate gentle movements of the plant to assess the stem’s firmness and detect any issues with its foundation.
If drooping returns despite following these steps, consider evaluating potential pest issues or diseases, which can weaken plants after stress. For example, spider mites may become a problem during heatwaves, indicating that your lavender may not be completely out of the woods. If some leaves start exhibiting a speckled appearance, this may signal the presence of pests. For any severe signs of distress, obtaining professional advice may become necessary to prevent loss, especially if replanting is needed. Additionally, researching appropriate insecticides or organic pest control methods may become essential if pests are a recurring issue in your landscape.
FAQ
How long does it take for lavender to recover after drooping?
Once proper care is initiated, lavender plants can show signs of recovery within a few days to a week. Factors such as environmental conditions, soil quality, and overall plant health will influence the speed of recovery. Generally, expect initial improvement within 48-72 hours of applying adequate water.
Can overwatering cause lavender to droop?
Yes, overwatering can lead to root rot, causing drooping. If the roots cannot absorb water due to decay, this will worsen wilting and stress symptoms. If you suspect overwatering, it may take longer for your lavender plants to stabilize as they slowly regain healthy root structures. Watch for symptoms of drooping that may reoccur, indicating lingering moisture in the soil that might need addressing.
Should I remove all the wilted parts of my lavender plant?
It is best to trim back only the most affected areas rather than removing everything at once. Over-trimming can stress the plant and slow down recovery, so aim to retain healthy growth while managing any dead or wilted sections. In some cases, leaving some foliage intact can help balance photosynthesis during the recovery process. If the plant leads with health, trimming becomes less required in the long-term care plan, allowing natural pruning by seasonal growth instead.