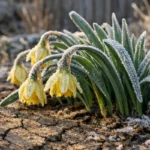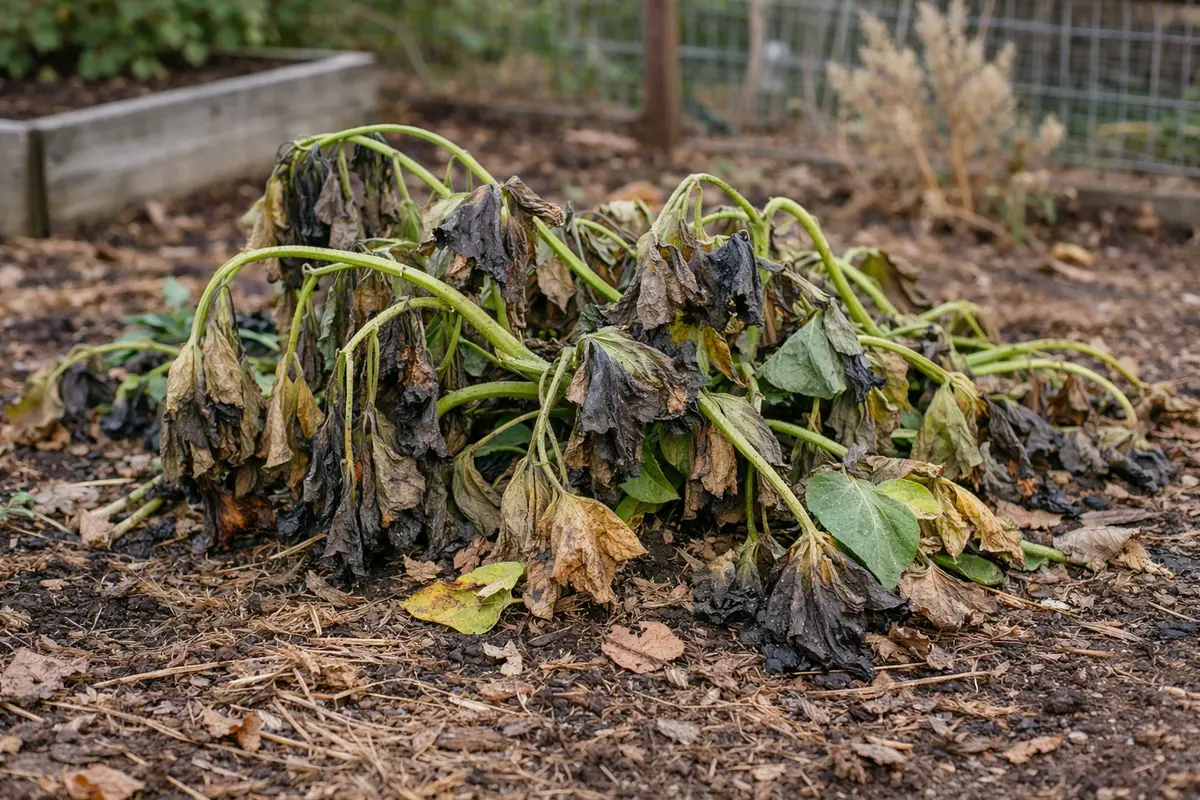
You may notice your sweet potato vines drooping and wilting when the temperatures drop after a frost, which is why you need to know what to do when sweet potato vines wilting after frost. This wilting often occurs because the cold temperatures cause cellular damage to the plant, leading to visible signs of distress. If left unaddressed, this condition can worsen, weakens the plant and stalls growth, but fixing it is possible now, so be sure to monitor, trim, and insulate your vines appropriately.
Step 1 – Prune Wilting Sweet Potato Vines Immediately
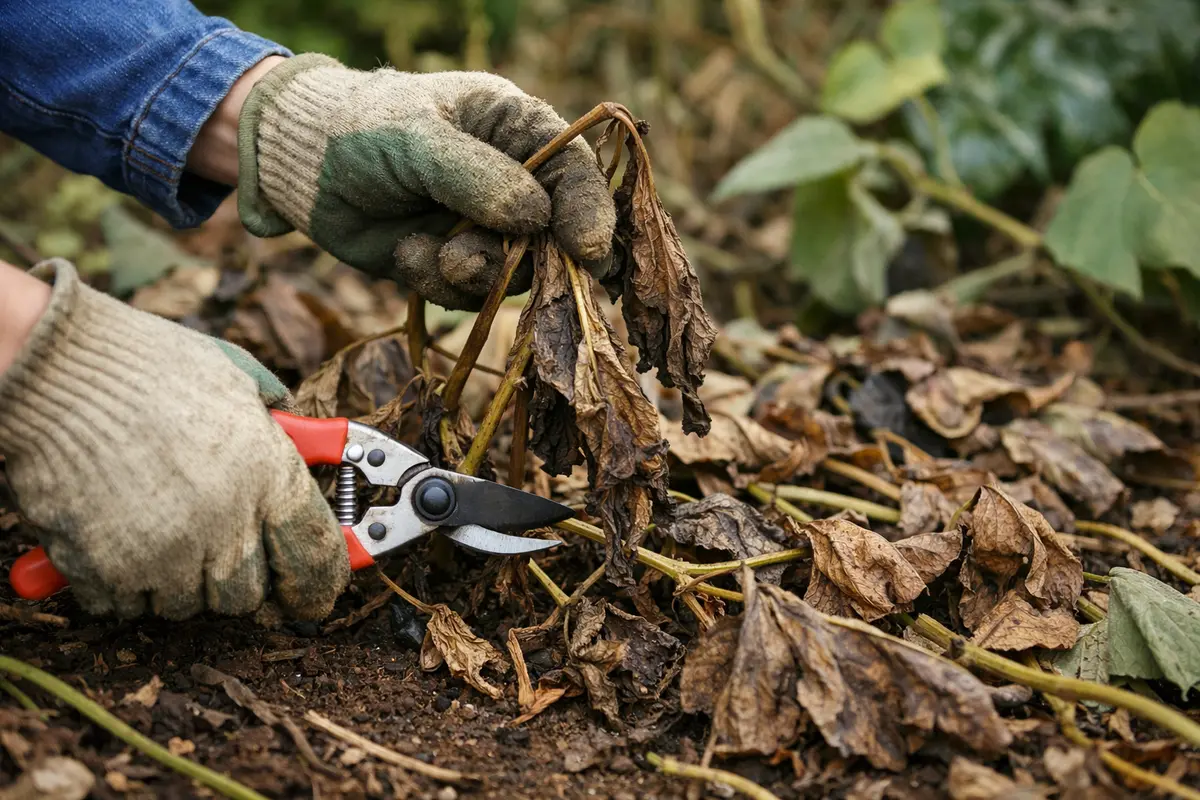
First, cut back the wilted sweet potato vines to about 4 inches above the soil line to limit further damage. After doing this, you should notice that the remaining stems and any healthy leaves begin to perk up slightly as they recover from frost stress, allowing the plant to redirect its energy. This action prevents rot and promotes healthier growth from the root system before the next growing season.
Acting quickly is crucial because sweet potato vines can sustain irreversible damage the longer they remain exposed to cold conditions. When frost occurs, the plant cells get damaged, and delaying action can lead to rot setting in the stems or roots, causing more extensive dieback. If the stems feel mushy when squeezed, check for any signs of root decay or disease; if not mushy, focus on stabilizing the remaining healthy parts.
For instance, a gardener who promptly cut the affected vines saw that their plants rebounded quickly, producing new shoots within weeks, while another who waited found their entire crop lost to rot. A typical mistake is to wait too long believing the plant will recover on its own when immediate action can effectively save significant portions of the harvest.
Quick pruning is essential because it redirects the plant’s energy toward healthy growth instead of trying to revive desiccated foliage. Wilting occurs when the foliage can no longer support transpiration and nutrient flow, particularly after frost damage that compromises cell structures. This initial action helps not only to remove dead weight but also stops the spread of pathogens that thrive in rotting tissue. The act of pruning encourages airflow around the remaining leaves, which is crucial for preventing mold or rot from settling in. For example, if you notice large sections with brown, crisp edges, prioritize their removal to alleviate further stress on the healthy parts. You may notice a slight wilt occurring on the remaining healthy foliage if pruning is done incorrectly, indicating that not enough damaged material has been taken away. When feeding is off, expect signs such as if petunia plants turn yellow.
A common mistake gardeners make at this stage is to leave all the damaged leaves on the plant, thinking it will recover more swiftly. However, if you leave the wilted areas, they can contribute to further decay, obstruct nutrient absorption, and ultimately slow down recovery. This is particularly true in cases where frost impact has caused extensive damage; you may need to be aggressive in cutting back to ensure more reliable regrowth. Diligently assess each stem and leaf, prioritizing immediate action to avoid long-lasting damage. If pruning creates a stark imbalance in the plant’s structure, further trimming may be necessary to maintain stability and support in the root system. Also, remember to keep cutting tools sterilized to prevent introducing infections, which can become easily masked under the stress condition of frost-affected plants, leading to compounded issues later on.
Step 2 – Check for Frost Damage in Roots
Inspect the root system for signs of frost damage by gently digging around the base of the plant. You will notice if any roots are mushy or have a dark color, indicating decay from being compromised by frost. This step may require you to sift through the soil, as hidden root rot can easily go undetected without careful examination. If roots appear healthy, you might feel a firm texture and see a creamy white color, which signals that the plant can recover. Take care to do this gently, as aggressive digging might disturb even the healthy parts of the root system. In poor drainage conditions, plants may also develop lawn yellow spots overwatering.
Examining the roots is crucial because frost can cause tissue damage below ground, preventing the plant from absorbing necessary nutrients and water. Healthy roots are firm and creamy-colored, indicating proper moisture and air circulation, while damaged roots become soft and may emit a foul odor due to rot. If the roots are still intact and healthy, you can confidently support the plant’s recovery; if they’re damaged, it indicates a deficient ability to bounce back and may require more intensive corrective actions. Ensure that your examination goes at least a foot deep since frost can penetrate deeper than expected, impacting roots that may be hidden from the surface view. Look for fine lateral roots, which are crucial for nutrient uptake — they should appear white and crisp, reflecting vitality.
If the soil smells sour during your examination, that’s a sign of over-saturation after frost damage, which can further enhance root decline. In cases of significant damage, you should trim back those affected roots and replace them with a fresh soil mix that improves drainage. If you observe mushy roots, consider options that include compost to encourage beneficial microorganisms while ensuring proper drainage to prevent suffocation in waterlogged soils. After pruning, replant in a location that offers warmth and immediate access to beneficial nutrients, as damaged plants are often in a vulnerable condition and require as much help as possible. Should your examination reveal signs of contamination or widespread rot, it may be advisable to discard the affected plants, as their chances of recovery may be significantly compromised. In such cases, testing soil nutrients afterward should also be reviewed to avoid repeating the problem. In poor drainage conditions, plants may also develop root rot in potted cacti.
Step 3 – Feed Sweet Potato Vines to Aid Recovery

Apply a balanced fertilizer to nourish your sweet potato vines after frost damage. You should notice that, within one to two weeks, new growth starts to emerge, indicating that the plant is beginning to rebound with the help of dedicated nutrition. Use a fertilizer designed for root crops, as it provides additional potassium that sweet potatoes specifically need during recovery, which supports both root establishment and foliage health. Mix the fertilizer into the top layer of soil rather than simply scattering it on top as this ensures better contact with the roots.
Fertilizing is vital for recovery because it provides essential nutrients that may have been depleted, particularly after severe stress from a frost event. Nutrients like nitrogen and phosphorus are crucial in the formation of new leaves and strong, healthy stems while also enhancing the plant’s immunity against future stresses. In a rehabilitative phase, adequate nutrition enables faster recovery and strengthens the plant’s resilience. Look for slow-release fertilizers to minimize the risk of nutrient burn while still processing the significant recovery needs of the plant. Before applying, ensure the soil is slightly moist to aid in nutrient uptake, as dry soil conditions during fertilization can lead to nutrient lockout. If the soil feels compacted, consider aerating lightly before fertilization to improve nutrient absorption.
A frequent mistake during this recovery phase is over-fertilizing, which can lead to a buildup of salts in the soil, causing more harm than good. Instead, stick to the recommended dosage on the fertilizer package, paying close attention to your plant’s size and health. If you find that the soil feels dry only a couple of inches below the surface just a few days after feeding, it might be time to provide additional water after your feeding to create optimal hydration for nutrient absorption. Avoid fertilizing if the plant seems saturated or stressed, as introducing salts can compound issues by effectively burning already weakened roots. Be on the lookout for signs of over-fertilization, like leaf burn or browning edges, which can signal that your feeding strategy needs reevaluation. If you experience stunted growth despite fertilization, your next action may involve reassessing soil pH levels to identify any potential nutrient inhibits or locks.
Step 4 – Inspect Leaves for New Growth After Care
Inspect your sweet potato vines every few days for signs of new growth and green coloration. Look for fresh leaves unfurling or a return to perky, upright stems, as these signs indicate recovery. If you see the plant starting to produce leaves from previously cut portions, it reflects successful ongoing recovery efforts. Early signs of recovery may include brighter green leaf color and smoother leaf edges, indicating new healthy tissue development. This observation phase should include recognizing any color shifts that may indicate further stress or a return to poor health.
A fully recovered plant will feature vibrant green leaves, strong stems, and visible new growth where damaged sections had been cut away. In contrast, if you see browning or wilting persisting, it may mean that the plant is still struggling with hidden root issues or inadequate nutrients in the soil. At this stage of monitoring, attention to detail is critical; take note of any lingering damage because this could suggest chronic underlying issues that need to be addressed. If the plant does not display any visible signs of recovery within three weeks of care, consider diagnosing further into water, light, and nutrient accessibility. If the leaves are yellowing while new growth is present, this could signal over-fertilization; investigate changing your watering routine or evaluate your current fertilization regimen.
If you observe other issues like persistent wilting and discoloration despite the care steps you’ve taken, it may be time to reassess your soil quality or consider obtaining a professional assessment to check for root rot or other underlying problems. Watch for signs of pest activity or fungal infections, which may manifest as spots, web-like appearances, or curling of the leaves. Implementing a routine check on leaves should become a weekly habit until confidence in the plant’s recovery is established. Evaluate any white or black spots, as these often indicate aphids or fungal infections, respectively. Another common situation is root aphid infestation, which not only hinders growth but can cause stunted development—if you suspect this, immediate action should be taken to apply beneficial nematodes as a natural control option.
FAQ
How long does it take for sweet potato vines to recover from frost damage?
Recovery may take anywhere from a few days to several weeks, depending on the severity of the frost and the overall health of the plant. Initially, you might see signs of improvement within one week if the vines receive proper care and nutrition, but more severely damaged plants can take longer to show revival. Monitoring growth can provide cues about the recovery progress, particularly as you see new growth or normal leaf sizes returning. Take note that if conditions remain poor, a second or third recovery effort using different methods may also be required.
Can frost damage spread to other plants?
Generally, frost damage is contained to the affected plant and does not spread to others. However, if the damaged plant has wilted leaves close to others, this might encourage pests to focus on those neighboring plants, so isolate affected plants to prevent potential pest issues. Practicing careful sanitation of tools used on affected plants can also help minimize any risk of introducing diseases to healthy specimens. Ensure that neighboring plants are well-groomed, as debris can enhance pest attraction and inhibit recovery in other plants.
Should I remove all affected leaves from sweet potato vines?
Yes, remove all severely affected leaves to prevent further deterioration and encourage healthy growth. If leaves are only slightly damaged, consider leaving them, as some can still photosynthesize and assist in the plant’s overall health. Balance the need for immediate wellness against the potential functional loss of what remains on the plant while aiming for the best visually supportive structure for regrowth. In cases where only a few leaves show modest damage, it is often more effective to let the plant utilize them while focusing on enhancing roots and overall nourishment.