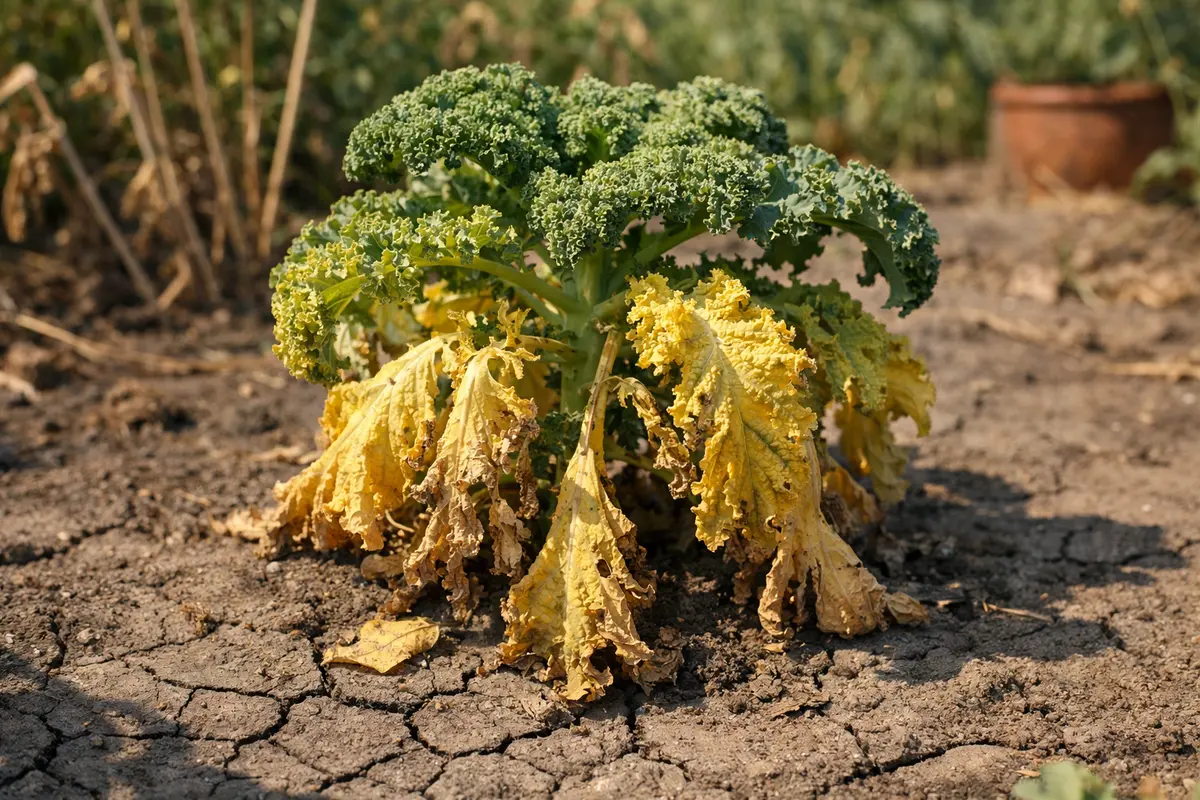
You may notice your kale plants starting to show signs of distress during a heatwave, which is why you need to know what to do when your kale plants turn yellow in heat. This yellowing often occurs due to stress from high temperatures, leading to potential leaf drop and overall plant decline. If overlooked, this issue gets worse and weakens the plant, making it harder to fix, but addressing it now means you can inspect the leaves, adjust your watering routine, and improve their growing conditions.
Step 1 – Water Kale Plants Immediately in Heat
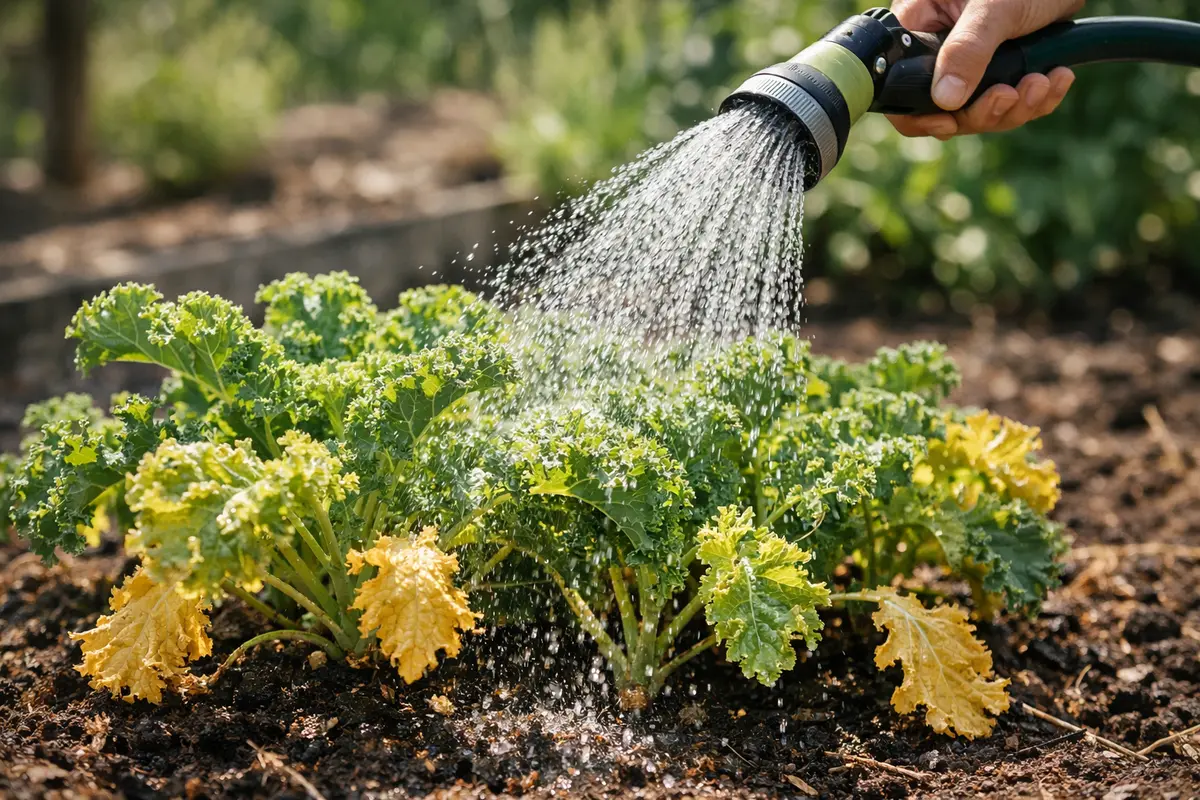
Water your kale plants deeply right away. You will notice the color saturation of the leaves improve within a few hours, and the plants will begin to perk up. Aim to provide at least one inch of water directly to the soil, ensuring it penetrates sufficiently. Watering should be done in the early morning or late afternoon to minimize evaporation during peak heat.
Strong heat can rapidly dry out the top layer of soil, leading to dehydration in kale plants. Kale, being a leafy green, requires consistent moisture to maintain its vibrant green color and prevent leaves from wilting or yellowing. Providing immediate water boosts moisture levels in the soil, allowing the roots to absorb essential nutrients necessary for recovery. If the top layer feels dry but the roots remain moist, the plants may still be in stress, indicating a need to check the deeper soil. If you suspect the soil is compacted, try digging a small hole to see how deeply moisture has penetrated; if it hasn’t reached 6 inches down, your plants need more water. When feeding is off, expect signs such as yellow leaves eggplant drought.
A common mistake at this stage is only lightly watering the plants, which does not penetrate deeply enough to affect the roots. If you find that your kale plants are still drooping even after watering, check the soil’s depth; it may be necessary to water again to ensure moisture reaches down at least 6 inches to effectively hydrate the roots. If the yellowing persists even after proper watering, evaluate the drainage of the soil; compacted or heavy soil can prevent moisture absorption, risking your plants. Consider amending the soil with coarse sand or organic matter to improve drainage in future plantings.
Step 2 – Diagnose Nutritional Deficiencies in Kale
Start by checking the moisture level in the soil around your kale plants. If the soil feels dry to the touch or has become compacted, water the plants deeply until moisture reaches the root zone. After a few days, you should notice a revival in the green color of the leaves as they receive the hydration they need.
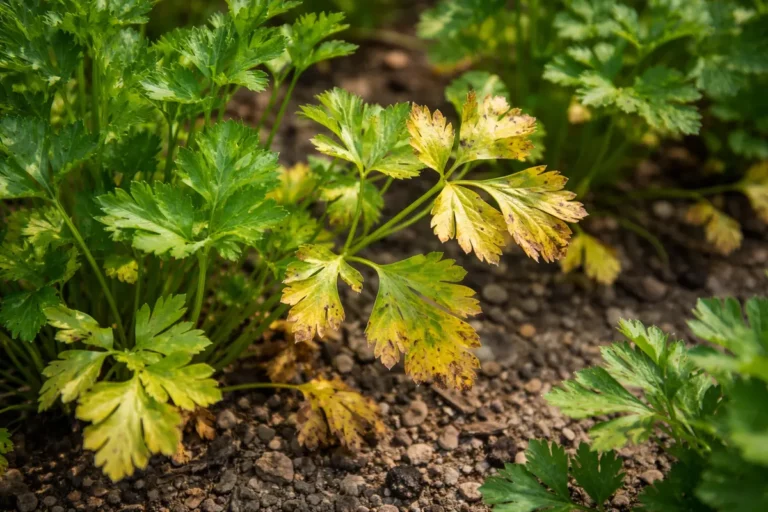
When kale turns yellow in heat, the underlying cause often relates to inadequate water uptake, leading to stress within the plant. As the soil dries out, roots cannot absorb the necessary nutrients, and the leaves begin to lose their chlorophyll, resulting in yellowing. Conversely, if your kale appears to have yellowing leaves but retains decent moisture, this could indicate nutrient deficiency, wherein the plant fails to uptake essential elements like nitrogen.
If the soil smells sour, it could indicate overwatering and subsequent root rot. In this case, refrain from watering and consider improving drainage or relocating the plants to a raised bed. Alternatively, if you spot yellowing alongside dark, wilted leaves, it typically signifies a nutrient imbalance requiring a balanced fertilizer to correct the condition. Excess moisture often leads to problems like lawn yellow spots overwatering.
When soil lacks vital nutrients, plants struggle to produce enough chlorophyll, resulting in yellow leaves. Without sufficient nitrogen, in particular, kale will show signs of leaf yellowing, while magnesium deficiencies can cause yellowing between leaf veins. By identifying these nutrient gaps, you can tailor your amendments to help the plant recuperate efficiently. If the leaves are also curling or wilting, it suggests that the problem is compounded by both nutrient deficiency and water stress. Use a simple soil test kit to measure nutrient levels and verify deficiencies, which is crucial for determining the appropriate fertilizer to apply.
If the soil smells sour during your inspection, this could point to overwatering, which inhibits nutrient absorption. Rather than applying nutrients immediately, allow the soil to dry out slightly before making amendments to avoid further stressing the plants. If your soil test shows a deficiency but it is still too wet, you could consider using foliar feeding with a diluted liquid fertilizer to bypass poor soil absorption. Alternatively, a pH test can also reveal if your soil is too acidic or alkaline; if the pH is inappropriate (ideally between 6.0 and 7.0), necessary amendments like lime or sulfur can help rectify this issue. Make sure to wait a couple of days after testing to give your soil a chance to equilibrate before applying fertilizers, as immediate addition can further complicate deficiencies.
Step 3 – Provide Nutrient Boost to Revive Kale
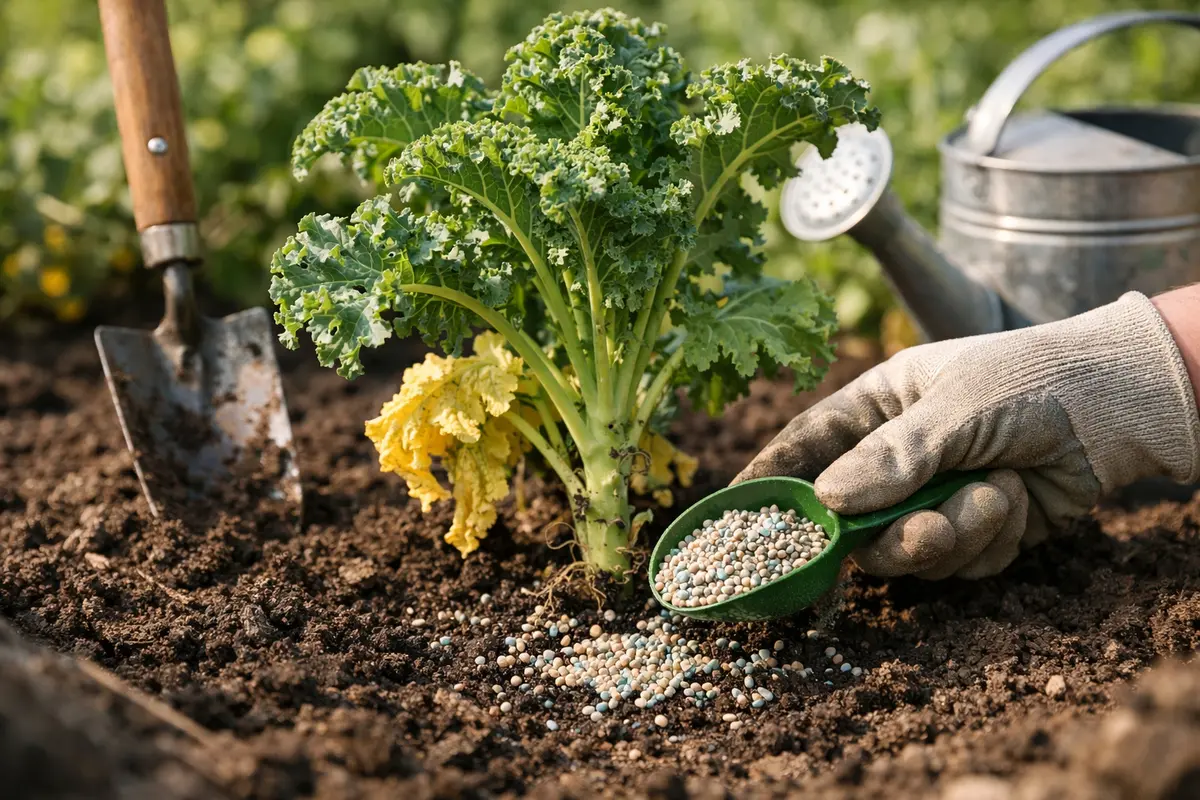
Apply a balanced fertilizer specifically designed for leafy greens. Within a week, you should start seeing improvements in leaf color and overall vitality. Look for fertilizers that include micronutrients, particularly nitrogen, which rejuvenates leaf color and overall growth. Opt for a slow-release formulation to feed your kale steadily without overwhelming the root system.
A nutrient boost provides kale with the essential macro and micronutrients it may have been lacking, which promotes rapid recovery and healthy growth. Fertilizers rich in nitrogen, phosphorus, and potassium will help revive foliage, encourage new growth, and enhance overall plant health. This is particularly important at this growth stage, as kale can be susceptible to further yellowing without proper care. Water your plants after applying fertilizer to help the soil absorb nutrients more effectively, reducing potential burn from concentrated fertilizer. To prevent nutrient burn, ensure you are following label instructions regarding application rates and frequencies. When feeding is off, expect signs such as if petunia plants turn yellow.
A mistake many gardeners make during recovery is applying too much fertilizer, thinking it accelerates recovery. This can lead to nutrient burn — brown edges on leaves indicating over-fertilization. Instead, opt for a gradual-release fertilizer to improve soil condition steadily over time without overwhelming the plant. If you notice that the plants have not responded positively after a week, consider reducing the amount of fertilizer used or switching to an organic option, which can be gentler on the roots. If the yellowing of leaves continues despite adequate fertilization, you may need to reassess underlying watering practices or disease issues that could be contributing to the hanging problem.
Step 4 – Shield Kale from Intense Sun Exposure
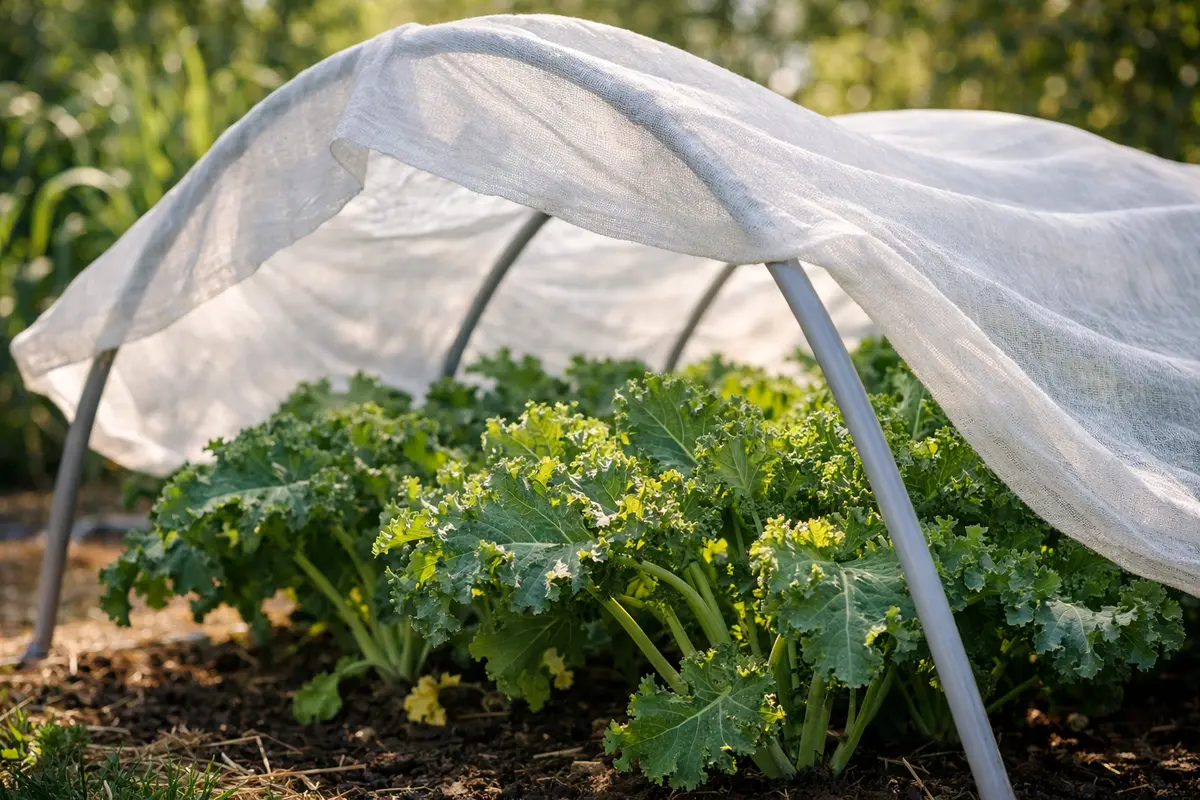
Apply shade cloth or move your kale plants to a shaded area during the hottest part of the day. You will find that the plants are less stressed and can retain moisture better. Ideally, use a light, breathable material that blocks direct sunlight while allowing airflow to circulate. Ensure that the shade is provided consistently throughout the hottest hours.
Direct, intense sunlight can severely aggravate stress in your kale plants, especially if they are already struggling due to yellowing leaves from heat exposure. By blocking the harsh sun, you promote optimal photosynthesis without overextending the plant’s capabilities. Consider using plant clips to securely attach the shade cloth over your kale, ensuring it stays in place without obstructing airflow. If moving the plants, do so gradually to avoid shock from different lighting conditions that they may not be accustomed to. Under prolonged heat, the same plants may show cucumber plants wilting heatwave.
During summer’s peak, it’s crucial to adapt watering and shade routines based on daily and weekly temperature fluctuations. If the forecast predicts extended periods of high temperatures, it becomes even more essential to implement these protective measures as a long-term habit to reduce heat-related damage. Monitor the weather closely for changes in temperature and humidity, and ensure that your suitable shade solution remains in place, particularly when extreme weather is anticipated. If your kale plants begin to show signs of wilting even with adequate shade, check for pest activity such as aphids or whiteflies; both can compound stress issues in heat by feeding on weakened plants.
Step 5 – Inspect Kale Leaves for Color Changes Regularly
Check your kale plants every few days for color changes and overall leaf health. You should see the return of a rich green color and signs of new growth, indicating successful recovery efforts. Take note of any new yellowing or browning, as it may signal that something else is amiss. If you notice that despite following all steps, yellowing continues, it’s time to analyze all care aspects thoroughly.
Regular inspections provide valuable early detection of potential issues, such as pest infestations or returning heat stress symptoms. Healthy kale plants will have vibrant leaves, bright green in color, which indicates proper nutrient supply and moisture levels. However, if yellowing reappears a few days after treatment, it suggests that adjustments in care may still be needed. Keep a log of your watering and fertilization schedule along with the plant’s health to better track what methods yield the best results. Look for visual cues such as limpness, unusual spots, or mold that may indicate other stress factors.
Should you observe any fresh yellowing or wilting, reassess your watering schedule, and consider if recent weather changes are affecting growth conditions. Check soil moisture—if your soil feels too dry or saturated at this point, correct your watering routine accordingly. In extreme cases where plants fail to recover despite treatment, consider consulting a local extension service for specialized assistance. If new growth is small and pale, it’s also worth investigating whether they are getting adequate light based on their location; too much shade can lead to yellowing as well, signaling insufficient light exposure necessary for chlorophyll production.
FAQ
How long will it take for my kale to recover after yellowing?
Recovery can take about one to two weeks, depending on the severity of the yellowing and the actions taken. As you care for the plants, look for signs of improved leaf color and new growth as indicators of a successful recovery. In cases of severe nutrient deficiency, recovery may be slower, requiring patience and careful observation of the plants’ responses to treatment.
Can heat stress spread to other plants in my garden?
Heat stress itself does not spread like a disease, but it can weaken kale, making it more susceptible to pests and diseases that may affect nearby plants. It’s essential to maintain optimal conditions for all plants to prevent them from becoming vulnerable. Monitor all garden plants during extreme heat events to ensure they are adequately hydrated and shaded, thus reducing the risk of widespread stress and promoting a healthier overall environment.
Should I remove the yellow leaves from my kale plants?
Yes, you should prune yellow leaves as they cannot recover and may divert energy from healthy growth. Make sure to use clean tools and avoid excessive cutting, focusing on removing only the severely affected leaves. If yellowing continues to appear, also consider the overall plant health and make adjustments in care to support stronger foliage growth.