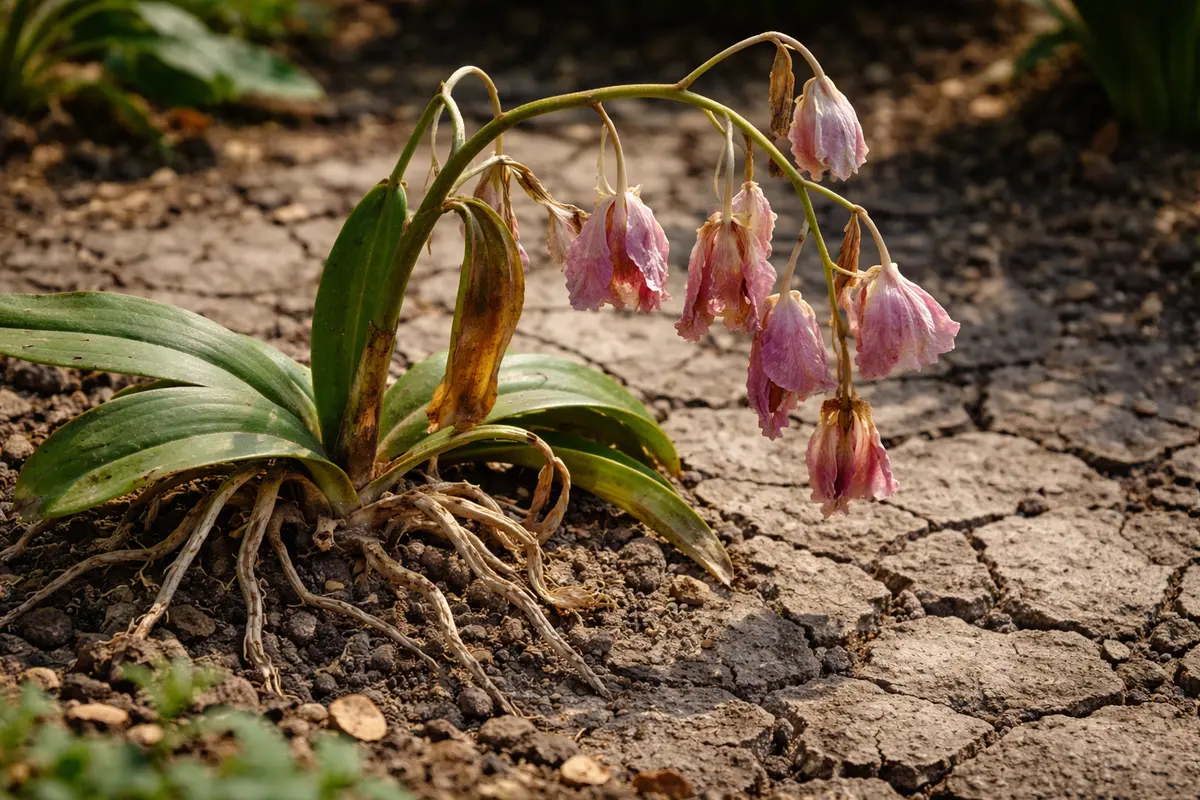
You may notice your orchids drooping and wilting during the humidity of summer, which is why you need to know how to treat wilting orchids after high humidity. This wilting occurs because excess moisture can lead to root rot, causing the plant’s leaves to droop and develop yellowing spots. If left untreated, the problem can spread and lead to more damage, weakening the plant and stalling growth. Fortunately, you can fix this by checking the roots, adjusting watering practices, and monitoring humidity levels.
Step 1 – Assess Leaves for Wilting Symptoms
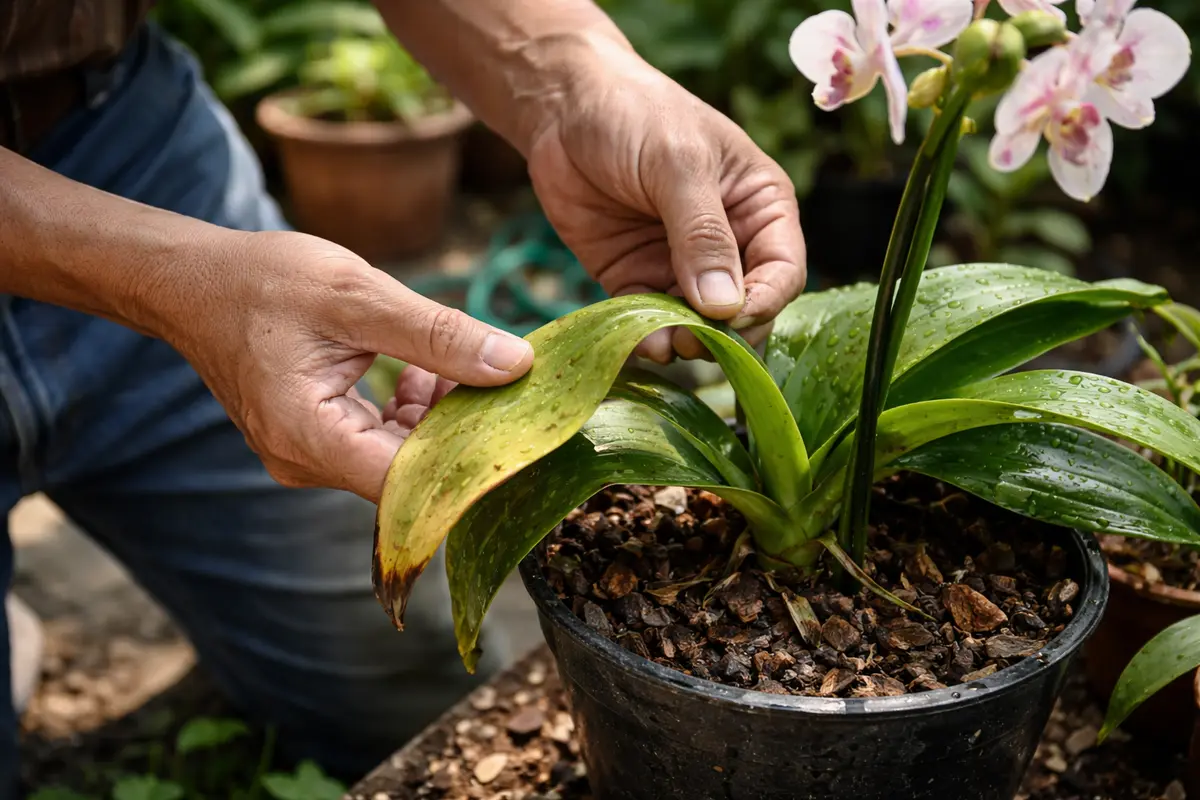
Start by inspecting the leaves to identify the extent of wilting. You should see changes in the leaf texture, where leaves may appear soft and droopy, indicating that they are not receiving enough water due to root stress. Healthy orchid leaves should feel firm and plump; when they begin to wilt, this is a clear sign that corrective measures are urgently needed. Check for shiny spots on the leaves, as this may also signal excessive moisture causing cellular breakdown.
Acting promptly is crucial because prolonged exposure to humidity can lead to root rot. Orchids like Phalaenopsis are particularly vulnerable; if their roots are unable to breathe, the entire plant may suffer. Wilting leaves signify that the plant’s water balance is disrupted, which can escalate if left unchecked. Check to see if the leaves are yellowing or developing dark spots, as these are telltale signs that root health is compromised, and could indicate a critical state needing action. Note the color deviation from the usual green; any browning or blackening indicates distress. A faster response leads to a quicker recovery, as lingering conditions can exacerbate wilting and stress response. If potted in a less breathable medium, the moisture retention may heighten, making it essential to correct the planting medium if it appears overly compacted or retains excessive moisture.
A common mistake at this stage is watering the plant excessively, thinking it will recover. However, if the roots are already suffering from too much moisture, additional watering can worsen the situation. Immediate diagnosis is essential — for example, if the leaves are limp but firm to the touch, it’s a sign of underwatering; if they feel mushy or have dark spots, overwatering is likely the cause. In situations where the leaves are drooping yet the humidity levels are high, check the surface of the potting mix as well for any signs of dryness; if the top inch is dry but leaves are drooping, it may signal that while moisture levels are adequate overall, the roots are still not effectively absorbing it. This discrepancy between leaf condition and media moisture often highlights critical root activity issues. Ensure to check that air circulation around the plant is optimal, as stagnant air can trap moisture and worsen the issue.
Step 2 – Diagnose Excess Humidity Effects on Orchids
Check the root system for signs of rot, such as a sour smell or discolored roots. You should observe that some roots may appear brown or mushy, confirming excessive moisture damage due to high humidity. Gently pull the orchid from its pot and inspect the root system. Roots should primarily be firm and green; any that are overly soft or blackened indicate significant distress. Assessing root health now can provide early indicators of severe problems down the line; discoloration in roots can often be an early warning sign before visible affects on leaves arise.
The primary issue with high humidity is that it creates a microclimate conducive to fungal growth, which can suffocate roots. Healthy orchid roots should be green and firm; when humidity remains high, roots can become waterlogged, leading to decay. If necessary, consider extending your examination into the potting mix itself; a check can often reveal whether it has become waterlogged in places, feeling more like sludge, especially near the base. Neglecting to assess the roots at this stage can result in irreversible damage as fungal pathogens take hold in the overly moist environment. Be cautious: if you notice any clear fungal growth on the surface of the media or around the roots, this is a sign that immediate action is required to remove affected roots and change the potting medium. It’s crucial to act quickly; if fungal growth begins, it multiplies rapidly in humid conditions.
If the roots appear fine but the plant is still wilting, check the humidity levels in the potting mix. For instance, if you find the potting mix is overly saturated but the roots look intact, consider shifting to a more breathable medium or improving drainage by repotting. Adjusting the medium can also improve how well the roots can absorb water; using a mix with larger bark pieces allows for better air flow while still retaining some moisture. Doing so can significantly enhance the plant’s recovery chances. If using a pot with no drainage holes, such as decorative containers, consider switching to perforated pots to prevent water from accumulating, thereby reducing the humidity impact. This strategy allows excess water to drain freely, decreasing the chances of both root rot and plant wilting. Also, elevated pots can help encourage runoff from excess watering when adjusting to a new watering schedule.
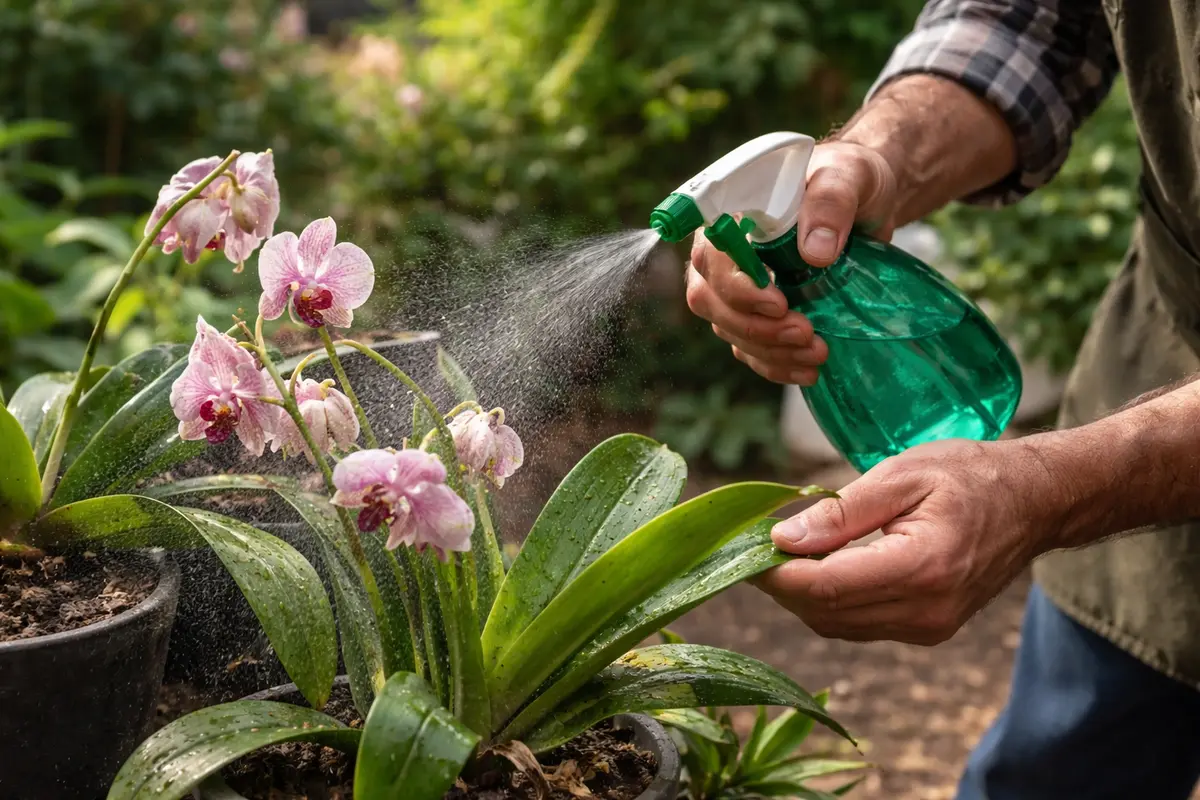
Step 3 – Mist Orchids to Aid Recovery from Humidity Stress
Start by adjusting the watering routine to let the top inch of the potting medium dry out before re-watering. Look for signs of recovery like the orchid’s leaves regaining firmness and the roots appearing plump and green. To prevent future wilting, maintain a humidity level between 40-60% and ensure proper airflow around the plant to avoid stagnant moisture, especially after a period of high humidity.
The recovery timeline for wilting orchids can range from a few days to several weeks, depending on the severity of water damage and overall growing conditions. High humidity paired with poor air circulation can lead to root rot, which delays recovery, while a well-managed environment will promote quicker improvement. If the leaves remain limp after a week, check for root health and adjust your care regimen accordingly.
A common mistake during the recovery-prevention transition is overwatering, thinking that more water will help revive the plant. If you observe dark roots that feel mushy, reduce watering frequency to allow the roots to breathe. If the orchid continues to wilt despite adjusting watering practices, check for underlying pest issues or disease that may require further intervention.
The recovery timeline for orchids can vary, with some plants showing signs of improvement in as little as a week, while others may require several weeks for full recovery. High humidity can lead to both overwatering and root rot; if the roots remain too wet, recurring wilting may occur, indicating a need for better drainage practices. If you notice wilting persists while roots appear healthy, environmental factors, such as excessive heat or cold drafts, could be the culprit affecting transpiration. If the plant is underwatered in humid conditions, the physiological response may still lead it to appear wilted due to reduced capacity to transport water through its leaves.
A frequent mistake during the recovery-prevention transition is overwatering the orchid, leading to additional stress that can delay improvement. If wilting persists despite good drainage, adjust your watering schedule based on the moisture of the media and ambient humidity levels, ensuring the medium dries out slightly between waterings. For severe cases of wilting, delay fertilizing until new growth is observed, as fresh roots need time to stabilize before taking on additional nutrients. The rooting system can easily become overburdened with nutrients if they lack sufficient health to utilize them effectively.
This misting process aids in quick recovery by allowing the stomata on the leaves to release built-up moisture and absorb needed nutrients. It also stimulates transpiration, which helps restores the natural water balance in an orchid’s tissues. Monitoring how the leaves respond after misting is essential, as quick recovery signals effective moisture management. A well-timed misting in the morning allows the leaves to dry out by nightfall, reducing the risk of excess moisture building up again overnight. If the leaves start curling up again after misting, it could signal that while the external moisture levels may be adequate, there is still internal root stress needing attention. If this persists over multiple cycles, it indicates that higher humidity levels both in the environment and the media may require more significant alteration.
However, maintaining this balance is critical. A common mistake many gardeners make is to continue heavy misting or watering afterward, thinking it supports recovery. Instead, you should allow the top layer of potting mix to dry out for a day or two before watering again. If humidity levels at night remain high, consider utilizing a dehumidifier to prevent further stress on the plants. Remember that misting is only part of the solution; you may need to increase airflow around the orchids, perhaps by using a small fan, to prevent stagnant humidity from reaffecting the plants. If the orchids respond well, expect visible improvements in the leaves within a few days, showing more upright and firm leaves. Alternatively, grouping plants can increase humidity but reduce airflow, so it’s essential to strike a balance to ensure overall health.
Step 4 – Check Orchid Roots for Signs of Overwatering
Start by checking the moisture levels in the potting medium of your orchids after high humidity conditions. Look for signs of over-saturation, such as a soggy or waterlogged substrate, as well as any excess water pooling at the bottom of the pot. Recheck these conditions every few days, ensuring to feel the soil with your fingers to judge if it is drying out adequately.
A fully recovered orchid will exhibit vibrant green leaves, firm and plump roots, and an overall perkiness that indicates proper hydration. In contrast, if the wilting begins to return, leaves may droop again, showing a leathery texture or a change in color toward yellow or brown. If you see leaf edges curling or a rough texture forming, this could indicate renewed stress from humidity overload.
If the problem returns despite monitoring humidity levels and adjusting watering practices, consider repotting the orchid in fresh, well-draining media to enhance air circulation around the roots. Additionally, if the substrate continues to retain too much moisture, check for signs of root rot, like a mushy feel when gently probing the roots. Addressing these issues swiftly can prevent further decline.
A fully recovered orchid will have leaves that are vibrant and firm, showcasing a glossy finish with no wrinkles. In contrast, early signs of wilting returning will exhibit leaves that droop and feel soft or mushy, indicating stress. If the roots remain green and firm, chances are the plant is thriving; however, if they turn brown or mushy, the problem may be recurring.
If the wilting issue returns despite following these monitoring steps, consider adjusting the watering routine or repotting into fresh medium. If these adjustments do not yield improvement, escalating to an orchid specialist for guidance on potential pests or diseases might be necessary.
After addressing previous problems, it’s essential to keep an eye on the root health as they recover. A fully healthy orchid will display upright leaves, firm roots, and new growth from the base. Actively check for new root tips, which should show up during recovery as bright green. If you notice signs of returning wilting or mushiness in the roots, it indicates that humidity levels may have again risen above optimal levels, potentially leading to further health issues. Regular monitoring allows you to react quickly; an ideal humidity range for most orchids is 50-70%. You can consider using a hygrometer to keep track of humidity levels accurately to prevent them from reaching levels that could induce another cycle of wilting.
If the problem persists, you may need to reconsider the orchid’s environment. For example, moving the plant to a location that maintains better air circulation can help prevent humidity issues from resurfacing. Heavy and compact potting mixes may need to be replaced with a more porous orchid mix to keep the roots dry enough for healthy growth. Should repotting become necessary, choose bark-based or clay mixes that offer better drainage and airflow; often, these mixes maintain humidity while facilitating root oxygenation effectively. Continually monitoring the moisture level in the pot will help in preventing overwatering, leading to healthier root development. If other plants are present, be sure to space them adequately to allow for proper air movement.
FAQ
How long will it take for my orchids to recover after high humidity?
The recovery time for orchids can vary, but generally, you should see improvement in leaf firmness and texture within a few days after addressing moisture issues. Full recovery, including new growth, might take a few weeks, depending on the severity of the root damage. Monitoring roots closely during this time is crucial, as roots often take longer to heal than leaves do. Engaging with the orchid regularly will provide insight into its ongoing recovery needs and reinforce growth patterns, allowing you to adjust your care accordingly.
Can overwatering spread to other nearby plants?
Yes, overwatering can lead to fungal infections that may spread to nearby plants if they are in close proximity. If you have a collection of plants, keeping orchids separated until you ensure they are healthy will help prevent the contamination of other species. Continuously monitor the watering habits of your other plants to prevent similar stress from impacting them while also allowing space for airflow around each individual container. If there is any sign of fungal growth in the potting media of one plant, it’s advisable to check the others to catch any early signs of infection.
What should I do if I notice mold on the potting mix or roots?
If you notice mold, it’s essential to act quickly. Remove any visibly moldy surfaces and repot the orchid into fresh, clean potting mix to reduce the chances of further fungal growth. Ensure that your watering schedule allows the mix to dry out appropriately to discourage mold return, as consistently saturated media create ideal conditions for fungal issues. Regular checks can prevent future outbreaks, and ensuring that air circulation in the area is maintained is critical; if airflow seems limited, consider relocating the plants to a more open space or using additional fans to encourage drying. This proactive approach can significantly improve plant vitality while maintaining a healthy growing environment.