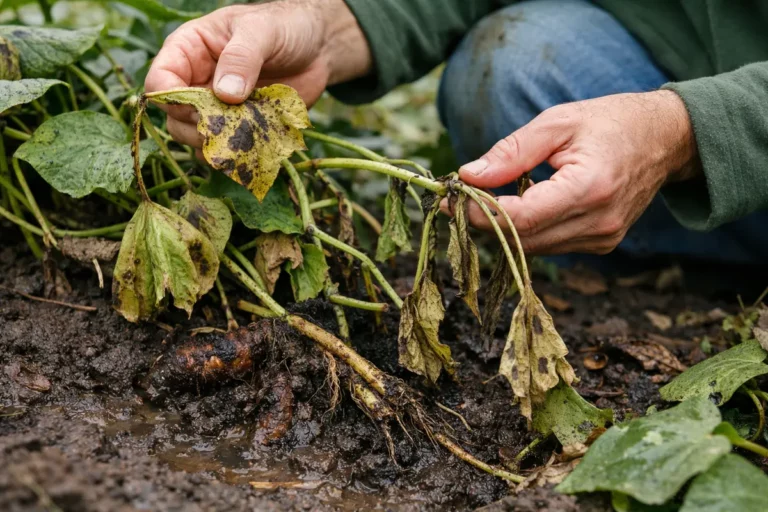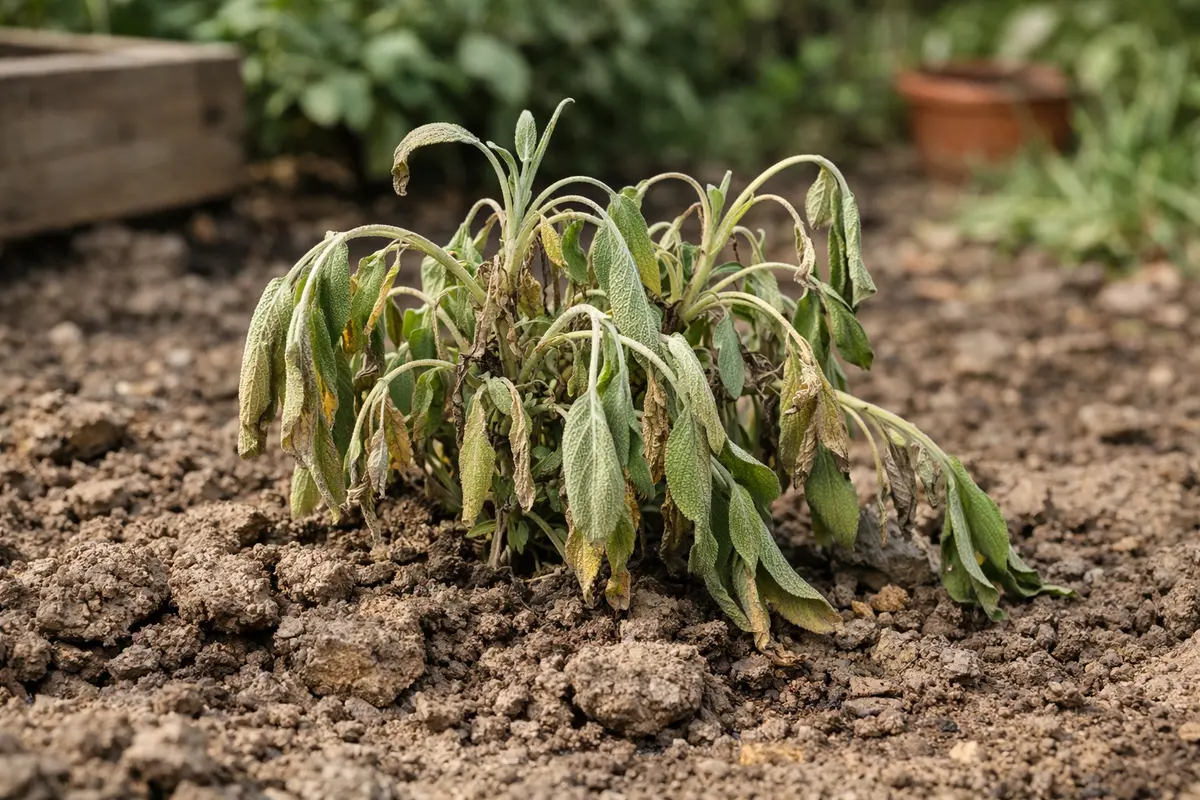
You may notice your sage looking droopy and yellowing when temperatures rise and the soil becomes compacted, which is why you need to know the answer to the question, “Why is my sage dying after being planted in clay soil.” This decline often occurs due to poor drainage in the clay, causing the roots to suffocate and rot instead of thriving. If this issue is ignored, it can weaken the plant and lead to more damage, but fixing it is possible now—just inspect the soil, adjust the watering frequency, and improve drainage to encourage healthy growth. Taking immediate action will allow you to address potential problems before they escalate further.
Step 1 – Remove Dead Sage Stems Promptly
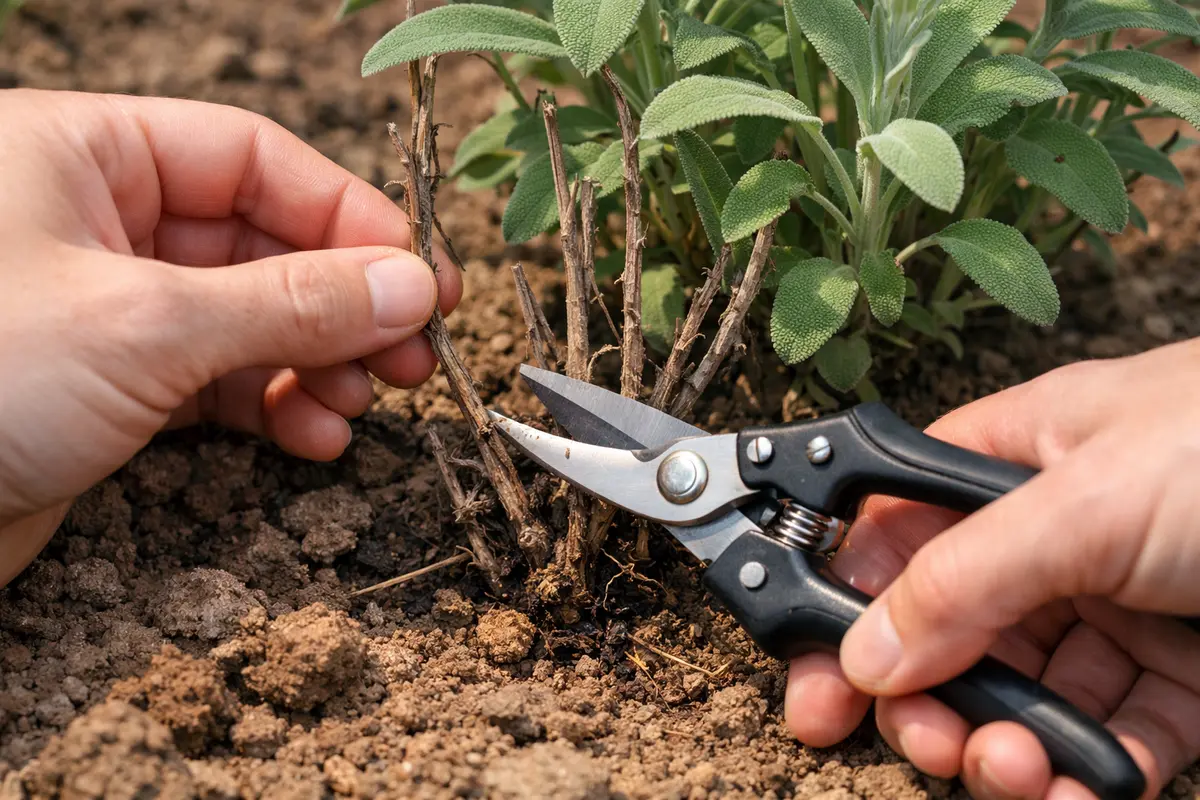
Start by cutting away any visibly dead or damaged stems from your sage plant. You will see an immediate improvement in airflow around the remaining healthy stems, which will help the plant redirect its energy to new growth. By ensuring that the plant conserves energy, you equip it to recover more effectively from soil stress. Taking this action creates a healthier environment that supports robust leaf and stem growth.
Swiftly removing dead stems allows healthier parts of the plant to thrive by reducing the risk of fungal infections, which are common in plants showing stress. In denser soils like clay, moisture can linger around dead or damaged stems, creating a conducive environment for mold and rot. When a sage is afflicted, dead growth can lead to complications that spread throughout the plant, limiting its ability to absorb water and nutrients. Cutting these away can significantly improve the prognosis for your sage. Ideally, the cutting should be done at a slight angle to prevent water pooling at the cut, further mitigating rot risk.
A common mistake at this initial stage is failing to remove all dead growth, which can continue to attract pests or disease. If a grower overlooks even one damaged stem, the plant might not recover fully, leading to further problems down the road, such as spreading rot from damaged areas. Timing is crucial here; addressing the dead stems immediately after noticing the issue greatly increases the chances for healthy regrowth. If left beyond a few days, the overall health of the sage can decline drastically, leading to irreversible damage. Watch for new growth within a week after cleanup as a sign that the plant is on the path to recovery.
Step 2 – Diagnose Clay Soil Drainage Issues
First, assess your sage’s growing conditions and check for drainage issues in the clay soil. Dig around the plant and feel for moisture levels; if the soil is overly wet and sticky, consider amending it with organic matter or relocating your sage to a well-draining area to witness improvement in its vigor within a few days. Tools like moisture meters can also be helpful in gauging soil conditions accurately.
Clay soil tends to compact easily, leading to poor air circulation and water retention around the roots, which can cause root rot in sage plants. Healthy sage requires well-aerated soil to access both water and oxygen; muddy or waterlogged conditions can lead to yellowing leaves and stunted growth, whereas drier, well-drained environments promote strong root establishment. If your sage’s leaves are yellowing, check for water saturation; if the leaves remain dark green but limp, lack of moisture could be the issue. Altering watering practices based on the soil’s condition is critical. If you are dealing with a related issue, yellowing leaves shallot covers a similar problem in detail.
If your soil smells sour, adjust drainage by adding sand or peat moss to break up the compact layers; this will enhance aeration and promote a healthier root system. Alternatively, if you notice a crusty layer of soil on top, it could indicate evaporation issues that require more frequent watering to prevent dehydration, which would otherwise stress the plant as well. Regularly turning the soil can help prevent crust formation while improving aeration. Plants like sage thrive in well-draining soil; when planted in clay soil, excess moisture can lead to root rot. The roots of your sage are likely unable to access the necessary air, leading to decay and nutrient uptake issues. Inspecting the drainage is critical, as clay soil compacts easily, reducing aeration and making it hard for roots to function properly. Fixing drainage will help restore a healthier environment, allowing your sage to flourish once again.
If the soil smells sour, it may indicate anaerobic conditions—this generally occurs when soil has been overly saturated for a prolonged period. In that case, consider digging up the plant, amending the clay soil with compost or sand to enhance drainage, and then replanting it. The ratio should ideally be one part compost or sand for every two parts clay soil. It’s essential to monitor how much moisture the soil retains, especially after watering, since clay can hold more water than most plants can handle. If drainage issues persist, consider methods like creating raised beds to ensure better drainage and aeration, as these can help with soil stratification, further minimizing root stress.
Step 3 – Water Sage with Balanced Nutrients
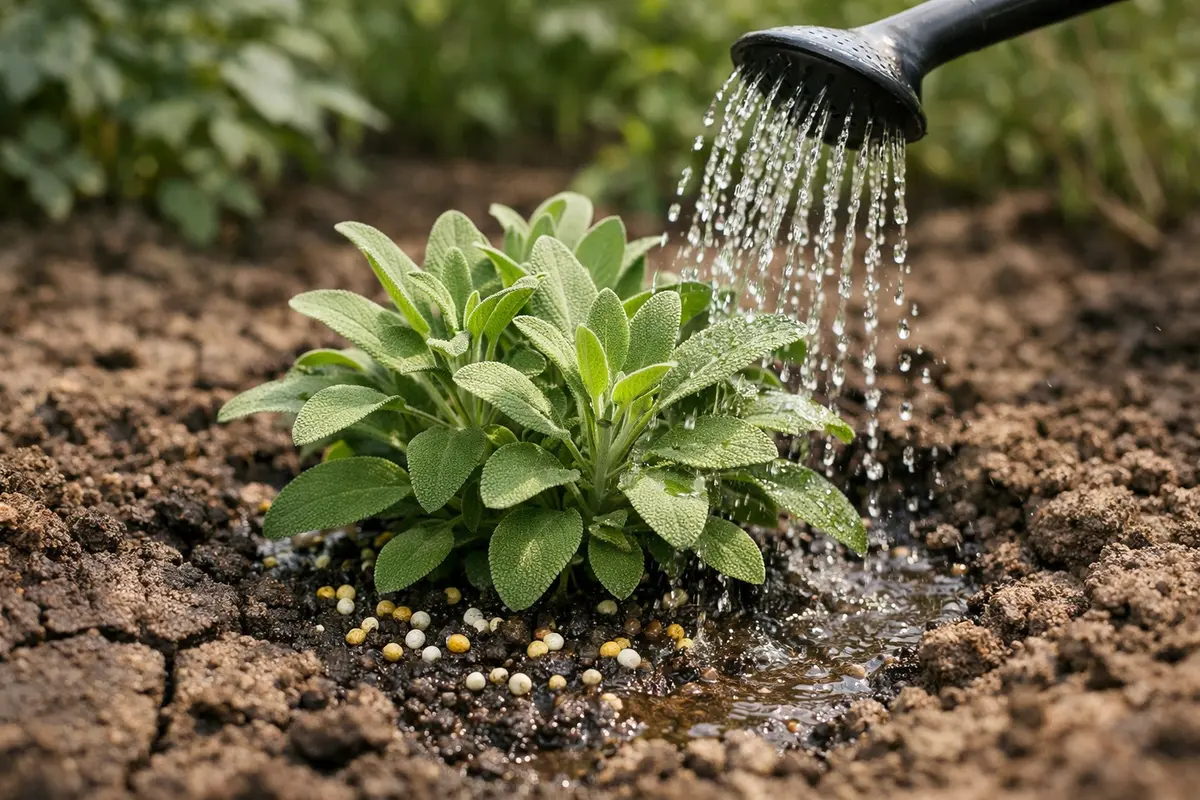
Start by improving drainage around your sage by amending the clay soil with organic matter like compost or coarse sand. Within a week, you should see the sage’s leaves begin to perk up, indicating it’s absorbing water better and recovering from root stress. Adding incremental organic matter also helps build nutrient-rich environments that prevent future soil compaction.
Realistic recovery timelines for sage depend on soil conditions, climate, and the extent of root damage. Expect to see new growth within two to four weeks if conditions are ideal, such as a warm environment and adequate sunlight. However, if the weather is consistently damp, recovery may be slower, with yellowing leaves as a sign of continued struggle. If your sage isn’t thriving in warmer spots, check for overly saturated roots. The time of year can also influence this; for instance, recovery might be expedited during spring compared to the cooler fall months.
Avoid overwatering your sage during recovery, as excess moisture in clay soil can lead to root rot. Additionally, refrain from applying fertilizers too soon, as this may burn the stressed roots. If you notice wilting despite watering, check the drainage rather than adding more moisture to the soil. The use of slow-release fertilizers can help provide steady nutrient support without overwhelming delicate root systems. Balanced nutritional input is vital for your sage’s recovery. By flushing the soil, you remove old nutrients that may no longer benefit the plant and provide it with a cleaner slate to absorb what it needs effectively. Observe new growth and a transition to greener leaves as indicators of recovery; the plant will begin to perk up, signaling it’s on the mend. Optimally, you should see signs of revival such as erect stems and fresh leaf shoots emerging within 7-10 days of implementing this step. A related fix is explained in rain drainage becomes if you want to compare approaches.
One mistake to avoid during the recovery phase is over-fertilizing, thinking more is better. Overcompensating can lead to nutrient burn, which will further stress your sage. This problem particularly arises if the sage is given high-nitrogen fertilizers; instead, opt for a balanced fertilizer to prevent root burn. It typically takes several days to notice improvements, so patience is necessary before adjusting your care regimen again. If at any point you observe leaf tips turning brown, this is a clear signal that you may be applying too much fertilizer; a reduction in application should be considered. Additionally, flushing with plain water periodically can help prevent nutrient buildup that stems from a recovery fertilization diet.
Step 4 – Protect Sage from Excessive Watering
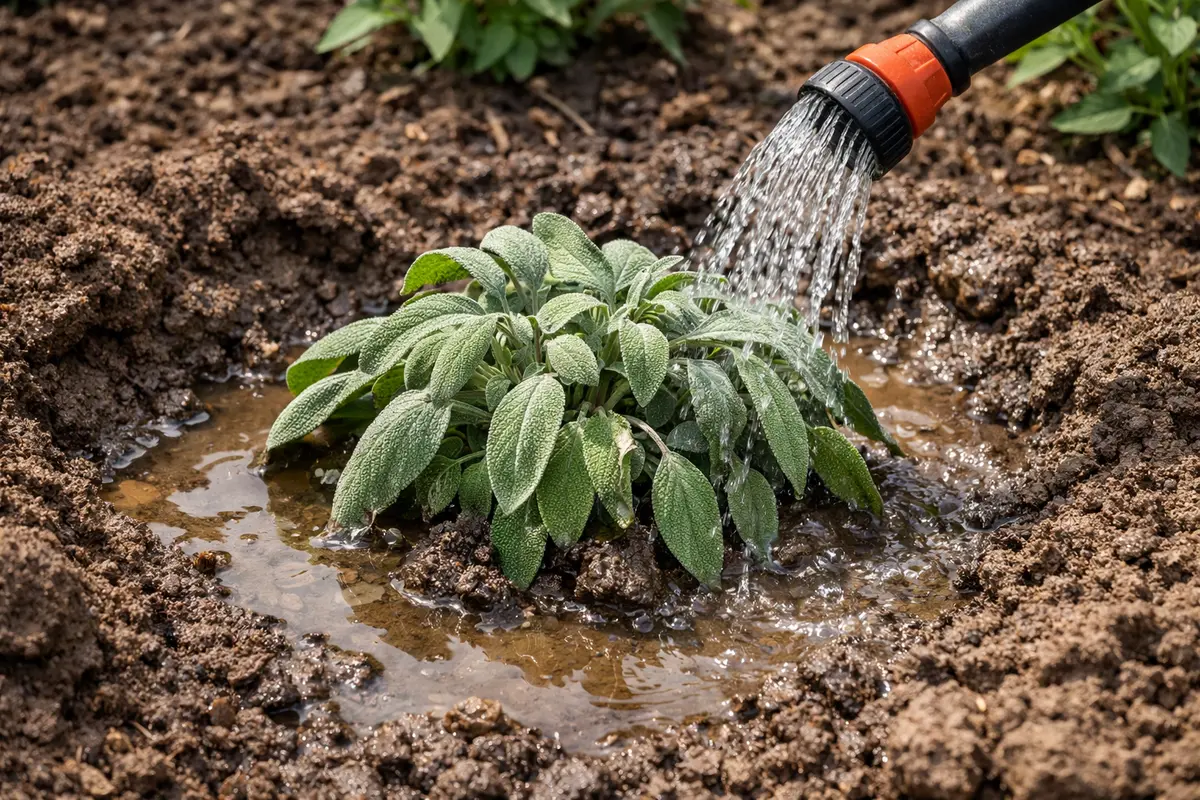
Start by amending the clay soil with organic matter such as compost or well-rotted manure. This action improves drainage and aeration, which allows the sage roots to access oxygen and nutrients more effectively, fostering robust growth. Implementing a strategic irrigation approach in combination with these amendments will help maintain soil balance.
Clay soil tends to retain excess moisture, which can suffocate sage and lead to root rot. By enhancing the soil texture, the roots can better breathe and absorb water, reducing the likelihood of over-saturation. If you notice wilting, check if the soil is compacted or soggy; a simple amendment can transform your sage’s health. Observing how quickly water is absorbed after watering can also indicate soil health—if water pools on the surface, this is a sign of poor drainage.
In dry summer months, reevaluate your soil amendment efforts by incorporating mulch to retain moisture without over-saturating the roots. Additionally, consider adjusting irrigation frequency; if not controlled, excess watering can lead to similar moisture retention issues as found in clay soil. During hot, dry spells, it’s a good practice to check soil moisture using your finger up to the second knuckle; if it feels dry, it’s time to water, but if it’s still moist, hold off. Excessive watering can lead to a resurgence of root rot and nutrient deficiencies, especially in clay soil, which naturally holds moisture. By protecting your plants from overwatering, you create a balanced environment where roots can breathe and absorb nutrients effectively. Adjusting your frequency in response to seasonal weather changes is essential, as clay soil retains moisture longer during cooler months or rainy seasons; for instance, during wetter months, reduce watering frequency to once every two weeks. Make note of rainfall to avoid adding unnecessary water during periods of consistent precipitation.
A secondary method of preventing excess water retention is to apply mulch or organic matter around the base to bolster soil structure and moisture retention. This step not only prevents water logging but promotes beneficial microbial activity in the soil. However, be cautious with the thickness of the mulch; a layer too deep can hold moisture against the base of the plant, leading again to adverse conditions. Ideally, aim for a mulch layer of 2-3 inches, keeping it a few inches away from the plant stem to allow air circulation. Additionally, consider rotating the mulch every few months to promote even moisture retention and reduce compaction.
Step 5 – Inspect Sage Leaves for Wilting Signs
Check your sage leaves for signs of wilting or discoloration every few days after implementing the changes. Positive signs include any improvement in leaf firmness and new growth appearing within a week, signaling that optimal conditions are fostering recovery. Conversely, if you notice the leaves continuing to wilt despite your care, additional steps may be required. Observing changes daily can help you catch any regression in health quickly.
A fully recovered sage will have vibrant green leaves with a robust structure, indicating it’s no longer suffering from overwatering. Conversely, if you observe new leaf yellowing or the return of limp leaves, this could signal a recurrence of root issues, necessitating further investigation into soil conditions or watering practices. Regular inspections can help catch early signs of trouble, allowing for swift corrective measures. If the growth appears stunted after making changes to watering or soil, this prompts a deeper look into root health, potentially necessitating root inspection.
If problems recur despite following these steps, consider consulting a local gardening expert or extension service for advice specific to your environment. Persistent issues like these often indicate deeper soil problems or pathogens that need professional attention to resolve; for example, you might need to test soil pH or look for nematodes or fungal infections if problems persist despite adjustments in care. It can also sometimes reveal that it’s time to move the sage to a different area with better drainage or amendment sooner rather than later. Keeping detailed notes on what changes are made and their effects on the plant can also help identify patterns in soil or plant behavior.
FAQ
How long will it take for my sage to recover after being overwatered?
Recovery time for sage after correcting overwatering typically ranges from one to three weeks. You should start seeing improvements in leaf color and overall vigor as the roots regain access to oxygen and nutrients. Be alert for signs of recovery such as new shoots emerging; if these do not materialize within a few weeks, re-evaluating your care routine may be necessary.
Can sage come back from root rot caused by clay soil?
If the root rot is caught early and the plant is treated promptly, sage can recover. However, severe rot may necessitate replanting, so attention to soil drainage from the start is crucial. Post-treatment, keeping a close eye on moisture levels will be essential to prevent a repeat of the situation.
Should I remove all yellowing leaves from my sage plant?
Yes, removing all yellowing and dead leaves will help the plant focus its energy on new growth and reduce the likelihood of disease spreading. Be sure to inspect for any signs of pest infestation or disease while pruning; any signs of infestation, if noticed, should be treated promptly to support recovery.