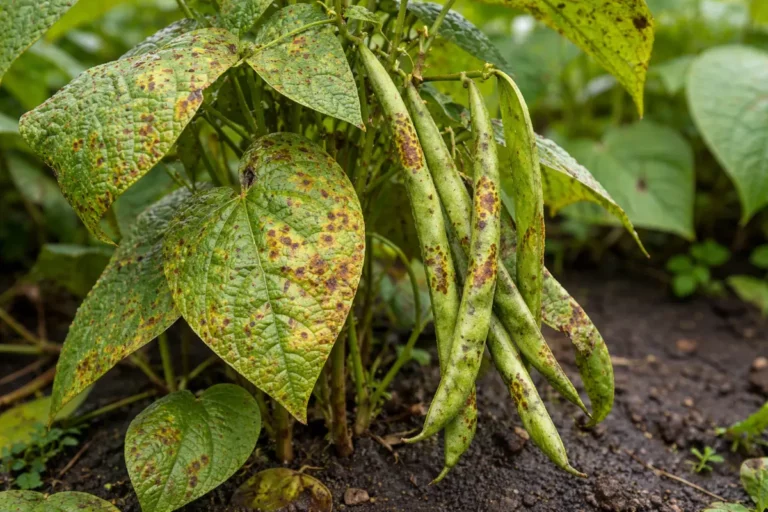
You may notice tiny pests emerging on your kale plants after spring rain, which is why you need to know how to prevent aphids on kale plants after spring rain. These aphids can cause yellowing and wilting of leaves, leading to potential damage that threatens your crop’s health. If left unchecked, the infestation gets worse and can spread rapidly, stalling growth and weakening the plant. You can still take action by inspecting your kale regularly and using organic deterrents to keep these pests at bay while focusing on the conditions that aggravate their recurrence.
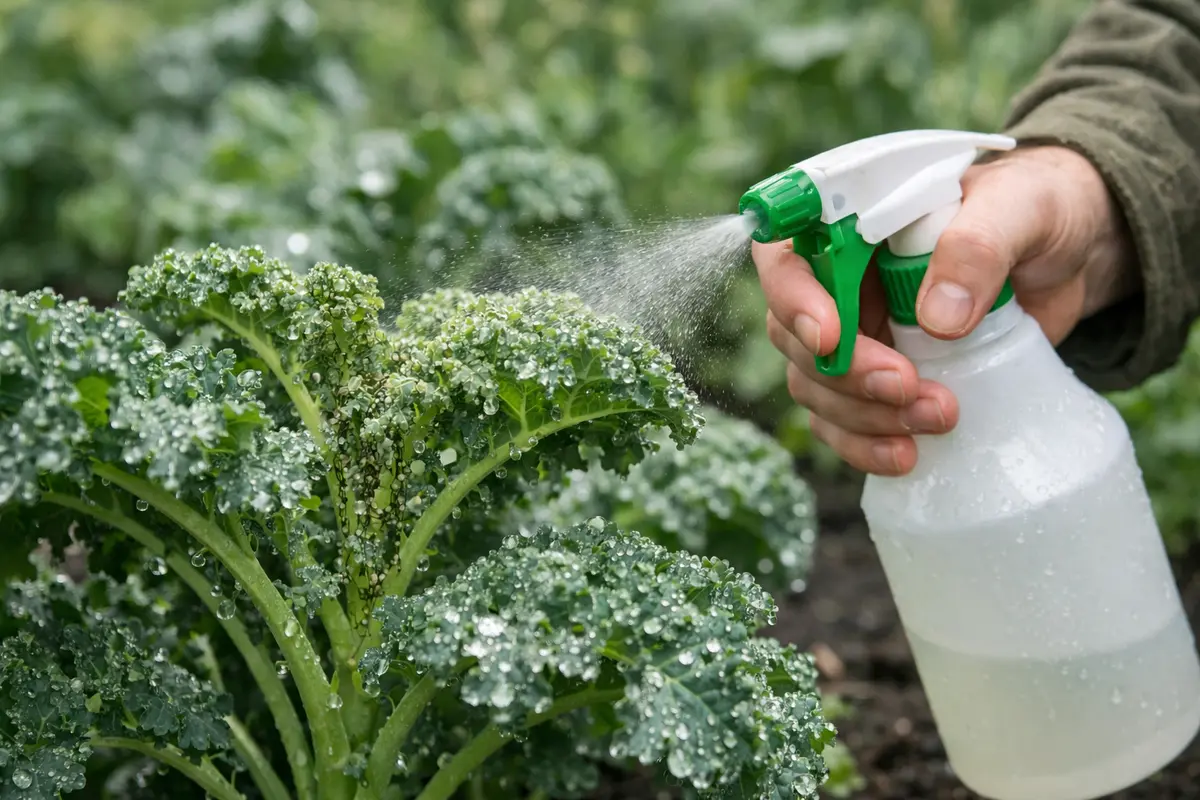
Step 1 – Spray Neem Oil on Affected Kale
Begin by spraying neem oil on the affected kale leaves to eliminate the aphid infestation. This natural insecticide can effectively reduce the number of live aphids within just a few hours, bringing swift relief. Neem oil works by disrupting the life cycle of aphids, preventing them from feeding and reproducing, thereby halting further damage to your plants. However, if applied improperly, such as during the heat of the day, it can cause leaf burn, negating its benefits and potentially leading to further issues.
Time is of the essence when dealing with aphids; if you delay treatment, you may face a larger infestation, as these pests can double their population every few days. Neem oil, derived from the seeds of the neem tree, presents a safe solution that targets aphids while also being relatively harmless to beneficial insects if applied correctly. For maximum effect, ensure an even coating on both sides of the leaves and reapply every five to seven days, especially after rain, as water can wash it away and diminish its effect. A good practice is to choose early morning or late afternoon for application to avoid potential leaf burn associated with higher temperatures.
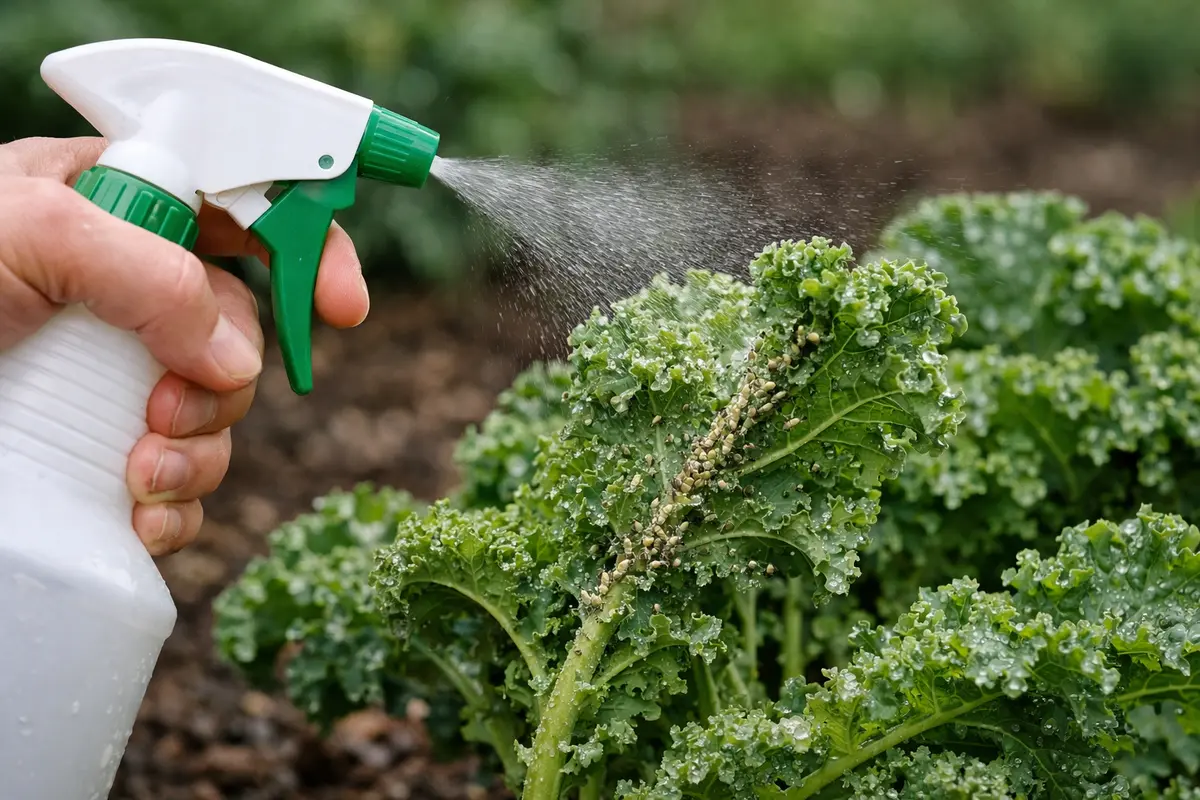
A common mistake gardeners often make is applying neem oil solely to the top sides of the leaves. Since aphids primarily reside on the underside, thoroughly covering both the tops and undersides is vital for complete eradication. Neglecting the undersides can result in ongoing battles with aphids, as eggs and juvenile nymphs are often hidden there. Observing fewer live aphids after the first application indicates you are on the right path. If you notice no change after three applications, consider switching to other methods or products to prevent further infestation. If the infestation continues without improvement, it may be time to escalate your approach by trying insecticidal soap or introducing beneficial insects like ladybugs.
Step 2 – Investigate Soil Drainage for Aphid Infestation
Start by inspecting and rectifying soil drainage issues that may be contributing to your aphid problem. You should notice healthier plants with fewer stress indicators following the improvements. This happens because poor drainage creates a moist environment that encourages aphid proliferation, as they thrive in damp conditions. Additionally, it can lead to root rot, indirectly worsening aphid infestations due to weakened plants.
The cause is that when plants suffer from inadequate drainage, their roots struggle to absorb necessary water and nutrients, leading to an overall decline in health. Weak plants are less equipped to resist pests or recover from damage, making them more susceptible to aphid infestations. This situation is particularly exacerbated in spring when an abundance of rain can saturate the soil, fostering the perfect breeding ground for pests if drainage is ineffective. Regularly monitor the moisture level in your soil, perhaps even utilizing a moisture meter to ensure consistency, and adjust your watering practices accordingly. If you are dealing with a related issue, watering humid weather covers a similar problem in detail.
From here on, if your soil exhibits a sour odor or appears excessively soggy, you might need to amend it with organic matter such as compost to improve aeration and drainage. Watch for any signs of better drainage, such as quicker drying times and improved root health. If aphids persist despite improved soil conditions, consider introducing beneficial insects like ladybugs or lacewings, which actively feed on aphids and can help restore balance to your garden ecosystem. Alternatively, if the issue is severe, assess whether you should relocate your kale plants to a more suitable area with better drainage, possibly elevating the beds to enhance water runoff.
Step 3 – Fertilize Kale Plants to Aid Recovery

Start by fertilizing your kale plants with a balanced, organic fertilizer to support their recovery process. After application, you should witness new healthy leaf growth and an overall revitalized appearance within just a few days. Fertilization replenishes essential nutrients that may have been depleted during the aphid infestation, facilitating faster recovery and strengthening your plants against future pest invasions. However, be cautious not to fertilize too frequently—over-fertilization can lead to nutrient lockout and further health issues within your plants.
Recovery begins when adequate fertilization is applied, and the timeline for improvement can vary based on the severity of damage your kale plants suffered during the aphid infestation. With proper fertilization, most kale can bounce back within one to two weeks, showcasing healthier foliage and resilience. Proper nutrition, especially nitrogen, promotes vigorous leaf growth; robust plants are much more resilient against pests like aphids in the future. Additionally, avoid using chemical fertilizers that can harm beneficial organisms in the soil or disturb the pH balance, which can lead to further complications in plant growth. For a closely related scenario, see cucumber plants develop.
From here on, be mindful of one common error gardeners make during this stage: over-fertilizing, mistakenly believing that more will accelerate recovery. In reality, excessive fertilizer can lead to nutrient burn, damaging the roots due to high salt concentrations. Gradual recovery is the goal, so adhering to the manufacturer’s application instructions is essential for optimal results. Watching for fresh leaf growth within a week after fertilizing typically signals the start of successful recovery. If you notice yellowing leaves persisting despite fertilization, this may indicate ongoing stress, requiring a reassessment of your watering practices and pest control measures.
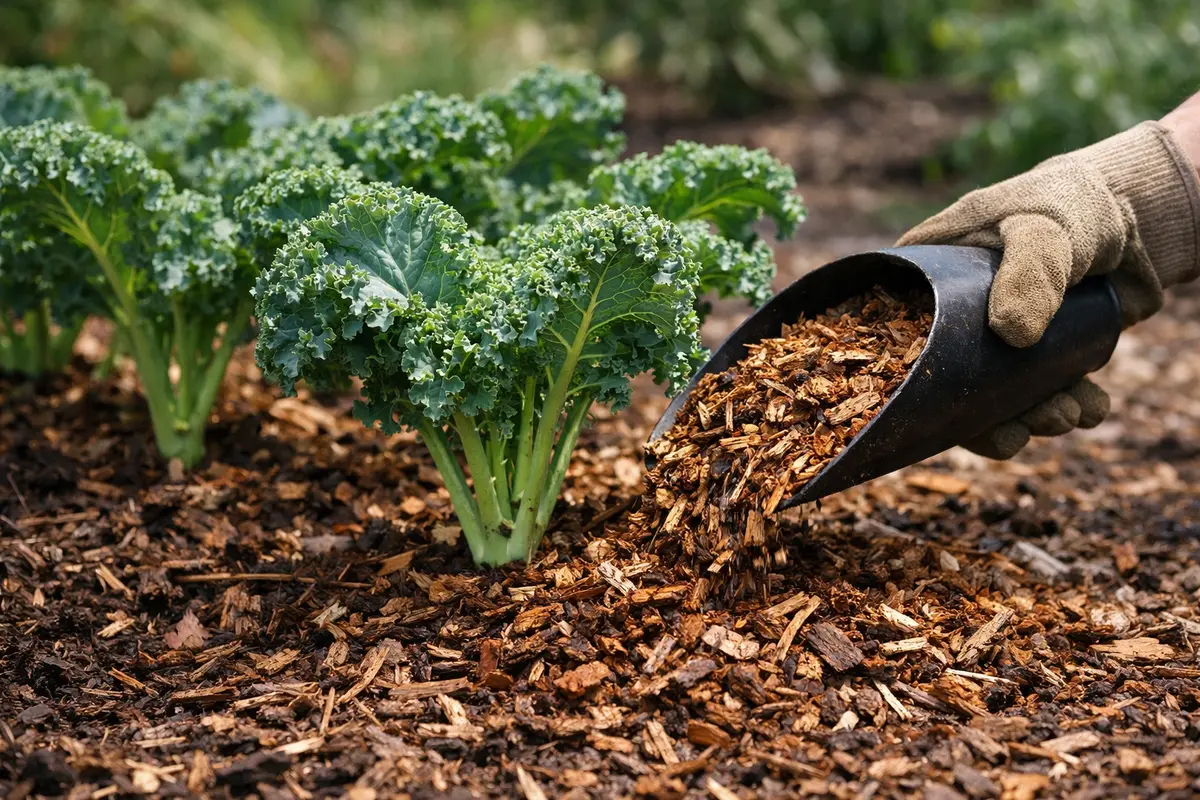
Step 4 – Mulch Around Kale to Deter Aphids
Reduce repeat flare-ups by making it a habit to inspect after watering and before humid weather. You should see steadier growth from here on once the repeatable routine is locked in.
Keep it from returning by adjusting your watering schedule and monitoring before the next wet spell. Next time conditions shift, repeat the same prevention check. The plant should bounce back faster each time the routine is in place. A related fix is explained in afternoon heatwave containers if you want to compare approaches.
Aphids thrive in warm, damp conditions that can worsen after spring rain, as they find ample food on tender young leaves. By utilizing mulch effectively, you can disrupt the aphids’ lifecycle and deter them from establishing colonies, effectively addressing the root cause of their recurrence. Make sure the mulch layer is about 2-4 inches thick to be effective without causing suffocation to the kale plants’ roots. In hotter months, increase the frequency of your neem oil applications to once a week, as higher temperatures can boost aphid populations significantly.
However, keep a close eye on moisture levels beneath the mulch. Excess moisture due to overly dense mulch layers can promote fungal growth, which can compound existing health issues in your plants if left unaddressed. If you notice persistent fungal growth despite regular checks, reduce the thickness of the mulch layer or aerate the soil to enhance drainage. Additionally, avoid using raw materials that may harbor aphids or other pests, as this could backfire, introducing more problems than it solves. Regularly monitoring your mulch and ensuring it remains healthy helps create a thriving environment for your kale.
Step 5 – Inspect Kale Leaves for Aphids Weekly
Monitor your kale plants regularly following spring rain, focusing on checking the undersides of the leaves and the stem junctions for nesting aphids. Observe the overall health of the plant, looking for curling leaves or sticky residue, which are signs of aphids establishing a presence. Recheck every few days, especially after periods of rain or high humidity, to catch any potential infestations early.
A fully recovered kale plant displays vibrant green leaves that are smooth and firm to the touch, indicating good health. Early signs of aphid problems returning may include leaves appearing mottled, curled, or having a sticky film, which suggests that aphids might be feeding again. It’s crucial to closely monitor these changes, as texture and color are key indicators of plant health.
If you notice aphids returning despite your preventative measures, immediately apply insecticidal soap or neem oil to affected areas to disrupt their lifecycle. If the infestation persists or worsens, escalate your approach by introducing beneficial insects, such as ladybugs, or consulting with a local garden center for more potent solutions. Prompt action can help safeguard your kale plants from significant damage.
A healthy kale plant exhibits vibrant green leaves that feel firm and sturdy to the touch, while leaves that are infested with aphids may appear curled or yellowed, often developing a noticeable sticky film. Early signs of a recurring problem include the return of discolored foliage and the emergence of deformed growth, which can indicate that aphids are reestablishing in your garden.
If aphids return despite your preventative efforts, introduce beneficial insects like ladybugs, which are natural predators of aphids. Alternatively, consider applying insecticidal soap or neem oil treatments as a fallback measure, but only if the infestation appears severe, as these solutions can disrupt the ecosystem if used excessively.
A fully recovered kale plant should display vibrant green leaves, an overall healthy structure, and minimal to no insect presence. In contrast, early signs of aphid infestation include curled, yellowing leaves and a sticky residue (honeydew) on the plant surface. As aphid populations grow, you may also notice a decrease in leaf vigor and stunted growth.
If you notice aphids returning despite implementing preventive measures, treat the affected areas with insecticidal soap or a strong stream of water to dislodge the pests. If the problem persists, escalate your efforts by consulting with a local garden center for targeted treatments or organic pest control options.
A fully recovered kale plant appears robust with deep green leaves, free from wilting or distortions, showing a smooth and healthy texture. In contrast, early signs of aphids returning include curled or distorted leaves and a sticky film on the surface, indicating that the problem may be re-emerging. Observing small clusters of aphids concentrated on young leaves signals the need for swift action to prevent greater damage.
If you spot aphids returning despite your preventative measures, implement natural remedies such as a strong spray of water to dislodge them or introduce beneficial insects like ladybugs to your garden. If the infestation escalates, consider applying an organic insecticidal soap as a more targeted and effective approach, ensuring your kale remains safe and healthy. Familiarizing yourself with these signs is essential, as recognizing the difference between healthy plants and those infested with aphids can save you from extensive damage in the long run.
A healthy plant will display vibrant foliage without any tiny green or black aphids or sticky honeydew residue that indicates aphid presence. Regular inspections enable you to catch minor pest resurgences early, allowing for timely action before significant damage occurs. Utilize a magnifying glass if needed to better identify small infestations, ensuring you do not overlook any potential threats. If re-infestation continues to occur, consider increasing the frequency of your inspections and be prepared to adjust your approach. Exploring tougher treatments may involve reintroducing beneficial insects, like ladybugs, or using insecticidal soap when necessary, which remains effective against aphids yet safe for your plants when used correctly.
FAQ
How long does it take for aphids to damage kale plants?
Aphids can inflict significant damage to kale plants within a week if not managed effectively. These pests multiply rapidly, and a small infestation can escalate quickly into a larger issue, resulting in stunted growth, yellowing leaves, and a decline in overall plant health. Thus, prompt action is crucial after spotting them to minimize long-term damage.
Can aphids spread to other plants after spring rain?
Yes, aphids can easily spread to nearby plants, especially in moist conditions that follow spring rain. They may be carried by the wind or inadvertently transferred through gardener tools and hands. It is essential to address aphid issues promptly to help prevent their spread throughout your garden and protect your crops.
Should I remove affected leaves from my kale plants?
Yes, removing heavily infested leaves is a proactive measure to curb aphid spread to other parts of your kale plants or neighboring crops. It’s essential to discard these leaves far away from the garden to minimize the chance of reinfestation while maintaining an overall healthy growing environment for your crops.